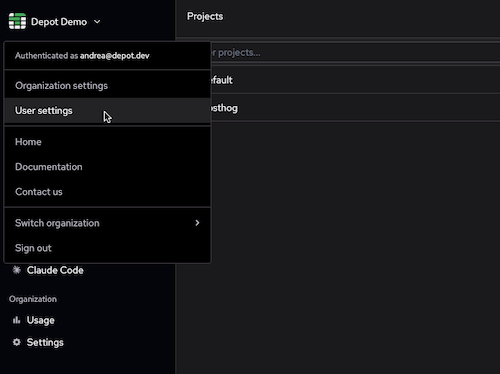
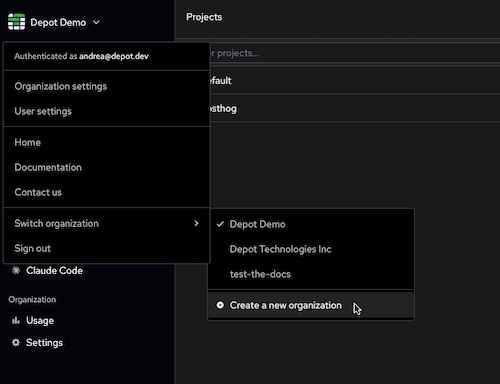
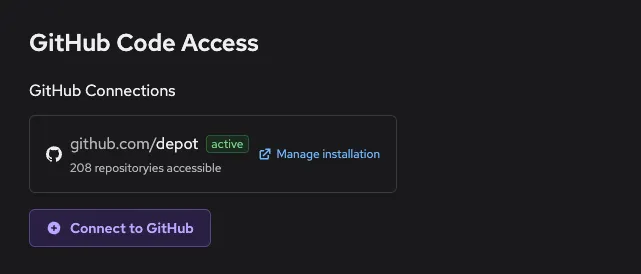
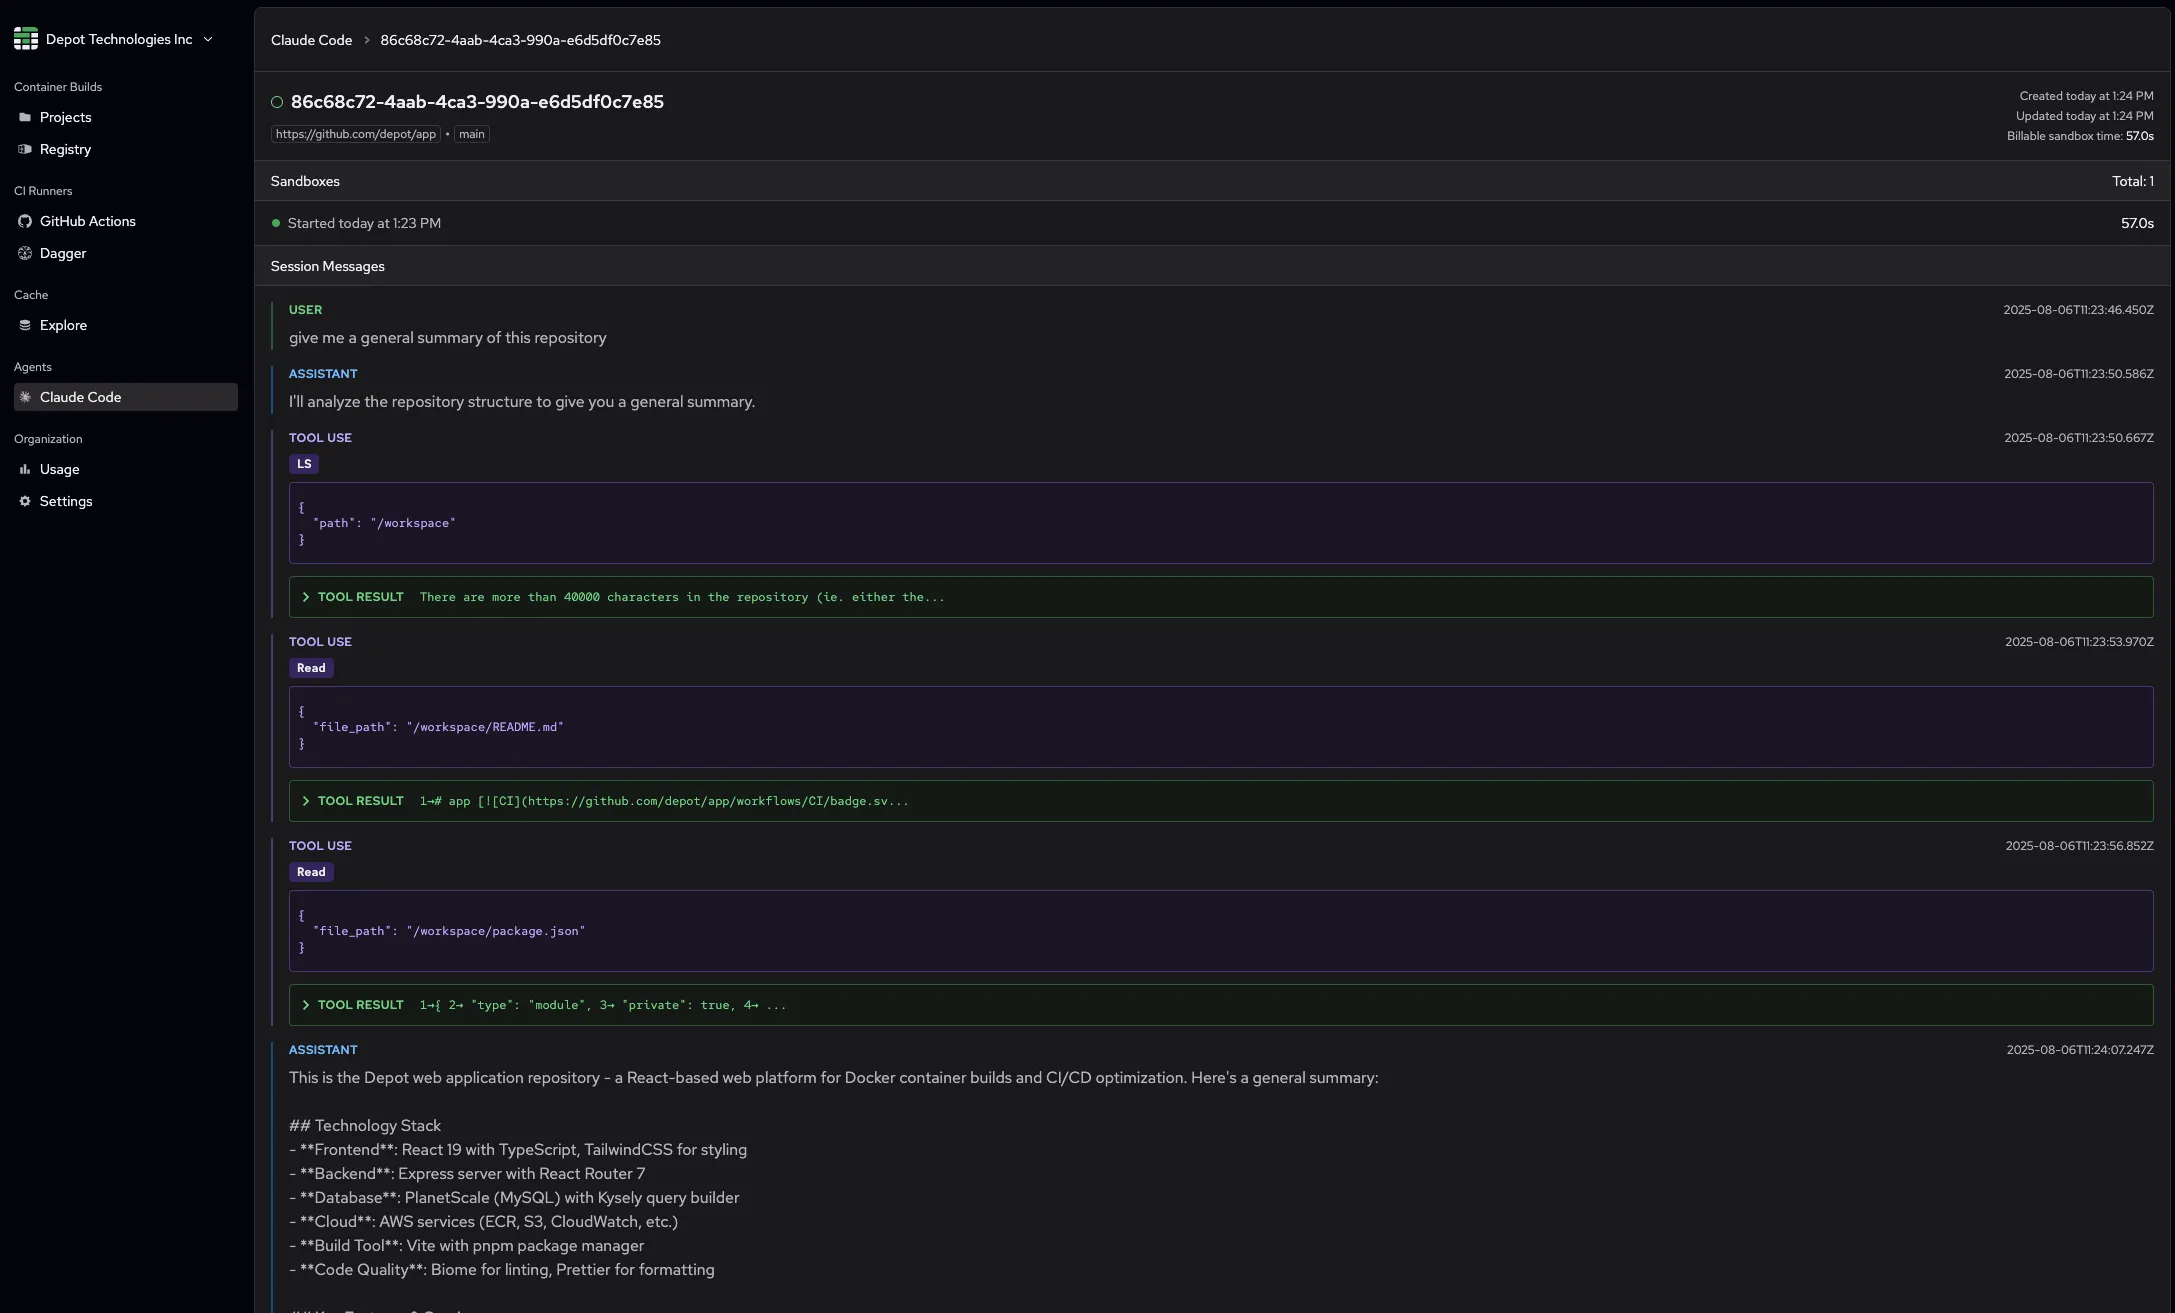
# Depot Documentation ## Get started with Depot Depot makes your CI workflows and container builds faster, more observable, and easier to debug. Use any product standalone. Or combine them for compounding gains: run Depot container builds in Depot CI workflows or in GitHub Actions workflows on Depot runners. {/* prettier-ignore */} Sign up for a Depot account to start a free trial. No credit card required. Deploy the Depot data plane in your AWS account with Depot Managed → ## Manage your Depot account and organizations Your Depot account is your login and identity on the Depot platform. Your account can be an owner or member of multiple Depot organizations. The [Depot dashboard](/orgs/) is where you manage your account and organizations in Depot. ## Account settings You can access your user account settings in the Depot dashboard. Click the organization name at the top of the page and select **User settings**. Select User settings from the depot dashboard menu From the user [Settings](/settings) page you can do the following: * Sign out of your Depot account * Update your profile name * Create [user access tokens](/docs/cli/authentication#user-access-tokens) to authenticate for local development * Add public SSH keys for authentication You can't change the email address for your Depot account. To delete an account, send a request to [help@depot.dev](mailto:help@depot.dev). ## Organizations Every action you take in Depot is within the context of an organization. An organization typically represents a single company or team. Depot bills at the organization level, consolidating all usage across products into a single invoice. You can view all of your builds, runners, usage, and billing per organization in your Depot dashboard. Configure organization-level settings in the organization [Settings](/orgs/_/settings) page. ### Create an organization When you sign up for Depot, we either prompt you to create an organization, or you automatically join the organization you were invited to. To create a new organization or request to join an organization: 1. Log in to your [Depot dashboard](/orgs). 2. Click the organization name at the top of the page. 3. Go to **Switch organization** and select **Create a new organization**. Select Create new organization from the depot dashboard menu ### Switch organizations in the Depot dashboard 1. Log in to your [Depot dashboard](/orgs). 2. Click the organization name at the top of the page. 3. Go to **Switch organization** and select another organization from the list. ### Organization access roles Organizations have role-based access. When you create an organization, you have the owner role and permissions. | Role | Permissions | | ------ | --------------------------------------------------------------------------------------------------------------------------------------------------------------------------------------------------------------------------------------------- | | Owner | Manage all organization settings, such as billing, payments, SSO (if purchased), tokens, and GitHub connections. Manage members, including invitations, roles, and removal. Manage projects, builds, and runners. Access usage and analytics. | | Member | Manage projects, builds, runners. Access usage and analytics. | ### Invite and manage organization members If you have a Startup or Business plan, you can invite users to join an organization. 1. Log in to your [Depot dashboard](/orgs). 2. Under **Organization**, click [Settings](/orgs/_/settings). 3. From the **Members** section of the **Settings** page you can: * View members and change their role. * View or remove pending invites. * Invite new members using either their existing Depot account email or the email they'll use to sign up for Depot. When you invite someone to join your organization, they receive an invitation email with an **Accept invite** link. If the user doesn't have a Depot account, or isn't signed in, the **Accept invite** link redirects them to sign in or sign up. After the user authenticates, they become an organization member and can access the organization in the Depot dashboard. ### Manage organization members with SSO Single sign-on (SSO) with SCIM provisioning for Depot is an add-on feature. To learn more, get in touch at [contact@depot.dev](mailto:contact@depot.dev). With SSO enabled, you configure your identity provider once through the Depot dashboard. Your identity provider handles Depot sign-ins and organization members. ### Delete an organization To delete an organization, send a request to [help@depot.dev](mailto:help@depot.dev). Include the name of the organization you want to delete. We'll process the deletion manually to ensure all associated projects and runners are properly removed. ## Billing Each Depot organization has its own [plan](/pricing) and billing. To view an organization's billing, payment, and plan details, go to the organization [Settings](/orgs/_/settings) page in your Depot dashboard. You can access invoices from Stripe that contain VAT information through the Billing Portal in your organization [Settings](/orgs/_/settings). For billing issues, see the [troubleshooting page](/docs/troubleshooting#billing). ## Quickstart for remote Claude Code agents on Depot Run Claude Code agents in Depot's remote agent sandboxes: a secure, isolated environment in the cloud, where you can launch, resume, and share coding sessions. ## Prerequisites You'll need a [Depot account](https://depot.dev/sign-up). ## Install the Depot CLI Install the [Depot CLI](/docs/cli/reference) on your machine to configure and launch remote sandboxes. * **macOS** Install the Depot CLI with Homebrew: ```shell brew install depot/tap/depot ``` * **Linux** Install the Depot CLI with the installation script: ```shell curl -L https://depot.dev/install-cli.sh | sh ``` * **All platforms** Download the binary file for your platform from the [Depot CLI releases page](https://github.com/depot/cli/releases) in GitHub. ## Get and set your Anthropic credentials To run Claude Code in remote agent sandboxes, configure your Anthropic credentials. You have two options: * Claude Code token (Max plan) * Anthropic API key ### Use your Claude Code token with Anthropic Max plan (recommended) 1. Use the `claude` CLI to generate a new OAuth token: ```shell claude setup-token ``` This will output a token that you can copy to use in the next step. Claude Code OAuth token 2. Set the token as a secret in your Depot organization: ```shell depot claude secrets add CLAUDE_CODE_OAUTH_TOKEN --value <"claude-code-token"> ``` ### Use your Anthropic API key 1. Generate an API key in the Anthropic web console. Learn how to get an API key in the [Claude Docs](https://docs.claude.com/en/api/overview). 2. Set the API key as a secret in your Depot organization: ```shell depot claude secrets add ANTHROPIC_API_KEY --value <"anthropic-api-key"> ``` ## Access your Git repositories You can work with public and private Git repositories in your remote agent sandboxes. To use private Git repositories, either install the Depot Code app into your GitHub organization or set your Git credentials as secrets in your Depot organization. ### Install the Depot Code app into your GitHub organization To grant remote agent sandboxes access to clone and push changes to your private GitHub repositories, install the Depot Code app into your GitHub organization: 1. Log in to your [Depot dashboard](/orgs). 2. Click **Settings**. 3. In the **GitHub Code Access** section, click **Connect to GitHub**. 4. Follow the prompts to add Depot Code to your GitHub organization. Install Depot Code app ### Grant access outside of GitHub If you don't want to use the Depot Code app, you can set your Git credentials as secrets in your Depot organization to allow changes to your private repositories. The value of `GIT_CREDENTIALS` must be one of the following: * A token, such as a personal access token. Depot uses `x-token` as the username and the token you specify as the password. * A user name and password in the format: username\@password. To set your Git credentials as secrets, run the following command: ```shell depot claude secrets add GIT_CREDENTIALS --value <"your-credentials"> ``` ## Launch your first remote agent sandbox To create a remote agent sandbox, run the `depot claude` command. For example: ```shell depot claude \ --session-id feature-auth \ --repository https://github.com/foo/bar \ --branch main \ "Give me a general summary of this repository" ✓ Claude sandbox started! Session ID: feature-auth Link: https://depot.dev/orgs/12345678911/claude/feature-auth ``` This command tells the Depot control plane to start a new agent sandbox for Claude Code. The command returns a URL to the session inside of Depot where you can follow the output. Remote Claude Code session inside of Depot And that's it! Your Depot organization is set up to use remote agent sandboxes for Claude Code. ## Manage sessions using the Depot dashboard In addition to using the CLI, you can also manage your remote agent sandboxes directly from the Depot dashboard: 1. Log in to your [Depot dashboard](/orgs). 2. To view all your sessions, click **Claude Code**. 3. From this view, you can: * **Resume existing sessions**: Click on any session to view its details, then use the prompt input at the bottom to resume the session with a new message. * **Start new sessions**: Click the **New sandbox** button to launch a fresh Claude Code session in a new remote agent sandbox. You can select a repository, branch, and provide an initial prompt. ## Next steps Try the following with your remote agent sandbox: * Work with different Git repositories that your Git credentials or Depot Code app have access to. * Switch between branches using the `--branch` flag. * Resume a session using the `--resume` flag or via the Depot dashboard. * Fork a new session from an existing session using the `--resume` and `--fork-session` flags together. Run `depot claude --help` or check the [CLI reference](/docs/cli/reference/agents) to see all the available command options. ## Remote Agents Depot's remote agent sandboxes provide a secure, isolated environment for running AI coding agents like Claude Code in the cloud. Allowing you to move your agent coding sessions off of your local machine and into fast remote environments where you can easily launch, resume, and share sessions. Current agent sandboxes support Claude Code, with more agents coming soon. By default, running `depot claude` will start a new session in a remote sandbox. To dive into using remote agents on Depot, check out our Claude Code quickstart guide → ## Key features ### Isolated environments Each agent session runs in its own isolated container, providing a clean and secure environment for your development work. Sessions are completely isolated from each other, ensuring your work remains private and secure. ### Persistent file system Agent sandboxes work directly with your git repositories and persists files automatically across agents sessions. Allowing you to resume your work exactly where you left off, whether you're picking up a session from last week, sharing with a teammate, or starting a new session from an existing sandbox. ### Pre-configured development tools Agent sandboxes come pre-installed with popular programming languages, package managers, and development tools. ### Session management Every agent sandbox not only persists your filesystem, but also the entire context and conversation you have built up with your coding agent in the remote sandbox. ### Git integration Work directly with Git repositories in your sandbox. Clone public or private repositories (using secrets for authentication), make changes, and push updates - all within the isolated environment. ### High performance Agent sandboxes run on Depot's optimized infrastructure with plans to provide automatic integrations with our existing Depot services like accelerated container builds, Depot Cache, and more. Every sandbox launches with **2 vCPUs and 4 GB RAM** by default, providing ample resources for most development tasks. ### Web UI for sessions Manage your agent sessions through the Depot dashboard: * **Session overview**: View all your Claude Code sessions with their status, last updated time, and whether they used a remote agent * **Resume sessions**: Pick up exactly where you left off by resuming any session with a new prompt * **Start new sessions**: Launch fresh sandboxes by entering a prompt and selecting a repository * **Session details**: View the session details, full conversation, and sandbox execution history ## How it works To demonstrate how remote agents work in Depot, we will use the `depot claude` command to demonstrate how remote Claude Code agents are launched in Depot. **Note:** To run the command below, you should complete the [Quickstart guide for Claude Code](/docs/agents/claude-code/quickstart) first. ```shell depot claude \ --session-id feature-auth \ --repository https://github.com/user/repo.git \ --branch main \ "Implement authentication flow" ``` This command will fire a request to the Depot control plane to start a new remote agent sandbox and return a url to the web UI where that Claude Code session can be monitored and managed. Behind the scenes, Depot will do all of the following: 1. **Session creation**: A new isolated container is provisioned for your session, named after the `--session-id` you provided or generate a session ID if not specified 2. **Environment setup**: The sandbox comes pre-configured with development tools, languages, and libraries 3. **Load filesystem**: The sandbox can be prepopulated with a filesystem from a previous session via the `--resume` flag. If no previous session is passed in, a brand new file system is provisioned for the session. 4. **Git repository cloning**: If you specified a `--repository`, Depot will clone the repository into the sandbox and checkout the specified branch (if no branch is specified, it defaults to `main`) 5. **Session saving**: When Claude Code has finished it's work and exits, the session state is preserved for later resumption 6. **Easy resumption**: Use `--resume ` to continue from any environment The following examples start a new session with one prompt, then resume it later to continue working. **Using the Depot CLI:** ```shell # Start a new session with a custom ID depot claude \ --session-id feature-auth \ --repository https://github.com/user/repo.git \ "Create a new branch called `feature-auth` and lets implement authentication flow for this new feature. Once you're happy with the initial implementation, commit your changes and push the branch to the remote repository." # Later, resume the session to continue working depot claude --resume feature-auth "This looks good, but we need to add the concept of a user profile now." ``` **Using the Depot dashboard:** 1. Navigate to the [**Claude Code** section](https://depot.dev/orgs/_/claude) in your dashboard 2. Click **New sandbox** to start a fresh session, selecting your repository and providing an initial prompt 3. Later, click on any session to view its details and use the prompt input to resume it with additional instructions ## Pricing Depot remote agent sandboxes are available on **all plans** and are billed at a usage rate of **$0.01/minute** with no included usage for remote agents. Start your 7-day free trial to try remote agents on Depot → ## AI and agent resources Depot uses AI in two complementary ways: product features that help people use Depot and machine-readable resources that help agents use Depot. ## AI product features We integrate AI into Depot so that you can find information and debug issues faster. We never use your data (usage or logs) to train models. ### Sherlock - Depot AI assistant Sherlock is Depot's AI assistant, available in the public docs and in the Depot dashboard. It answers questions about the Depot platform. In the docs it cites the pages it used. In the dashboard it adds authenticated context and infers the resource you mean from the page you're on, so on a build page you can ask "why did this build fail?" without copying anything. What it can do depends on where you ask. Open Sherlock from the **Ask AI** button in the dashboard sidebar, from **Analyze Build** or **Analyze Job** on a build or GitHub Actions job page, or from the **Ask Sherlock** link on a [Depot CI AI error summary](/docs/ai-at-depot#ai-error-summaries-in-depot-ci). Use it when you want a natural-language path through Depot docs or your dashboard data. Use the CLI or API when you need deterministic automation. #### What Sherlock can do Available to everyone, including logged-out docs visitors: * Search and read Depot documentation and blog posts. * Check Depot system status and active incidents. Added when you're signed in to the dashboard, scoped to resources in organizations you belong to: * Fetch details and logs for builds, GitHub Actions jobs, and Depot CI workflows and jobs, including AI failure summaries. * Read project and organization settings, usage and analytics, registry information, and cache summaries. * Open a support ticket with context from your conversation, after you confirm it. ### AI error summaries in Depot CI Depot CI generates an AI error summary after a job attempt fails. The summary appears in the workflow log viewer and includes what went wrong and a suggested next step or fix. The summary also stores relevant log lines so the dashboard can link the diagnosis back to the failed step. Behind the scenes, Depot waits briefly for job logs to flush, reads the tail of the failed attempt logs, includes the failed step and any error annotation, and asks the model for a diagnosis, possible fix, and relevant line references. Log content sent for analysis has already gone through the worker's secret masking before being stored. ## Agent resources ### Skills [Depot skills](https://github.com/depot/skills) give AI coding agents the product context they need to use Depot from a shell. To install Depot skills: ```bash npx skills add depot/skills ``` The skills cover four areas: * General Depot usage * Depot CI * Container builds * GitHub Actions runners Skills are especially useful when an agent is iterating in Depot CI. See [Use Depot CI in coding agent loops](/docs/ci/how-to-guides/coding-agents) for a complete example. ### Depot CI for coding agents [Depot CI](/docs/ci/overview) is built for programmatic use and is a natural fit for AI coding agents. Instead of the usual push-wait-guess cycle, an agent can run CI locally, read the failure, fix the code, and rerun, all in a closed loop from the terminal. The key is `depot ci run`: it tests workflows against your local working tree without a commit or push, so an agent can iterate in a tight loop without polluting git history or waiting on remote CI. Paired with `depot ci status`, `depot ci logs`, and `depot ci ssh`, an agent can run a job, read the error, optionally drop into the running sandbox to debug, fix the code, and rerun until the build is green. Install [Depot skills](https://github.com/depot/skills) first so the agent knows the `depot ci` commands and how to drive the loop. * See [Use Depot CI in coding agent loops](/docs/ci/how-to-guides/coding-agents) for an example. * See the [Depot CI CLI reference](/docs/cli/reference/depot-ci) for the full set of `depot ci` commands your agent can run. * For agents that integrate over HTTP instead of a shell, the [Depot CI API](/docs/api/ci/reference) exposes the same operations: dispatching workflows, checking run status, fetching logs and metrics, and retrying jobs. ### Markdown Every documentation, blog, changelog, and customer page is also available as raw Markdown. There are three ways to get it: * **Add `.md` to the URL.** For example, [`https://depot.dev/docs/ci/quickstart.md`](https://depot.dev/docs/ci/quickstart.md) returns the Markdown source of the Depot CI quickstart. * **Use the Copy markdown button.** Every docs page has a **Copy markdown** control next to **Edit on GitHub** that copies the page's Markdown source to your clipboard, ready to paste into an AI tool. * **Negotiate for it.** A request to any `/docs/...` page with an `Accept: text/markdown` header returns Markdown instead of HTML. ### `llms.txt` Depot publishes two LLM-oriented text resources: * [`/llms.txt`](/llms.txt): an index of documentation, blog posts, changelog entries, and customer pages with titles, URLs, and descriptions. * [`/llms-all.txt`](/llms-all.txt): a concatenated Markdown export of all documentation pages. Use `/llms.txt` when an agent needs to discover the right page first. Use `/llms-all.txt` when an agent needs the full documentation corpus in one text file. ## Getting help If you can't find what you need, reach out to [Support](https://depot.dev/help) or join our [Discord](https://discord.gg/depot) community. ## Container builds API tutorial This tutorial walks you through using Depot API to build Docker images programmatically. The container builds API allows you to build Docker images on behalf of your users without managing build infrastructure. Depot provides two SDKs for building images via the API: **Node.js SDK + Depot CLI** The Node.js SDK handles project management and build registration, then delegates the actual build to the Depot CLI. This approach is simpler and requires less code. **Go SDK + BuildKit** The Go SDK provides direct access to BuildKit, giving you full control over the build process. You manage the connection, configuration, and build steps yourself. *** ## Choose your approach Select the SDK that best fits your use case:

Node.js SDK + Depot CLI
## Prerequisites * A Depot account with an organization * Node.js installed locally * [Depot CLI](/docs/cli/installation) installed ## Setup This tutorial uses code from our [example repository](https://github.com/depot/examples/tree/main/build-api). Clone it to follow along: ```shell git clone https://github.com/depot/examples.git cd examples/build-api ``` The example repository contains the following Node.js examples under (`nodejs/`): * [`list-projects.js`](https://github.com/depot/examples/blob/main/build-api/nodejs/src/list-projects.js) - List all projects * [`create-project.js`](https://github.com/depot/examples/blob/main/build-api/nodejs/src/create-project.js) - Create a new project * [`delete-project.js`](https://github.com/depot/examples/blob/main/build-api/nodejs/src/delete-project.js) - Delete a project * [`create-build.js`](https://github.com/depot/examples/blob/main/build-api/nodejs/src/create-build.js) - Build image with options (load/save/push) To get started, install Node.js dependencies: ```bash cd nodejs npm install ``` ## Step 1: Create an organization token 1. Navigate to your organization settings in the Depot dashboard 2. Scroll to **API Tokens** section 3. Enter a description (e.g., `test-token`) and click **Create token** 4. Copy the token and save it securely (you won't see it again) Set the token as an environment variable: ```shell export DEPOT_TOKEN= ``` ## Step 2: Install Depot CLI Install via curl: ```shell curl -L https://depot.dev/install-cli.sh | sh ``` Or via Homebrew (macOS): ```shell brew install depot/tap/depot ``` ## Step 3: Create a project Projects in Depot provide isolated builder infrastructure and cache storage. We recommend creating a separate project for each customer organization to maximize cache effectiveness and prevent cache poisoning. To create a project, use the `ProjectService.createProject` method with your organization token: ```javascript const {depot} = require('@depot/sdk-node') const headers = { Authorization: `Bearer ${process.env.DEPOT_TOKEN}`, } const result = await depot.core.v1.ProjectService.createProject( { name: 'my-project', regionId: 'us-east-1', cachePolicy: {keepBytes: 50 * 1024 * 1024 * 1024, keepDays: 14}, // 50GB, 14 days }, {headers}, ) console.log(result.project.projectId) ``` Try it with the example: `node nodejs/src/create-project.js my-project` Save the `projectId` from the output, you'll need it for builds. Example output: ```text _Project { projectId: 'krt0wtn195', organizationId: '3d1h48dqlh', name: 'my-project', regionId: 'us-east-1', createdAt: Timestamp { seconds: 1708021346n, nanos: 83000000 }, cachePolicy: _CachePolicy { keepBytes: 53687091200n, keepDays: 14 } } ``` ## Step 4: Build a Docker image To build an image, first register a build with the Build API using `BuildService.createBuild`. This returns a build ID and one-time build token that you pass to the Depot CLI: ```javascript const {depot} = require('@depot/sdk-node') const {exec} = require('child_process') const headers = { Authorization: `Bearer ${process.env.DEPOT_TOKEN}`, } // Register the build const result = await depot.build.v1.BuildService.createBuild({projectId: ''}, {headers}) // Execute build with Depot CLI exec( 'depot build --load .', { env: { DEPOT_PROJECT_ID: '', DEPOT_BUILD_ID: result.buildId, DEPOT_TOKEN: result.buildToken, }, }, (error, stdout, stderr) => { if (error) { console.error(`Error: ${error}`) return } console.log(stdout) }, ) ``` Try it with the example: `node nodejs/src/create-build.js ` The `--load` flag downloads the built image to your local Docker daemon. ## Step 5: Run the container List your local Docker images: ```shell docker image ls ``` Run the built container: ```shell docker run ``` You should see "Hello World" output from the Node.js application. ## Step 6: Save to a registry ### Push to Depot Registry Instead of loading locally with `--load`, you can save the image to Depot Registry using the `--save` flag: ```javascript exec('depot build --save .', { env: { DEPOT_PROJECT_ID: '', DEPOT_BUILD_ID: result.buildId, DEPOT_TOKEN: result.buildToken, }, }) ``` Try it: `node nodejs/src/create-build.js save` The build output shows how to pull or push the saved image: ```text Saved target: To pull: depot pull --project To push: depot push --project --tag ``` ### Push to external registries To push directly to Docker Hub, GHCR, ECR, or other registries during the build, use the `--push` flag with `--tag`: ```javascript exec('depot build --push --tag docker.io/myuser/myapp:latest .', { env: { DEPOT_PROJECT_ID: '', DEPOT_BUILD_ID: result.buildId, DEPOT_TOKEN: result.buildToken, }, }) ``` First authenticate with `docker login`, then pushing to other registries simply requires setting the proper image name: ```shell # Docker Hub node nodejs/src/create-build.js push docker.io/myuser/myapp:latest # GitHub Container Registry node nodejs/src/create-build.js push ghcr.io/myorg/myapp:latest # AWS ECR node nodejs/src/create-build.js push 123456789012.dkr.ecr.us-east-1.amazonaws.com/myapp:latest ```
Go SDK + BuildKit
## Prerequisites * A Depot account with an organization * Go 1.21+ installed locally ## Setup This tutorial uses code from our [example repository](https://github.com/depot/examples/tree/main/build-api). Clone it to follow along: ```shell git clone https://github.com/depot/examples.git cd examples/build-api ``` The Go examples use two packages: * **Buf Connect API** (`buf.build/gen/go/depot/api`) - For project management * **Depot Go SDK** (`github.com/depot/depot-go`) - For builds Available examples: * [`list-projects/main.go`](https://github.com/depot/examples/blob/main/build-api/go/list-projects/main.go) - List all projects * [`create-project/main.go`](https://github.com/depot/examples/blob/main/build-api/go/create-project/main.go) - Create a new project * [`delete-project/main.go`](https://github.com/depot/examples/blob/main/build-api/go/delete-project/main.go) - Delete a project * [`create-build/main.go`](https://github.com/depot/examples/blob/main/build-api/go/create-build/main.go) - Build image (saved to Depot) * [`build-and-push/main.go`](https://github.com/depot/examples/blob/main/build-api/go/build-and-push/main.go) - Build and push to external registry Install dependencies: ```bash cd go go mod download ``` ## Build flow overview Building with the Go SDK involves three steps: 1. **Register a build** - Request a build from the Depot API 2. **Acquire a builder machine** - Get an ephemeral BuildKit machine with your project cache 3. **Build and push** - Connect to BuildKit and execute the build See the complete implementation in [`build-and-push/main.go`](https://github.com/depot/examples/blob/main/build-api/go/build-and-push/main.go). ## Step 1: Create an organization token 1. Navigate to your organization settings in the Depot dashboard 2. Scroll to **API Tokens** section 3. Enter a description (e.g., `test-token`) and click **Create token** 4. Copy the token and save it securely (you won't see it again) Set the token as an environment variable: ```shell export DEPOT_TOKEN= ``` ## Step 2: Create a project Projects in Depot provide isolated builder infrastructure and cache storage. To create a project, use the Buf Connect API client with `ProjectService.CreateProject`: ```go import ( "net/http" corev1 "buf.build/gen/go/depot/api/protocolbuffers/go/depot/core/v1" "buf.build/gen/go/depot/api/connectrpc/go/depot/core/v1/corev1connect" "connectrpc.com/connect" ) token := os.Getenv("DEPOT_TOKEN") // Create the Project Service client client := corev1connect.NewProjectServiceClient( http.DefaultClient, "https://api.depot.dev", ) // Create a new project req := connect.NewRequest(&corev1.CreateProjectRequest{ Name: "my-project", RegionId: "us-east-1", CachePolicy: &corev1.CachePolicy{ KeepGb: 50, // 50GB KeepDays: 14, // 14 days }, }) // Add authentication header req.Header().Set("Authorization", fmt.Sprintf("Bearer %s", token)) resp, err := client.CreateProject(ctx, req) if err != nil { log.Fatal(err) } log.Printf("Project ID: %s", resp.Msg.Project.ProjectId) ``` Try it with the example: `go run ./create-project/main.go my-project` Save the project ID, you'll need it for builds. ## Step 3: Register a build To start a build, register it with the Build API using `build.NewBuild`. This returns a build ID and one-time build token: ```go import ( "github.com/depot/depot-go/build" cliv1 "github.com/depot/depot-go/proto/depot/cli/v1" ) token := os.Getenv("DEPOT_TOKEN") projectID := os.Getenv("DEPOT_PROJECT_ID") build, err := build.NewBuild(ctx, &cliv1.CreateBuildRequest{ ProjectId: projectID, }, token) if err != nil { log.Fatal(err) } // Report build result when finished var buildErr error defer build.Finish(buildErr) ``` The `build.Finish()` call reports success or failure back to Depot when your build completes. ## Step 4: Acquire a builder machine With your build registered, acquire an ephemeral BuildKit machine using `machine.Acquire`. The machine comes pre-configured with your project's cache: ```go import "github.com/depot/depot-go/machine" buildkit, buildErr := machine.Acquire(ctx, build.ID, build.Token, "arm64") if buildErr != nil { return } defer buildkit.Release() ``` Specify `"arm64"` or `"amd64"` for your target platform. Released machines stay alive for 2 minutes to serve subsequent builds. ## Step 5: Connect to BuildKit Connect to your BuildKit machine using `buildkit.Connect`: ```go import "github.com/moby/buildkit/client" buildkitClient, buildErr := buildkit.Connect(ctx) if buildErr != nil { return } ``` This establishes a secure mTLS connection to the BuildKit endpoint. ## Step 6: Configure the build Configure your build by creating a `SolveOpt` with your Dockerfile path, build context, and export settings: ```go import ( "github.com/docker/cli/cli/config" "github.com/moby/buildkit/session" "github.com/moby/buildkit/session/auth/authprovider" ) solverOptions := client.SolveOpt{ Frontend: "dockerfile.v0", FrontendAttrs: map[string]string{ "filename": "Dockerfile", "platform": "linux/arm64", }, LocalDirs: map[string]string{ "dockerfile": ".", "context": ".", }, Exports: []client.ExportEntry{ { Type: "image", Attrs: map[string]string{ "name": "myuser/myapp:latest", "oci-mediatypes": "true", "push": "true", }, }, }, Session: []session.Attachable{ authprovider.NewDockerAuthProvider(config.LoadDefaultConfigFile(os.Stderr), nil), }, } ``` The `Session` uses your Docker credentials from `docker login` to authenticate registry pushes. ## Step 7: Stream build output (optional) To monitor build progress, create a status channel and process BuildKit status messages: ```go import "encoding/json" buildStatusCh := make(chan *client.SolveStatus, 10) go func() { enc := json.NewEncoder(os.Stdout) enc.SetIndent("", " ") for status := range buildStatusCh { _ = enc.Encode(status) } }() ``` This streams build progress in real-time as JSON. ## Step 8: Build and push Execute the build with `buildkitClient.Solve`. BuildKit automatically reuses cached layers from your project: ```go _, buildErr = buildkitClient.Solve(ctx, nil, solverOptions, buildStatusCh) if buildErr != nil { return } ``` When complete, your image is pushed to the registry specified in the `Exports` configuration. Try the complete example: `DEPOT_PROJECT_ID= go run ./build-and-push/main.go` ### Push to third-party registries To push to external registries, configure the full registry path in your image name and provide authentication. #### Set the full registry path: ```go Exports: []client.ExportEntry{ { Type: "image", Attrs: map[string]string{ "name": "docker.io/myuser/myapp:latest", // or ghcr.io, ECR, etc. "oci-mediatypes": "true", "push": "true", }, }, }, ``` The `build-and-push` example supports two options for authentication: #### Option 1: Docker login credentials (default) After running `docker login`, BuildKit automatically uses credentials from `~/.docker/config.json`: ```bash docker login docker.io DEPOT_PROJECT_ID= go run ./build-and-push/main.go docker.io/user/app:latest ``` #### Option 2: Programmatic credentials (for CI/CD) Provide credentials via environment variables: ```bash DEPOT_PROJECT_ID= \ REGISTRY_USERNAME=myuser \ REGISTRY_PASSWORD=mytoken \ REGISTRY_URL=https://index.docker.io/v1/ \ go run ./build-and-push/main.go docker.io/user/app:latest ``` The example automatically detects which method to use based on the presence of `REGISTRY_USERNAME` and `REGISTRY_PASSWORD`. See the complete working examples in the repository: [`go/create-build/main.go`](https://github.com/depot/examples/blob/main/build-api/go/create-build/main.go) and [`go/build-and-push/main.go`](https://github.com/depot/examples/blob/main/build-api/go/build-and-push/main.go).
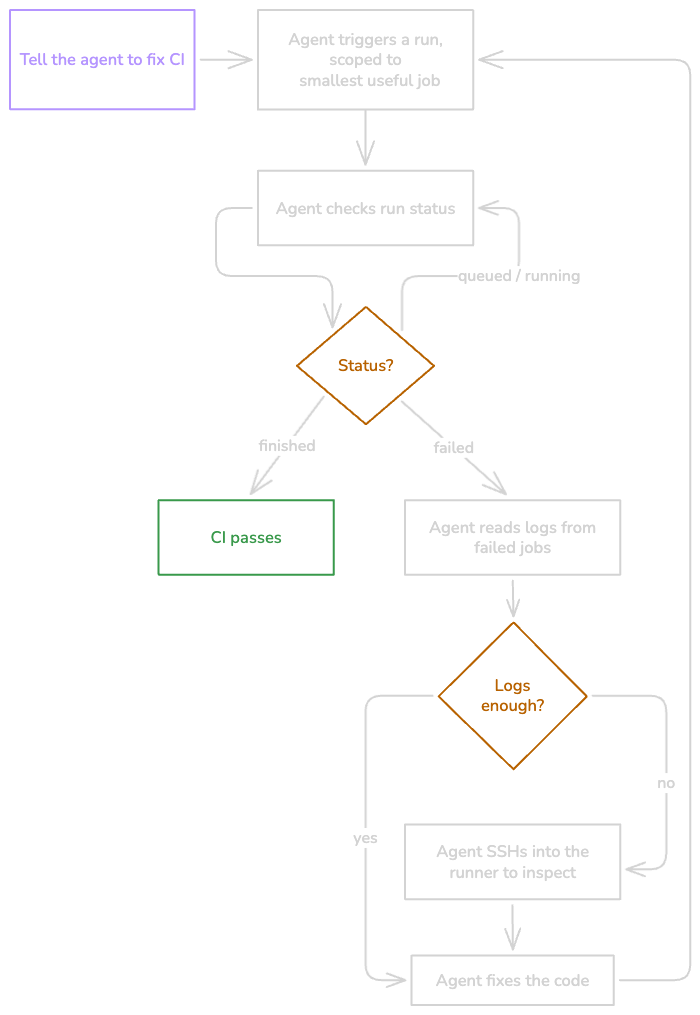
*** ## Next steps * Review the [API reference](/docs/api/overview) for complete API documentation * Explore the [Node.js SDK on GitHub](https://github.com/depot/sdk-node) * Explore the [Go SDK on GitHub](https://github.com/depot/depot-go) * Learn about [BuildKit in depth](/blog/buildkit-in-depth) ## Authentication You need to generate an API token to authenticate with the Depot API. API tokens are scoped to a single organization and grant access to manage projects and builds within your Depot organization. **Registry Access:** Organization API tokens provide full push and pull permissions to the Depot Registry for any project within the organization, allowing you to both push images to and pull images from any project's registry. ## Generating an API token You can generate an API token for an organization by going through the following steps: 1. Open your Organization Settings 2. Enter a description for your token under API Tokens 3. Click Create token This token can create, update, and delete projects and run builds within your organization. You can revoke this token at any time by clicking `Remove API token` in the token submenu. ## Using the API token To authenticate with the Depot API you must pass the token in the `Authorization` header of the request. For example, to list the projects in your organization you would make the following request via our Node SDK: ```typescript import {depot} from '@depot/sdk-node' const headers = { Authorization: `Bearer ${process.env.DEPOT_TOKEN}`, } async function example() { const result = await depot.core.v1.ProjectService.listProjects({}, {headers}) console.log(result.projects) } ``` ## Depot API Overview The Depot APIs are collections of endpoints that grant access to the underlying architecture and primitives. The APIs use Connect, offering [multiprotocol support](https://connectrpc.com/docs/introduction#seamless-multi-protocol-support) for gRPC and HTTP JSON. ## Depot CI API [Depot CI](/docs/ci/overview) has its own API for working with workflows programmatically: dispatching and rerunning workflows, listing runs, checking status, fetching logs and metrics, retrying and cancelling jobs, and downloading artifacts. See the [Depot CI API reference](/docs/api/ci/reference) for all endpoints and examples. ## Container Builds API Organizations can manage projects, acquire BuildKit endpoints, and run image builds for their applications or services programmatically. Depot provides the following SDKs for interacting with the Container Builds API: * [`depot/sdk-node`](https://github.com/depot/sdk-node) * [`depot/depot-go`](https://github.com/depot/depot-go) For detailed documentation on all available endpoints, parameters, and examples, see the [SDK Reference](/docs/api/sdk-reference). ### Security If you're using the Container Builds API to build untrusted code, you need **one Depot project per customer entity in your organization**. A separate project per customer ensures secure cache isolation so that one customer's build can't access another customer's build cache. ## Sandbox API The Sandbox SDK is in private beta. Methods might change before the SDK becomes generally available. Sandboxes are billed per vCPU-second at the Depot CI compute rate. [Contact us](/help) to request access for your organization. Run untrusted or agent-generated code in isolated, ephemeral sandboxes: create a sandbox, run commands and stream their output, and work with the sandbox file system through a `node:fs/promises`-shaped interface. Depot provides the following SDK for interacting with the Sandbox API: * [`depot/sandbox-sdk`](https://github.com/depot/sandbox-sdk) For detailed documentation on all available methods, parameters, and examples, see the [Sandbox SDK reference](/docs/api/sandbox-sdk-reference). Sandboxes are billed by compute usage, at the same per-second rate as Depot CI compute: the number of vCPUs you request x how long the sandbox runs, with no one-minute minimum. See the Depot CI sandbox table on the [pricing page](/pricing) for details. ## Authentication Authenticate to the API using an `Authorization` header with an Organization Token that you generate in your [organization settings](/orgs/_/settings). See the [Authentication docs](/docs/api/authentication) for more details. ## Depot Sandbox SDK reference The Sandbox SDK is in private beta. Methods might change before the SDK becomes generally available. Sandboxes are billed per vCPU-second at the Depot CI compute rate. [Contact us](/help) to request access for your organization. The [`@depot/sandbox`](https://www.npmjs.com/package/@depot/sandbox) package is the Node.js SDK for Depot sandboxes. It wraps the `depot.sandbox.v1` API with ergonomic classes for creating sandboxes, running commands, streaming command output, and working with a sandbox's file system through a `node:fs/promises`-shaped interface. The source is on GitHub at [`depot/sandbox-sdk`](https://github.com/depot/sandbox-sdk). The SDK requires Node.js 20 or newer. The package ships as ES modules. ## Installation ```bash pnpm add @depot/sandbox ``` The package ships its compiled protobuf bindings, so you don't need a separate proto module. ## Quickstart Set `DEPOT_TOKEN` in your environment, then create a client and use it to create a sandbox, run a command, read its output, write a file, and stop the sandbox: ```typescript import {createClient, Sandbox} from '@depot/sandbox' const client = createClient({token: process.env.DEPOT_TOKEN!}) const sandbox = await Sandbox.create(client, { env: {NODE_ENV: 'development'}, }) const command = await sandbox.runCommand({cmd: '/bin/sh', args: ['-c', 'echo hello from depot']}) const finished = await command.wait() console.log(finished.exitCode) // 0 console.log(await command.stdout()) // "hello from depot\n" const fs = sandbox.fs() await fs.writeFile('/tmp/message.txt', 'hello') console.log(await fs.readFile('/tmp/message.txt', {encoding: 'utf8'})) // "hello" await sandbox.stop({blocking: true}) ``` ## Create a client `createClient` builds an authenticated client that you pass to the static `Sandbox` entry points. Sandbox instances returned by the SDK keep a reference to that client, so instance methods don't take a client argument. ```typescript import {createClient, Sandbox} from '@depot/sandbox' const client = createClient({token: process.env.DEPOT_TOKEN!}) ``` `createClient` accepts the following options: * **token**: bearer token used to authenticate requests, typically your `DEPOT_TOKEN`. Required. * **orgID**: the organization the client should act on. Required for app and service tokens, and for user tokens that belong to more than one organization. A user token bound to a single organization already implies its org, so the value is ignored there. Corresponds to the `--org` flag on the `depot` CLI. * **endpoint**: the API endpoint to connect to. Defaults to `https://api.depot.dev`. ```typescript const client = createClient({ token: process.env.DEPOT_TOKEN!, orgID: process.env.DEPOT_ORG_ID, }) ``` {/* prettier-ignore-start */} ## Sandboxes A `Sandbox` represents one sandbox running on the server. You don't construct it directly: use the static `Sandbox.create`, `Sandbox.get`, `Sandbox.list`, or `Sandbox.listAll` entry points, each of which takes the client as its first argument. ### Create a sandbox `Sandbox.create` provisions a new sandbox. Every option is optional; the server fills in defaults for anything you leave unset. ```typescript const sandbox = await Sandbox.create(client, { name: 'my-sandbox', resources: {vcpus: 2, memoryMb: 4096, diskGb: 100}, env: {NODE_ENV: 'development'}, timeoutMinutes: 240, }) ``` Options (`CreateSandboxOpts`): * **name**: an optional name for the sandbox, unique within your organization. * **runtime**: the runtime to boot into. Custom runtimes aren't available in the beta. Sandboxes boot from Depot's pre-cached default base image. * **resources**: the compute to request, as `{vcpus?, memoryMb?, diskGb?}`, each a positive integer. The server fills a default for any field you omit: 2 vCPUs, 4096 MB of memory, and 100 GB of disk. Sandboxes support 2 to 64 vCPUs. Disk must be large enough to hold the base image, so very small values fail to start. * **env**: environment variables for the sandbox. The server merges these into every command it runs. When a command sets the same variable, the command's value wins. * **timeoutMinutes**: requested lifetime in minutes, measured from when the sandbox is created (including provisioning time). Defaults to 120 minutes. Our preview currently limits container lifetime to a maximum of 24 hours; please contact us to increase this limit. ### Get a sandbox `Sandbox.get` fetches a sandbox by its id. ```typescript const sandbox = await Sandbox.get(client, 'sandbox-id') console.log(sandbox.status) ``` ### List sandboxes `Sandbox.list` fetches a single page of sandboxes. It returns the sandboxes on that page along with a `nextPageToken` you can pass back to fetch the following page. ```typescript const result = await Sandbox.list(client, { pagination: {pageSize: 50}, filter: {states: ['running']}, }) console.log(result.sandboxes) console.log(result.pagination.nextPageToken) ``` Options (`ListSandboxesOpts`): * **pagination**: `{pageSize?, pageToken?}`. The server caps `pageSize` and picks a default when it's unset. `pageToken` is the opaque cursor from a previous call's `nextPageToken`. * **filter**: narrows the results with `{states?, createdAfter?, createdBefore?}`. `states` is an array of sandbox statuses, and the `createdAfter` / `createdBefore` bounds are `Date` values, each exclusive. ### List all sandboxes `Sandbox.listAll` returns an async iterable over every sandbox, fetching pages as needed until the server has none left. Use it instead of paging manually. ```typescript for await (const sandbox of Sandbox.listAll(client, {filter: {states: ['running']}})) { console.log(sandbox.sandboxId, sandbox.status) } ``` Options (`ListAllSandboxesOpts`): `{pageSize?, filter?}`, where `filter` has the same shape as in `Sandbox.list`. ### Stop a sandbox `sandbox.stop` stops the sandbox gracefully. The sandbox ends in the `finished` status. By default the call resolves as soon as the server records the stop request; pass `{blocking: true}` to wait for the sandbox to finish cleaning up before the call returns. The instance is updated in place from the server's response, and the call throws if the sandbox has already stopped. ```typescript await sandbox.stop() // or wait for cleanup to complete: await sandbox.stop({blocking: true}) ``` ### Kill a sandbox `sandbox.kill` cancels the sandbox immediately. The sandbox ends in the `cancelled` status. The call throws if the sandbox has already stopped. ```typescript await sandbox.kill() ``` The `signal` option (for example `{signal: 'SIGKILL'}`) is accepted but currently ignored: every kill is a hard cancel regardless of the signal you pass. Forwarding the signal to the sandbox is planned for a later release. ### Set the timeout `sandbox.setTimeout` resets a running sandbox's expiry to a fresh deadline, measured from when the server handles the request. The server clamps the new deadline to the sandbox's absolute maximum lifetime. The call throws if the sandbox has not started, has already expired, or has reached a terminal status. ```typescript await sandbox.setTimeout({timeoutMinutes: 240}) ``` To keep a sandbox alive while it's in active use, call `setTimeout` on an interval shorter than the timeout you set. When the calls stop, the server terminates the sandbox once the deadline lapses. ### Sandbox properties A `Sandbox` instance exposes read-only properties describing its current state, refreshed in place whenever a method receives an updated view from the server: * **sandboxId**: the sandbox's unique id. * **organizationId**: the organization the sandbox belongs to. * **name**: the human-readable label set at creation, if any. * **status**: the current lifecycle status, one of `created`, `assigned`, `starting`, `running`, `finished`, `cancelled`, or `failed`. Undefined when the server hasn't assigned one yet. * **resources**: the resources the server actually allocated, as `{vcpus, memoryMb, diskGb}`. * **runtime**: the runtime the server actually resolved. * **createdAt** / **startedAt** / **stoppedAt** / **expiresAt**: lifecycle timestamps as `Date` values, set as the sandbox reaches each point. * **exitCode**: exit code of the sandbox's main process. * **errorMessage**: a description of the failure when the sandbox ended with an error. * **env**: the environment variables the server merges into every command run on the sandbox. * **activeCpuUsageMs**: total CPU time used, in milliseconds. Only populated once the sandbox has stopped, and only when server-side metering is in place; otherwise undefined. * **networkUsage**: bytes sent and received, as `{ingressBytes, egressBytes}`. Populated under the same conditions as `activeCpuUsageMs`. ## Command execution `sandbox.runCommand` runs a command in a sandbox and returns a `SandboxCommandExecution`. It's a server-streaming call: it returns as soon as the server reports the command has started, rather than waiting for it to finish, so you can attach output iterators and watch progress while the command is still running. ```typescript const command = await sandbox.runCommand({ cmd: 'npm', args: ['install'], cwd: '/app', env: {CI: 'true'}, }) ``` Options (`RunCommandOpts`): * **cmd**: the command to run. Required. * **args**: arguments to pass to the command. * **cwd**: the working directory to run in. * **env**: per-command environment variables. These are merged on top of the sandbox's environment, and win on collisions. * **sudo**: run the command as root. * **detached**: run the command fire-and-forget. See [Detached commands](#detached-commands) below. `runCommand` runs `cmd` directly without a shell, passing `[cmd, ...args]` as argv. `cmd` must be an executable on the sandbox's `PATH` (or an absolute path), and shell features aren't interpreted: no pipes, redirects, globs, `&&`, variable expansion, or builtins like `echo` and `cd`. Commands therefore work even on images with no shell (distroless or scratch). To use shell features, invoke a shell explicitly: ```typescript await sandbox.runCommand({cmd: '/bin/sh', args: ['-c', 'echo "$HOME" && ls /tmp | wc -l']}) ``` ### Wait for a command to finish `command.wait()` resolves once the command reaches a terminal state. The resolved value is typed as `SandboxCommandExecutionFinished`, so you can read `exitCode` and `finishedAt` without checking for undefined. ```typescript const command = await sandbox.runCommand({cmd: '/bin/sh', args: ['-c', 'echo hi']}) const finished = await command.wait() console.log(finished.exitCode) console.log(finished.finishedAt) ``` ### Collect command output `command.output()` collects the command's output, waiting until the command finishes. Pass `'both'` (the default) to get stdout and stderr interleaved in arrival order, or `'stdout'` / `'stderr'` to get just one stream. `command.stdout()` and `command.stderr()` are shorthands for the single-stream calls. ```typescript const command = await sandbox.runCommand({cmd: 'ls', args: ['-la']}) await command.wait() console.log(await command.output()) // stdout + stderr interleaved console.log(await command.stdout()) // stdout only console.log(await command.stderr()) // stderr only ``` Collected output is capped at 16 MiB. For larger or long-running output, stream it instead with `logs()`. ### Stream command output `command.logs()` streams the command's output as decoded UTF-8 chunks, with stdout and stderr interleaved in the order they arrived. You can call it more than once: each call returns its own independent iterator over the same shared output, so several consumers can read at once without interfering. ```typescript const command = await sandbox.runCommand({cmd: 'npm', args: ['run', 'build']}) for await (const chunk of command.logs()) { process.stdout.write(`[${chunk.stream}] ${chunk.data}`) } ``` Each chunk (`SandboxCommandExecutionLogChunk`) has: * **stream**: `'stdout'` or `'stderr'`. * **data**: the decoded UTF-8 text. * **byteOffset**: the running total of bytes seen on this stream, up to and including this chunk. Useful for resuming where you left off. * **timestamp**: when the chunk arrived, as a `Date`. A consumer that attaches after the command has started first replays whatever recent output is still held in the buffer, then catches up to live output. If your loop reads more slowly than the command produces output, it can fall behind what the buffer holds, and the SDK ends the loop with a `SlowConsumerError` (see [SlowConsumerError](#slowconsumererror)). Other consumers on the same command are unaffected. ### Detached commands Detached mode is in beta. When you set `detached: true`, the command runs fire-and-forget: `runCommand` returns as soon as the server reports it started, and the command keeps running in the sandbox afterward. ```typescript await sandbox.runCommand({cmd: 'node', args: ['worker.js'], detached: true}) ``` A detached command's output is **not retained and cannot be retrieved yet** (reattach and log replay is a future API). As a result, `logs()`, `output()`, and `wait()` on the returned execution throw, and the SDK logs a warning when detached is used. ### Command properties The `SandboxCommandExecution` returned by `runCommand` (the `command` in the examples above) exposes read-only properties describing the command's invocation and current state, refreshed in place as the server reports progress: * **cmdId**: the command's unique id, assigned by the server. * **sandboxId**: the sandbox the command runs in. * **cmd** / **args** / **cwd** / **env** / **sudo** / **detached**: the command's invocation, as it was run. * **startedAt**: when the command started, as a `Date`. * **status**: the current status, one of `pending`, `running`, `finished`, `failed`, or `killed`. * **exitCode**: the exit code once the command has finished, or undefined while it's still running. * **finishedAt**: when the command finished, or undefined while it's still running. * **stdoutBytesEmitted** / **stderrBytesEmitted**: the total bytes produced on each stream so far. ## File system `sandbox.fs()` returns a `FileSystem` bound to the sandbox. Its methods mirror `node:fs/promises`, so existing fs code can drop in with little friction, and a failure throws a `FileSystemError` carrying the same `code` / `syscall` / `path` / `errno` fields Node attaches to its own fs errors. Each call to `fs()` returns a fresh, lightweight instance bound to the same sandbox. ```typescript const fs = sandbox.fs() ``` ### Read and write files `readFile` returns a `Buffer`, or a string when you pass an `encoding`. `writeFile` replaces any existing contents, and `appendFile` adds to the end of the file, creating it if needed. Both accept `{mode?, recursive?}`; with `recursive: true`, missing parent directories are created first. ```typescript await fs.writeFile('/home/runner/hello.txt', 'hi', {recursive: true}) await fs.appendFile('/home/runner/hello.txt', ' there') const buf = await fs.readFile('/home/runner/hello.txt') // Buffer const text = await fs.readFile('/home/runner/hello.txt', {encoding: 'utf8'}) // string ``` ### Directories `mkdir` creates a directory, `readdir` lists a directory's entries, and `mkdtemp` creates a directory with a unique name. ```typescript import {DirEntry} from '@depot/sandbox' await fs.mkdir('/home/runner/nested', {recursive: true, mode: 0o755}) const names = await fs.readdir('/home/runner') // string[] const entries = (await fs.readdir('/home/runner', {withFileTypes: true})) as DirEntry[] for (const entry of entries) { console.log(entry.name, entry.isDirectory()) } const tmp = await fs.mkdtemp('/tmp/build-') // e.g. "/tmp/build-a1b2c3" ``` `readdir` returns a `string[] | DirEntry[]` union: plain `string[]` by default, or `DirEntry[]` when `withFileTypes` is set. Because the return type is a union, narrow the `withFileTypes` result to `DirEntry[]` (imported from `@depot/sandbox`) before reading entry fields. A `DirEntry` has a `name`, a `type`, and `isFile()` / `isDirectory()` / `isSymbolicLink()` helpers. `mkdtemp` creates a uniquely named temporary directory by suffixing your prefix with a random string. ### Stat `stat` follows symlinks; `lstat` stats the link itself. Both return a `StatResult`. `realpath` resolves a path to its canonical form by walking symlinks. ```typescript const stat = await fs.stat('/home/runner/hello.txt') console.log(stat.size, stat.mode, stat.uname, stat.gname, stat.mtime) console.log(stat.isFile(), stat.isDirectory()) const real = await fs.realpath('/home/runner/link') ``` A `StatResult` carries `path`, `size`, `mode` (POSIX permission bits as an octal integer), `uname`, `gname`, `mtime` (a `Date`), and `type`, along with `isFile()`, `isDirectory()`, `isSymbolicLink()`, `isBlockDevice()`, `isCharacterDevice()`, `isFIFO()`, and `isSocket()`. `isSymbolicLink()` is only true for a value that came from `lstat`. ### Move, copy, and remove `rename` moves or renames a path, `copyFile` copies a file, `unlink` / `rm` / `rmdir` remove files and directories, and `truncate` resizes a file. ```typescript await fs.rename('/home/runner/old.txt', '/home/runner/new.txt') await fs.copyFile('/home/runner/new.txt', '/home/runner/copy.txt', {preserveMetadata: true}) await fs.unlink('/home/runner/copy.txt') // remove a file or symlink await fs.rm('/home/runner/nested', {recursive: true, force: true}) // remove a tree await fs.rmdir('/home/runner/empty') // remove an empty directory await fs.truncate('/home/runner/new.txt', 1024) // resize to 1024 bytes (default 0) ``` `copyFile` accepts `{preserveMetadata?}` to keep mode, owner, and timestamps where possible (like `cp -p`). `rm` accepts `{recursive?, force?}`. `rmdir` fails with `ENOTEMPTY` if the directory isn't empty. ### Permissions and ownership `chmod` accepts an octal integer (`0o755`) or an octal string (`"755"`). `chown` takes a numeric uid and gid. ```typescript await fs.chmod('/home/runner/script.sh', 0o755) await fs.chown('/home/runner/script.sh', 1000, 1000) // needs root, which file system operations don't have in the beta ``` ### Symlinks `symlink` creates a symbolic link at `linkPath` pointing to `target`, and `readlink` returns the target path a link points to. ```typescript await fs.symlink('/home/runner/target.txt', '/home/runner/link.txt') // symlink(target, linkPath) const target = await fs.readlink('/home/runner/link.txt') ``` ### Check existence and access `access` checks access to a path, resolving on success and rejecting with a `FileSystemError` otherwise. `exists` is an SDK convenience composed from `stat`, returning a boolean; errors other than `ENOENT` (for example `EACCES` on an unreadable parent) propagate. ```typescript await fs.access('/home/runner/hello.txt') // throws if not accessible if (await fs.exists('/home/runner/hello.txt')) { // ... } ``` ## Errors The SDK exposes two error types. ### FileSystemError Every `sandbox.fs()` method throws a `FileSystemError` on failure. It carries the same fields Node attaches to its own fs errors, so code written against `node:fs/promises` can branch on `err.code` without caring that the operation crossed the wire: * **code**: a Node-style error code such as `'ENOENT'`. The catch-all `'OTHER'` is used when the server can't classify a failure into a specific code. * **syscall**: the operation that failed, for example `'stat'` or `'open'`. * **path**: the path the operation was attempted on. * **errno**: the negated Linux errno for the code, for Node-shape parity. ```typescript import {FileSystemError} from '@depot/sandbox' try { await fs.readFile('/missing.txt') } catch (err) { if (err instanceof FileSystemError && err.code === 'ENOENT') { console.log('file not found') } } ``` ### SlowConsumerError `command.logs()` holds recent output in a fixed-size buffer so each consumer can catch up from where it left off. If your loop processes chunks more slowly than the command produces them, the buffer fills and the oldest unread output is dropped. When that happens, the SDK ends your loop with a `SlowConsumerError` rather than silently skipping output, so wrap the loop in a `try/catch` to handle it. The same applies to `command.output()`, which fails with a `SlowConsumerError` if the buffer drops output before the call finishes reading. Other consumers on the same command, and the command itself, keep running. ```typescript import {SlowConsumerError} from '@depot/sandbox' try { for await (const chunk of command.logs()) { await slowProcess(chunk) } } catch (err) { if (err instanceof SlowConsumerError) { // fell behind the replay buffer } } ``` ## Coming soon The following sandbox capabilities are planned but not yet part of the SDK surface. All of the following are subject to change: * **Detached output**: reattach and log replay for [detached commands](#detached-commands), so their output can be retrieved after the fact. * **Secrets**: injecting secrets when a sandbox is created. * **Snapshots**: capturing and restoring sandbox state. * **Custom runtimes**: selecting the image a sandbox boots into, whether an arbitrary OCI image reference or a curated catalog of runtimes selectable by name (`{named: 'node24'}`). Sandboxes currently boot from Depot's default base image. {/* prettier-ignore-end */} ## Depot SDK Reference {/* prettier-ignore-start */} You can interact with the Depot API only through the following Connect RPC-based SDKs: * **Node.js SDK**: For TypeScript/JavaScript projects, uses the Depot CLI ([`depot/sdk-node`](https://github.com/depot/sdk-node)) * **Go SDK**: For Go projects and BuildKit integration ([`depot/depot-go`](https://github.com/depot/depot-go)) Both SDKs provide access to the Project, Build, Registry, and Usage services. The Go SDK additionally provides lower-level BuildKit APIs for direct interaction with build infrastructure. ## API services The Depot API includes the following services. Access each service through the SDKs using the methods listed below: ### Project service [`depot.core.v1.ProjectService`](https://buf.build/depot/api/docs/main:depot.core.v1#depot.core.v1.ProjectService) * `ListProjects` - List all projects for an organization * `GetProject` - Get details for a specific project * `CreateProject` - Create a new project * `UpdateProject` - Update a project's configuration * `DeleteProject` - Delete a project * `ResetProject` - Reset a project (terminates all machines and deletes all cached data) * `ListTrustPolicies` - List trust policies for a project * `AddTrustPolicy` - Add a trust policy to a project * `RemoveTrustPolicy` - Remove a trust policy from a project * `ListTokens` - List all tokens for a project * `CreateToken` - Create a new project token * `UpdateToken` - Update a project token * `DeleteToken` - Delete a project token ### Build service [`depot.build.v1.BuildService`](https://buf.build/depot/api/docs/main:depot.build.v1#depot.build.v1.BuildService) * `CreateBuild` - Create a new build * `FinishBuild` - Mark a build as finished * `GetBuildSteps` - Get the steps for a build * `GetBuildStepLogs` - Get logs for a specific build step ### Registry service [`depot.build.v1.RegistryService`](https://buf.build/depot/api/docs/main:depot.build.v1#depot.build.v1.RegistryService) * `ListImages` - List all images in a project's registry * `DeleteImages` - Delete images from a project's registry ### BuildKit service [`depot.buildkit.v1.BuildKitService`](https://buf.build/depot/api/docs/main:depot.buildkit.v1#depot.buildkit.v1.BuildKitService) * `GetEndpoint` - Get a BuildKit endpoint for a build * `ReportHealth` - Report the health status of a build * `ReleaseEndpoint` - Release a BuildKit endpoint ### Usage service [`depot.core.v1.UsageService`](https://buf.build/depot/api/docs/main:depot.core.v1#depot.core.v1.UsageService) * `ListProjectUsage` - List usage data for projects * `GetProjectUsage` - Get usage data for a specific project * `GetUsage` - Get detailed usage data over a specified period *** ## Project service Docs: [`depot.core.v1.ProjectService`](https://buf.build/depot/api/docs/main:depot.core.v1#depot.core.v1.ProjectService) A project is an isolated cache. Projects belong to a single organization and are never shared. They represent the layer cache associated with the images built inside of it; you can build multiple images for different platforms with a single project. Or you can choose to have one project per image built. When you want to segregate your customer builds from one another, we recommend one project per customer. ### List projects for an organization You can list all of the projects for your org with an empty request payload. ```typescript const headers = {Authorization: `Bearer ${process.env.DEPOT_TOKEN}`} const result = await depot.core.v1.ProjectService.listProjects({}, {headers}) console.log(result.projects) ``` ```go import ( "net/http" corev1 "buf.build/gen/go/depot/api/protocolbuffers/go/depot/core/v1" "buf.build/gen/go/depot/api/connectrpc/go/depot/core/v1/corev1connect" "connectrpc.com/connect" ) token := os.Getenv("DEPOT_TOKEN") client := corev1connect.NewProjectServiceClient( http.DefaultClient, "https://api.depot.dev", ) req := connect.NewRequest(&corev1.ListProjectsRequest{}) req.Header().Set("Authorization", fmt.Sprintf("Bearer %s", token)) resp, err := client.ListProjects(ctx, req) if err != nil { log.Fatal(err) } log.Printf("Projects: %v", resp.Msg.Projects) ``` ### Create a project To create a project, you need to pass a request that contains the name of the project, the id of your organization, the region you want to create the project in, and the cache volume size you want to use with the project. Supported regions: * `us-east-1` * `eu-central-1` ```typescript const headers = {Authorization: `Bearer ${process.env.DEPOT_TOKEN}`} const result = await depot.core.v1.ProjectService.createProject( { name: 'my-project', organizationId: 'org-id', regionId: 'us-east-1', cachePolicy: {keepBytes: 50 * 1024 * 1024 * 1024, keepDays: 14}, }, {headers}, ) console.log(result.project) ``` ```go import ( "net/http" corev1 "buf.build/gen/go/depot/api/protocolbuffers/go/depot/core/v1" "buf.build/gen/go/depot/api/connectrpc/go/depot/core/v1/corev1connect" "connectrpc.com/connect" ) token := os.Getenv("DEPOT_TOKEN") client := corev1connect.NewProjectServiceClient( http.DefaultClient, "https://api.depot.dev", ) req := connect.NewRequest(&corev1.CreateProjectRequest{ Name: "my-project", RegionId: "us-east-1", CachePolicy: &corev1.CachePolicy{ KeepBytes: 50 * 1024 * 1024 * 1024, // 50GB KeepDays: 14, }, }) req.Header().Set("Authorization", fmt.Sprintf("Bearer %s", token)) resp, err := client.CreateProject(ctx, req) if err != nil { log.Fatal(err) } log.Printf("Project ID: %s", resp.Msg.Project.ProjectId) ``` ### Get a project To get a project, you need to pass the ID of the project you want to get. ```typescript const headers = {Authorization: `Bearer ${process.env.DEPOT_TOKEN}`} const result = await depot.core.v1.ProjectService.getProject({projectId: 'project-id'}, {headers}) console.log(result.project) ``` ```go import ( "net/http" corev1 "buf.build/gen/go/depot/api/protocolbuffers/go/depot/core/v1" "buf.build/gen/go/depot/api/connectrpc/go/depot/core/v1/corev1connect" "connectrpc.com/connect" ) token := os.Getenv("DEPOT_TOKEN") client := corev1connect.NewProjectServiceClient( http.DefaultClient, "https://api.depot.dev", ) req := connect.NewRequest(&corev1.GetProjectRequest{ ProjectId: "project-id", }) req.Header().Set("Authorization", fmt.Sprintf("Bearer %s", token)) resp, err := client.GetProject(ctx, req) if err != nil { log.Fatal(err) } log.Printf("Project: %v", resp.Msg.Project) ``` ### Update a project To update a project, you can pass the ID of the project you want to update and the fields you want to update. ```typescript const headers = {Authorization: `Bearer ${process.env.DEPOT_TOKEN}`} const result = await depot.core.v1.ProjectService.updateProject( { projectId: 'project-id', name: 'my-project', regionId: 'us-east-1', cachePolicy: {keepBytes: 50 * 1024 * 1024 * 1024, keepDays: 14}, hardware: Hardware.HARDWARE_32X64, }, {headers}, ) console.log(result.project) ``` ```go import ( "net/http" corev1 "buf.build/gen/go/depot/api/protocolbuffers/go/depot/core/v1" "buf.build/gen/go/depot/api/connectrpc/go/depot/core/v1/corev1connect" "connectrpc.com/connect" ) token := os.Getenv("DEPOT_TOKEN") client := corev1connect.NewProjectServiceClient( http.DefaultClient, "https://api.depot.dev", ) req := connect.NewRequest(&corev1.UpdateProjectRequest{ ProjectId: "project-id", Name: "my-project", RegionId: "us-east-1", CachePolicy: &corev1.CachePolicy{ KeepBytes: 50 * 1024 * 1024 * 1024, KeepDays: 14, }, Hardware: corev1.Hardware_HARDWARE_32X64, }) req.Header().Set("Authorization", fmt.Sprintf("Bearer %s", token)) resp, err := client.UpdateProject(ctx, req) if err != nil { log.Fatal(err) } log.Printf("Updated project: %v", resp.Msg.Project) ``` ### Delete a project You can delete a project by ID. This will destroy any underlying volumes associated with the project. ```typescript await depot.core.v1.ProjectService.deleteProject({projectId: 'project-id'}, {headers}) ``` ```go import ( "net/http" corev1 "buf.build/gen/go/depot/api/protocolbuffers/go/depot/core/v1" "buf.build/gen/go/depot/api/connectrpc/go/depot/core/v1/corev1connect" "connectrpc.com/connect" ) token := os.Getenv("DEPOT_TOKEN") client := corev1connect.NewProjectServiceClient( http.DefaultClient, "https://api.depot.dev", ) req := connect.NewRequest(&corev1.DeleteProjectRequest{ ProjectId: "project-id", }) req.Header().Set("Authorization", fmt.Sprintf("Bearer %s", token)) _, err := client.DeleteProject(ctx, req) if err != nil { log.Fatal(err) } ``` ### List tokens for a project You can list the tokens for a project by ID. ```typescript const headers = {Authorization: `Bearer ${process.env.DEPOT_TOKEN}`} const result = await depot.core.v1.ProjectService.listTokens({projectId: 'project-id'}, {headers}) ``` ```go import ( "net/http" corev1 "buf.build/gen/go/depot/api/protocolbuffers/go/depot/core/v1" "buf.build/gen/go/depot/api/connectrpc/go/depot/core/v1/corev1connect" "connectrpc.com/connect" ) token := os.Getenv("DEPOT_TOKEN") client := corev1connect.NewProjectServiceClient( http.DefaultClient, "https://api.depot.dev", ) req := connect.NewRequest(&corev1.ListTokensRequest{ ProjectId: "project-id", }) req.Header().Set("Authorization", fmt.Sprintf("Bearer %s", token)) resp, err := client.ListTokens(ctx, req) if err != nil { log.Fatal(err) } log.Printf("Tokens: %v", resp.Msg.Tokens) ``` ### Create a project token You can create a token for a given project ID. ```typescript const headers = {Authorization: `Bearer ${process.env.DEPOT_TOKEN}`} const result = await depot.core.v1.ProjectService.createToken( { projectId: 'project-id', description: 'my-token', }, {headers}, ) ``` ```go import ( "net/http" corev1 "buf.build/gen/go/depot/api/protocolbuffers/go/depot/core/v1" "buf.build/gen/go/depot/api/connectrpc/go/depot/core/v1/corev1connect" "connectrpc.com/connect" ) token := os.Getenv("DEPOT_TOKEN") client := corev1connect.NewProjectServiceClient( http.DefaultClient, "https://api.depot.dev", ) req := connect.NewRequest(&corev1.CreateTokenRequest{ ProjectId: "project-id", Description: "my-token", }) req.Header().Set("Authorization", fmt.Sprintf("Bearer %s", token)) resp, err := client.CreateToken(ctx, req) if err != nil { log.Fatal(err) } log.Printf("Token: %s", resp.Msg.Token) ``` ### Update a project token You can update a project token by ID. ```typescript const headers = {Authorization: `Bearer ${process.env.DEPOT_TOKEN}`} const result = await depot.core.v1.ProjectService.updateToken( { tokenId: 'token-id', description: 'new-description', }, {headers}, ) ``` ```go import ( "net/http" corev1 "buf.build/gen/go/depot/api/protocolbuffers/go/depot/core/v1" "buf.build/gen/go/depot/api/connectrpc/go/depot/core/v1/corev1connect" "connectrpc.com/connect" ) token := os.Getenv("DEPOT_TOKEN") client := corev1connect.NewProjectServiceClient( http.DefaultClient, "https://api.depot.dev", ) req := connect.NewRequest(&corev1.UpdateTokenRequest{ TokenId: "token-id", Description: "new-description", }) req.Header().Set("Authorization", fmt.Sprintf("Bearer %s", token)) resp, err := client.UpdateToken(ctx, req) if err != nil { log.Fatal(err) } log.Printf("Updated token: %v", resp.Msg.Token) ``` ### Delete a project token You can delete a project token by ID. ```typescript const headers = {Authorization: `Bearer ${process.env.DEPOT_TOKEN}`} const result = await depot.core.v1.ProjectService.deleteToken({tokenId: 'token-id'}, {headers}) ``` ```go import ( "net/http" corev1 "buf.build/gen/go/depot/api/protocolbuffers/go/depot/core/v1" "buf.build/gen/go/depot/api/connectrpc/go/depot/core/v1/corev1connect" "connectrpc.com/connect" ) token := os.Getenv("DEPOT_TOKEN") client := corev1connect.NewProjectServiceClient( http.DefaultClient, "https://api.depot.dev", ) req := connect.NewRequest(&corev1.DeleteTokenRequest{ TokenId: "token-id", }) req.Header().Set("Authorization", fmt.Sprintf("Bearer %s", token)) _, err := client.DeleteToken(ctx, req) if err != nil { log.Fatal(err) } ``` ### List trust policies for a project ```typescript const policies = await depot.core.v1.ProjectService.listTrustPolicies({projectId: 'project-id'}, {headers}) ``` ```go import ( "net/http" corev1 "buf.build/gen/go/depot/api/protocolbuffers/go/depot/core/v1" "buf.build/gen/go/depot/api/connectrpc/go/depot/core/v1/corev1connect" "connectrpc.com/connect" ) token := os.Getenv("DEPOT_TOKEN") client := corev1connect.NewProjectServiceClient( http.DefaultClient, "https://api.depot.dev", ) req := connect.NewRequest(&corev1.ListTrustPoliciesRequest{ ProjectId: "project-id", }) req.Header().Set("Authorization", fmt.Sprintf("Bearer %s", token)) resp, err := client.ListTrustPolicies(ctx, req) if err != nil { log.Fatal(err) } log.Printf("Trust policies: %v", resp.Msg.TrustPolicies) ``` ### Add a trust policy for a project ```typescript // GitHub await depot.core.v1.ProjectService.addTrustPolicy( { projectId: 'project-id', provider: { case: 'github', value: { repositoryOwner: 'org', repository: 'repo', }, }, }, {headers}, ) ``` ```typescript // BuildKite await depot.core.v1.ProjectService.addTrustPolicy( { projectId: 'project-id', provider: { case: 'buildkite', value: { organizationSlug: 'org', pipelineSlug: 'pipeline', }, }, }, {headers}, ) ``` ```typescript // CircleCI await depot.core.v1.ProjectService.addTrustPolicy( { projectId: 'project-id', provider: { case: 'circleci', value: { organizationUuid: 'uuid', projectUuid: 'uuid', }, }, }, {headers}, ) ``` ```go import ( "net/http" corev1 "buf.build/gen/go/depot/api/protocolbuffers/go/depot/core/v1" "buf.build/gen/go/depot/api/connectrpc/go/depot/core/v1/corev1connect" "connectrpc.com/connect" ) token := os.Getenv("DEPOT_TOKEN") client := corev1connect.NewProjectServiceClient( http.DefaultClient, "https://api.depot.dev", ) // GitHub req := connect.NewRequest(&corev1.AddTrustPolicyRequest{ ProjectId: "project-id", Provider: &corev1.AddTrustPolicyRequest_Github{ Github: &corev1.GitHubTrustPolicy{ RepositoryOwner: "org", Repository: "repo", }, }, }) req.Header().Set("Authorization", fmt.Sprintf("Bearer %s", token)) resp, err := client.AddTrustPolicy(ctx, req) if err != nil { log.Fatal(err) } ``` ```go // BuildKite req := connect.NewRequest(&corev1.AddTrustPolicyRequest{ ProjectId: "project-id", Provider: &corev1.AddTrustPolicyRequest_Buildkite{ Buildkite: &corev1.BuildKiteTrustPolicy{ OrganizationSlug: "org", PipelineSlug: "pipeline", }, }, }) req.Header().Set("Authorization", fmt.Sprintf("Bearer %s", token)) resp, err := client.AddTrustPolicy(ctx, req) if err != nil { log.Fatal(err) } ``` ```go // CircleCI req := connect.NewRequest(&corev1.AddTrustPolicyRequest{ ProjectId: "project-id", Provider: &corev1.AddTrustPolicyRequest_Circleci{ Circleci: &corev1.CircleCITrustPolicy{ OrganizationUuid: "uuid", ProjectUuid: "uuid", }, }, }) req.Header().Set("Authorization", fmt.Sprintf("Bearer %s", token)) resp, err := client.AddTrustPolicy(ctx, req) if err != nil { log.Fatal(err) } ``` ### Remove a trust policy for a project ```typescript const headers = {Authorization: `Bearer ${process.env.DEPOT_TOKEN}`} await depot.core.v1.ProjectService.removeTrustPolicy( {projectId: 'project-id', trustPolicyId: 'policy-id'}, {headers}, ) ``` ```go import ( "net/http" corev1 "buf.build/gen/go/depot/api/protocolbuffers/go/depot/core/v1" "buf.build/gen/go/depot/api/connectrpc/go/depot/core/v1/corev1connect" "connectrpc.com/connect" ) token := os.Getenv("DEPOT_TOKEN") client := corev1connect.NewProjectServiceClient( http.DefaultClient, "https://api.depot.dev", ) req := connect.NewRequest(&corev1.RemoveTrustPolicyRequest{ ProjectId: "project-id", TrustPolicyId: "policy-id", }) req.Header().Set("Authorization", fmt.Sprintf("Bearer %s", token)) _, err := client.RemoveTrustPolicy(ctx, req) if err != nil { log.Fatal(err) } ``` ## Build service Docs: [`depot.build.v1.BuildService`](https://buf.build/depot/api/docs/main:depot.build.v1#depot.build.v1.BuildService) A build is a single image build within a given project. Once you create a build for a project, you get back an ID to reference it and a token for authentication. ### Create a build To create a build, you need to pass a request that contains the ID of the project you want to build in. ```typescript const headers = {Authorization: `Bearer ${process.env.DEPOT_TOKEN}`} const result = await depot.build.v1.BuildService.createBuild({projectId: 'project-id'}, {headers}) console.log(result.buildId) console.log(result.buildToken) ``` ```go import ( "github.com/depot/depot-go/build" cliv1 "github.com/depot/depot-go/proto/depot/cli/v1" ) token := os.Getenv("DEPOT_TOKEN") projectID := os.Getenv("DEPOT_PROJECT_ID") build, err := build.NewBuild(ctx, &cliv1.CreateBuildRequest{ ProjectId: projectID, }, token) if err != nil { log.Fatal(err) } log.Printf("Build ID: %s", build.ID) log.Printf("Build Token: %s", build.Token) ``` #### Using the build id & token If you're not managing the build context yourself in code via `buildx`, you can use the Depot CLI to build a given `Dockerfile` as we wrap `buildx` inside our CLI. With a build created via our API, you pass along the project, build ID, and token as environment variables: ```bash DEPOT_BUILD_ID= DEPOT_TOKEN= DEPOT_PROJECT_ID= depot build -f Dockerfile ``` **Note:** Build IDs are unique identifiers generated by Depot when creating a build via the API. When you set the `DEPOT_BUILD_ID` environment variable, `depot build` uses the existing build instead of creating a new one. If a build with that ID doesn't exist, the command will error. ### Finish a build **Note:** You only need to do this if you're managing the build context yourself in code via `buildx`. To mark a build as finished and clean up the underlying BuildKit endpoint, you need to pass the ID of the build you want to finish and the error result if there was one. ```typescript const headers = {Authorization: `Bearer ${process.env.DEPOT_TOKEN}`} await depot.build.v1.BuildService.finishBuild( {buildId: 'build-id', result: {error: 'error message'}}, {headers}, ) ``` ```go import ( "github.com/depot/depot-go/build" ) // Report build result when finished var buildErr error defer build.Finish(buildErr) ``` ### List the steps for a build To list the steps for a build, you need to pass the build ID, the project ID, the number of steps to page, and an optional page token returned from a previous API call. ```typescript const headers = {Authorization: `Bearer ${process.env.DEPOT_TOKEN}`} const result = await depot.build.v1.BuildService.getBuildSteps( { buildId: 'build-id', projectId: 'project-id', pageSize: 100, pageToken: 'page-token', }, {headers}, ) ``` ```go import ( "net/http" buildv1 "buf.build/gen/go/depot/api/protocolbuffers/go/depot/build/v1" "buf.build/gen/go/depot/api/connectrpc/go/depot/build/v1/buildv1connect" "connectrpc.com/connect" ) token := os.Getenv("DEPOT_TOKEN") client := buildv1connect.NewBuildServiceClient( http.DefaultClient, "https://api.depot.dev", ) req := connect.NewRequest(&buildv1.GetBuildStepsRequest{ BuildId: "build-id", ProjectId: "project-id", }) req.Header().Set("Authorization", fmt.Sprintf("Bearer %s", token)) resp, err := client.GetBuildSteps(ctx, req) if err != nil { log.Fatal(err) } log.Printf("Steps: %v", resp.Msg.BuildSteps) ``` ### Get the logs for a build step To get the logs for a build step, you need to pass the build ID, the project ID, and the build step's digest. You can also pass the number of lines to page and an optional page token returned from a previous API call. ```typescript const headers = {Authorization: `Bearer ${process.env.DEPOT_TOKEN}`} const result = await depot.build.v1.BuildService.getBuildStepLogs( { buildId: 'build-id', projectId: 'project-id', buildStepDigest: 'step-digest', pageSize: 100, pageToken: 'page-token', }, {headers}, ) ``` ```go import ( "net/http" buildv1 "buf.build/gen/go/depot/api/protocolbuffers/go/depot/build/v1" "buf.build/gen/go/depot/api/connectrpc/go/depot/build/v1/buildv1connect" "connectrpc.com/connect" ) token := os.Getenv("DEPOT_TOKEN") client := buildv1connect.NewBuildServiceClient( http.DefaultClient, "https://api.depot.dev", ) req := connect.NewRequest(&buildv1.GetBuildStepLogsRequest{ BuildId: "build-id", ProjectId: "project-id", BuildStepDigest: "step-digest", }) req.Header().Set("Authorization", fmt.Sprintf("Bearer %s", token)) resp, err := client.GetBuildStepLogs(ctx, req) if err != nil { log.Fatal(err) } log.Printf("Logs: %v", resp.Msg.Logs) ``` ## Registry service Docs: [`depot.build.v1.RegistryService`](https://buf.build/depot/api/docs/main:depot.build.v1#depot.build.v1.RegistryService) The Registry service provides access to the underlying registry that stores the images built by Depot. You can use this service to list and delete images. ### List the images for a project To list the images for a project, you need to pass the ID of the project you want to list the images for. When listing more than 100 images, you can use the `pageSize` and `pageToken` fields to paginate the results. ```typescript const headers = {Authorization: `Bearer ${process.env.DEPOT_TOKEN}`} const result = await depot.build.v1.RegistryService.listImages( { projectId: 'project-id', pageSize: 100, pageToken: undefined, }, {headers}, ) console.log(result.images) console.log(result.nextPageToken) ``` The images returned will consist of an image tag, digest, a pushedAt timestamp, and the size of the image in bytes. ```go import ( "net/http" buildv1 "buf.build/gen/go/depot/api/protocolbuffers/go/depot/build/v1" "buf.build/gen/go/depot/api/connectrpc/go/depot/build/v1/buildv1connect" "connectrpc.com/connect" ) token := os.Getenv("DEPOT_TOKEN") client := buildv1connect.NewRegistryServiceClient( http.DefaultClient, "https://api.depot.dev", ) req := connect.NewRequest(&buildv1.ListImagesRequest{ ProjectId: "project-id", }) req.Header().Set("Authorization", fmt.Sprintf("Bearer %s", token)) resp, err := client.ListImages(ctx, req) if err != nil { log.Fatal(err) } log.Printf("Images: %v", resp.Msg.Images) log.Printf("Next page token: %s", resp.Msg.NextPageToken) ``` The images returned will consist of an image tag, digest, a pushedAt timestamp, and the size of the image in bytes. ### Delete images To delete images, you need to pass the ID of the project and the list of image tags you want to remove. ```typescript const headers = {Authorization: `Bearer ${process.env.DEPOT_TOKEN}`} await depot.build.v1.RegistryService.deleteImage( { projectId: 'project-id', imageTags: ['image-tag-1', 'image-tag-2'], }, {headers}, ) ``` ```go import ( "net/http" buildv1 "buf.build/gen/go/depot/api/protocolbuffers/go/depot/build/v1" "buf.build/gen/go/depot/api/connectrpc/go/depot/build/v1/buildv1connect" "connectrpc.com/connect" ) token := os.Getenv("DEPOT_TOKEN") client := buildv1connect.NewRegistryServiceClient( http.DefaultClient, "https://api.depot.dev", ) req := connect.NewRequest(&buildv1.DeleteImagesRequest{ ProjectId: "project-id", ImageTags: []string{"image-tag-1", "image-tag-2"}, }) req.Header().Set("Authorization", fmt.Sprintf("Bearer %s", token)) _, err := client.DeleteImages(ctx, req) if err != nil { log.Fatal(err) } ``` ## BuildKit service Docs: [`depot.buildkit.v1.BuildKitService`](https://buf.build/depot/api/docs/main:depot.buildkit.v1#depot.buildkit.v1.BuildKitService) The BuildKit service provides lower level access to the underlying BuildKit endpoints that power the image builds. They give you the ability to interact with the underlying builders without needing the Depot CLI as a dependency. For example, you can use the [`buildx` Go library](https://pkg.go.dev/github.com/docker/buildx) with the given BuildKit endpoint to build images from your own code via Depot. ### Get a BuildKit endpoint To get a BuildKit endpoint, you need to pass the ID of the build you want to get the endpoint for and the platform you want to build. Supported platforms: * `PLATFORM_AMD64` for `linux/amd64` builds * `PLATFORM_ARM64` for `linux/arm64` builds **Note:** The BuildKit service requires the [buildx Go library](https://pkg.go.dev/github.com/docker/buildx). While the Node.js SDK includes these methods, you can only use buildx with Go. ```go import ( "github.com/depot/depot-go/build" "github.com/depot/depot-go/machine" cliv1 "github.com/depot/depot-go/proto/depot/cli/v1" ) token := os.Getenv("DEPOT_TOKEN") projectID := os.Getenv("DEPOT_PROJECT_ID") // Create a build build, err := build.NewBuild(ctx, &cliv1.CreateBuildRequest{ ProjectId: projectID, }, token) if err != nil { log.Fatal(err) } // Acquire a BuildKit machine buildkit, err := machine.Acquire(ctx, build.ID, build.Token, "amd64") if err != nil { log.Fatal(err) } defer buildkit.Release() // Connect to BuildKit buildkitClient, err := buildkit.Connect(ctx) if err != nil { log.Fatal(err) } ``` When a connection is active and ready to be used, you can use the `buildkitClient` to execute builds using the BuildKit API. ### Report the health of a build To report the health of a build, you need to pass the ID of the build you want to report and the platform. **Once you acquire a BuildKit endpoint, you must report the health of the build to Depot or the underlying resources will be removed after 5 minutes of inactivity.** ```go import ( "net/http" buildkitv1 "buf.build/gen/go/depot/api/protocolbuffers/go/depot/buildkit/v1" "buf.build/gen/go/depot/api/connectrpc/go/depot/buildkit/v1/buildkitv1connect" "connectrpc.com/connect" ) buildToken := os.Getenv("BUILD_TOKEN") client := buildkitv1connect.NewBuildKitServiceClient( http.DefaultClient, "https://api.depot.dev", ) req := connect.NewRequest(&buildkitv1.ReportHealthRequest{ BuildId: "build-id", Platform: buildkitv1.Platform_PLATFORM_AMD64, }) req.Header().Set("Authorization", fmt.Sprintf("Bearer %s", buildToken)) _, err := client.ReportHealth(ctx, req) if err != nil { log.Fatal(err) } ``` ### Release the endpoint for a build To release the endpoint for a build, you need to pass the ID of the build you want to release and the platform. This endpoint tells Depot you're done using that endpoint and we can schedule it for removal. ```go import ( "github.com/depot/depot-go/machine" ) // The buildkit.Release() method handles releasing the endpoint defer buildkit.Release() ``` ## Usage service Docs: [`depot.core.v1.UsageService`](https://buf.build/depot/api/docs/main:depot.core.v1#depot.core.v1.UsageService) The UsageService service enables consuming resource utilization data via API. ### Get usage for one project To get usage for a given project, you need to pass a project id, and the starting and ending timestamp of the desired period. All three parameters are mandatory. ```typescript import {depot, wkt} from '@depot/sdk-node' const {timestampFromDate} = wkt const headers = { Authorization: `Bearer ${process.env.DEPOT_TOKEN}`, } const request = { projectId: 'myprojectid', startAt: timestampFromDate(new Date('2025-09-01T00:00:00Z')), endAt: timestampFromDate(new Date('2025-09-30T23:59:59Z')), } const result = await depot.core.v1.UsageService.getProjectUsage(request, {headers}) console.log(result.usage) ``` ```go import ( "net/http" "time" corev1 "buf.build/gen/go/depot/api/protocolbuffers/go/depot/core/v1" "buf.build/gen/go/depot/api/connectrpc/go/depot/core/v1/corev1connect" "connectrpc.com/connect" "google.golang.org/protobuf/types/known/timestamppb" ) token := os.Getenv("DEPOT_TOKEN") client := corev1connect.NewUsageServiceClient( http.DefaultClient, "https://api.depot.dev", ) startAt, _ := time.Parse(time.RFC3339, "2025-09-01T00:00:00Z") endAt, _ := time.Parse(time.RFC3339, "2025-09-30T23:59:59Z") req := connect.NewRequest(&corev1.GetProjectUsageRequest{ ProjectId: "myprojectid", StartAt: timestamppb.New(startAt), EndAt: timestamppb.New(endAt), }) req.Header().Set("Authorization", fmt.Sprintf("Bearer %s", token)) resp, err := client.GetProjectUsage(ctx, req) if err != nil { log.Fatal(err) } log.Printf("Usage: %v", resp.Msg.Usage) ``` ### Get usage for a given period To get usage data for your organization for a specific period of time, you need to pass the starting and ending timestamp of the period. Both `startAt` and `endAt` are mandatory parameters. `getUsage` returns the same data as the CSV generated via `Settings > Usage > Usage History`. ```typescript import {depot, wkt} from '@depot/sdk-node' const {timestampFromDate} = wkt const headers = { Authorization: `Bearer ${process.env.DEPOT_TOKEN}`, } const request = { startAt: timestampFromDate(new Date('2025-09-01T00:00:00Z')), endAt: timestampFromDate(new Date('2025-09-30T23:59:59Z')), } const result = await depot.core.v1.UsageService.getUsage(request, {headers}) console.log(result.containerBuild) console.log(result.githubActionsJobs) console.log(result.storage) console.log(result.agentSandbox) ``` ```go import ( "net/http" "time" corev1 "buf.build/gen/go/depot/api/protocolbuffers/go/depot/core/v1" "buf.build/gen/go/depot/api/connectrpc/go/depot/core/v1/corev1connect" "connectrpc.com/connect" "google.golang.org/protobuf/types/known/timestamppb" ) token := os.Getenv("DEPOT_TOKEN") client := corev1connect.NewUsageServiceClient( http.DefaultClient, "https://api.depot.dev", ) startAt, _ := time.Parse(time.RFC3339, "2025-09-01T00:00:00Z") endAt, _ := time.Parse(time.RFC3339, "2025-09-30T23:59:59Z") req := connect.NewRequest(&corev1.GetUsageRequest{ StartAt: timestamppb.New(startAt), EndAt: timestamppb.New(endAt), }) req.Header().Set("Authorization", fmt.Sprintf("Bearer %s", token)) resp, err := client.GetUsage(ctx, req) if err != nil { log.Fatal(err) } log.Printf("Container build usage: %v", resp.Msg.ContainerBuild) log.Printf("GitHub Actions jobs: %v", resp.Msg.GithubActionsJobs) log.Printf("Storage: %v", resp.Msg.Storage) log.Printf("Agent sandbox: %v", resp.Msg.AgentSandbox) ``` {/* prettier-ignore-end */} ## Authentication Depot Cache supports authenticating with **user** tokens and **organization** tokens. Additionally, [Depot GitHub Actions runners](/docs/github-actions/overview) are pre-configured with a token that is active for a single job, which is set as environment variable called `DEPOT_CACHE_TOKEN`. Project tokens are **not** supported for Depot cache because only [container builds](/docs/container-builds/overview) use projects. ## Token types * **User tokens** are used to authenticate as a specific user and can be generated from your [user settings](/settings) page. * **Organization tokens** are used to authenticate as an organization. These tokens can be generated from your organization's settings page. * **Depot GitHub Actions runners** are pre-configured with a token that is active for a single job (`DEPOT_CACHE_TOKEN`). If you are using the automatic Depot Cache integration with Depot runners, you do not need to manually configure authentication. ## Configuring build tools For specific details on how to configure your build tools to authenticate with Depot Cache, refer to the following guides: * [Bazel](/docs/cache/integrations/bazel) * [Go](/docs/cache/integrations/gocache) * [Gradle](/docs/cache/integrations/gradle) * [Pants](/docs/cache/integrations/pants) * [sccache](/docs/cache/integrations/sccache) * [Turborepo](/docs/cache/integrations/turbo) ## Configure Bazel to use Depot Cache [**Bazel**](https://bazel.build/) is a build tool that builds code quickly and reliably. Many large projects use it, including Google, and optimizes for incremental builds with advanced local and remote caching and parallel execution. Bazel supports many different languages and platforms, and is highly configurable, scaling to codebases of any size. [**Depot Cache**](/docs/cache/overview) provides a remote cache service that works with Bazel, allowing you to incrementally cache and reuse parts of your builds. This cache is accessible from anywhere, both on your local machine and on CI/CD systems. **Note:** You need a [Depot API token](/docs/cli/authentication) to authenticate with the cache service. ## Local workstation To configure Bazel to use Depot Cache, set two build flags in your `.bazelrc` file: ```bash build --remote_cache=https://cache.depot.dev build --remote_header=authorization=DEPOT_TOKEN ``` If you are a member of multiple organizations and authenticating with a user token, you must additionally specify which organization to use for cache storage with the `x-depot-org` header: ```bash build --remote_header=x-depot-org=DEPOT_ORG_ID ``` After you configure Bazel to use Depot Cache, run your builds as you normally would. Bazel automatically communicates with Depot Cache to fetch and reuse any stored build artifacts from your previous builds. ## Local workstation with containerized builds When building Docker images that contain Bazel workspaces locally, your build needs access to Bazel's remote cache credentials to benefit from caching. Containerized builds execute in isolated environments that require explicit configuration. ### Dockerfile configuration Update your Dockerfile to mount the secret and configure Bazel: ```dockerfile # syntax=docker/dockerfile:1 # ... other Dockerfile instructions # Create .bazelrc with cache configuration RUN --mount=type=secret,id=DEPOT_TOKEN,env=DEPOT_TOKEN \ echo "build --remote_cache=https://cache.depot.dev" >> ~/.bazelrc && \ echo "build --remote_header=authorization=${DEPOT_TOKEN}" >> ~/.bazelrc && \ bazel build ``` Adding `# syntax=docker/dockerfile:1` as the first line of your Dockerfile enables mounting secrets as environment variables. ### Depot CLI ```shell depot build --secret id=DEPOT_TOKEN,env=DEPOT_TOKEN -t your-image:tag . ``` ### Docker buildx ```shell docker buildx build --secret id=DEPOT_TOKEN,env=DEPOT_TOKEN -t your-image:tag . ``` ### Bake Define the secret in your `docker-bake.hcl` file: ```hcl target "default" { context = "." dockerfile = "Dockerfile" tags = ["your-image:tag"] secret = [ { type = "env" id = "DEPOT_TOKEN" } ] } ``` Then run the build: ```shell DEPOT_TOKEN=your_token depot bake ``` ## Depot GitHub Actions runners [Depot GitHub Actions runners](/docs/github-actions/overview) are pre-configured to use Depot Cache with Bazel. Each runner launches with a `$HOME/.bazelrc` file pre-populated with the connection details for Depot Cache. You don't need additional configuration. Run your Bazel builds as normal: ```yaml jobs: build: runs-on: depot-ubuntu-24.04 steps: - uses: actions/checkout@v4 - run: bazel build //... ``` To disable automatic configuration, turn off **Allow Actions jobs to automatically connect to Depot Cache** in your organization settings page. You can then manually configure Bazel as described in the Local workstation section. ## Depot GitHub Actions runners with containerized builds When running containerized builds on Depot GitHub Actions runners, your build needs access to Bazel's remote cache credentials. These credentials aren't automatically available inside your Docker build environment. ### Dockerfile configuration Update your Dockerfile to mount the secret and configure Bazel: ```dockerfile # syntax=docker/dockerfile:1 # ... other Dockerfile instructions # Create .bazelrc with cache configuration RUN --mount=type=secret,id=DEPOT_TOKEN,env=DEPOT_TOKEN \ echo "build --remote_cache=https://cache.depot.dev" >> ~/.bazelrc && \ echo "build --remote_header=authorization=${DEPOT_TOKEN}" >> ~/.bazelrc && \ bazel build ``` Adding `# syntax=docker/dockerfile:1` as the first line of your Dockerfile enables mounting secrets as environment variables. ### `depot/build-push-action` Store the Depot token in a GitHub Secret named `DEPOT_TOKEN`, then configure your workflow: ```yaml - name: Build and push uses: depot/build-push-action@v1 with: context: . file: ./Dockerfile push: true tags: your-image:tag secrets: | "DEPOT_TOKEN=${{ secrets.DEPOT_TOKEN }}" ``` ### `depot/bake-action` Define the secret in your `docker-bake.hcl` file: ```hcl target "default" { context = "." dockerfile = "Dockerfile" tags = ["your-image:tag"] secret = [ { type = "env" id = "DEPOT_TOKEN" } ] } ``` Then configure your workflow: ```yaml - name: Bake uses: depot/bake-action@v1 with: files: docker-bake.hcl env: DEPOT_TOKEN: ${{ secrets.DEPOT_TOKEN }} ``` ### Docker CLI Store the Depot token in a GitHub Secret named `DEPOT_TOKEN`, then configure your workflow: ```yaml - name: Build run: | docker buildx build \ --secret id=DEPOT_TOKEN,env=DEPOT_TOKEN \ -t your-image:tag . env: DEPOT_TOKEN: ${{ secrets.DEPOT_TOKEN }} ``` ## GitHub Actions [**Depot Cache**](/docs/cache/overview) provides a remote cache service for GitHub Actions cache when running workflows on Depot GitHub Actions runners, which provides faster upload and download speeds compared to the standard GitHub Actions cache. ## Use GitHub Actions cache with Depot Cache Depot Cache for GitHub Actions is only available when using [Depot GitHub Actions runners](/docs/github-actions/overview). Standard GitHub-hosted runners or self-hosted runners use the standard GitHub Actions cache. ### From Depot GitHub Actions runners [Depot GitHub Actions runners](/docs/github-actions/overview) are pre-configured to use Depot Cache for all GitHub Actions cache operations. When running workflows on Depot GitHub Actions runners, any action that uses the GitHub Actions cache API automatically uses Depot Cache instead of the standard GitHub Actions cache. This includes: * `actions/cache`: the standard caching action * `actions/setup-node`: caches npm/yarn dependencies when you enable the cache option * `actions/setup-python`: caches pip dependencies when you enable the cache option * `actions/setup-java`: caches Maven/Gradle dependencies when you enable the cache option * Any other action that uses the GitHub Actions cache API #### Example workflow A workflow using `actions/cache` automatically uses Depot Cache when running on Depot GitHub Actions runners, with no changes to your workflow file: ```yaml steps: - uses: actions/checkout@v4 - name: Cache dependencies uses: actions/cache@v4 with: path: ~/.npm key: ${{ runner.os }}-node-${{ hashFiles('**/package-lock.json') }} restore-keys: | ${{ runner.os }}-node- - name: Install dependencies run: npm ci ``` ### Compatibility with other tools Depot Cache works with any tool or package manager that's compatible with the GitHub Actions cache API. When running on Depot GitHub Actions runners, these tools automatically use Depot Cache for faster upload and download speeds. For example, you can configure NX to use the GitHub Actions cache by using the [`@nx/shared-fs-cache`](https://nx.dev/docs/reference/remote-cache-plugins/shared-fs-cache/overview) package combined with `actions/cache` to save and restore the `.nx/cache` directory. Other build tools and package managers that integrate with GitHub Actions cache similarly work with Depot Cache without additional configuration. ## Cache behavior ### Repository scope Depot Cache scopes cache entries by repository. This means that only the same repository that saved them can read cache entries. Scoping cache by repository has the following benefits: * Repositories don't have key collisions when using the same cache key * One repository can't unexpectedly read cache entries from another repository of a different trust level (for example, a public repository reading from or writing to a private repository) ### Branch isolation Depot Cache doesn't enforce cache isolation based on the branch that runs the job. Whether the branch is main or another topic branch, the cache contributes to the same namespace making it accessible to other jobs. This allows you to control your cache isolation based on how you format your cache keys. ### Cache retention and limits The amount of Depot Cache storage you get depends on [your plan](/pricing). You can configure a cache retention policy (7, 14, or 30 days) and size limits (25 GB to 500 GB, or no limit) in your [organization settings](/orgs/_/settings). The default retention policy is 14 days with no size limit. ## Configure Go to use Depot Cache Depot Cache works with Go from your local machine, from Depot's managed GitHub Actions runners, or within containerized builds using Dockerfiles or Bake files. **Note:** Go added support for remote caching in Go `1.24`, so you need this version or later to take advantage of Depot Cache. Additionally, you need a [Depot API token](/docs/cli/authentication) to authenticate with the cache service. ## Local workstation To use Depot Cache with Go on your local machine, set the `GOCACHEPROG` environment variable: ```shell export GOCACHEPROG="depot gocache" ``` The `depot` CLI needs [authorization](/docs/cli/authentication) to write to the cache. If you are a member of multiple organizations and authenticating with a user token, specify which organization to use for cache storage: ```shell export GOCACHEPROG='depot gocache --organization ORG_ID' ``` After you configure Go to use Depot Cache, run your builds as you normally would. Go automatically communicates with `GOCACHEPROG` to fetch from Depot Cache and reuse any stored build artifacts. ### Additional options To clean the cache, use the typical `go clean` workflow: ```shell go clean -cache ``` To enable verbose output: ```shell export GOCACHEPROG='depot gocache --verbose' ``` ## Local workstation with containerized builds When building Docker images that contain Go projects locally, your build needs access to Go's remote cache credentials to benefit from caching. Containerized builds execute in isolated environments that require explicit configuration. ### Dockerfile configuration Update your Dockerfile to install the Depot CLI and configure Go cache: ```dockerfile # syntax=docker/dockerfile:1 # ... other Dockerfile instructions # Install Depot CLI RUN curl -L https://depot.dev/install-cli.sh | sh # Mount secret and set GOCACHEPROG RUN --mount=type=secret,id=DEPOT_TOKEN,env=DEPOT_TOKEN \ PATH="/root/.depot/bin:$PATH" \ GOCACHEPROG="depot gocache" \ go build -v ./ ``` Adding `# syntax=docker/dockerfile:1` as the first line of your Dockerfile enables mounting secrets as environment variables. ### Depot CLI ```shell depot build --secret id=DEPOT_TOKEN,env=DEPOT_TOKEN -t your-image:tag . ``` ### Docker buildx ```shell docker buildx build --secret id=DEPOT_TOKEN,env=DEPOT_TOKEN -t your-image:tag . ``` ### Bake Define the secret in your `docker-bake.hcl` file: ```hcl target "default" { context = "." dockerfile = "Dockerfile" tags = ["your-image:tag"] secret = [ { type = "env" id = "DEPOT_TOKEN" } ] } ``` Then run the build: ```shell DEPOT_TOKEN=your_token depot bake ``` ## Depot GitHub Actions runners [Depot GitHub Actions runners](/docs/github-actions/overview) are pre-configured to use Depot Cache with Go. Each runner launches with the `GOCACHEPROG` environment variable pre-populated with the connection details for Depot Cache. You don't need additional configuration. Run your Go builds as normal: ```yaml jobs: build: runs-on: depot-ubuntu-24.04 steps: - uses: actions/checkout@v4 - uses: actions/setup-go@v5 with: go-version: '1.24' - run: go build ./... ``` To disable automatic configuration, turn off **Allow Actions jobs to automatically connect to Depot Cache** in your organization settings page. You can then manually configure `GOCACHEPROG` as described in the Local workstation section. ## Depot GitHub Actions runners with containerized builds When running containerized builds on Depot GitHub Actions runners, your build needs access to Go's remote cache credentials. These credentials aren't automatically available inside your Docker build environment. ### Dockerfile configuration Update your Dockerfile to install the Depot CLI and configure Go cache: ```dockerfile # syntax=docker/dockerfile:1 # ... other Dockerfile instructions # Install Depot CLI RUN curl -L https://depot.dev/install-cli.sh | sh # Mount secret and set GOCACHEPROG RUN --mount=type=secret,id=DEPOT_TOKEN,env=DEPOT_TOKEN \ PATH="/root/.depot/bin:$PATH" \ GOCACHEPROG="depot gocache" \ go build -v ./ ``` Adding `# syntax=docker/dockerfile:1` as the first line of your Dockerfile enables mounting secrets as environment variables. ### `depot/build-push-action` Store the Depot token in a GitHub Secret named `DEPOT_TOKEN`, then configure your workflow: ```yaml - name: Build and push uses: depot/build-push-action@v1 with: context: . file: ./Dockerfile push: true tags: your-image:tag secrets: | "DEPOT_TOKEN=${{ secrets.DEPOT_TOKEN }}" ``` ### `depot/bake-action` Define the secret in your `docker-bake.hcl` file: ```hcl target "default" { context = "." dockerfile = "Dockerfile" tags = ["your-image:tag"] secret = [ { type = "env" id = "DEPOT_TOKEN" } ] } ``` Then configure your workflow: ```yaml - name: Bake uses: depot/bake-action@v1 with: files: docker-bake.hcl env: DEPOT_TOKEN: ${{ secrets.DEPOT_TOKEN }} ``` ### Docker CLI Store the Depot token in a GitHub Secret named `DEPOT_TOKEN`, then configure your workflow: ```yaml - name: Build run: | docker buildx build \ --secret id=DEPOT_TOKEN,env=DEPOT_TOKEN \ -t your-image:tag . env: DEPOT_TOKEN: ${{ secrets.DEPOT_TOKEN }} ``` ## Configure Gradle to use Depot Cache [**Gradle**](https://gradle.org/) is the build tool of choice for Java, Android, and Kotlin. Many large projects use it, including Android itself, and optimizes for incremental builds, advanced local and remote caching, and parallel execution. Gradle supports many different languages and platforms, and is highly configurable, scaling to codebases of any size. [**Depot Cache**](/docs/cache/overview) provides a remote cache service that works with Gradle, allowing you to incrementally cache and reuse parts of your builds. This cache is accessible from anywhere, both on your local machine and on CI/CD systems. **Note:** You need a [Depot API token](/docs/cli/authentication) to authenticate with the cache service. ## Local workstation First, enable caching in your `gradle.properties` file: ```properties org.gradle.caching=true ``` Then, configure Gradle to use the Depot Cache service in your `settings.gradle` file: ```groovy buildCache { remote(HttpBuildCache) { url = 'https://cache.depot.dev' enabled = true push = true credentials { username = '' password = 'DEPOT_TOKEN' } } } ``` If you are a member of multiple organizations and authenticating with a user token, specify which organization ID to use for cache storage in the username: ```groovy buildCache { remote(HttpBuildCache) { url = 'https://cache.depot.dev' enabled = true push = true credentials { username = 'DEPOT_ORG_ID' password = 'DEPOT_TOKEN' } } } ``` After you configure Gradle to use Depot Cache, run your builds as you normally would. Gradle automatically communicates with Depot Cache to fetch and reuse any stored build artifacts from your previous builds. ## Local workstation with containerized builds When building Docker images that contain Gradle projects locally, your build needs access to Gradle's remote cache credentials to benefit from caching. Containerized builds execute in isolated environments that require explicit configuration. ### Gradle configuration Enable caching in your `gradle.properties` file: ```properties org.gradle.caching=true ``` Update your `settings.gradle` to read the Depot token from an environment variable: ```groovy buildCache { remote(HttpBuildCache) { url = 'https://cache.depot.dev' enabled = true push = true credentials { username = '' password = System.getenv('DEPOT_TOKEN') } } } ``` ### Dockerfile configuration Update your Dockerfile to copy Gradle configuration files and mount the secret: ```dockerfile # syntax=docker/dockerfile:1 # ... other Dockerfile instructions # Copy Gradle configuration and run build with mounted secret COPY gradle.properties settings.gradle ./ RUN --mount=type=secret,id=DEPOT_TOKEN,env=DEPOT_TOKEN \ ./gradlew build ``` Adding `# syntax=docker/dockerfile:1` as the first line of your Dockerfile enables mounting secrets as environment variables. ### Depot CLI ```shell depot build --secret id=DEPOT_TOKEN,env=DEPOT_TOKEN -t your-image:tag . ``` ### Docker buildx ```shell docker buildx build --secret id=DEPOT_TOKEN,env=DEPOT_TOKEN -t your-image:tag . ``` ### Bake Define the secret in your `docker-bake.hcl` file: ```hcl target "default" { context = "." dockerfile = "Dockerfile" tags = ["your-image:tag"] secret = [ { type = "env" id = "DEPOT_TOKEN" } ] } ``` Then run the build: ```shell DEPOT_TOKEN=your_token depot bake ``` ## Depot GitHub Actions runners [Depot GitHub Actions runners](/docs/github-actions/overview) are pre-configured to use Depot Cache with Gradle. Each runner launches with an `init.gradle` file pre-populated with the connection details for Depot Cache. Enable caching in your `gradle.properties` file: ```properties org.gradle.caching=true ``` Then run your Gradle builds as normal: ```yaml jobs: build: runs-on: depot-ubuntu-24.04 steps: - uses: actions/checkout@v4 - uses: actions/setup-java@v4 with: distribution: 'temurin' java-version: '17' - run: ./gradlew build ``` To disable automatic configuration, turn off **Allow Actions jobs to automatically connect to Depot Cache** in your organization settings page. You can then manually configure Gradle as described in the Local workstation section. ## Depot GitHub Actions runners with containerized builds When running containerized builds on Depot GitHub Actions runners, your build needs access to Gradle's remote cache credentials. These credentials aren't automatically available inside your Docker build environment. ### Gradle configuration Enable caching in your `gradle.properties` file: ```properties org.gradle.caching=true ``` Update your `settings.gradle` to read the Depot token from an environment variable: ```groovy buildCache { remote(HttpBuildCache) { url = 'https://cache.depot.dev' enabled = true push = true credentials { username = '' password = System.getenv('DEPOT_TOKEN') } } } ``` ### Dockerfile configuration Update your Dockerfile to copy Gradle configuration files and mount the secret: ```dockerfile # syntax=docker/dockerfile:1 # ... other Dockerfile instructions # Copy Gradle configuration and run build with mounted secret COPY gradle.properties settings.gradle ./ RUN --mount=type=secret,id=DEPOT_TOKEN,env=DEPOT_TOKEN \ ./gradlew build ``` Adding `# syntax=docker/dockerfile:1` as the first line of your Dockerfile enables mounting secrets as environment variables. ### `depot/build-push-action` Store the Depot token in a GitHub Secret named `DEPOT_TOKEN`, then configure your workflow: ```yaml - name: Build and push uses: depot/build-push-action@v1 with: context: . file: ./Dockerfile push: true tags: your-image:tag secrets: | "DEPOT_TOKEN=${{ secrets.DEPOT_TOKEN }}" ``` ### `depot/bake-action` Define the secret in your `docker-bake.hcl` file: ```hcl target "default" { context = "." dockerfile = "Dockerfile" tags = ["your-image:tag"] secret = [ { type = "env" id = "DEPOT_TOKEN" } ] } ``` Then configure your workflow: ```yaml - name: Bake uses: depot/bake-action@v1 with: files: docker-bake.hcl env: DEPOT_TOKEN: ${{ secrets.DEPOT_TOKEN }} ``` ### Docker CLI Store the Depot token in a GitHub Secret named `DEPOT_TOKEN`, then configure your workflow: ```yaml - name: Build run: | docker buildx build \ --secret id=DEPOT_TOKEN,env=DEPOT_TOKEN \ -t your-image:tag . env: DEPOT_TOKEN: ${{ secrets.DEPOT_TOKEN }} ``` ## Configure Maven to use Depot Cache [**Maven**](https://maven.apache.org/) is a build automation and project management tool primarily used for Java projects that helps developers manage dependencies, build processes, and documentation in a centralized way. It follows a convention-over-configuration approach by providing a standard project structure and build lifecycle, allowing teams to quickly begin development without extensive configuration. [**Depot Cache**](/docs/cache/overview) provides a remote cache service that works with Maven, allowing you to incrementally cache and reuse parts of your builds. This cache is accessible from anywhere, both on your local machine and on CI/CD systems. **Note:** You need a [Depot API token](/docs/cli/authentication) to authenticate with the cache service. Maven support currently only supports Depot Organization API tokens, not user tokens. ## Local workstation Configure the [Maven Build Cache extension](https://maven.apache.org/extensions/maven-build-cache-extension/index.html) in `.mvn/maven-build-cache-config.xml`: ```xml true SHA-256 true https://cache.depot.dev ``` Then configure Maven to use the Depot Cache service in your `~/.m2/settings.xml` file. Replace `DEPOT_TOKEN` with your API token: ```xml depot-cache Authorization Bearer DEPOT_TOKEN ``` After you configure Maven to use Depot Cache, run your builds as usual. Maven automatically communicates with Depot Cache to fetch and reuse any stored build artifacts from your previous builds. ## Local workstation with containerized builds When building Docker images that contain Maven projects locally, your build needs access to Maven's remote cache credentials to benefit from caching. Containerized builds execute in isolated environments that require explicit configuration. ### Maven configuration Configure the Maven Build Cache extension in `.mvn/maven-build-cache-config.xml`: ```xml true SHA-256 true https://cache.depot.dev ``` Create or update `.m2/settings.xml` to read the Depot token from an environment variable: ```xml depot-cache Authorization Bearer ${env.DEPOT_TOKEN} ``` ### Dockerfile configuration Update your Dockerfile to copy configuration files and mount the secret: ```dockerfile # syntax=docker/dockerfile:1 # ... other Dockerfile instructions # Copy Maven configuration files COPY .mvn/maven-build-cache-config.xml .mvn/maven-build-cache-config.xml COPY .m2/settings.xml /root/.m2/settings.xml # Run build with mounted secret RUN --mount=type=secret,id=DEPOT_TOKEN,env=DEPOT_TOKEN \ mvn clean install ``` Adding `# syntax=docker/dockerfile:1` as the first line of your Dockerfile enables mounting secrets as environment variables. ### Depot CLI ```shell depot build --secret id=DEPOT_TOKEN,env=DEPOT_TOKEN -t your-image:tag . ``` ### Docker buildx ```shell docker buildx build --secret id=DEPOT_TOKEN,env=DEPOT_TOKEN -t your-image:tag . ``` ### Bake Define the secret in your `docker-bake.hcl` file: ```hcl target "default" { context = "." dockerfile = "Dockerfile" tags = ["your-image:tag"] secret = [ { type = "env" id = "DEPOT_TOKEN" } ] } ``` Then run the build: ```shell DEPOT_TOKEN=your_token depot bake ``` ## Depot GitHub Actions runners [Depot GitHub Actions runners](/docs/github-actions/overview) are pre-configured to use Depot Cache with Maven. Each runner launches with a `settings.xml` file pre-populated with the connection details for Depot Cache. You must configure the [Maven Build Cache extension](https://maven.apache.org/extensions/maven-build-cache-extension/index.html) in `.mvn/maven-build-cache-config.xml`: ```xml true SHA-256 true https://cache.depot.dev ``` Set the `id` of your remote cache to `depot-cache` for the Depot Cache service to work correctly in Depot GitHub Actions Runners. You should also verify that you have registered the Build Cache extension in your `pom.xml` file: ```xml org.apache.maven.extensions maven-build-cache-extension 1.0.1 ``` Then run your Maven builds as normal: ```yaml jobs: build: runs-on: depot-ubuntu-24.04 steps: - uses: actions/checkout@v4 - uses: actions/setup-java@v4 with: distribution: 'temurin' java-version: '17' - run: mvn clean install ``` To disable automatic configuration, turn off **Allow Actions jobs to automatically connect to Depot Cache** in your organization settings page. You can then manually configure Maven as described in the Local workstation section. ## Depot GitHub Actions runners with containerized builds When running containerized builds on Depot GitHub Actions runners, your build needs access to Maven's remote cache credentials. These credentials aren't automatically available inside your Docker build environment. ### Maven configuration Configure the Maven Build Cache extension in `.mvn/maven-build-cache-config.xml`: ```xml true SHA-256 true https://cache.depot.dev ``` Create or update `.m2/settings.xml` to read the Depot token from an environment variable: ```xml depot-cache Authorization Bearer ${env.DEPOT_TOKEN} ``` ### Dockerfile configuration Update your Dockerfile to copy configuration files and run the build with mounted secret: ```dockerfile # syntax=docker/dockerfile:1 # ... other Dockerfile instructions # Copy Maven configuration files COPY .mvn/maven-build-cache-config.xml .mvn/maven-build-cache-config.xml COPY .m2/settings.xml /root/.m2/settings.xml # Run build with mounted secret RUN --mount=type=secret,id=DEPOT_TOKEN,env=DEPOT_TOKEN \ mvn clean install ``` Adding `# syntax=docker/dockerfile:1` as the first line of your Dockerfile enables mounting secrets as environment variables. ### `depot/build-push-action` Store the Depot token in a GitHub Secret named `DEPOT_TOKEN`, then configure your workflow: ```yaml - name: Build and push uses: depot/build-push-action@v1 with: context: . file: ./Dockerfile push: true tags: your-image:tag secrets: | "DEPOT_TOKEN=${{ secrets.DEPOT_TOKEN }}" ``` ### `depot/bake-action` Define the secret in your `docker-bake.hcl` file: ```hcl target "default" { context = "." dockerfile = "Dockerfile" tags = ["your-image:tag"] secret = [ { type = "env" id = "DEPOT_TOKEN" } ] } ``` Then configure your workflow: ```yaml - name: Bake uses: depot/bake-action@v1 with: files: docker-bake.hcl env: DEPOT_TOKEN: ${{ secrets.DEPOT_TOKEN }} ``` ### Docker CLI Store the Depot token in a GitHub Secret named `DEPOT_TOKEN`, then configure your workflow: ```yaml - name: Build run: | docker buildx build \ --secret id=DEPOT_TOKEN,env=DEPOT_TOKEN \ -t your-image:tag . env: DEPOT_TOKEN: ${{ secrets.DEPOT_TOKEN }} ``` ## Configure moonrepo to use Depot Cache [**moonrepo**](https://moonrepo.dev/) is a repository management, organization, orchestration, and notification tool for the web ecosystem, written in Rust. Many of the concepts within moon are heavily inspired from Bazel and other popular build systems. [**Depot Cache**](/docs/cache/overview) provides a remote cache service that works with moonrepo, allowing you to incrementally cache and reuse parts of your builds. This cache is accessible from anywhere, both on your local machine and on CI/CD systems. **Note:** You need a [Depot API token](/docs/cli/authentication) to authenticate with the cache service. ## Local workstation Set a `DEPOT_TOKEN` environment variable with an organization or user token and add the following to your `.moon/workspace.yml` file: ```yaml unstable_remote: host: 'grpcs://cache.depot.dev' auth: token: 'DEPOT_TOKEN' ``` If you are using a user token and are a member of more than one organization, you additionally need to set an `X-Depot-Org` header to your Depot organization ID: ```yaml unstable_remote: host: 'grpcs://cache.depot.dev' auth: token: 'DEPOT_TOKEN' headers: 'X-Depot-Org': '' ``` See [moonrepo's remote cache documentation](https://moonrepo.dev/docs/guides/remote-cache#cloud-hosted-depot) for more details. After you configure moonrepo to use Depot Cache, run your builds as you normally would. moonrepo automatically communicates with Depot Cache to fetch and reuse any stored build artifacts from your previous builds. ## Local workstation with containerized builds When building Docker images that contain moonrepo workspaces locally, your build needs access to moonrepo's remote cache credentials to benefit from caching. Containerized builds execute in isolated environments that require explicit configuration. ### Moonrepo configuration Configure moonrepo to read the Depot token from an environment variable in `.moon/workspace.yml`: ```yaml unstable_remote: host: 'grpcs://cache.depot.dev' auth: token: 'DEPOT_TOKEN' ``` ### Dockerfile configuration Update your Dockerfile to copy the workspace configuration and mount the secret: ```dockerfile # syntax=docker/dockerfile:1 # ... other Dockerfile instructions # Copy moonrepo workspace configuration COPY .moon/workspace.yml .moon/workspace.yml # Mount secret as environment variable and run build RUN --mount=type=secret,id=DEPOT_TOKEN,env=DEPOT_TOKEN \ moon run build ``` Adding `# syntax=docker/dockerfile:1` as the first line of your Dockerfile enables mounting secrets as environment variables. ### Depot CLI ```shell depot build --secret id=DEPOT_TOKEN,env=DEPOT_TOKEN -t your-image:tag . ``` ### Docker buildx ```shell docker buildx build --secret id=DEPOT_TOKEN,env=DEPOT_TOKEN -t your-image:tag . ``` ### Bake Define the secret in your `docker-bake.hcl` file: ```hcl target "default" { context = "." dockerfile = "Dockerfile" tags = ["your-image:tag"] secret = [ { type = "env" id = "DEPOT_TOKEN" } ] } ``` Then run the build: ```shell DEPOT_TOKEN=your_token depot bake ``` ## Depot GitHub Actions runners [Depot GitHub Actions runners](/docs/github-actions/overview) are pre-configured to use Depot Cache with moonrepo. Each runner launches with the necessary environment variables for accessing Depot Cache. You don't need additional configuration. Run your moonrepo builds as normal: ```yaml jobs: build: runs-on: depot-ubuntu-24.04 steps: - uses: actions/checkout@v4 - run: moon run build ``` To disable automatic configuration, turn off **Allow Actions jobs to automatically connect to Depot Cache** in your organization settings page. You can then manually configure moonrepo as described in the Local workstation section. ## Depot GitHub Actions runners with containerized builds When running containerized builds on Depot GitHub Actions runners, your build needs access to moonrepo's remote cache credentials. These credentials aren't automatically available inside your Docker build environment. ### Moonrepo configuration Configure moonrepo to read the Depot token from an environment variable in `.moon/workspace.yml`: ```yaml unstable_remote: host: 'grpcs://cache.depot.dev' auth: token: 'DEPOT_TOKEN' ``` ### Dockerfile configuration Update your Dockerfile to copy the workspace configuration and run the build with mounted secret: ```dockerfile # syntax=docker/dockerfile:1 # ... other Dockerfile instructions # Copy moonrepo workspace configuration COPY .moon/workspace.yml .moon/workspace.yml # Mount secret as environment variable and run build RUN --mount=type=secret,id=DEPOT_TOKEN,env=DEPOT_TOKEN \ moon run build ``` Adding `# syntax=docker/dockerfile:1` as the first line of your Dockerfile enables mounting secrets as environment variables. ### `depot/build-push-action` Store the Depot token in a GitHub Secret named `DEPOT_TOKEN`, then configure your workflow: ```yaml - name: Build and push uses: depot/build-push-action@v1 with: context: . file: ./Dockerfile push: true tags: your-image:tag secrets: | "DEPOT_TOKEN=${{ secrets.DEPOT_TOKEN }}" ``` ### `depot/bake-action` Define the secret in your `docker-bake.hcl` file: ```hcl target "default" { context = "." dockerfile = "Dockerfile" tags = ["your-image:tag"] secret = [ { type = "env" id = "DEPOT_TOKEN" } ] } ``` Then configure your workflow: ```yaml - name: Bake uses: depot/bake-action@v1 with: files: docker-bake.hcl env: DEPOT_TOKEN: ${{ secrets.DEPOT_TOKEN }} ``` ### Docker CLI Store the Depot token in a GitHub Secret named `DEPOT_TOKEN`, then configure your workflow: ```yaml - name: Build run: | docker buildx build \ --secret id=DEPOT_TOKEN,env=DEPOT_TOKEN \ -t your-image:tag . env: DEPOT_TOKEN: ${{ secrets.DEPOT_TOKEN }} ``` ## Configure Pants to use Depot Cache [**Pants**](https://www.pantsbuild.org/) is an ergonomic build tool for codebases of all sizes and supports Python, Go, Java, Scala, Kotlin, Shell, and Docker. Many large projects use it, including Coinbase, IBM, and Slack, and optimizes for fine-grained incremental builds with advanced local and remote caching. Pants is highly configurable and can scale to codebases of any size. [**Depot Cache**](/docs/cache/overview) provides a remote cache service that works with Pants, allowing you to incrementally cache and reuse parts of your builds. This cache is accessible from anywhere, both on your local machine and on CI/CD systems. **Note:** You need a [Depot API token](/docs/cli/authentication) to authenticate with the cache service. ## Local workstation Enable remote caching in your `pants.toml` file. Replace `DEPOT_TOKEN` with your API token: ```toml [GLOBAL] # Enable remote caching remote_cache_read = true remote_cache_write = true # Point remote caching to Depot Cache remote_store_headers = { "Authorization" = "DEPOT_TOKEN" } remote_store_address = "grpcs://cache.depot.dev" ``` If you are a member of multiple organizations and authenticating with a user token, additionally specify which organization to use for cache storage using the `x-depot-org` header: ```toml remote_store_headers = { "x-depot-org" = "DEPOT_ORG_ID" } ``` After you configure Pants to use Depot Cache, run your builds as you normally would. Pants automatically communicates with Depot Cache to fetch and reuse any stored build artifacts from your previous builds. ## Local workstation with containerized builds When building Docker images that contain Pants projects locally, your build needs access to Pants' remote cache credentials to benefit from caching. Containerized builds execute in isolated environments that require explicit configuration. ### Pants configuration Update your `pants.toml` to read the Depot token from an environment variable: ```toml [GLOBAL] remote_cache_read = true remote_cache_write = true remote_store_address = "grpcs://cache.depot.dev" [GLOBAL.remote_store_headers] Authorization = "%(env.DEPOT_TOKEN)s" ``` ### Dockerfile configuration Update your Dockerfile to copy the configuration and mount the secret: ```dockerfile # syntax=docker/dockerfile:1 # ... other Dockerfile instructions # Copy pants.toml and run build with mounted secret COPY pants.toml . RUN --mount=type=secret,id=DEPOT_TOKEN,env=DEPOT_TOKEN \ pants package :: ``` Adding `# syntax=docker/dockerfile:1` as the first line of your Dockerfile enables mounting secrets as environment variables. ### Depot CLI ```shell depot build --secret id=DEPOT_TOKEN,env=DEPOT_TOKEN -t your-image:tag . ``` ### Docker buildx ```shell docker buildx build --secret id=DEPOT_TOKEN,env=DEPOT_TOKEN -t your-image:tag . ``` ### Bake Define the secret in your `docker-bake.hcl` file: ```hcl target "default" { context = "." dockerfile = "Dockerfile" tags = ["your-image:tag"] secret = [ { type = "env" id = "DEPOT_TOKEN" } ] } ``` Then run the build: ```shell DEPOT_TOKEN=your_token depot bake ``` ## Depot GitHub Actions runners [Depot GitHub Actions runners](/docs/github-actions/overview) are pre-configured to use Depot Cache with Pants. Each runner launches with a `pants.toml` file pre-configured with the connection details for Depot Cache. You don't need additional configuration. Run your Pants builds as normal: ```yaml jobs: build: runs-on: depot-ubuntu-24.04 steps: - uses: actions/checkout@v4 - run: pants package :: ``` To disable automatic configuration, turn off **Allow Actions jobs to automatically connect to Depot Cache** in your organization settings page. You can then manually configure Pants as described in the Local workstation section. ## Depot GitHub Actions runners with containerized builds When running containerized builds on Depot GitHub Actions runners, your build needs access to Pants' remote cache credentials. These credentials aren't automatically available inside your Docker build environment. ### Pants configuration Update your `pants.toml` to read the Depot token from an environment variable: ```toml [GLOBAL] remote_cache_read = true remote_cache_write = true remote_store_address = "grpcs://cache.depot.dev" [GLOBAL.remote_store_headers] Authorization = "%(env.DEPOT_TOKEN)s" ``` ### Dockerfile configuration Update your Dockerfile to mount the secret and run the build: ```dockerfile # syntax=docker/dockerfile:1 # ... other Dockerfile instructions # Copy pants.toml and run build with mounted secret COPY pants.toml . RUN --mount=type=secret,id=DEPOT_TOKEN,env=DEPOT_TOKEN \ pants package :: ``` Adding `# syntax=docker/dockerfile:1` as the first line of your Dockerfile enables mounting secrets as environment variables. ### `depot/build-push-action` Store the Depot token in a GitHub Secret named `DEPOT_TOKEN`, then configure your workflow: ```yaml - name: Build and push uses: depot/build-push-action@v1 with: context: . file: ./Dockerfile push: true tags: your-image:tag secrets: | "DEPOT_TOKEN=${{ secrets.DEPOT_TOKEN }}" ``` ### `depot/bake-action` Define the secret in your `docker-bake.hcl` file: ```hcl target "default" { context = "." dockerfile = "Dockerfile" tags = ["your-image:tag"] secret = [ { type = "env" id = "DEPOT_TOKEN" } ] } ``` Then configure your workflow: ```yaml - name: Bake uses: depot/bake-action@v1 with: files: docker-bake.hcl env: DEPOT_TOKEN: ${{ secrets.DEPOT_TOKEN }} ``` ### Docker CLI Store the Depot token in a GitHub Secret named `DEPOT_TOKEN`, then configure your workflow: ```yaml - name: Build run: | docker buildx build \ --secret id=DEPOT_TOKEN,env=DEPOT_TOKEN \ -t your-image:tag . env: DEPOT_TOKEN: ${{ secrets.DEPOT_TOKEN }} ``` ## Configure sccache to use Depot Cache [**sccache**](https://github.com/mozilla/sccache) is a ccache-like compiler caching tool created by Mozilla. This compiler wrapper that avoids compilation when possible and stores cached results locally or in remote storage. It supports caching the compilation of several languages including C, C++, and Rust. Many large projects use sccache, including Firefox, and optimizes for incremental builds and advanced local and remote caching. [**Depot Cache**](/docs/cache/overview) provides a remote cache service that works with sccache, allowing you to incrementally cache and reuse parts of your builds. This cache is accessible from anywhere, both on your local machine and on CI/CD systems. **Note:** You need a [Depot API token](/docs/cli/authentication) to authenticate with the cache service. ## Local workstation Set two environment variables representing the Depot Cache service endpoint and your API token: ```shell export SCCACHE_WEBDAV_ENDPOINT=https://cache.depot.dev export SCCACHE_WEBDAV_TOKEN=DEPOT_TOKEN ``` If you are a member of multiple organizations and authenticating with a user token, specify a password along with which organization to use for cache storage: ```shell export SCCACHE_WEBDAV_ENDPOINT=https://cache.depot.dev export SCCACHE_WEBDAV_USERNAME=DEPOT_ORG_ID export SCCACHE_WEBDAV_PASSWORD=DEPOT_TOKEN ``` After you configure sccache to use Depot Cache, run your builds as you normally would. sccache automatically communicates with Depot Cache to fetch and reuse any stored build artifacts from your previous builds. ## Local workstation with containerized builds When building Docker images that contain Rust projects with sccache locally, your build needs access to sccache's remote cache credentials to benefit from caching. Containerized builds execute in isolated environments that require explicit configuration. ### Dockerfile configuration Update your Dockerfile to mount the secret as environment variables: ```dockerfile # syntax=docker/dockerfile:1 # ... other Dockerfile instructions # Mount secrets with IDs matching the environment variable names RUN --mount=type=secret,id=DEPOT_TOKEN,env=SCCACHE_WEBDAV_TOKEN \ SCCACHE_WEBDAV_ENDPOINT=https://cache.depot.dev sccache --start-server && \ cargo build --release ``` Adding `# syntax=docker/dockerfile:1` as the first line of your Dockerfile enables mounting secrets as environment variables. ### Depot CLI ```shell depot build --secret id=DEPOT_TOKEN,env=DEPOT_TOKEN -t your-image:tag . ``` ### Docker buildx ```shell docker buildx build --secret id=DEPOT_TOKEN,env=DEPOT_TOKEN -t your-image:tag . ``` ### Bake Define the secret in your `docker-bake.hcl` file: ```hcl target "default" { context = "." dockerfile = "Dockerfile" tags = ["your-image:tag"] secret = [ { type = "env" id = "DEPOT_TOKEN" } ] } ``` Then run the build: ```shell DEPOT_TOKEN=your_token depot bake ``` ## Depot GitHub Actions runners [Depot GitHub Actions runners](/docs/github-actions/overview) are pre-configured to use Depot Cache with sccache. Each runner launches with a `SCCACHE_WEBDAV_ENDPOINT` environment variable pre-configured with the connection details for Depot Cache. Tell Rust to compile via sccache, and run your sccache builds as normal: ```yaml jobs: build: runs-on: depot-ubuntu-24.04 steps: - uses: actions/checkout@v4 - uses: mozilla-actions/sccache-action@v0.0.9 - run: cargo build --release env: RUSTC_WRAPPER: 'sccache' ``` To disable automatic configuration, turn off **Allow Actions jobs to automatically connect to Depot Cache** in your organization settings page. You can then manually configure sccache as described in the Local workstation section. ## Depot GitHub Actions runners with containerized builds When running containerized builds on Depot GitHub Actions runners, your build needs access to sccache's remote cache credentials. These credentials aren't automatically available inside your Docker build environment. ### Dockerfile configuration Update your Dockerfile to mount the secrets as environment variables: ```dockerfile # syntax=docker/dockerfile:1 # ... other Dockerfile instructions # Mount secrets with IDs matching the environment variable names RUN --mount=type=secret,id=DEPOT_TOKEN,env=SCCACHE_WEBDAV_TOKEN \ SCCACHE_WEBDAV_ENDPOINT=https://cache.depot.dev sccache --start-server && \ cargo build --release ``` Adding `# syntax=docker/dockerfile:1` as the first line of your Dockerfile enables mounting secrets as environment variables. ### `depot/build-push-action` Store the Depot token in a GitHub Secret named `DEPOT_TOKEN`, then configure your workflow: ```yaml - name: Build and push uses: depot/build-push-action@v1 with: context: . file: ./Dockerfile push: true tags: your-image:tag secrets: | "DEPOT_TOKEN=${{ secrets.DEPOT_TOKEN }}" ``` ### `depot/bake-action` Define the secret in your `docker-bake.hcl` file: ```hcl target "default" { context = "." dockerfile = "Dockerfile" tags = ["your-image:tag"] secret = [ { type = "env" id = "DEPOT_TOKEN" } ] } ``` Then configure your workflow: ```yaml - name: Bake uses: depot/bake-action@v1 with: files: docker-bake.hcl env: DEPOT_TOKEN: ${{ secrets.DEPOT_TOKEN }} ``` ### Docker CLI Store the Depot token in a GitHub Secret named `DEPOT_TOKEN`, then configure your workflow: ```yaml - name: Build run: | docker buildx build \ --secret id=DEPOT_TOKEN,env=DEPOT_TOKEN \ -t your-image:tag . env: DEPOT_TOKEN: ${{ secrets.DEPOT_TOKEN }} ``` ## Configure Turborepo to use Depot Cache [**Turborepo**](https://turbo.build/) is a high-performance build system for JavaScript and TypeScript codebases, designed to scale build performance for large monorepos. Large projects at Netflix, AWS, and Disney use it, and it supports incremental builds backed by local and remote cache options. [**Depot Cache**](/docs/cache/overview) provides a remote cache service that works with Turborepo, allowing you to incrementally cache and reuse parts of your builds. This cache is accessible from anywhere, both on your local machine and on CI/CD systems. **Note:** You need a [Depot API token](/docs/cli/authentication) to authenticate with the cache service. Turborepo uses the `TURBO_TOKEN` environment variable for authentication, which you should set to your Depot API token. ## Local workstation Set three environment variables representing the Depot Cache service endpoint, your API token, and your Depot organization ID: ```shell export TURBO_API=https://cache.depot.dev export TURBO_TOKEN= export TURBO_TEAM= ``` After you configure Turborepo to use Depot Cache, run your builds as you normally would. Turborepo automatically communicates with Depot Cache to fetch and reuse any stored build artifacts from your previous builds. ## Local workstation with containerized builds When building Docker images that contain Turborepo workspaces locally, your build needs access to Turborepo's remote cache credentials to benefit from caching. Containerized builds execute in isolated environments that require explicit configuration. ### Dockerfile configuration Update your Dockerfile to configure Depot Cache and mount the token as a secret: ```dockerfile # syntax=docker/dockerfile:1 # ... other Dockerfile instructions # Configure Depot Cache for Turborepo ENV TURBO_API=https://cache.depot.dev ENV TURBO_TEAM= # Mount the token secret and run build RUN --mount=type=secret,id=TURBO_TOKEN,env=TURBO_TOKEN \ turbo build ``` Adding `# syntax=docker/dockerfile:1` as the first line of your Dockerfile enables mounting secrets as environment variables. ### Depot CLI Set `TURBO_TOKEN` to your Depot API token, then run the build: ```shell depot build --secret id=TURBO_TOKEN,env=TURBO_TOKEN -t your-image:tag . ``` ### Docker buildx ```shell docker buildx build --secret id=TURBO_TOKEN,env=TURBO_TOKEN -t your-image:tag . ``` ### Bake Define the secret in your `docker-bake.hcl` file: ```hcl target "default" { context = "." dockerfile = "Dockerfile" tags = ["your-image:tag"] secret = [ { type = "env" id = "TURBO_TOKEN" } ] } ``` Then run the build: ```shell depot bake ``` ## Depot GitHub Actions runners [Depot GitHub Actions runners](/docs/github-actions/overview) are pre-configured to use Depot Cache with Turborepo. Each runner launches with a `TURBO_API` environment variable and includes the connection details for Depot Cache. You don't need additional configuration. Run your Turborepo builds as normal: ```yaml jobs: build: runs-on: depot-ubuntu-24.04 steps: - uses: actions/checkout@v4 - run: turbo build ``` To disable automatic configuration, turn off **Allow Actions jobs to automatically connect to Depot Cache** in your organization settings page. You can then manually configure Turborepo as described in the Local workstation section. ## Depot GitHub Actions runners with containerized builds When running containerized builds on Depot GitHub Actions runners, your build needs access to Turborepo's remote cache credentials. These credentials aren't automatically available inside your Docker build environment. ### Dockerfile configuration Update your Dockerfile to configure Depot Cache and mount the token as a secret: ```dockerfile # syntax=docker/dockerfile:1 # ... other Dockerfile instructions # Configure Depot Cache for Turborepo ENV TURBO_API=https://cache.depot.dev ENV TURBO_TEAM= # Mount the token secret and run build RUN --mount=type=secret,id=TURBO_TOKEN,env=TURBO_TOKEN \ turbo build ``` Adding `# syntax=docker/dockerfile:1` as the first line of your Dockerfile enables mounting secrets as environment variables. ### `depot/build-push-action` Store your Depot API token in a GitHub Secret named `TURBO_TOKEN`, then configure your workflow: ```yaml - name: Build and push uses: depot/build-push-action@v1 with: context: . file: ./Dockerfile push: true tags: your-image:tag secrets: | "TURBO_TOKEN=${{ secrets.TURBO_TOKEN }}" ``` ### `depot/bake-action` Define the secret in your `docker-bake.hcl` file: ```hcl target "default" { context = "." dockerfile = "Dockerfile" tags = ["your-image:tag"] secret = [ { type = "env" id = "TURBO_TOKEN" } ] } ``` Then configure your workflow: ```yaml - name: Bake uses: depot/bake-action@v1 with: files: docker-bake.hcl env: TURBO_TOKEN: ${{ secrets.TURBO_TOKEN }} ``` ### Docker CLI Store your Depot API token in a GitHub Secret named `TURBO_TOKEN`, then configure your workflow: ```yaml - name: Build run: | docker buildx build \ --secret id=TURBO_TOKEN,env=TURBO_TOKEN \ -t your-image:tag . env: TURBO_TOKEN: ${{ secrets.TURBO_TOKEN }} ``` ## Depot Cache **Depot Cache** is our remote caching service that speeds up your builds by providing incremental builds and accelerated tests, both locally and inside of your favorite CI provider. One of the biggest benefits of adopting advanced build tools like Bazel is the ability to build only the parts of your codebase that have changed. Or, in other words, incremental builds. This is done by reusing previously built artifacts that have not changed via a build cache. ## Supported tools Depot Cache integrates with build tools that support remote caching like GitHub Actions, Bazel, Go, Turborepo, sccache, Pants, and Gradle. For information about how to configure each tool to use Depot Cache, see the tool documentation: Don't see a tool that supports remote caching that you use? Let us know in our [Discord Community](https://discord.gg/MMPqYSgDCg)! ## How does it work? Supported build tools can be configured to use Depot Cache, so that they store and retrieve build artifacts from Depot's remote cache. That cache can then be used from local development environments, CI/CD systems, or anywhere else you run your builds. This speeds up your builds and tests by orders of magnitude, especially for large codebases, as those builds and tests become incremental. Instead of always having to rebuild from scratch, only the parts of your codebase that have changed are rebuilt, and only affected tests are re-run. ### Cache retention policy The default cache retention policy is to store the cache entries for 14 days with no limit on total cache size. Configure the cache retention policy on your organization's [settings page](/orgs/_/settings) to control time based retention and cache size limits. * Available values for time based retention: 7 days, 14 days (default), 30 days * Available values for size based retention: 25 GB, 50 GB, 100 GB, 150 GB, 250 GB, 500 GB, No limit (default) **Note:** Retention policy settings don't apply to Docker layer cache entries (shown as type `docker` in the [Cache Explorer](/orgs/_/cache)). To manage Docker cache retention, set cache policy per [project](/orgs/_/projects) in project Settings. ## Where can I use Depot Cache? Depot Cache is accessible anywhere you run your builds, in local development or from any CI/CD system. Additionally, all supported tools are pre-configured to use Depot Cache when using [Depot GitHub Actions Runners](/docs/github-actions/overview). This means that build artifacts are shared between different members of your team and sequential CI/CD jobs, making these builds and tests incremental. ## Pricing Depot Cache is available on all of our pricing plans. Each plan includes a block of cache storage. Each additional GB over the included amount is billed at $0.20 per GB of usage. We calculate usage by taking a snapshot every hour and then averaging out those snapshots over the month. For more information about plans and included usage, see the [pricing page](/pricing). ## Depot CI compatibility with GitHub Actions Depot CI executes GitHub Actions YAML workflows. The following tables list GitHub Actions syntax, triggers, and configuration and whether they're supported in Depot CI. ## Workflow-level configuration | **Field** | **Purpose** | **Supported** | | ------------------------- | ------------------------------------------- | ------------- | | `name` | Workflow display name | ✅ | | `run-name` | Dynamic run title | ✅ | | `on` | Workflow triggers | ✅ | | `on.workflow_call` | Reusable workflow definition | ✅ | | `on.workflow_call.inputs` | Reusable workflow inputs | ✅ | | `permissions` | Token scopes | ✅ | | `env` | Workflow environment variables | ✅ | | `defaults` | Default settings (shell, working-directory) | ✅ | | `concurrency` | Concurrency control | ✅ | | `jobs` | Jobs definition | ✅ | ## Triggers (`on.*`) | **Field** | **Event type** | **Supported** | | ------------------------------ | -------------------------------------------------- | ------------- | | `on.` | Event triggers | ✅ | | `on..types` | Event trigger types | ✅ | | `on.merge_group` | Merge queue triggers | ✅ | | `on.push.branches` | Push branch filters | ✅ | | `on.push.tags` | Push tag filters | ✅ | | `on.pull_request` | Pull request triggers | ✅ | | `on.pull_request.branches` | PR branch filters | ✅ | | `on.pull_request_target` | Pull request triggers from the base branch context | ✅ | | `on.pull_request_review` | Pull request review triggers | ✅ | | `on.deployment_status` | Deployment status triggers | ✅ | | `on.*.paths` | Path filters | ✅ | | `on.schedule` | Cron schedule triggers | ✅ | | `on.workflow_call.inputs.*` | Reusable workflow inputs (type, default, required) | ✅ | | `on.workflow_call.outputs` | Reusable workflow outputs | ✅ | | `on.workflow_call.secrets` | Reusable workflow secrets definition | ✅ | | `on.workflow_run` | Workflow run triggers | ✅ | | `on.workflow_dispatch` | Manual dispatch triggers | ✅ | | `on.workflow_dispatch.inputs` | Manual dispatch inputs | ✅ | | `on.repository_dispatch` | Custom events sent through the GitHub API | ✅ | | `on.repository_dispatch.types` | Custom event type filters | ✅ | ### Repository dispatch events `repository_dispatch` lets you trigger Depot CI workflows from outside GitHub by sending a custom event to the GitHub API — useful for kicking off a run from another system (for example, a deployment provider) without polling or running your own relay. Subscribe to every dispatch, or filter by event type with `types`: ```yaml on: repository_dispatch: types: [deploy-succeeded] ``` GitHub only delivers `repository_dispatch` events against your repository's default branch, so the workflow that runs is the one on the default branch. The custom event type and any `client_payload` you send are available through the `github.event` context (`github.event.action` and `github.event.client_payload`), matching GitHub Actions. ## Job-level configuration (`jobs..*`) | **Field** | **Purpose** | **Supported** | Notes | | ------------------------------------- | ------------------------------------ | ------------- | ------------------------------------------------------------------------------------- | | `jobs.` | Job definition | ✅ | | | `jobs..name` | Job display name | ✅ | | | `jobs..needs` | Job dependencies / DAG | ✅ | | | `jobs..if` | Conditional job execution | ✅ | | | `jobs..runs-on` | Runner selection | ❌ | We respect Depot runner labels and treat non-Depot labels as `depot-ubuntu-latest`. | | `jobs..permissions` | Job-scoped permissions | ✅ | | | `jobs..environment` | Deployment environments | ❌ | | | `jobs..concurrency` | Job-level concurrency | ✅ | | | `jobs..outputs` | Job outputs / cross-job data | ✅ | | | `jobs..env` | Job environment variables | ✅ | | | `jobs..defaults` | Job default settings | ✅ | | | `jobs..timeout-minutes` | Job timeout | ✅ | | | `jobs..strategy` | Matrix strategy | ✅ | | | `jobs..[strategy.fail]` | Matrix fail-fast | ✅ | | | `jobs..strategy.max-parallel` | Matrix parallel limit | ✅ | | | `jobs..continue-on-error` | Allow job failure | ✅ | | | `jobs..container` | Job container | ✅ | | | `jobs..services` | Service containers | ✅ | | | `jobs..uses` | Reusable workflow call | ✅ | | | `jobs..with` | Reusable workflow inputs | ✅ | | | `jobs..secrets` | Reusable workflow secrets | ✅ | | | `jobs..secrets.inherit` | Inherit all secrets | ✅ | | | `jobs..steps` | Step definitions | ✅ | | | `jobs..snapshot` | Custom images from sandbox snapshots | ✅ | See [Build and use custom images with Depot CI](/docs/ci/how-to-guides/custom-images) | ## Step-level configuration | **Field** | **Purpose** | **Supported** | | ---------------------------- | ------------------------------- | ------------- | | `steps[*].id` | Step identifier | ✅ | | `steps[*].name` | Step display name | ✅ | | `steps[*].if` | Conditional step execution | ✅ | | `steps[*].uses` | Action reference | ✅ | | `steps[*].run` | Shell command execution | ✅ | | `steps[*].shell` | Shell type (bash, pwsh, python) | ✅ | | `steps[*].with` | Action inputs | ✅ | | `steps[*].env` | Step environment variables | ✅ | | `steps[*].working-directory` | Step working directory | ✅ | | `steps[*].continue-on-error` | Allow step failure | ✅ | | `steps[*].timeout-minutes` | Step timeout | ✅ | ## Expressions ### Contexts | **Context** | **Purpose** | **Supported** | | ----------- | -------------------------- | ------------- | | `github` | Event payload, repo, actor | ✅ | | `env` | Environment variables | ✅ | | `vars` | Repository/org variables | ✅ | | `secrets` | Secret values | ✅ | | `needs` | Dependent job outputs | ✅ | | `strategy` | Matrix strategy info | ✅ | | `matrix` | Current matrix values | ✅ | | `steps` | Prior step outputs | ✅ | | `job` | Current job info | ✅ | | `runner` | Runner info | ✅ | | `inputs` | Workflow inputs | ✅ | ### Functions | **Function** | **Purpose** | **Supported** | | -------------- | ------------------------ | ------------- | | `always()` | Run regardless of status | ✅ | | `success()` | Run if no failures | ✅ | | `failure()` | Run if any failure | ✅ | | `cancelled()` | Run if cancelled | ✅ | | `case()` | Conditional value select | ✅ | | `hashFiles()` | File hashing for caching | ✅ | | `contains()` | String/array contains | ✅ | | `startsWith()` | String prefix check | ✅ | | `endsWith()` | String suffix check | ✅ | | `format()` | String formatting | ✅ | | `join()` | Array to string | ✅ | | `toJSON()` | Object to JSON | ✅ | | `fromJSON()` | JSON to object | ✅ | ## Action types | **Type** | **Description** | **Supported** | | ---------- | ------------------------ | ------------- | | JavaScript | Node 12/16/20/24 actions | ✅ | | Composite | Composite actions | ✅ | | Docker | Container actions | ✅ | ## GitHub checks Depot CI automatically reports GitHub checks for each job in a workflow run. For more information, see [GitHub checks](/docs/ci/observability/github-checks). ## Limitations ### GitHub-only event triggers The following events are GitHub-specific concepts that aren't applicable to Depot CI workflows, such as Discussions, Pages, and issue events other than comments. | **Field** | **Event type** | **Supported** | | -------------------------------- | ----------------------------- | ------------- | | `on.branch_protection_rule` | GitHub specific event trigger | ❌ | | `on.check_run` | GitHub specific event trigger | ❌ | | `on.check_suite` | GitHub specific event trigger | ❌ | | `on.create` | GitHub specific event trigger | ❌ | | `on.delete` | GitHub specific event trigger | ❌ | | `on.deployment` | GitHub specific event trigger | ❌ | | `on.discussion` | GitHub specific event trigger | ❌ | | `on.discussion_comment` | GitHub specific event trigger | ❌ | | `on.fork` | GitHub specific event trigger | ❌ | | `on.gollum` | GitHub specific event trigger | ❌ | | `on.image_version` | GitHub specific event trigger | ❌ | | `on.issues` | GitHub specific event trigger | ❌ | | `on.label` | GitHub specific event trigger | ❌ | | `on.milestone` | GitHub specific event trigger | ❌ | | `on.page_build` | GitHub specific event trigger | ❌ | | `on.public` | GitHub specific event trigger | ❌ | | `on.pull_request_comment` | GitHub specific event trigger | ❌ | | `on.pull_request_review_comment` | GitHub specific event trigger | ❌ | | `on.registry_package` | GitHub specific event trigger | ❌ | | `on.release` | GitHub specific event trigger | ❌ | | `on.status` | GitHub specific event trigger | ❌ | | `on.watch` | GitHub specific event trigger | ❌ | ### Reusable workflows from other repositories The `uses` key for referencing workflows from other repositories is not supported. You can still use `uses` to reference actions from the GitHub Actions Marketplace (for example, `uses: actions/checkout@v4`). ### Pull request workflows triggered from forks GitHub allows `pull_request` and `pull_request_target` workflows to run when triggered from forked repositories. Support for this is planned. ### Runner labels Only Depot `runs-on` labels are supported. Nonstandard labels become `depot-ubuntu-latest` and expressions are preserved as-is. For Depot CI sandbox sizes and labels, see [Depot CI sandboxes](/docs/ci/overview#depot-ci-sandboxes). ### Permissions The following permissions are supported: `actions`, `checks`, `contents`, `id-token`, `metadata`, `pull_requests`, `statuses`, `workflows`. #### GitHub Packages authentication Pushing and pulling from GitHub Packages registries using `secrets.GITHUB_TOKEN` doesn't work in Depot CI. GitHub's package registry servers only accept personal access tokens for authentication, not GitHub App tokens. This is a known GitHub limitation (see discussions: [Read GitHub Packages permission for GitHub App](https://github.com/orgs/community/discussions/24636) and [Using GitHub Packages with GitHub Apps](https://github.com/orgs/community/discussions/26920)). For container images, you can use another registry instead, such as [Depot Registry](/docs/registry/overview). When using `depot/build-push-action`, replace the GHCR login and push steps with the `save` input: ```yaml - uses: depot/build-push-action@v1 with: context: . project: save: true save-tags: | latest ${{ github.sha }} ``` See the [Depot Registry quickstart](/docs/registry/quickstart) for pulling images and other usage. This limitation applies to all GitHub Packages registries, not just the container registry. If you need to keep using a GitHub Packages registry, you can authenticate with a GitHub [personal access token](https://docs.github.com/en/packages/working-with-a-github-packages-registry/working-with-the-container-registry#authenticating-with-a-personal-access-token-classic) with `write:packages` scope, [stored as a Depot CI secret](/docs/ci/how-to-guides/manage-secrets-and-variables). Note that a PAT is a long-lived credential scoped to a user account, so consider the security implications of storing and rotating it. ## Mount a durable cache disk Cache disks for Depot CI is in beta and free to use during the beta period. If you have suggestions to make this feature better, [reach out](/help) and let us know. Mount a durable disk into your Depot CI jobs to persist data between runs and share a directory across multiple workflows. You mount it with the [`depot/cache-mount`](https://github.com/depot/cache-mount) action under a name that's global to your organization, and any workflow that mounts the same name reuses the same disk. ## How it works A cache disk is a durable filesystem you mount into a Depot CI job with the [`depot/cache-mount`](https://github.com/depot/cache-mount) action. Unlike a job's ephemeral sandbox, the disk's contents persist after the job finishes, so the next run starts with whatever the previous run left behind. Each disk is identified by a name that is global to your Depot organization and is unique within it. The disk is created automatically the first time a workflow uses a name, and any workflow in the org that mounts the same name gets the same disk. Reusing a name across runs is what makes a disk shareable across repositories and workflows. The disk isn't scoped to a single repository. Any build in your Depot organization that uses the same disk name can read its contents, so don't store secrets or untrusted output on a cache disk. An unlimited number of parallel workflows can read from the same disk at once. To coordinate writes from concurrent workflows, the action's `write-lock` input locks a directory for write operations so parallel writers don't corrupt shared state. If the locked directory doesn't exist yet, the action pre-creates it. Public fork pull requests skip mounting the disk and only create the target directory, so untrusted forks can't read or write your organization's cached data. ## When to use a cache disk A cache disk is a good fit when the work fits a shared directory: * Package and build caches: Persist dependency and build caches between runs without the upload, download, and restore-key steps that `actions/cache` requires. The cache is just present on a real filesystem. * Content-addressed tool caches: Point the mount at the tool's cache via env or flag: GOCACHE/GOMODCACHE, CARGO\_HOME registry, \~/.m2, \~/.gradle, ccache/sccache, Bazel/buildkit local cache. * Sharing data between workflows: Write results to the disk in one workflow and consume them from another, or use files on the disk to communicate between jobs. * Read-only reference data: Model weights, test fixtures, seed databases, toolchains/SDKs. Build once under a lock, read concurrently everywhere. * Directory-partitioned writes: Matrix or monorepo jobs that each write-lock only their own slice (`/tmp/cache-mount/`, `/tmp/cache-mount/`) never contend. * Per-job downloads from S3: Anything you would otherwise download from S3 for each job. ## Mount a cache disk in a job Add the `depot/cache-mount` action to your job before the steps that read or write the cached directory. Give the disk a name and the path to mount it at: ```yaml jobs: build: runs-on: depot-ubuntu-latest steps: - uses: actions/checkout@v6 - name: Mount cache disk uses: depot/cache-mount@v1 with: name: my-org-build-cache path: /mnt/cache write-lock: /mnt/cache - name: Build run: ./build.sh --cache-dir /mnt/cache ``` The action takes the following inputs: | Input | Required | Default | Description | | ------------ | -------- | ------- | ---------------------------------------------------------------------------------------------------------- | | `path` | Yes | — | The path to mount the cache disk at, for example `/mnt/cache`. | | `name` | Yes | — | The name of the disk. Reuse the same name across runs to reference it. Created automatically on first use. | | `write-lock` | No | — | Lock a directory for write operations. If the directory doesn't exist, it's pre-created. | | `debug` | No | `false` | Enable verbose logging. | ## Best practices * **Naming**: Because names are global and unique to the org, use a convention that prevents collisions and makes intentional sharing obvious, for example prefixing by repository or purpose. * **Sharing**: Reads are unlimited and concurrent, so a disk is well-suited to many-reader fan-out. Mount a shared name only where you mean to share. * **Concurrent writes**: Use the `write-lock` input to lock a directory you write to so parallel writers don't corrupt shared state. * **Safety**: Don't store secrets or untrusted output. Any build in the organization that knows the disk name can read its contents. ## Understanding disk operations ### Read-only By default (when `write-lock` isn't used), the disks are in read-only mode. Technically a single client might perform certain write operations within already existing directories, but the write performance is lacking and we generally advise against it. As a rule of thumb, when `write-lock` isn't used, only use the disk for read operations. ### Exclusive disk locking When `write-lock` is set to the `path`, the job exclusively locks the whole disk for writing. This means that other jobs are allowed to read the disk contents, but they will not be able to write to it. When there are multiple paths listed in `write-lock`, but one of them is the `path`, all the others are discarded, and **full lock** is acquired. #### Examples: **Locking the whole disk exclusively**\ Other jobs may read, but not write its contents. ```yaml jobs: mount-cache-disk: runs-on: depot-ubuntu-latest steps: - uses: depot/cache-mount@v1 with: path: /tmp/cache-mount name: my-disk write-lock: | /tmp/cache-mount ``` **Locking the whole disk exclusively & discarding other paths**\ `/tmp/cache-mount/a` and `/tmp/cache-mount/b` locks are discarded, instead the whole disk is exclusively locked by job. ```yaml jobs: mount-cache-disk: runs-on: depot-ubuntu-latest steps: - uses: depot/cache-mount@v1 with: path: /tmp/cache-mount name: my-disk write-lock: | /tmp/cache-mount/a /tmp/cache-mount/b /tmp/cache-mount ``` ### Selective directory locking The cache disk doesn't support multi-write to the disk root, or within a directory, but allows multiple jobs writing into different directories at the same time. When multiple (non-overlapping) directories are listed in `write-lock`, the job acquires a lock only on them. Any other directory is lockable/writable by other jobs. We recommend locking certain directories instead of locking the whole disk. When the directory defined in `write-lock` doesn't exist, the action creates it. #### Example: `my-disk` has the following contents: ```txt /tmp/cache-mount/ ├─ node_modules/ ├─ public/ ├─ src/ ├─ .gitignore ├─ package.json ├─ README.md ``` The job is the following: ```yaml jobs: mount-cache-disk: runs-on: depot-ubuntu-latest steps: - uses: depot/cache-mount@v1 with: path: /tmp/cache-mount name: my-disk write-lock: | /tmp/cache-mount/node_modules /tmp/cache-mount/public ``` ## Manage and delete cache disks Cache disks created by the `depot/cache-mount` action appear on the [workflow settings page](/orgs/_/workflows/settings/general), where you can see each disk's name, when it was created, when it was last used, and its size. Organization owners can delete a disk from that page. Disks are also removed automatically once they fall outside the retention policy. ## Retention Cache disks are automatically deleted based on your organization's Depot cache retention policy, configured on the [organization settings page](/orgs/_/settings). The default retention is 14 days. ## Use Depot CI in coding agent loops Depot CI is built for programmatic use, so it's a natural fit for AI coding agents. Instead of the usual push-wait-guess cycle, an agent can run CI locally, read the failure, fix the code, and rerun, all in a closed loop from your terminal. This guide provides an example of how to set up that loop. The guide covers Claude Code and Cursor, but the pattern works for any agent with shell access. ## The agent loop You're working with an agent on a task, and you want to make sure CI passes before moving on or pushing your changes. No human needs to approve each step. You tell the agent to fix CI, and the agent iterates until it's done. Agent fix-CI loop: tell agent to fix CI, agent triggers run scoped to
smallest job, checks status, reads logs from failed jobs, SSHs into runner if
logs aren't enough, fixes code, reruns until CI
passes For a raw narrative version of this pattern, see the blog post [The End of push-wait-guess CI](/blog/the-end-of-push-wait-guess-ci). ## Why the CLI works well for agents Most coding agents already have a shell. The Depot CLI gives them CI without any HTTP plumbing. `depot ci run` tests workflows against your local working tree without requiring a commit or push. That's what makes the agent loop work: the agent can edit code and rerun CI in a tight loop without polluting the git history or waiting on long-running CI in GitHub. * `depot ci run` starts a run against your local working tree. Use `--job` to scope to specific jobs for faster iteration. The CLI resolves job dependencies automatically. * `depot ci status` shows the full run hierarchy, workflows, jobs, and attempts with their statuses. * `depot ci logs` fetches the log output for a failed job so the agent can read the error and fix it. * `depot ci ssh` connects directly to a running sandbox via the Depot API, giving you (or the agent) an interactive shell on the sandbox. To keep a sandbox alive at the right moment, use `depot ci run --ssh-after-step ` to inject a tmate debug pause after a specific step, then connect with `depot ci ssh` or the tmate connection string from the logs. If your agent or tooling integrates over HTTP instead of a shell, the [Depot CI API](/docs/api/ci/reference) exposes the same operations: dispatching workflows, checking run status, fetching logs and metrics, and retrying jobs. ## Prerequisites * Complete the Depot CI [quickstart](/docs/ci/quickstart). * Run `depot login` or set `DEPOT_TOKEN` so the agent can authenticate. * An AI coding agent with shell access (such as Claude Code or Cursor). ## Install the Depot skills Install [Depot skills](https://github.com/depot/skills) to teach your agent how to get started with Depot and use all the Depot CLI commands for Depot CI. To install Depot skills with [skills.sh](https://skills.sh/), run `npx skills add depot/skills`. ## Set up the fix CI loop command With the skills installed, create a command that tells the agent to use them, defines the loop, and sets the boundaries for what the agent can do autonomously. The example command for this guide is `/fix-ci`. Add a markdown file that defines the command to your repo. For example, in `.claude/commands/` or `.cursor/commands/`. Example `fix-ci.md`: ```markdown Fix a Depot CI workflow, run, or job until it is green. ### Before you start Invoke the `depot-ci` skill to load the full CLI reference. Then drive the debug loop. ### Inputs Accept any of: - a workflow path (for example, `.depot/workflows/ci.yml`) - a run ID, job ID, or attempt ID - a target job name (for example, `build`) - a natural-language goal (for example, "make the test job pass") If the request is ambiguous, ask for the narrowest useful target. ### The Loop 1. **Run** the workflow against local changes, scoped to the smallest useful job. 2. **Check status** and **read logs** for failed jobs. 3. If logs aren't enough, connect to the running sandbox with **`depot ci ssh`**, or **rerun with `--ssh-after-step`** to pause at a specific step first. 4. **Fix locally** based on what you found. 5. **Rerun.** Repeat until green. ### Autonomy The agent may: run workflows, inspect status/logs, SSH into sandboxes, edit local files, and rerun until green. Ask before: changing secrets or vars, altering deploy or release behavior, opening a PR, or large refactors beyond the immediate fix. ### When done, report - what was targeted - what was wrong - what changed - proof of green (or the exact remaining blocker) ``` The key ingredients are the same for any agent: install the skill so the agent has the CLI reference, then give it a command or prompt that describes the run-status-logs-ssh loop and the autonomy boundaries. ## Give the agent permission to run the loop For the agent to iterate autonomously, it needs permission to run `depot` commands without prompting. How you configure permissions depends on your agent. Here are some examples. ### Claude Code permissions Add a permission rule to `.claude/settings.json` to allow any Depot command: ```json { "permissions": { "allow": ["Bash(depot *)"] } } ``` ### Cursor permissions Add a permission rule to `/.cursor/cli.json` to allow any Depot command: ```json { "permissions": { "allow": ["Shell(depot)"] } } ``` ## Run the agent loop Type `/fix-ci .depot/workflows/ci.yml` (for example) in your agent chat and watch the agent take over. You can adjust your custom command using the tips in the following section. ## Tips for customizing your agent loop ### Iteration limits Cap the number of CI attempts so the agent doesn't loop forever on a fundamentally broken build. Three to five attempts is a reasonable default. ### Log truncation CI logs can be long. If your agent has a limited context window, truncate logs to the last N lines or extract just the error output. Most failures surface near the end of the log. ### Polling `depot ci status` returns immediately. It doesn't block until the run finishes. Agents will naturally poll by calling the status command in a loop. This works fine in practice. ### Human approval gates If the agent shouldn't take certain actions autonomously, configure your agent's permission model to require approval for those commands. The `/fix-ci` command definition in the example includes suggested boundaries: the agent can run workflows, read logs, SSH in, and edit code, but should ask before changing secrets, deploying, or opening PRs. ### Untracked files aren't patched `depot ci run` only includes tracked files in the local patch. If you've added a new file, use `git add` before running the agent, or add that step to your agent loop. ## What's next The pattern in this guide is one way to implement a coding agent loop that uses Depot CI to iterate locally. Experiment with skills or sub agents or a mixture of these to create patterns that work for you. You can create more custom commands for managing or monitoring workflows with Depot CI. Learn more about the [Depot CI CLI commands](/docs/cli/reference/depot-ci) that your agents can use, or build directly against the [Depot CI API](/docs/api/ci/reference). ## Build and use custom images Build a reusable custom image from the Depot base image that includes your tools and dependencies. ## How it works A custom image in Depot CI is a snapshot of a sandbox environment. The snapshot is stored in your org's Depot registry (registry.depot.dev) and any job in any workflow can reference it by name. To build the custom image create a job that runs only your setup steps on the Depot base image and include the `snapshot` keyword. After your setup steps complete, Depot captures the state of the sandbox environment and pushes it to the Depot registry as a reusable image. Any job can then use that snapshot as its starting image to skip the setup steps entirely. Custom images can only be used in workflows running on Depot CI. ## Quickstart The first run will build the snapshot for you. Subsequent runs will reuse the snapshot and skip the `setup` job. Time is saved every time you run this workflow. ```yaml jobs: setup: runs-on: depot-ubuntu-latest snapshot: your-image:v1 steps: - name: Install dependencies run: sudo apt-get update && sudo apt-get install -y your-tool-here work: needs: setup runs-on: image: your-image steps: - uses: actions/checkout@v4 - run: your-tool-here do-the-thing ``` ## Build a custom image in a dedicated workflow You can create a separate workflow for the build image job, and then use the resulting image in other workflows. Build a custom image using a job that runs on a standard Depot sandbox and installs the tools and dependencies you want to bake in. The job creates your custom image and pushes it to the Depot Registry. This pattern is efficient because you run the image build workflow once to create the image and then only when dependencies change. To create the build image workflow: * Add `snapshot` to the job that installs your tools and dependencies. * Choose the custom image name and, optionally, a version tag. Snapshot jobs are unique because they first check whether the requested image tags already exist. If the tags exist, Depot skips the job and reuses the existing snapshot. If the tags do not exist, Depot runs the job and creates the snapshot after the job completes. Example build image job: ```yaml jobs: build-image: runs-on: depot-ubuntu-latest snapshot: ci-base:v1 steps: - name: Install dependencies run: | sudo apt-get update sudo apt-get install -y your-tool-here ``` For advanced configuration, use the expanded `snapshot` form: ```yaml jobs: build-image: runs-on: depot-ubuntu-latest snapshot: image-name: ci-base version: v1 with: max-age: 5d steps: - name: Install dependencies run: | sudo apt-get update sudo apt-get install -y your-tool-here ``` The `with` block configures the underlying [`depot/snapshot-action`](https://github.com/depot/snapshot-action). For example, `max-age` forces the snapshot to be rebuilt after the configured age. Snapshots include non-masked environment variables from the setup job; built-in sensitive token variables are excluded by default, and `env-mask` can blacklist additional variable names. ## Use a custom image in a job Any job in any workflow on Depot CI can specify your custom image. The custom image is in the Depot registry (`registry.depot.dev`). Images from external registries aren't supported. To run a job on a custom image, specify `runs-on` with `size` and `image` keys (both required). * `size`: the size of the sandbox * `image`: the custom image name or Depot Registry URL defined by the snapshot job The `runs-on.image` value must reference an image created by a snapshot job as described in [Snapshot a sandbox to build a custom image](#build-a-custom-image-in-a-dedicated-workflow). You can't use any other images or artifacts, even if they exist in the Depot registry. The image can either be a full Depot Registry reference `{orgId}.registry.depot.dev/some-image` or use shorthand names like `ci-base`, which Depot expands to `{orgId}.registry.depot.dev/depot/snapshots/ci-base`. Example specifying a custom image in a job: ```yaml jobs: use-image: runs-on: size: 2x8 image: ci-base steps: - uses: actions/checkout@v4 - run: your-tool-here do-the-thing ``` Available values for `size`: | Size | CPUs | Memory | | -------- | ---- | ------ | | `2x8` | 2 | 8 GB | | `4x16` | 4 | 16 GB | | `8x32` | 8 | 32 GB | | `16x64` | 16 | 64 GB | | `32x128` | 32 | 128 GB | | `64x256` | 64 | 256 GB | For sandbox information and pricing, see [Depot CI sandboxes](/docs/ci/overview#depot-ci-sandboxes). ## Versioning If no explicit version is given, Depot uses the `latest` tag. If an explicit version like `v1` is given, Depot tags the snapshot as both `v1` and `latest`. This lets consumers choose between pinning a version and following the latest snapshot. It also lets the producer version act as a cache buster: changing `snapshot: ci-base:v1` to `snapshot: ci-base:v1.1` creates a new version, while consumers that use `image: ci-base` will still automatically pick up the new `latest` tag. ## Full example for Playwright ```yaml name: ci-test-e2e on: workflow_dispatch: permissions: contents: read jobs: setup-e2e: runs-on: depot-ubuntu-latest snapshot: image-name: e2e-base version: 1.0 with: max-age: 3d steps: - uses: actions/checkout@v4 - uses: pnpm/action-setup@v4 - uses: actions/setup-node@v4 - name: Install test dependencies run: pnpm install --frozen-lockfile - name: Install Chromium run: pnpm exec playwright install --with-deps chromium - name: Preload service images run: docker pull postgres:16 dashboard-e2e: needs: setup-e2e runs-on: image: e2e-base size: 2x8 strategy: matrix: shard: [1, 2, 3, 4] steps: - uses: actions/checkout@v4 with: clean: false - name: Start app run: docker compose up -d --wait - name: Run Playwright env: APP_URL: http://127.0.0.1:3030 run: pnpm exec playwright test --shard ${{ matrix.shard }}/4 ``` ## Best practices **Set `clean: false` when pre-cloning a repository**: If your custom image includes a pre-cloned copy of your repository, set `clean: false` on `actions/checkout` so it skips running `git clean -ffdx` before fetching. Without `clean: false`, checkout removes untracked files from the pre-cloned repo (like installed dependencies or build artifacts), negating the benefit of pre-cloning. ```yaml steps: - uses: actions/checkout@v4 with: clean: false ``` ## Debug a failing job with SSH Debug a Depot CI job using SSH to inspect the sandbox running the job. ## How it works You can connect to the sandbox running your job using SSH. There are two ways to do this depending on what you need: * **tmate-based SSH**: Inject a pause at a specific step number and automatically connect with the [tmate](https://github.com/mxschmitt/action-tmate) action. Use this when you want to inspect the exact environment state right before a failing step, with the full workflow environment (checked-out code, installed dependencies, environment variables) available. * **Direct SSH**: Connect directly to the Depot sandbox running your job. Use this when you want a live shell without needing to stop at a specific step. Note that direct SSH connects to the sandbox itself and does not include the workflow environment. Steps like `actions/checkout` or dependency installation might not have run yet, or might land in a different working directory. ## Prerequisites * [Install the Depot CLI](/docs/cli/installation) and authenticate via `depot login` * A workflow file to run in `.depot/workflows/.yml` ## tmate-based SSH The `--ssh-after-step` flag injects a tmate (`mxschmitt/action-tmate@v3`) debug step after a specific step in your job. When the run reaches that step, the job pauses and the CLI automatically connects you to the tmate session. When you end the session, the tmate step completes and the remaining workflow steps continue normally. **Note on access control:** The step is injected with `limit-access-to-actor: false`. Anyone who can see the connection string in the logs can connect, not just the user who triggered the run. Keep logs private during active sessions. ### Choose which step to pause after Count the steps in your job definition, starting at 1. For example: {/* prettier-ignore */} ```yaml jobs: build-and-test: # the job to reference in --job flag runs-on: depot-ubuntu-latest steps: - uses: actions/checkout@v4 # step 1 - name: Set up Node # step 2 uses: actions/setup-node@v4 - name: Install dependencies # step 3 run: npm ci - name: Build # step 4 run: npm run build - name: Test # step 5 (failing step) run: npm test ``` To inspect the environment right before the failing step, use `--ssh-after-step 4`. ### Run a workflow with tmate From the root of your repository, run: ```bash depot ci run \ --workflow .depot/workflows/.yml \ --job \ --ssh-after-step ``` The CLI starts the run, waits for the job to reach the tmate step, and then automatically connects you via SSH. In a non-interactive context (scripts, CI), it prints the SSH command to stdout instead. Constraints: * Requires exactly one `--job` * `` must be less than or equal to the total number of steps * Mutually exclusive with `--ssh` * `--org` is required if you belong to more than one Depot organization Example output: ``` Repo: depot-demo-org/habits-demo-app Jobs: lint_typecheck Inserting tmate step after step 4 Org: Run: hbdc14bcbk Waiting for tmate session to start... Waiting for job to be created... Waiting for tmate session in logs... Connecting: ssh GPB7Xs4TJj6WEpjNGuuyjUA5R@nyc1.tmate.io ``` ## Direct SSH Direct SSH connects you to the Depot sandbox environment over `exec.depot.dev` using your Depot API token. This gives you a shell on the sandbox, but the workflow environment (checked-out code, installed dependencies, and so on) is not available. You're connecting to the raw sandbox, not to a paused workflow step. You can connect two ways: when you start a new run, or by attaching to a job that's already running. ### Start a run and connect immediately Use `--ssh` on `depot ci run` to start the workflow and automatically connect once the sandbox is ready: ```bash depot ci run \ --workflow .depot/workflows/.yml \ --job \ --ssh ``` The CLI waits for the sandbox to be provisioned and then opens an interactive terminal session. Constraints: * Requires exactly one `--job` * Mutually exclusive with `--ssh-after-step` * `--org` is required if you belong to more than one Depot organization ### Attach to an already-running job Use `depot ci ssh` to connect to a job that's already in progress: ```bash depot ci ssh --job ``` Or, if the run has only one job: ```bash depot ci ssh ``` You can also pass a job ID directly: ```bash depot ci ssh ``` If the job hasn't started yet, the command waits up to 5 minutes for the sandbox to be provisioned. Once a sandbox has been provisioned for a running attempt, `depot ci status` shows the exact `depot ci ssh` command to use. For queued jobs or attempts that haven't yet received a sandbox, the SSH hint won't appear in the status output, but you can still run `depot ci ssh --job ` directly and it will wait for provisioning. For single-job runs, `--job` can be omitted. ### Print connection details instead of connecting To print the SSH connection string instead of connecting interactively, use `--info`. This is useful for scripting or if you want to connect from a different terminal: ```bash depot ci ssh --info depot ci ssh --info --output json ``` ## What you can do in the session Whether you connect via direct SSH or tmate, you're in a shell on the Depot CI sandbox as the `runner` user, with root privileges. For tmate sessions, you're in the job's workspace with the full workflow environment. For direct SSH, you're in the sandbox and the working directory and environment depends on what steps have run. Some examples of tasks you can do in the sandbox environment over SSH: * Run the failing command manually to see full output. For example: `npm test` * Inspect environment variables. For example: `env | grep MY_VAR` * Check the filesystem. For example: `ls -la` or `cat /etc/os-release` * Inspect GitHub Actions context files under `$GITHUB_ENV`, `$GITHUB_PATH` * Make changes in the environment and then end the session to observe if the job continues as expected ## End the session and continue To end the session, press `CTRL` + `D` or type `exit`. For tmate sessions, the tmate step completes and the remaining workflow steps resume running after you exit. {/* TODO: Add session duration / timeout? */} ## Manage secrets and variables Store secrets and variables used by your workflows in Depot CI. You can limit availability of secrets and variables by repository, branch, workflow, and environment. You can also create variants of secrets and variables with different values depending on the availability you define. Organization owners manage secrets and variables from the [Depot CI settings](https://depot.dev/orgs/_/workflows/settings) in the dashboard or from the CLI. ## How secrets are used in workflows When a Depot CI job starts, secrets are decrypted on demand and dispatched to the sandbox in an isolated VM. The sandbox hydrates the environment with those secrets on a per-step basis as configured in your workflow YAML. Within an organization, a secret scoped to a repository is available only to jobs running for that repository. When multiple secrets have the same name, Depot chooses the most specific matching variant for the job's repository, environment, branch, and workflow file. Secret values are masked in all log output. For more information about secret encryption and access control, see [Understanding security in Depot CI](/docs/security#understanding-security-in-depot-ci). ## Import secrets and variables from GitHub If you're migrating from GitHub Actions, you can import your existing GitHub secrets and variables into Depot CI with a single command: ```bash depot ci migrate secrets-and-vars ``` This creates a one-shot GitHub Actions workflow that reads secrets and variables from your GitHub repository and imports them into Depot CI. See [`depot ci migrate secrets-and-vars`](/docs/cli/reference/depot-ci#depot-ci-migrate-secrets-and-vars) in the CLI reference for details. ## Manage secrets You need to be an [organization owner](/docs/account#organization-access-roles) to manage secrets and variables. You can't view secret values after you create them. Variable values are plain text and visible in the dashboard and CLI output. Use the dashboard to create secrets and variables and optionally limit availability by repository, branch, workflow, or environment. You can also add and remove secrets and variables using the [Depot CLI](/docs/cli/reference/depot-ci). Names must be non-empty and names matching to a specific repository can't contain a forward slash (`/`). ### Add a secret 1. From the [Depot CI workflows](/orgs/_/workflows) page, click the settings icon. 2. Click **Secrets**. 3. Click **Create secret**. 4. Enter a **Name**, optional **Description**, and **Value** for the secret. 5. Optional: **Limit availability** by defining when to use the secret. Learn more about [limiting availability](#limit-availability-of-secrets-and-variables). 1. Define a single attribute or any combination of repository, branch, workflow, and environment attributes. 2. Enter a **Variant name**, or keep the auto-generated name. 6. Click **Create secret**. ### Add a variable 1. From the [Depot CI workflows](/orgs/_/workflows) page, click the settings icon. 2. Click **Variables**. 3. Click **Create variable**. 4. Enter a **Name**, optional **Description**, and **Value** for the variable. 5. Optional: **Limit availability** by defining when to use the variable. Learn more about [limiting availability](#limit-availability-of-secrets-and-variables). 1. Define a single attribute or any combination of repository, branch, workflow, and environment attributes. 2. Enter a **Variant name**, or keep the auto-generated name. 6. Click **Create variable**. ### Update secrets and variables You can update a secret or variable's description, value, and availability from the dashboard. You can't view secret values after you create a secret, so you can only enter a new value. 1. From the [Depot CI workflows](/orgs/_/workflows) page, click the settings icon. 2. Click **Secrets** or **Variables**. 3. Find the secret or variable you want to edit. 4. Click the variant name or the details icon to open the details panel. 5. In the details panel, click the edit icon. 6. Update the fields and click **Save changes**. ### Remove secrets and variables 1. From the [Depot CI workflows](/orgs/_/workflows) page, click the settings icon. 2. Click **Secrets** or **Variables**. 3. Find the secret or variable you want to remove. 4. Click the variant name or the details icon to open the details panel. 5. In the details panel, click the trash icon and then click **Delete** to confirm. ## Limit availability of secrets and variables When you create or edit a secret or variable, you can limit its availability by defining the repository, branch, workflow, and environment to which it belongs. This is useful for security-sensitive credentials and configuration where you want to follow the principle of least privilege. For example, a deployment key in an open source repository might be needed only by deployment workflows, production environments, or release branches. Limiting that secret to trusted contexts keeps it out of untrusted pull request jobs that could try to print secrets from a modified workflow. Limit availability using one or more of the following attributes: * **Repository**: Use when the repository matches (select from the available repos). * **Branch**: Use when the branch name matches. * **Workflow**: Use when the workflow file matches. * **Environment**: Use when the job's GitHub environment name matches exactly. Provides compatibility with GitHub Environment Secrets. Both branch and workflow attributes support glob patterns. For example, `release/*` or `deploy-*.yaml`. Availability gets stricter when you add different kinds of attributes and broader when you add alternatives within the same kind of attribute. For example, a secret with the following attributes: * Branch main * Branch * Environment production is accessible only when the branch matches main *or* *and* the `environment` field in the workflow YAML matches production. ### Using environment attributes An environment attribute matches to the job's `environment` field in your workflow YAML. Use an environment attribute when a value should be available only to jobs that explicitly run in an environment such as `staging` or `production`. For example, an environment attribute with the value production matches the `deploy` job in the following workflow snippet. ```yaml name: Deploy on: push: branches: - main jobs: deploy: runs-on: depot-ubuntu-24.04 environment: production steps: - uses: actions/checkout@v4 - run: ./scripts/deploy.sh ``` You can also use the object form when you want to attach environment metadata: ```yaml jobs: deploy: runs-on: depot-ubuntu-24.04 environment: name: production url: https://app.example.com ``` Depot uses the environment `name` for attribute matching. Jobs without an `environment` field do not match environment attributes, even if they run on the same branch or in the same workflow file. ## Secret and variable variants Variants let one secret or variable name resolve to different values depending on the [workflow availability](#limit-availability-of-secrets-and-variables) you define (by repository, branch, workflow file, environment). Use variants when the workflow should receive a different value depending on where it runs. For example, you can create: * A default `DATABASE_URL` secret or variable for all repositories. * A release `DATABASE_URL` secret or variable selected by a branch attribute match. * A repository-specific `DATABASE_URL` secret or variable. * A production `DATABASE_URL` secret or variable selected by an environment attribute match. You can create, view, and manage all of these variants in the dashboard. You can also use filters to [check which variant resolves](#check-variant-resolution-in-the-dashboard) for your workflow before running it. ### Add a variant using the dashboard 1. From the [Depot CI workflows](/orgs/_/workflows) page, click the settings icon. 2. Click **Secrets** or **Variables**. 3. Click the variant link or the details icon for the secret or variable you want to create a variant from. This opens the details panel. 4. In the details panel, click the plus icon. 5. Enter the new **Value** and optionally update the **Description**. 6. Under **Limit availability**, define a single attribute or any combination of repository, branch, workflow, and environment attributes. 7. Expand the **Secret variants** or **Variable variants** list to view all variants and any conflicts between them. 8. Click **Create secret** or **Create variable**. ### How multiple variants resolve Depot resolves matching variants before a workflow starts. A repository variant is invisible to all other repositories. When multiple variants match a job, the variants resolve from least to most specific and with the following priority from highest to lowest: environment, repository, branch, workflow. The following table summarizes how variants resolve: | Attribute type | Priority | Resolution | | -------------- | -------- | -------------------------------------------------------------------------------------------------------------------------------------------------------------- | | Environment | Highest | Beats repository, branch, and workflow attributes. For example, a variant with only an environment attribute beats a variant with only a repository attribute. | | Repository | High | Beats branch and workflow attributes. | | Branch | Medium | Beats workflow attributes. Narrow branch glob patterns beat broad ones. For example, `release/v2` beats `release/*`. | | Workflow | Low | Narrow workflow file glob patterns beat broad ones. | | No attributes | Lowest | Matches all jobs (fallback value). | Combining attribute types always increases specificity. A variant with both an environment and a repository attribute beats a variant with only one of them. So a variant with no repository attribute (matching any repo by default) and a defined environment attribute beats a variant with a repository attribute and no environment attribute. To resolve to a different value for a specific repo, create a variant that matches to both the repository and the environment. #### Check variant resolution in the dashboard You can use the filter to confirm which variant resolves to your workflow before running it. With no filters applied, the dashboard displays variants for each secret sorted from least specific to most specific. 1. From the [Depot CI workflows](/orgs/_/workflows) page, click **Secrets** or **Variables**. 2. Click the filter icon beside the search bar. 3. In the filter context panel, select **Env**, **Repo**, **Branch**, or **Workflow** to view defined attributes for each across your organization. 4. Click the attributes that match the workflow you want to check to filter the workflow view. When a variant is the definitive winner for a specific secret or variable, it moves to the top of the list and the other variants are greyed out. ## Manage workflow runs You can trigger, check status, retry, rerun, and cancel Depot CI workflow runs from the Depot dashboard, the [Depot CLI](/docs/cli/reference/depot-ci), or programmatically through the [Depot CI API](/docs/api/ci/reference). ## Run workflows with local changes You can run a workflow locally to test it against changes you're actively working on. You don't need to push to GitHub. Run any workflow locally with `depot ci run`. For example: ```shell depot ci run --workflow .depot/workflows/ci.yml ``` To run a specific job, use the `--job` flag. For usage, see the [`depot ci run` docs](/docs/cli/reference/depot-ci#depot-ci-run) or run `depot ci run --help`. #### How local workflow runs work When you run `depot ci run` with local changes, the CLI automatically detects the changes and uploads a patch. For any job that has an `actions/checkout` step, the CLI injects a step into each job to apply that patch after checkout. The run reflects your local state without requiring a push. For branches that exist on the remote, the patch contains only unpushed changes. For local-only branches, the patch is relative to the default branch. Each time you run `depot ci run` locally, the CLI uploads a fresh patch, so you can keep iterating until the workflow passes. ## Manually trigger workflows You can manually trigger workflows that include the `workflow_dispatch` event in the `on` section of the workflow YAML file. ### Manually trigger a workflow from the CLI To run a workflow that uses an `on.workflow_dispatch` trigger, use `depot ci dispatch`. Inputs are validated against the workflow's declared input schema. For example: ```shell depot ci dispatch --repo depot/cli --workflow deploy.yml --ref main \ --input environment=staging --input dry_run=true ``` The `--workflow` flag takes the workflow file's basename (for example `deploy.yml`), not the full `.depot/workflows/deploy.yml` path. The command outputs the run ID and a link to the Depot dashboard. Use `--output json` to get structured output. For usage, see the [`depot ci dispatch` docs](/docs/cli/reference/depot-ci#depot-ci-dispatch) or run `depot ci dispatch --help`. You can also use `depot ci dispatch` to [trigger a workflow automatically from another workflow](#trigger-workflows-from-other-workflows). ### Manually trigger a workflow from the dashboard You can start workflows with an `on.workflow_dispatch` trigger from the Depot dashboard. 1. Go to [Depot CI](https://depot.dev/orgs/_/workflows) and click **Run a workflow**. 2. Select a repository, an optional branch or tag, and the workflow to run. 3. Fill in inputs defined by the workflow, if any. 4. Click **Run workflow**. If you don't specify a branch or tag, the workflow runs against the repository's default branch. ## Trigger workflows from other workflows You can call `depot ci dispatch` from a running Depot CI job to start another workflow. Use a Depot organization or user API token for the dispatch request and pass it explicitly with `--token`. Depot CI injects a built-in `DEPOT_TOKEN` into each job, but that token only works for the current job attempt. It can't start new workflow runs. You also can't use the job's OIDC token directly to authorize `depot ci dispatch`. Store the API token as a Depot CI secret under a non-reserved name, such as `DEPOT_ORG_TOKEN`, then pass it to the command: ```yaml jobs: dispatch: runs-on: depot-ubuntu-latest steps: - name: Dispatch downstream workflow run: | depot ci dispatch \ --repo depot/demo-app \ --workflow downstream.yml \ --ref main \ --input upstream_run_id="$GITHUB_RUN_ID" \ --token "$DEPOT_ORG_TOKEN" env: DEPOT_ORG_TOKEN: ${{ secrets.DEPOT_ORG_TOKEN }} ``` If you use a user API token and belong to multiple Depot organizations, include `--org `. ## Find and check runs You can list recent runs and inspect a run's workflows, jobs, and attempts from the CLI. List recent runs with `depot ci run list`, optionally filtered. For example, to list only failed runs: ```shell depot ci run list --status failed ``` The `--status` flag is repeatable and accepts `queued`, `running`, `finished`, `failed`, and `cancelled`. You can also filter by `--repo`, `--sha`, `--trigger`, and `--pr` (requires `--repo`), limit results with `-n` (default 50), and get structured output with `--output json`. To check a run's workflows, jobs, and attempt IDs, use `depot ci status`: ```shell depot ci status ``` For usage, see the [`depot ci run list`](/docs/cli/reference/depot-ci#depot-ci-run-list) and [`depot ci status`](/docs/cli/reference/depot-ci#depot-ci-status) docs, or run `depot ci run list --help` and `depot ci status --help`. ## Retry failed jobs You can retry a failed or cancelled job, or every failed and cancelled job in a workflow, without rerunning the successful jobs. ### Retry a failed job from the CLI Retry a single job: ```shell depot ci retry --job ``` Retry every failed and cancelled job in the workflow: ```shell depot ci retry --failed ``` Include the `--workflow ` flag for runs with multiple workflows. Each retry creates a new attempt. You can see previous attempts with `depot ci status`. For usage, see the [`depot ci retry` docs](/docs/cli/reference/depot-ci#depot-ci-retry) or run `depot ci retry --help`. ### Retry a failed job from the dashboard 1. Go to [Depot CI](https://depot.dev/orgs/_/workflows) and click on the workflow. 2. Click **Retry job** for the job you want to retry. Depot creates a new attempt for that job and queues it immediately. The rest of the workflow continues to run. ## Rerun workflows After a workflow finishes, you can rerun every job in the workflow from scratch, or retry only the failed and cancelled jobs. See [Retry failed jobs](#retry-failed-jobs)). ### Rerun a workflow from the CLI ```shell depot ci rerun ``` For multi-workflow runs, pass `--workflow ` to select which workflow to rerun. A workflow must be in a terminal state (finished, failed, or cancelled) before it can be rerun — cancel it first if it's still running. For usage, see the [`depot ci rerun` docs](/docs/cli/reference/depot-ci#depot-ci-rerun) or run `depot ci rerun --help`. ### Rerun a workflow from the dashboard 1. Go to [Depot CI](https://depot.dev/orgs/_/workflows) and click on the workflow. 2. Do one of the following: * To reset every job to queued and run the entire workflow from scratch, click **Re-run workflow**. * To retry only the failed and cancelled jobs, along with any skipped jobs that depend on them, click **Re-run failed**. Jobs that already succeeded aren't retried. ## Cancel runs, workflows, or jobs You can cancel a queued or running run, an entire workflow (and all its jobs), or a single job. ### Cancel a run, workflow, or job from the CLI With no scope flags, `depot ci cancel` cancels the entire run: ```shell depot ci cancel ``` Cancel an entire workflow and all jobs within it with `--workflow`: ```shell depot ci cancel --workflow ``` Cancel a single job with `--job`: ```shell depot ci cancel --job ``` For usage, see the [`depot ci cancel` docs](/docs/cli/reference/depot-ci#depot-ci-cancel) or run `depot ci cancel --help`. ### Cancel a workflow or job from the dashboard 1. Go to [Depot CI](https://depot.dev/orgs/_/workflows) and click on the workflow. 2. Do one of the following: * To cancel a single job, click **Cancel job** next to that job. * To cancel the entire workflow, click **Cancel workflow**. This cancels all queued and running jobs in the workflow. ## Run steps in parallel Run multiple steps concurrently within a single job on Depot CI to cut job time down to the duration of the slowest step rather than the sum of all steps. ## How it works Instead of running every step in a job sequentially, you can run steps concurrently, wait for all of them to finish, and then continue, all within your workflow configuration YAML. You use `parallel:` blocks inside `steps:` in your job. Depot CI forks execution at the `parallel:` block, and runs each unit of work, either a single step or an ordered sequence of steps, at the same time. Each step or sequence receives an isolated snapshot of the job's state. Changes in one step or sequence don't affect its siblings. All steps or sequences start from the same job state at the start of the `parallel:` block. When all steps in a parallel group finish, Depot CI merges their state back into the job and moves on to the next step. Step outputs, environment variables, and `$GITHUB_PATH` modifications from all parallel steps and sequences become available from that point forward. Secret masking is the exception: `::add-mask::` in any step or sequence takes effect globally and immediately, including for sibling steps or sequences still running. ## Parallel step syntax | **Field** | **Purpose** | | --------------------------------- | ------------------------------------------------------ | | `steps[*].parallel` | Run multiple steps or sequences of steps concurrently | | `steps[*].parallel[*].sequential` | Group steps into an ordered sequence within `parallel` | A `parallel:` block goes inside `steps:` and can contain single steps and step sequences which are defined in `sequential:` arrays. A `sequential:` array is a list of steps that run in order. The following example configures a job that runs lint, type checks, and tests to run all three at once instead of one at a time: ```yaml jobs: check: runs-on: depot-ubuntu-latest steps: - uses: actions/checkout@v6 - name: Install dependencies run: pnpm install - parallel: - name: Lint run: pnpm lint - name: Typecheck run: pnpm type-check - name: Test run: pnpm test - name: All checks passed run: echo "done" ``` Use `sequential:` to group multiple steps that depend on each other into a single step sequence. For example: ```yaml - name: Install run: npm ci - parallel: - sequential: - name: Build run: npm run build - name: Test run: npm test - name: Lint run: npm run lint ``` ## Handling failures ### Cancel remaining steps when one step fails By default (`fail-fast: true`), if one step in a `parallel:` block fails, the remaining steps are cancelled immediately. Set `fail-fast: false` to let all steps run to completion after a failure. For example: ```yaml - fail-fast: false parallel: - name: Lint run: pnpm lint - name: Typecheck run: pnpm type-check ``` ### Allow individual steps to fail without failing the parallel group You can use `continue-on-error: true` on individual steps within a parallel group. If that step fails, the step is marked as failed but doesn't cause the whole parallel group to fail. For example: ```yaml - parallel: - name: Optional check continue-on-error: true run: pnpm optional-check - name: Required check run: pnpm required-check ``` This is different from `fail-fast: false` because `continue-on-error: true` absorbs the failure so the parallel group can still succeed. `fail-fast:` doesn't change whether the group fails. It only controls whether the other steps are cancelled when a failure occurs. ## Limitations * **Parallel blocks can't be nested**: You can use `sequential:` inside `parallel:`, but you can't nest `parallel:` inside `parallel:`. * **Step IDs must be unique across the entire job**: Two steps or sequences can't share the same `id`. This applies across all steps and sequences in a `parallel:` block, not just within a single sequence. ## Retry failed steps Automatically re-run a failed `run:` step on Depot CI to recover from flaky commands, such as network blips or a transient registry error, by adding a single `retry:` key. ## How it works Normally, when a `run:` step fails, the step fails and the rest of the job stops with it. With `retry:`, Depot CI re-runs the failed step in place and lets the job continue if a later attempt succeeds. You can add a `retry:` key to a `run:` step in your workflow configuration YAML. When that step exits with a failure, Depot waits a configurable backoff delay and runs the step again in the same sandbox, repeating until it succeeds or the configured number of attempts is used up. If an attempt succeeds, the job continues from that step as if it had passed the first time. If every attempt fails, the step fails and the job fails with it. ## Step retry syntax Use the shorthand form to set a retry count, where a bare number is the number of additional attempts: ```yaml steps: - run: npm ci retry: 3 ``` Use the structured form to control backoff and delays: ```yaml steps: - run: ./flaky-integration-test.sh retry: retries: 3 # additional attempts after the first run backoff: exponential # 'constant' (default) or 'exponential' delay-seconds: 5 # base delay before the first retry (default: 5) max-delay-seconds: 60 # maximum delay between attempts (default: 60) ``` `retry: 3` is exactly equivalent to `retry: {retries: 3}`. The structured defaults are filled in for any omitted key. Allowed values are enforced at parse time. Values outside them are rejected before the job runs. | Field | Default | Allowed values | Description | | ------------------- | ------------ | --------------------------------- | -------------------------------------------------------------------------------------------------------------- | | `retries` | *(required)* | `1`–`10`, integer | Additional attempts after the first run. `retries: 3` means up to 4 total runs. | | `backoff` | `constant` | `exponential` or `constant` | `exponential` doubles the delay each attempt; `constant` waits `delay-seconds` every time. | | `delay-seconds` | `5` | `0`–`3600`, ≤ `max-delay-seconds` | Base delay (seconds) before the first retry. With `exponential`, attempt *n* waits `delay-seconds × 2^(n-1)`. | | `max-delay-seconds` | `60` | `0`–`3600` | The maximum length of a single delay between attempts. With `exponential`, the delay never exceeds this value. | ## Retry behavior * **When retries apply**: * **Scope**: `retry:` is supported on `run:` (shell command) steps only. `retry:` on a `uses:` (action) step is rejected at parse time, because actions carry hidden `post:` and state machinery that is unsafe to re-run without special handling. * **Trigger**: A retry happens on any failure (any non-zero exit code). There is no exit-code or output filtering so any failure re-runs the step. * **How attempts run**: * **Attempt count**: `retries: N` means up to `N + 1` total runs (1 initial run plus N retries). A step that succeeds on the first try runs exactly once. * **Backoff**: `constant` (the default) waits `delay-seconds` before every retry. `exponential` doubles the wait each attempt (attempt *n* waits `delay-seconds × 2^(n-1)`), up to a maximum of `max-delay-seconds`. For example, `delay-seconds: 5` with `max-delay-seconds: 60` gives delays of `5, 10, 20, 40, 60, 60, …`. * **Interaction with other step keys**: * **`continue-on-error`**: Applied only after all retries are exhausted. `continue-on-error: true` does not skip retries. The step runs every attempt first, and only if they all fail does the job continue instead of failing. * **`timeout-minutes`**: Applies per attempt. Each attempt gets a fresh timeout budget, not a single budget shared across all attempts. * **Cancellation**: If the job is cancelled or reaches its timeout, retrying stops immediately, whether a step attempt is running or Depot is waiting out a backoff delay. The step is marked cancelled rather than failed, and the cancellation does not count as a used attempt. ## Reset state between attempts By default, Depot does not reset state between attempts, since retries re-run in the same sandbox. Any filesystem side effects from a failed attempt, such as files written or packages installed, are still present on the next attempt. Step outputs and env files (`$GITHUB_OUTPUT`, `$GITHUB_ENV`, `$GITHUB_PATH`, `$GITHUB_STATE`) are not cleared either; they accumulate across attempts and are read once after the retry loop finishes, with the last value written winning. If a step needs a clean slate on each attempt, prepend your own cleanup to the command: ```yaml steps: - run: | rm -rf ./build-output # clean up any partial state from a prior attempt ./build.sh retry: 2 ``` ## Observability Each attempt prints a group header to the step's logs so you can tell where one attempt ends and the next begins. The total in the header counts the initial run plus every retry, so a step with `retry: 3` shows `Step attempt 1/4`: ``` Retrying up to 3 times (4 step attempts max) ##[group]Step attempt 1/4 ... attempt 1 output ... ##[endgroup] ##[group]Step attempt 2/4 ... attempt 2 output ... ##[endgroup] ``` Every attempt appears under the same step's logs rather than in a separate log per attempt. A step that ran more than once also shows an "N attempts" label next to its name in the run detail page, for example "4 attempts". ## Split tests by timing Cut the wall-clock time of a large test suite by splitting it across jobs into balanced shards based on historical timing data. Test splitting is part of the test results feature currently in beta, available for [Depot CI](/docs/ci/observability/depot-ci-test-results) and [GitHub Actions](/docs/github-actions/observability/github-actions-test-results) jobs. Test results are free to use during the beta period. If you have suggestions to make this feature better, [reach out](/help) and let us know. `depot tests split`, `depot tests run`, and `depot tests report` are supported only in Depot CI and Depot GitHub Actions runner jobs. Depot CI authenticates automatically. For Depot GitHub Actions runners, grant the workflow `id-token: write` permission, as shown below. ## How it works Sharding tests across parallel jobs can reduce a suite’s wall-clock time, but a shard with disproportionately slow tests becomes the bottleneck that determines when the suite finishes. Using historical timing data to distribute tests evenly across shards helps reduce the suite’s total run time. Depot splits your tests by how long they take. First you give Depot a list of candidates. A candidate is one thing your test command can run, such as a test file or a package name. You also tell Depot how many shards to split into. Depot gives each shard a different, non-overlapping subset of the candidates, and it uses the time each candidate took in past runs to balance how long the shards take to run. Each job runs its shard and uploads a JUnit XML report. Depot uses the times in those reports to balance the next run. If a suite has no past timing data, filename candidates fall back to file-size splitting, and other candidates use fallback weights. Each later run uses the times from previous runs, so the split gets more balanced over time. ## Split, run, and report in a matrix job [`depot/tests-run-action`](https://github.com/depot/tests-run-action) wraps `depot tests run`: it selects the list assigned to the current shard, runs your command, and uploads the JUnit XML report it creates. This Depot CI example creates four matrix jobs. Every job uses the same package list; Depot assigns each one a different, timing-balanced subset. ```yaml jobs: test: runs-on: depot-ubuntu-24.04 strategy: fail-fast: false matrix: shard: [0, 1, 2, 3] steps: - uses: actions/checkout@v4 - uses: actions/setup-go@v5 with: go-version-file: go.mod - name: Install gotestsum run: | go install gotest.tools/gotestsum@latest echo "$(go env GOPATH)/bin" >> "$GITHUB_PATH" - name: Run test shard uses: depot/tests-run-action@v1 with: candidates-command: go list ./... command: mkdir -p reports && xargs gotestsum --junitfile reports/junit.xml -- report-path: reports/junit.xml ``` The action installs no test-runner integration of its own. Replace `go list` and `gotestsum` with the candidate discovery and command your test framework needs. In Depot CI, `DEPOT_MATRIX_JOB_INDEX` and `DEPOT_MATRIX_JOB_TOTAL` supply this matrix job's shard position. When shard inputs are omitted, the CLI uses those values. Non-matrix jobs receive `0` and `1`, so they remain unsplit. On Depot GitHub Actions runners, pass the shard inputs explicitly instead: ```yaml permissions: contents: read id-token: write # ...inside depot/tests-run-action@v1 with: index: ${{ strategy.job-index }} total: ${{ strategy.job-total }} ``` Explicit shard inputs override the corresponding Depot CI values. For a direct `depot tests run` call, `--total 1` runs the complete candidate list, even inside a matrix. In a multi-axis matrix, set `index` and `total` explicitly when tests should split on only one axis instead of the flattened matrix. The following example splits only on `shard`. ## Choose a split scope in a multi-axis matrix Automatic Depot CI values describe the immediate strategy's flattened matrix. A `type` × `usage` × `shard` matrix has 16 jobs, so it produces a 16-way split rather than four independent four-way splits. When only the `shard` axis should split tests instead of the flattened 16-job matrix, pass its index and total explicitly. In this example, each `runtime` and `usage` combination receives its own four-way split: ```yaml strategy: matrix: runtime: [node-20, node-22] usage: [unit, integration] shard: [0, 1, 2, 3] steps: - uses: depot/tests-run-action@v1 with: candidates-command: ./discover-tests ${{ matrix.runtime }} ${{ matrix.usage }} # Override the flattened matrix values: split only by the shard axis. index: ${{ matrix.shard }} total: 4 split-key: ${{ matrix.runtime }}-${{ matrix.usage }} # ...command and report path ``` In reusable workflows, use explicit values whenever the intended split scope differs from the called job's immediate strategy. ## Choose a candidate source A candidate is one runnable unit that your test command accepts. It must map to either a filename or classname emitted by your runner's JUnit report. The [Depot CI matrix example](#split-run-and-report-in-a-matrix-job) uses `go list ./...` to produce Go package names, which the JUnit report treats as classnames. When the effective shard total is greater than one, provide exactly one candidate source: a candidate list, file, or command. When the effective total is `1`, a candidate source is optional and `depot tests run` runs the command with empty standard input when none is provided. * `candidates-command` runs dynamic discovery in the Depot CLI. Use it for commands such as `go list ./...`; its standard output must contain only one candidate per line, while diagnostics belong on standard error. * `candidates-file` reads an existing or shared newline-delimited list. Use it for a large list or one another step has already generated. * `candidates` provides a small, fixed newline-delimited list directly in the workflow. ## Choose a candidate identity `candidate-type` is optional in both the action and CLI. When it is omitted, Depot infers `filename` when every candidate looks like a recognized source or test-file path; otherwise, it infers `classname`. The inferred or explicit type must match the identity in the uploaded JUnit report that Depot uses to look up timings. | Value | Use it when candidates match | JUnit timing field | | ----------- | ---------------------------- | ------------------ | | `filename` | Test-file paths | `file` | | `classname` | Package or class names | `classname` | For the following validated test runners, use the recommended candidate type. This is not an exhaustive list. | Runner | Recommended `candidate-type` | Candidate type inferred correctly? | | --------------------------------- | ---------------------------- | ------------------------------------------------------------------------------------- | | Node test | None | Yes (`filename`) | | Vitest | `classname` | No — file-looking candidates infer as `filename`, but report timings use `classname`. | | Jest with `jest-junit` file field | None | Yes (`filename`) | | Playwright JUnit | `classname` | No — file-looking candidates infer as `filename`, but report timings use `classname`. | | pytest (`junit_family=xunit1`) | None | Yes (`filename`) | | RSpec JUnit formatter | None | Yes (`filename`) | | gotestsum | None | Yes (`classname`) | You can omit `candidate-type` when the candidate strings' apparent file or class identity matches the identity recorded by the test report. Set it explicitly when they differ—especially when a runner accepts file paths but writes those paths to the JUnit `classname` field. Vitest and Playwright are examples: pass `candidate-type: classname` so Depot identifies their timings correctly. ## Choose timing granularity `timings-type` controls the granularity of the timing data Depot uses for each candidate. `filename` and `classname` use timings recorded for the whole candidate and must match the resolved `candidate-type`; `testname` uses individual JUnit test cases and is the only timing identity that can differ. | Candidate type | Candidate-level default | Test-level option | | -------------- | ----------------------- | ----------------- | | `filename` | `filename` (`file`) | `testname` | | `classname` | `classname` | `testname` | Use the default when the JUnit report records a timing for each candidate. Set `timings-type: testname` when the report has individual test cases and you want Depot to calculate each candidate's duration from those tests. For example, the [direct Go/gotestsum commands](#run-the-cli-directly) pass package candidates but use `timings-type: testname` to calculate package durations from their individual test names. ## Use keys for advanced workflows Basic matrices need neither `split-key` nor `report-key`: the split identity defaults to the job and action identity, and the report identity remains the action default. Use `split-key` only when distinct logical suites in one job would otherwise share split scope, such as when they have different candidate lists, timing identities, or granularity. Give every shard of one suite the same `split-key`. For example, when one job runs browser and API test suites, keep their timing assignments separate: ```yaml steps: - name: Run browser tests uses: depot/tests-run-action@v1 with: split-key: browser-tests report-key: browser-tests # ...browser candidates and command - name: Run API tests uses: depot/tests-run-action@v1 with: split-key: api-tests report-key: api-tests # ...API candidates and command ``` `report-key` identifies a report upload. Use a distinct value only when one job uploads more than one report; ordinary matrix jobs need no per-shard `report-key`. ## Run the CLI directly Use `depot tests split` when you only need Depot to print a shard's candidates: ```shell depot tests split \ --candidates-command 'go list ./...' \ --timings-type testname \ --index 0 \ --total 4 ``` Use `depot tests run` to select a shard, run a command, and upload its reports in one command: ```shell mkdir -p reports depot tests run \ --candidates-command 'go list ./...' \ --timings-type testname \ --index 0 \ --total 4 \ --command 'xargs gotestsum --junitfile reports/junit.xml --' \ --report-path reports/junit.xml ``` You can also pass candidates through standard input or an existing list with `--candidates-file`. For either command, Depot uses historical timings when it has them. A first run still works: filename candidates fall back to file-size splitting, and other candidates use deterministic fallback weights. After a run uploads JUnit XML, those durations are available to balance later runs. See [Depot CI test results](/docs/ci/observability/depot-ci-test-results) for JUnit reporting, result views, and analytics. ## Datadog CI Visibility Datadog CI Visibility for Depot CI is in private beta. To request access, [reach out to support](/help). Depot CI can send your CI runs to [Datadog CI Visibility](https://docs.datadoghq.com/continuous_integration/pipelines/custom/), so you can monitor Depot CI pipeline health next to the rest of your pipelines. Because Depot CI runs aren't GitHub Actions runs, Datadog's webhook ingestion never sees them — Depot emits the runs directly to Datadog's custom pipeline API instead. ## Set up Datadog CI Visibility for Depot CI 1. In the Depot dashboard, go to [Depot CI settings](/orgs/_/workflows/settings/general) and turn on the **Datadog CI Visibility** toggle. 2. Add a CI secret named `DD_API_KEY` with your Datadog API key: ``` DD_API_KEY= ``` Nothing is sent to Datadog until both the toggle is enabled and this secret is present. In Depot CI, a repo-scoped secret takes precedence over an org-scoped one, so you can point individual repositories at different Datadog accounts. 3. Optional: If your Datadog account is on a non-default region, add a `DD_SITE` secret to select it. The region defaults to `datadoghq.com`: ``` DD_SITE=datadoghq.com ``` ## How Depot CI runs appear in Datadog Depot maps each run onto Datadog's pipeline model: * Each **workflow run** becomes a Datadog **pipeline**. * Each **job** in the run becomes a Datadog **job**. * Each **step** in a job becomes a Datadog **step**. Retries are represented faithfully: * A **retry** appears as a distinct run of the same pipeline. * A **partial retry** — rerunning only the failed jobs, or a single job — is marked as a partial retry in Datadog. ## Usage notes * A cancelled step reports as an error in Datadog. * A skipped or never-run step is omitted rather than reported. * Emission to Datadog is best-effort. If Datadog is unavailable, the Datadog reporting is skipped and the CI run continues. ## Depot CI logs ## Find a workflow run Go to the [Depot CI page](/orgs/_/workflows) to see workflow runs across your repositories. The sidebar lists runs with their workflow name, repository, status, and relative timestamp. Click a workflow run to open its details. Depot CI workflow runs Use these controls to find the run you need: * **Search**: Type in the search box at the top to filter workflows by name. * **Status tabs**: Click **All**, **Running**, **Failed**, or **Passed** to filter by run status. You can also filter by repository, trigger, SHA, run ID, PR number or workflow ID. From the command line, you can use [`depot ci run list`](/docs/cli/reference/depot-ci#depot-ci-run-list) to list recent queued and running runs, and [`depot ci status`](/docs/cli/reference/depot-ci#depot-ci-status) to view the status of a specific run. ## View logs for a job Select a job to load its logs. The log viewer displays the full output organized by step. Each step shows its name on the left and duration on the right. A visual timing bar indicates relative duration for longer-running steps. Depot CI job logs Click a step name to collapse or expand its log output. Use **Expand all** in the toolbar to open all steps at once. Use the filter box to search logs by keyword, and the download or copy buttons to export the log output. Depot CI job logs You can also fetch logs from the command line with [`depot ci logs`](/docs/cli/reference/depot-ci#depot-ci-logs), which prints a job attempt's log output to stdout. Add `--follow` (or `-f`) to stream a running job's logs as they're produced, or pass `--follow` to [`depot ci run`](/docs/cli/reference/depot-ci#depot-ci-run) to start a run and follow its logs in one command. To read logs programmatically, use the [Depot CI API](/docs/api/ci/reference). ## Link to a job from within a workflow Every Depot CI job sets a `DEPOT_JOB_URL` environment variable containing a direct link to that job attempt's page in the Depot dashboard. Use it to surface the run from any step, such as a Slack message, a GitHub comment, or a custom webhook notification. For example: ```yaml - name: Notify Slack run: | curl -X POST $SLACK_WEBHOOK \ -H 'Content-type: application/json' \ -d "{\"text\": \"Build finished: $DEPOT_JOB_URL\"}" ``` For the list of variables Depot CI sets in every job, see the [environment variables reference](/docs/environment-variables#depot-ci). ## Depot CI metrics ## View job metrics From the [Depot CI page](/orgs/_/workflows), click a workflow run and select a specific job to view its metrics. ### Sandbox resource utilization The **Resource Usage** section above the logs displays CPU and memory utilization graphs for the job's sandbox. Use these graphs to determine if jobs are resource-constrained or over-provisioned. Depot CI resource usage Annotations on the graph mark the start of each step. Click an annotation to jump to the corresponding step in the log output. ### Step-level timing Each step in the job shows its name and duration. A visual timing bar indicates relative duration for longer-running steps, making it easy to spot bottlenecks like dependency installation or test execution. Depot CI step-level timing ### AI failure diagnosis When a job fails, Depot analyzes the failure and displays a **Failure Diagnosis** section at the top of the job detail view when a diagnosis is available. The diagnosis includes: * **What went wrong**: An AI-generated explanation of the root cause based on the job's logs and error output. * **Suggested fix**: Actionable steps to resolve the issue. Depot CI failure diagnosis For deeper investigation, you can [debug a failing job with SSH](/docs/ci/how-to-guides/debug-with-ssh) to connect directly to the sandbox environment. For viewing and navigating job logs, see [Depot CI logs](/docs/ci/observability/depot-ci-logs). You can also fetch job and run metrics programmatically with the [Depot CI API](/docs/api/ci/reference). ## Depot CI test results Test results are in beta and free to use during the beta period. If you have suggestions to make this feature better, [reach out](/help) and let us know. Depot CI can ingest JUnit XML test reports from your jobs and display them in the Depot dashboard. Add the `depot/test-report-action` to your workflow after your test step, pointed at your test runner's JUnit XML output. ## Report test results from a Depot CI job Add the [`depot/test-report-action`](https://github.com/depot/test-report-action) action to your workflow after the step that runs your tests. Point it at the directory, file, or glob containing the JUnit XML output: ```yaml jobs: test: runs-on: depot-ubuntu-24.04 steps: - uses: actions/checkout@v4 - name: Run tests run: | mkdir -p test-results pnpm exec vitest run \ --reporter=default \ --reporter=junit \ --outputFile.junit=test-results/junit.xml - name: Report tests uses: depot/test-report-action@v1 if: ${{ !cancelled() }} with: path: test-results/ ``` Depot CI uses native sandbox OIDC for authentication automatically. You don't need a `DEPOT_TOKEN` secret and you don't need to set `id-token: write` when this action runs in Depot CI. `if: ${{ !cancelled() }}` makes sure the action runs even when an earlier step (like your tests) fails, which is when you most want the results uploaded. The action still skips when the job is cancelled. `path:` is the path or glob the action uses for JUnit XML files. When `path` points at a directory, the action uploads XML files under that directory recursively. Newline-separated values are valid if you want to report multiple paths in one step. See the action's [README](https://github.com/depot/test-report-action) for examples. ### Supported JUnit XML producers Depot accepts JUnit XML directly, so most test runners work when they can write that format. These runners, adapters, and more work out of the box: * Node.js built-in test runner (`node:test`) * Vitest * Jest (via `jest-junit`) * Playwright * pytest * RSpec * gotestsum ### Reporting multiple test suites from one job If a job produces JUnit XML in more than one location, pass them all to a single step via the `path:` input: ```yaml - name: Report tests uses: depot/test-report-action@v1 if: ${{ !cancelled() }} with: path: | test-results/unit.xml test-results/integration/ test-results/e2e/**/*.xml ``` If the same job calls the action more than once, use one step per upload and set the action's `key:` input to a unique value so each upload invocation can be deduplicated separately. Test suites are still derived from the JUnit XML contents. ```yaml - name: Report unit tests uses: depot/test-report-action@v1 if: ${{ !cancelled() }} with: key: unit path: test-results/unit/ - name: Report integration tests uses: depot/test-report-action@v1 if: ${{ !cancelled() }} with: key: integration path: test-results/integration/ ``` If `key:` isn't set, the action falls back to `$GITHUB_ACTION`, then to `default`. ## View results in the Depot dashboard You can view test results in the Depot dashboard in three places: an overview inlined on each job, a job-based test results page, and an org-wide analytics dashboard that tracks failure rates, flaky tests, slow tests, and recurring failures over time. ### Inline on a job From the [Depot CI page](/orgs/_/workflows), open a workflow run and select a job. The job page shows a **Tests** tab in the **Outputs** section with pass/fail/error/skip counts and a list of failing tests, each with its failure details inlined. Click **View failures**, **View errors**, or **View all** (depending on what's reported) to open the full test results page. If a previously failing test passes on rerun, the inline section marks the result with a **Passed on rerun** badge. ### Job-level test results page The job-level test results page (linked from the inline section above) lists every test in the selected job attempt. Use the filters at the top to narrow by status (passed, failed, errored, skipped) and search by test name, suite, class, or file. Each failing row expands to show the failure message, failure type, stack trace, and captured `stdout` and `stderr`. For sharded or matrix jobs, use **View group results** to see related shard jobs together for the selected attempt. The grouped view shows each shard's status, duration, result counts, and reported tests, with links back to the individual job result pages. To create those shards from the timing data in these reports, see [Split tests by timing](/docs/ci/how-to-guides/split-tests). The page includes the following historical context for each test: * **Recurring**: A badge showing how often this test has failed across recent runs for the same test identity. * **Latest occurrence**: Marks the row as the most recent run where the test had this status. * **View latest failure**: A link to the most recent failure when you're viewing an older one. * **Passed on rerun**: A badge indicating a failure that was resolved by a later rerun on the same SHA. ### Org-wide analytics For trends across all your test runs, open the [Test Results Analytics page](/orgs/_/test-results/analytics). The page analyzes test results ingested from Depot CI jobs and GitHub Actions jobs in the organization, so you can step out of a single job and look for patterns over time. Use the **CI** filter at the top of the page to scope the dashboard to **Depot CI** only, or compare Depot CI against GitHub Actions side by side. Common reasons to open the analytics page: * A test is failing and you want to know if it's a one-off or a recurring problem. The **Most frequent test failures** card ranks tests by failure count, and the **Recent events** table links each failure back to its source run. * You're hunting flaky tests. The **Possibly flaky tests** card surfaces tests that have both passed and failed on the same commit, picking up reruns triggered from Depot CI. * A run feels slow and you want to find the bottleneck. The **Test duration trends** chart and **Top 5 slowest tests** list rank by P95 duration so you can target the tests costing the most time. Filter by timeframe (past 7, 30, 60, or 90 days, or month to date), repository, branch, suite, file, class, or test name. Filter state is stored in the URL, so you can share a link to a specific view. For a full breakdown of every section on the page, see [Test results analytics by organization](/docs/observability#test-results-analytics-by-organization). ## View results from the CLI The `depot tests` command lists parsed test results from your terminal, so you can pull up a failure without leaving the shell. Pass a job, attempt, or run ID. A job ID resolves to its latest attempt, and an attempt ID points at one specific attempt. A run ID resolves to the latest attempt only when the run has a single job: if the run has more than one job, narrow it with `--job` (and `--workflow` when the same job name appears in multiple workflows). ```bash # List results for a job (resolves to its latest attempt) depot tests # Point at one specific attempt depot tests # Pass a run ID when the run has a single job depot tests # Narrow a multi-job run to one job depot tests --job test # Show only failures depot tests --status failed ``` * `--job` selects a job by name when the ID is a run, and `--workflow` disambiguates when that job name exists in more than one workflow (for example, `--workflow ci.yml`). * `--ci` restricts the lookup to Depot CI results, since Depot otherwise tries the ID as both Depot CI and GitHub Actions results. * `--status` (passed, failed, errored, or skipped, repeatable), `--suite`, `--test`, `--class`, and `--file` narrow the output. * `--output` sets the format: a table in a terminal, JSON when piped, or JSON always with `--output json`. * `--token` and `--org` handle auth: the command uses your `depot login` session unless you pass `--token`, and `--org` is required when you belong to more than one organization. For the full list of flags and usage, see [`depot tests`](/docs/cli/reference/overview#depot-tests) in the CLI reference. ## Pricing Test results are free to use during the beta period. ## GitHub checks GitHub checks are status indicators that show whether CI jobs passed or failed for a given commit. When Depot CI runs a workflow, it automatically reports a check for each job on the corresponding commit. These checks appear in several places in GitHub: * **Pull requests**: at the bottom of the Conversation tab and in the Checks tab * **Commits**: from the Commits page, click the status icon (green checkmark, red X, or yellow dot) for any commit see a list of checks Each check is named after the workflow and job, for example `CI / build` or `Deploy / deploy-production`. You can identify Depot CI checks by the Depot icon in the checks list. As jobs progress, Depot updates the check status in real time. To view the job in context of the full run in Depot, click **Details** on a check to open the Depot CI page for the corresponding job. When you rerun a workflow or retry a failed job, Depot updates the existing check rather than creating a duplicate. ## OIDC with Depot CI Depot CI supports OpenID Connect (OIDC) so your workflows can authenticate with cloud providers like AWS, GCP, and Azure using short-lived tokens instead of static credentials. ## How it works OIDC (OpenID Connect) is a standard for token-based authentication. Instead of storing long-lived credentials like API keys or passwords in your CI, your job receives a short-lived signed token that proves its identity. Your cloud provider verifies the token against Depot CI's public endpoint and grants access based on the claims inside it. Depot CI automatically issues a signed JSON Web Token (JWT) to each job. To use OIDC with Depot CI you'll need to configure a trust relationship between Depot CI and your cloud provider, then request the token in your workflows and use it to authenticate. ## The Depot CI OIDC token Each job in Depot CI receives a JWT. You must set `permissions: id-token: write` in your workflow YAML for the token to be issued. The following is an example token: ```json { "actor": "my-username", "actor_id": "1000000", "aud": ["sts.amazonaws.com"], "base_ref": "", "event_name": "push", "exp": 1773766359, "head_ref": "", "iat": 1773766059, "iss": "https://identity.depot.dev", "job_id": "job_xxxxxxxxxxxx", "org_id": "org_xxxxxxxxxxxxxxxxxxxx", "ref": "refs/heads/main", "ref_type": "branch", "repository": "my-org/my-repo", "repository_id": "123456789", "repository_owner": "my-org", "repository_owner_id": "12345678", "repository_visibility": "private", "run_attempt": "1", "run_id": "run_xxxxxxxxxxxx", "run_number": "42", "sha": "a1b2c3d4e5f6a1b2c3d4e5f6a1b2c3d4e5f6a1b2", "sub": "spiffe://identity.depot.dev/org/org_xxxxxxxxxxxxxxxxxxxx/ci/github/my-org/my-repo/ref/refs/heads/main/sandbox/snd_xxxxxxxxxxxx", "workflow": ".depot/workflows/ci.yaml", "workflow_ref": "my-org/my-repo/.depot/workflows/ci.yaml@refs/heads/main", "workflow_sha": "a1b2c3d4e5f6a1b2c3d4e5f6a1b2c3d4e5f6a1b2" } ``` ## Configure OIDC with your cloud provider The general steps are the same for any OIDC-compatible provider: 1. Add `https://identity.depot.dev` as a trusted OIDC issuer. 2. Create a role or service account that grants access based on token claims. 3. Request the token in your workflow and use it to authenticate. ### Example: Configure OIDC with AWS 1. Add Depot CI as an identity provider in AWS IAM. * Provider URL: `https://identity.depot.dev` * Audience: `sts.amazonaws.com` 2. Create an IAM role with a trust policy. Scope the trust policy using the `sub` claim (matching on Depot org and GitHub repository) and `aud`: ```json { "Version": "2012-10-17", "Statement": [ { "Effect": "Allow", "Principal": {"Federated": "arn:aws:iam::ACCOUNT:oidc-provider/identity.depot.dev"}, "Action": "sts:AssumeRoleWithWebIdentity", "Condition": { "StringEquals": { "identity.depot.dev:aud": "sts.amazonaws.com" }, "StringLike": { "identity.depot.dev:sub": "spiffe://identity.depot.dev/org//ci/github/my-org/my-repo/*" } } } ] } ``` The `sub` claim scopes trust to a specific Depot org and GitHub repository. 3. Use the role in a workflow. Set `permissions: id-token: write` at the job level. Depot CI automatically injects the token request credentials into the environment, so `aws-actions/configure-aws-credentials` works without any extra configuration. ```yaml jobs: deploy: runs-on: depot-ubuntu-latest permissions: id-token: write contents: read steps: - uses: actions/checkout@v4 - uses: aws-actions/configure-aws-credentials@v4 with: role-to-assume: arn:aws:iam::123456789012:role/my-role aws-region: us-east-1 - run: aws s3 ls ``` ## Migrate from GitHub Actions OIDC `permissions: id-token: write` is required in your workflow YAML, the same as GitHub Actions. The following needs to change on the cloud provider side when moving from GitHub Actions to Depot CI: | | GitHub Actions | Depot CI | | ------------------- | ------------------------------------------------------------------- | ------------------------------------------------------------------------------------------------ | | Issuer (`iss`) | `https://token.actions.githubusercontent.com` | `https://identity.depot.dev` | | Subject (`sub`) | `repo:owner/repo:ref:refs/heads/main` | `spiffe://identity.depot.dev/org//ci/github///ref//sandbox/` | | Repo/branch scoping | `sub` (encoded in the subject) | `sub` or `repository` + `ref` claims (separate conditions) | | JWKS endpoint | `https://token.actions.githubusercontent.com/.well-known/jwks.json` | `https://identity.depot.dev/keys` | To use Depot CI with OIDC, follow these steps: 1. Add `https://identity.depot.dev` as a new identity provider in your cloud provider. 2. Create a new trust policy for Depot CI. Creating a new policy rather than modifying your existing GitHub Actions trust policy lets both providers work in parallel during the transition. 3. If your existing trust policy conditions on `sub`, update it to use the Depot CI format: ``` spiffe://identity.depot.dev/org//ci/github///ref//sandbox/ ``` For more specific matches, use a wildcard: * Everything in your GitHub organization: ``` spiffe://identity.depot.dev/org//ci/github//* ``` * A specific repository: ``` spiffe://identity.depot.dev/org//ci/github///* ``` * A specific branch: ``` spiffe://identity.depot.dev/org//ci/github///ref//sandbox/* ``` ## Token claim reference ### Standard claims | Claim | Description | | ----- | ------------------------------------------------------------------------------------------------ | | `iss` | Issuer: `https://identity.depot.dev` | | `sub` | `spiffe://identity.depot.dev/org//ci/github///ref//sandbox/` | | `aud` | Audience — set by the workload request (for example `sts.amazonaws.com`) | | `exp` | Expiry time (5 minutes from issuance) | | `iat` | Issued at time | ### GitHub Actions-compatible claims | Claim | Description | | ----------------------- | ------------------------------------------------- | | `repository` | `owner/repo` | | `repository_owner` | Repository owner | | `repository_id` | GitHub repository ID | | `repository_owner_id` | GitHub owner ID | | `repository_visibility` | `public`, `private`, or `internal` | | `ref` | Git ref, for example `refs/heads/main` | | `ref_type` | `branch` or `tag` | | `sha` | Commit SHA | | `actor` | Triggering user login | | `actor_id` | Triggering user ID | | `event_name` | Trigger event, for example `push`, `pull_request` | | `head_ref` | PR head branch | | `base_ref` | PR base branch | | `workflow` | Workflow file path | | `workflow_ref` | `owner/repo/path@ref` | | `workflow_sha` | Commit SHA of the workflow file | | `run_id` | Workflow run ID (groups jobs in a workflow run) | | `run_number` | Run number for the workflow | | `run_attempt` | Attempt number | ### Depot-specific claims | Claim | Description | | -------- | --------------------- | | `org_id` | Depot organization ID | | `job_id` | Depot CI job ID | ## Depot CI Depot CI is a programmable CI system for engineers and agents. Workflows in Depot CI run entirely on Depot compute with built-in job visibility, debuggability, and control. GitHub Actions is the first syntax Depot CI supports: migrate your existing GitHub Actions workflows, and get fast, reliable runs on optimized infrastructure. ## Switching to Depot CI Switching to Depot CI starts with one command: `depot ci migrate`. The interactive wizard helps you install our GitHub App, discovers your GitHub Actions workflows, analyzes them for compatibility, and copies selected workflows and any local actions to a `.depot/` directory. Secrets and variables can then be automatically imported from GitHub in a separate step with `depot ci migrate secrets-and-vars`. Your original `.github/` workflows continue running on GitHub in parallel until you're ready to switch over to Depot CI completely. For a step-by-step walkthrough, see the [quickstart](/docs/ci/quickstart). ## Feature summary {/* prettier-ignore */}
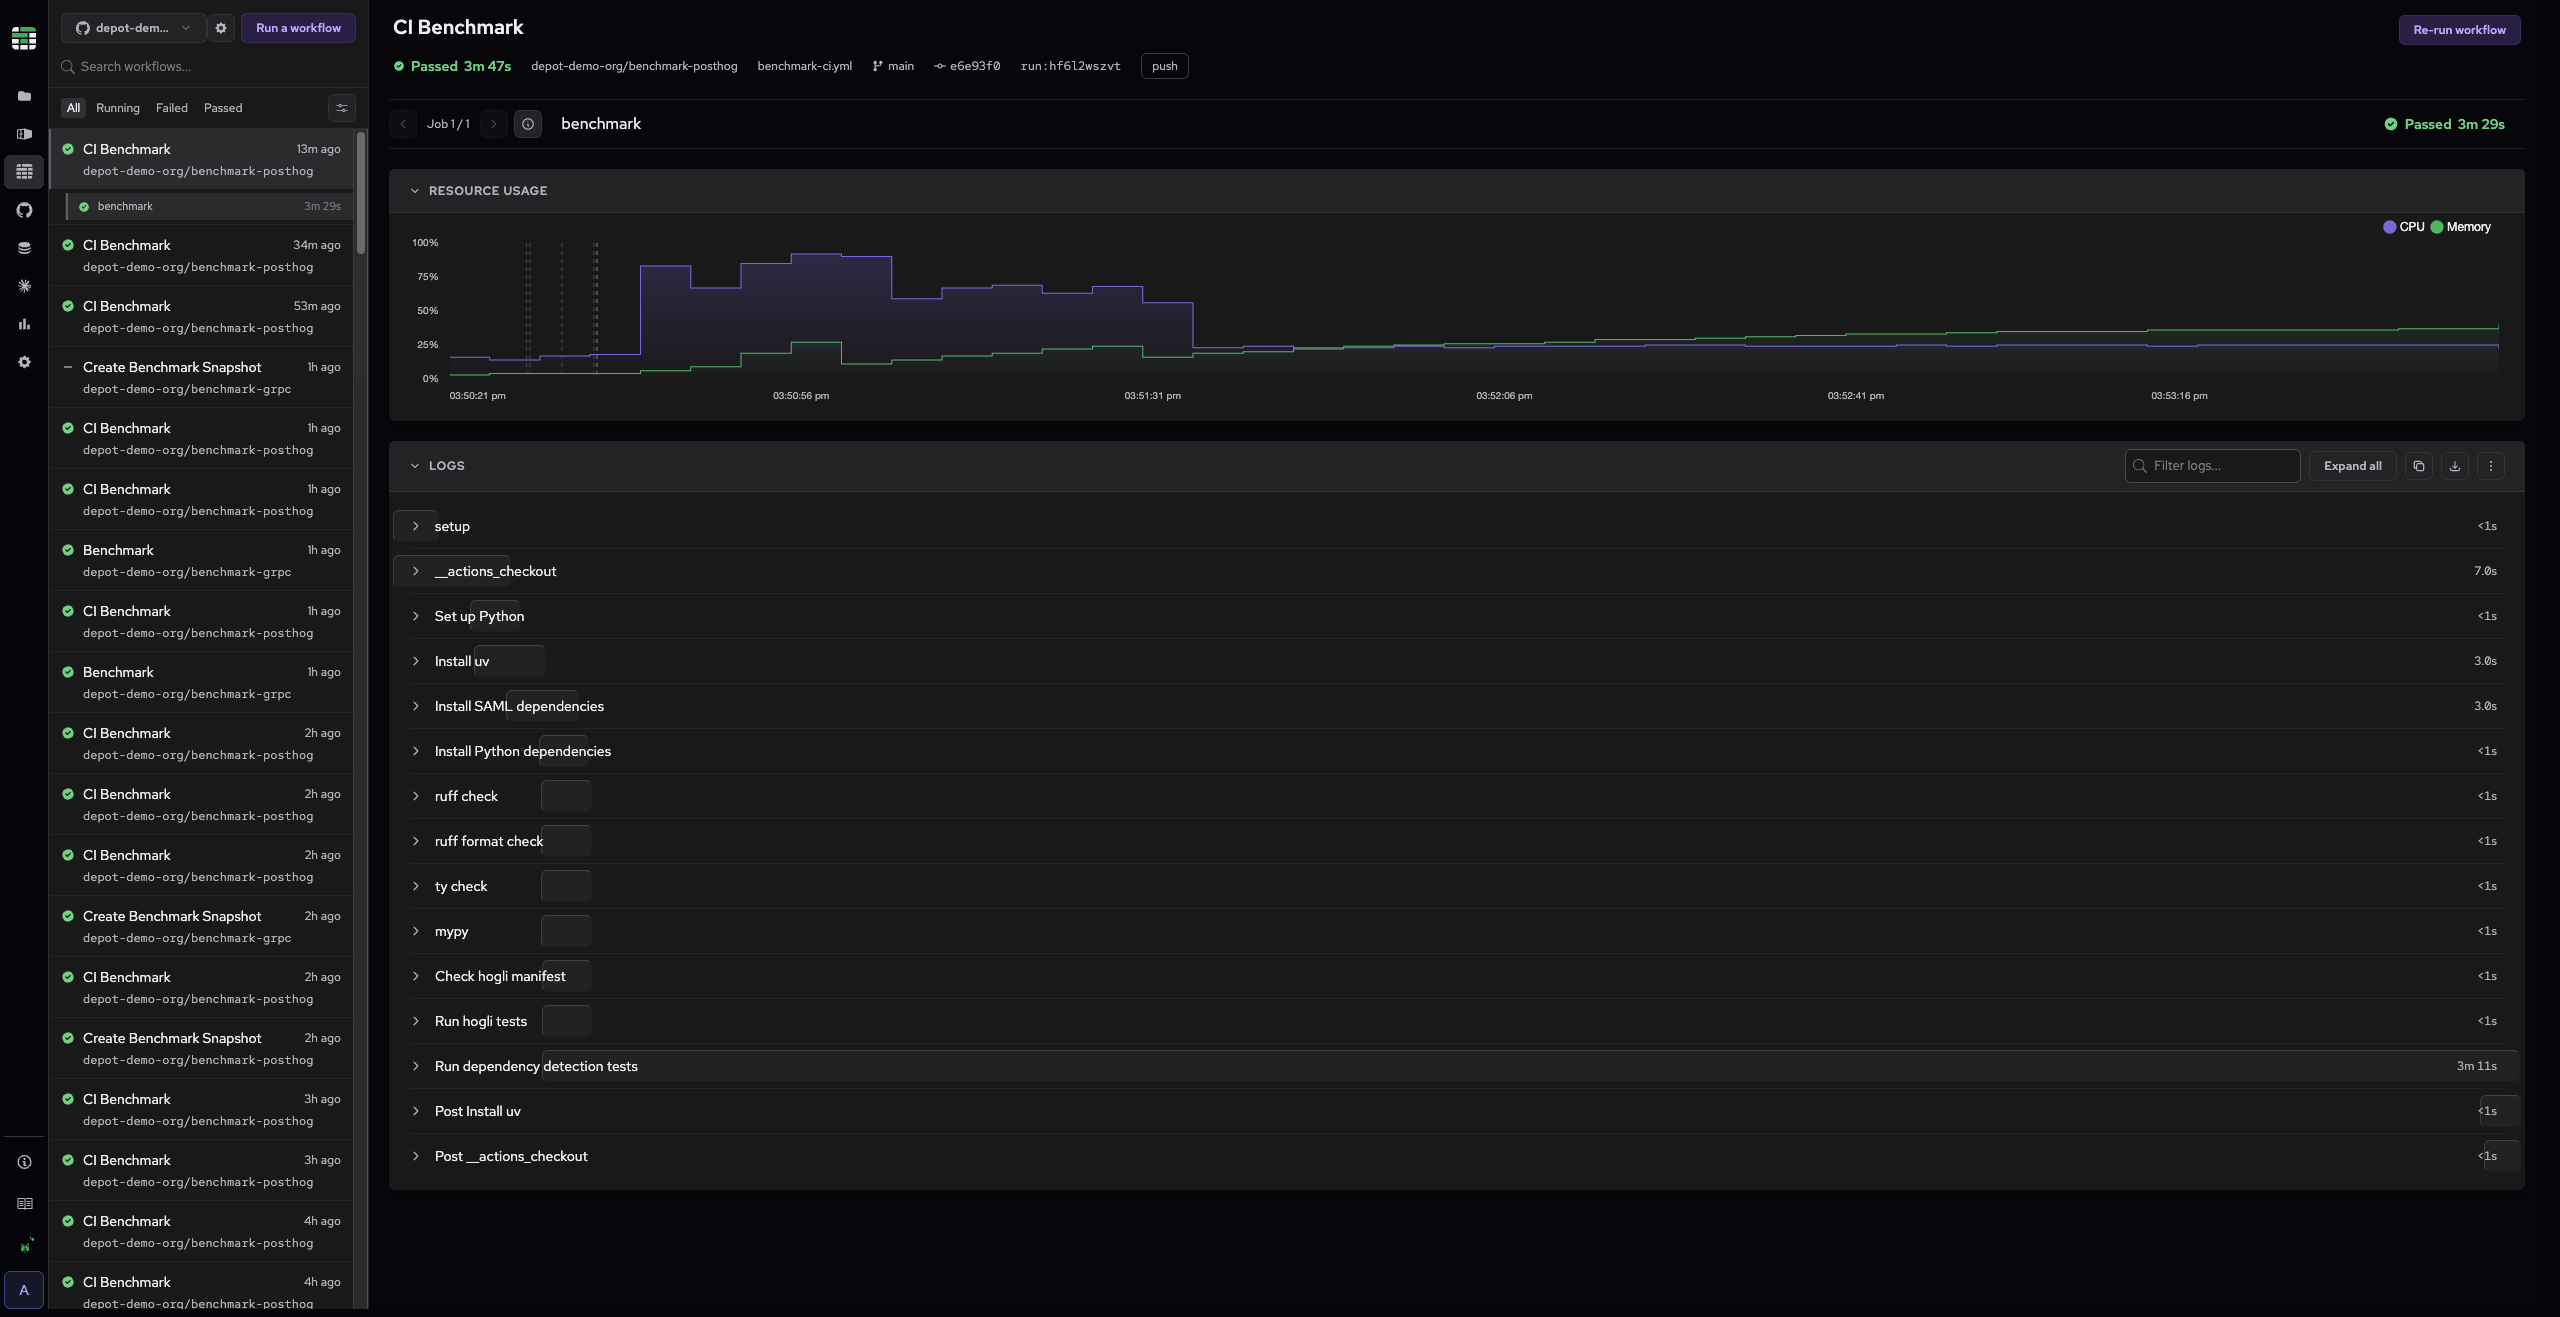
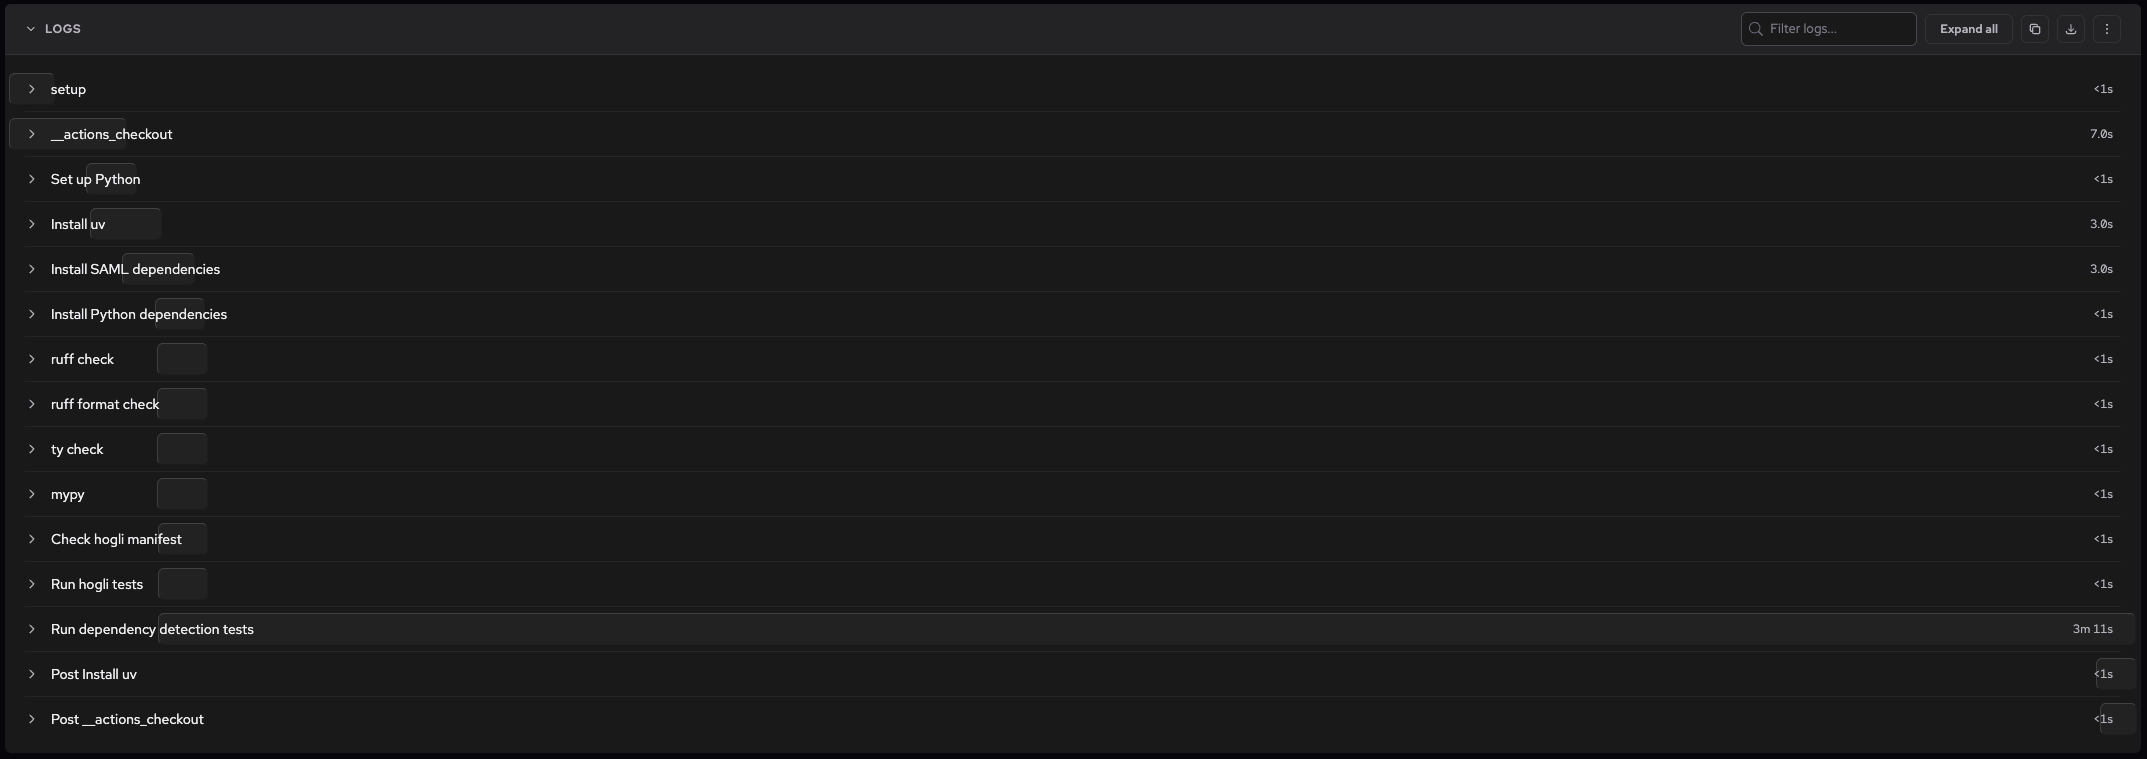
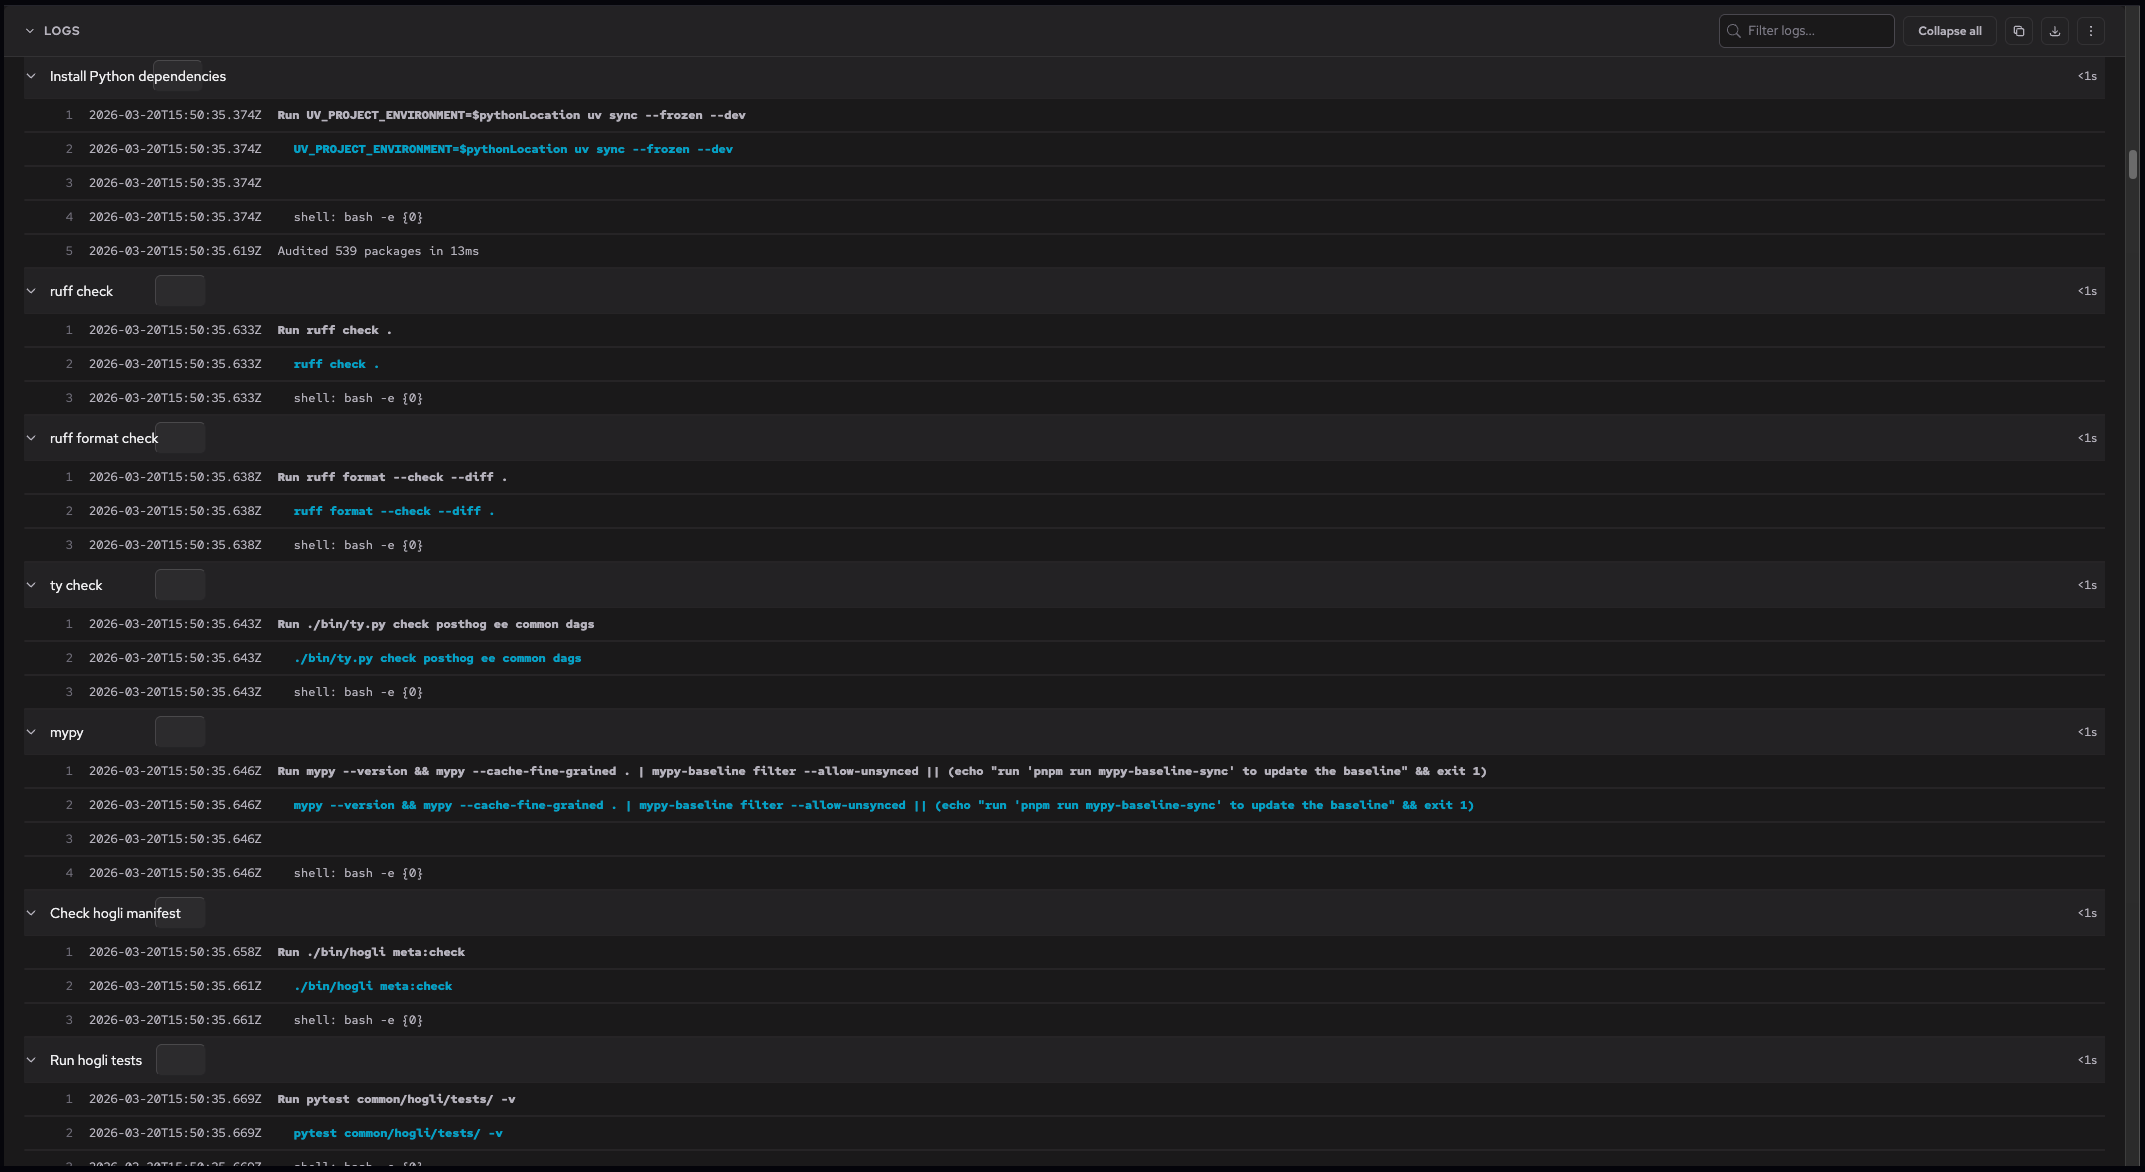


GitHub Actions compatibility
  • Runs your existing GitHub Actions YAML workflows.
  • Supports push, pull request, issue comment, pull request review, deployment status, schedule, workflow dispatch, workflow call, workflow run, and merge group triggers.
Fast runs
  • Commit to running job in 2-3 seconds.
  • Performance-tuned compute with pre-warmed sandboxes.
  • Depot Cache is built in with no configuration required.
Custom images
  • Build a [custom image](/docs/ci/how-to-guides/custom-images) with your dependencies and tooling pre-installed and use it from any Depot CI workflow.
  • Jobs start with everything they need in the sandbox environment instead of rebuilding from scratch on every run.
Nested virtualization
  • /dev/kvm is available in every Depot CI sandbox with no extra configuration.
  • Run Android Emulator, QEMU/KVM, VM-based test environments, and other workloads that need hardware virtualization inside CI jobs.
Built-in debuggability
  • Connect to the sandbox running your job [using SSH](/docs/ci/how-to-guides/debug-with-ssh) .
  • CPU and memory metrics are captured for every job.
  • Search logs across runs from the dashboard. Retrieve logs for runs via the CLI.
Local workflow runs
  • [Run a workflow against your local working tree](/docs/ci/how-to-guides/manage-workflow-runs#run-workflows-with-local-changes) without pushing to GitHub first.
  • Uncommitted changes are automatically patched into the job after checkout.
  • Pass --job to run a subset of jobs.
OIDC for cloud authentication
  • Authenticate workflows with AWS, GCP, and Azure using short-lived [OIDC tokens](/docs/ci/oidc) instead of static credentials.
API and CLI for engineers and agents
  • Trigger runs, fetch logs, and monitor job status from the [CLI](/docs/cli/reference/depot-ci) or the [Depot CI API](/docs/api/ci/reference) .
  • Works for engineers and agents: no GitHub event required to start a local run.
Workflows, logs, and metrics in the dashboard
  • View and manage all workflows from the Depot CI page in your Depot dashboard.
  • Retry failed jobs without re-running the entire workflow.
  • See job-level metrics, step-level timing, and CPU and memory usage for your workflows.
## How Depot CI works Depot CI is built on top of Switchyard. Switchyard is a system that takes an arbitrary task and ensures it is executed across a fleet of compute. Switchyard has two components: * **Orchestrator**: Schedules tasks across the compute fleet. Handles dependencies between jobs and monitors progress. * **Compute**: Executes workflow jobs. Receives a task from the orchestrator, provisions the compute resources needed (sandboxes), and executes the task. Depot CI translates CI workflows and pipelines for the Switchyard orchestrator. The first syntax Depot CI supports is GitHub Actions YAML. Depot CI handles compatibility with how a standard GitHub Actions runner behaves, including environment variables, expressions, and action execution. When you add a workflow file to `.depot/workflows/` in your repository and merge it to your default branch, Depot registers automatic triggers for that workflow. When a trigger fires, the orchestrator schedules jobs across the compute fleet and sends logs back to the Depot dashboard and CLI. While Depot CI today runs GitHub Actions YAML, the system is programmable. The [Depot CI API](/docs/api/ci/reference) exposes workflows, runs, jobs, logs, and metrics as endpoints you can call directly from your own CI frontend. ## Compatibility with GitHub Actions Depot CI supports the most commonly used GitHub Actions syntax, including workflow-, job-, and step-level configuration, expressions, and all major action types. For the full compatibility matrix, see [Depot CI compatibility with GitHub Actions](/docs/ci/compatibility). ## Pricing Depot CI sandbox usage is tracked and billed by the second, with no one-minute minimum per run. The minutes included with each plan are based on the smallest sandbox size (2 CPUs/8 GB). The included plan minutes aren't a hard cap. Additional usage is billed automatically. For sandbox sizes and additional usage pricing, see [Depot CI sandboxes](#depot-ci-sandboxes). | | Developer plan | Startup plan | Business plan | | -------------------- | ---------------------------------------------------- | ----------------------------------------------------- | ------------- | | **Plan cost** | $20/month | $200/month | Custom | | **Depot CI minutes** | 2,000 included min/month
+ $0.0001/second after | 20,000 included min/month
+ $0.0001/second after | Custom | | **Cache** | 25 GB included
+ $0.20/GB/month after | 250 GB included
+ $0.20/GB/month after | Custom | Try out Depot free for 7 days, no credit card required → Plans also include [container build](/docs/container-builds/overview) minutes and [GitHub Actions runner](/docs/github-actions/overview) minutes. See [Pricing](/pricing) for more about plan features and costs. ## Depot CI sandboxes Depot CI runs your workflows in x86\_64 sandboxes. Sandboxes can use from 2 CPUs/8 GB of memory up to 64 CPUs/256 GB of memory. The default sandbox image is based on Ubuntu 24.04. Larger sandboxes consume the Depot CI minutes included in your plan faster and cost more per second for extra usage. For example, a 4-CPU sandbox uses 2 minutes for every 1 minute of running time. Use a *Label* from the following table in the `runs-on` key of your workflow. For [custom images](/docs/ci/how-to-guides/custom-images), use a *Sandbox size* paired with a Depot Registry custom image URL in the `runs-on` key. | Label | Sandbox size | CPUs | Memory | Per-second price | Plan minutes multiplier | | :---------------------- | :----------- | :--- | :----- | :--------------- | :---------------------- | | `depot-ubuntu-24.04` | `2x8` | 2 | 8 GB | $0.0001 | 1x | | `depot-ubuntu-24.04-4` | `4x16` | 4 | 16 GB | $0.0002 | 2x | | `depot-ubuntu-24.04-8` | `8x32` | 8 | 32 GB | $0.0004 | 4x | | `depot-ubuntu-24.04-16` | `16x64` | 16 | 64 GB | $0.0008 | 8x | | `depot-ubuntu-24.04-32` | `32x128` | 32 | 128 GB | $0.0016 | 16x | | `depot-ubuntu-24.04-64` | `64x256` | 64 | 256 GB | $0.0032 | 32x | Depot CI doesn't provide sandboxes for Arm, macOS, or Windows. Labels for these runner types (as listed in [Depot GitHub Actions runner types](/docs/github-actions/runner-types)) aren't compatible with Depot CI. ## FAQ Depot CI is a programmable CI system for engineers and agents. It's an entirely new CI engine, not a wrapper around GitHub Actions. Depot CI sits on top of Depot's own orchestrator and compute layer, built from the ground up for performance. GitHub Actions is the first workflow syntax Depot CI supports, so you can migrate your existing workflows from .github/ to .depot/ with a single command and run them on Depot's infrastructure without any YAML rewrites. Jobs start in 2-3 seconds, Depot Cache is built in with no configuration required, and everything has an API/CLI, so both engineers and agents can trigger runs, fetch logs, and monitor jobs without a GitHub event or the dashboard. In most cases, no. Depot CI is designed to run your existing GitHub Actions YAML without modification. The depot ci migrate command copies your workflows and analyzes them for any compatibility issues before you commit. Yes. After migrating, your .github/workflows/ files remain untouched and continue running on GitHub. Depot CI runs the copies in .depot/workflows/ in parallel. This lets you test Depot CI without any risk to your existing workflows. Be mindful of workflows that write to external systems (deploys, artifact updates) since they will execute twice. Yes. The depot ci run command submits a local workflow file to Depot CI and applies any uncommitted changes automatically. You can also pass --job to run a subset of jobs and --ssh-after-step{' '} to open an interactive SSH debug session at a specific step. ## Next steps * [Quickstart for Depot CI](/docs/ci/quickstart) * [Compatibility with GitHub Actions](/docs/ci/compatibility) * [Manage secrets and variables](/docs/ci/how-to-guides/manage-secrets-and-variables) * [Depot CI API reference](/docs/api/ci/reference) ## Quickstart for Depot CI Migrate your GitHub Actions workflows to run entirely on Depot compute with built-in job visibility, debuggability, and control. During migration and testing, we recommend keeping your GitHub Actions workflows running alongside your Depot CI workflows. ## Prerequisites You'll need a [Depot account](https://depot.dev/sign-up). ## Install the Depot CLI Install the [Depot CLI](/docs/cli/reference/overview) on your machine to work with Depot CI from your terminal or coding agent. * **macOS** ```shell brew install depot/tap/depot ``` * **Linux** ```shell curl -L https://depot.dev/install-cli.sh | sh ``` * **All platforms** Download the binary file for your platform from the [Depot CLI releases page](https://github.com/depot/cli/releases) in GitHub. ## Connect to GitHub Depot CI uses the Depot Code Access app to read your repository and register workflow triggers. If you use Claude Code remote agent on Depot, you already have this installed. 1. Go to [Organization Settings](/orgs/_/settings) in your Depot dashboard. 2. In the **GitHub Code Access** section, click **Connect to GitHub**. 3. Follow the prompts to install the Depot Code Access app into your GitHub organization. ## Migrate your workflows The `depot ci migrate` command automates migrating your GitHub Actions workflows to Depot CI. From the root of your repository, run: ```bash depot ci migrate ``` The command runs a preflight check, then copies and transforms your workflows: 1. Validates authentication and checks that the [Depot Code Access app](#connect-to-github) is installed with the correct permissions. 2. Discovers all workflow files in `.github/workflows/`. 3. Prompts you to select which workflows to migrate. 4. Copies selected workflows to `.depot/workflows/` and any local actions to `.depot/actions/`, applies compatibility fixes, and adds inline comments for any changes. After migration, the command reports any secrets and variables referenced by the migrated workflows. To import them, see [Import secrets and variables](#import-secrets-and-variables) below. For a full description of flags and subcommands, see [`depot ci migrate`](/docs/cli/reference/depot-ci#depot-ci-migrate) in the Depot CLI reference. ### Sandbox labels and sizes The `depot ci migrate` command changes standard `ubuntu-24.x` or `ubuntu-latest` runner labels in your workflow to the equivalent Depot CI sandbox label and notes the change in the migrated file. Nonstandard labels become `depot-ubuntu-latest` and expressions are preserved as-is. For Depot CI sandbox sizes and labels, see [Depot CI sandboxes](/docs/ci/overview#depot-ci-sandboxes). ## Import secrets and variables If your workflows reference GitHub secrets or variables, run `depot ci migrate secrets-and-vars` to import them into Depot CI: ```bash depot ci migrate secrets-and-vars ``` This command creates a temporary GitHub Actions workflow that reads your existing GitHub secrets and variables and imports them into Depot CI. The workflow runs once and then you can delete it. The command prints a GitHub Actions run URL where you can monitor the workflow progress. `depot ci migrate secrets-and-vars` is the fastest path if you have many secrets. You can also add secrets and variables manually using the CLI or dashboard. See [Manage secrets and variables](/docs/ci/how-to-guides/manage-secrets-and-variables) for details. If your workflows authenticate with cloud providers using OIDC, see [OIDC with Depot CI](/docs/ci/oidc). ## Merge the migrated workflows Push and merge the changes so that automatic workflow triggers (like `push` and `pull_request`) are registered with Depot CI. **Important**: After you merge, the workflows run in both GitHub and Depot CI. Any workflows that deploy, update artifacts, or cause any changes in external systems will execute twice. 1. Commit the new `.depot/` directory and push. For example: ```bash git add .depot/ git commit -m "Add Depot CI workflows" git push ``` 2. Merge the changes into your default branch. If your workflows include a `push` trigger on the default branch, merging starts your first run on Depot CI. Go to the [Depot CI page](/orgs/_/workflows) in your Depot dashboard to see it. ## Next steps ### Check on your workflows After merging, go to the [Depot CI page](/orgs/_/workflows) in your Depot dashboard to confirm your workflows ran successfully. Compare the results against your GitHub Actions runs to make sure everything behaves as expected. You can also check run status from the CLI: ```bash depot ci run list depot ci status ``` ### Run a workflow locally Use `depot ci run` to test a workflow against your local working tree without pushing to GitHub first: ```bash depot ci run --workflow .depot/workflows/ci.yml ``` If you have uncommitted changes, they're automatically included in the run. Pass `--job` to run a subset of jobs: ```bash depot ci run --workflow .depot/workflows/ci.yml --job build --job test ``` ## Authentication The Depot CLI supports token-based authentication and OIDC trust relationships for container builds. For local development, use [`depot login`](/docs/cli/reference/overview#depot-login) to authenticate with a [user access token](#user-access-tokens). For CI, we recommend using an [OIDC trust relationship](#oidc-trust-relationships), but you can also use an [organization token](#organization-tokens) or a [project token](#project-tokens). ## Tokens Depot supports [Organization](#organization-tokens), [Project](#project-tokens), [User](#user-access-tokens), and [Pull](#pull-tokens) tokens. Each token type grants full access to different Depot services depending on its scope: | Service | User token | Organization token | Project token | Pull token | | ---------------- | ---------- | ------------------ | ------------------ | ------------- | | Container Builds | ✅ | ✅ | ✅ (project-scoped) | — | | Registry | ✅ | ✅ | ✅ (project-scoped) | ✅ (read-only) | | Depot CI | ✅ | ✅ | — | — | | Cache | ✅ | ✅ | — | — | | Agents | ✅ | ✅ | — | — | | API | ✅ | ✅ | — | — | ### User access tokens User access tokens are tied to your Depot account and grant access to every project in every organization you belong to. When you run `depot login`, Depot authenticates your account and stores a user access token on your machine that all subsequent builds use by default. Use user tokens only for local development, not in CI environments. To generate a user access token: 1. Go to your [Account settings](/settings) in the Depot dashboard. 2. In the **API Tokens** section, enter a description for your token. 3. Click **Create token**. 4. Copy the token and save it securely. You won't be able to retrieve the value again from the dashboard. ### Organization tokens Organization tokens are scoped to a single organization. They are not tied to a user account. To generate an organization token: 1. Go to your [Organization Settings](/orgs/_/settings) page in the Depot dashboard. 2. In the **API Tokens** section, enter a description for your token. 3. Click **Create token**. 4. Copy the token and save it securely. You won't be able to retrieve the value again from the dashboard. ### Project tokens Project tokens are scoped to a single project in your organization. They are not tied to a user account, making them ideal for CI environments where OIDC is not available. To generate a project token: 1. Go to your [Projects page](/orgs/_/projects) in the Depot dashboard. 2. Click on a project to open the details page. 3. Click **Settings**. 4. Under **Project Tokens**, enter a token description and click **Create token**. 5. Copy the token and save it securely. You won't be able to retrieve the value again from the dashboard. ### Pull tokens Pull tokens are short-lived, read-only tokens scoped to the Depot Registry. They grant pull access only and cannot be used to push images or authenticate any other Depot service. Use them in environments that only need to pull images, like production deployments or CI jobs pulling base images. Generate a pull token with the Depot CLI: ```shell depot pull-token --project ``` Pull tokens expire automatically and are not listed or manageable from the dashboard. ### Token resolution Most Depot CLI commands accept the `--token` flag, which lets you pass an organization, user, or project token directly. The CLI resolves tokens in the following order: 1. `--token` flag 2. `DEPOT_TOKEN` environment variable 3. Token stored locally via [`depot login`](/docs/cli/reference/overview#depot-login) 4. OIDC token (if available) ## OIDC trust relationships If your CI provider supports OIDC, you can authenticate with Depot through a token exchange instead of storing static secrets. Depot integrates with [GitHub Actions OIDC](https://docs.github.com/en/actions/deployment/security-hardening-your-deployments/about-security-hardening-with-openid-connect), [GitLab CI ID tokens](https://docs.gitlab.com/ci/secrets/id_token_authentication/), [CircleCI OIDC](https://circleci.com/docs/openid-connect-tokens/), [Buildkite OIDC](https://buildkite.com/docs/agent/v3/cli-oidc), and [RWX](https://www.rwx.com/). You configure a trust relationship in Depot that maps to your CI provider's identity. When a CI job runs, it requests an access token from Depot. Depot verifies the request against your configured trust relationships and, if everything matches, returns a temporary token valid only for the duration of that job. Trust relationship tokens have the same permissions as project tokens. ### Add a trust relationship for GitHub Actions 1. Go to your [Projects page](/orgs/_/projects) in the Depot dashboard. 2. Click on a project to open the details page. 3. Click **Settings**. 4. Under **Trust Relationships**, click the **Add trust relationship**. 5. Select GitHub as the provider. 6. Enter a GitHub User or Organization for the trust relationship. 7. Enter the name of the GitHub repository that will build images via Depot (Note: this is the repository name, not the full URL and it must match the repository name exactly). 8. Click **Add trust relationship**. 9. In your workflow file, add a `permissions` block to your job with `id-token: write` and `contents: read`. ### Add a trust relationship for GitLab CI 1. Go to your [Projects page](/orgs/_/projects) in the Depot dashboard. 2. Click on a project to open the details page. 3. Click **Settings**. 4. Under **Trust Relationships**, click the **Add trust relationship**. 5. Select GitLab CI as the provider. 6. Enter the GitLab namespace ID for the group or user namespace that owns the project. 7. Enter the GitLab project ID. 8. Optionally select **Restrict to protected refs** to only allow jobs from GitLab protected refs. 9. Click **Add trust relationship**. 10. In your `.gitlab-ci.yml`, configure a job ID token named `DEPOT_OIDC_TOKEN` with the audience `https://depot.dev`. ```yaml build-image: id_tokens: DEPOT_OIDC_TOKEN: aud: https://depot.dev script: - depot build . ``` ### Add a trust relationship for CircleCI 1. Go to your [Projects page](/orgs/_/projects) in the Depot dashboard. 2. Click on a project to open the details page. 3. Click **Settings**. 4. Under **Trust Relationships**, click the **Add trust relationship**. 5. Select CircleCI as the provider. 6. Enter your CircleCI organization UUID (this is found in your CircleCI organization settings). 7. Enter your CircleCI project UUID (this is found in your CircleCI project settings). 8. Click **Add trust relationship**. **Note**: CircleCI requires entering your organization and project UUID, *not* the friendly name of your organization or project. ### Add a trust relationship for Buildkite 1. Go to your [Projects page](/orgs/_/projects) in the Depot dashboard. 2. Click on a project to open the details page. 3. Click **Settings**. 4. Under **Trust Relationships**, click the **Add trust relationship**. 5. Select Buildkite as the provider. 6. Enter the organization slug (i.e., `buildkite.com/`). 7. Enter the pipeline organization slug (i.e., `buildkite.com//`). 8. Click **Add trust relationship**. ### Add a trust relationship for RWX To learn about configuring a trust relationship between Depot and RWX, see [OIDC with Depot](https://www.rwx.com/docs/oidc-depot) in the RWX docs. 1. Go to your [Projects page](/orgs/_/projects) in the Depot dashboard. 2. Click on a project to open the details page. 3. Click **Settings**. 4. Under **Trust Relationships**, click the **Add trust relationship**. 5. Select RWX as the provider. 6. Enter your RWX Vault subject you configured with RWX. 7. Click **Add trust relationship**. ## Install the Depot CLI To manage Depot builds and workflows from your terminal, install the Depot CLI. You can submit an issue or contribute to the Depot CLI in our public [GitHub repository](https://github.com/depot/cli). ## MacOS Install the Depot CLI with Homebrew: ```shell brew install depot/tap/depot ``` ## Linux Install the Depot CLI with the installation script. Install the latest version: ```shell curl -L https://depot.dev/install-cli.sh | sh ``` To install a specific version, replace `VERSION_NUMBER` with the version you want to install: ```shell curl -L https://depot.dev/install-cli.sh | sh -s VERSION_NUMBER ``` ## All platforms Download the binary file for your platform from the [Depot CLI releases](https://github.com/depot/cli/releases) page in GitHub. ## Depot CLI: Agents commands reference Reference for all `depot claude` commands. To install the Depot CLI, see [Installation](/docs/cli/installation). Other Depot product CLI references: * [CLI overview and platform commands](/docs/cli/reference/overview) * [Depot CI commands](/docs/cli/reference/depot-ci) * [Container builds commands](/docs/cli/reference/container-builds) ## `depot claude` Run Claude Code in remote agent sandboxes backed by Depot with automatic session & file system saving and resuming. Sessions are stored by Depot and can be resumed by session ID, allowing you to collaborate on any session in your organization across any environment. By default, Claude Code runs in a remote sandbox environment. Note: All flags not recognized by `depot` are passed directly through to the Claude CLI. This includes Claude flags like `-p`, `--model`, etc. **Example** Start a new Claude Code session with a custom ID: ```shell depot claude --session-id feature-auth-redesign ``` Resume an existing session: ```shell depot claude --resume feature-auth-redesign ``` Run Claude Code locally instead of in a sandbox: Note: This will only persist the Claude Code session information up to Depot, but not execute in a remote sandbox. ```shell depot claude --local --session-id local-development ``` Work with a Git repository in the sandbox: ```shell depot claude --repository https://github.com/user/repo.git --branch main --session-id repo-work ``` Use a private repository with authentication: Note: You can use the `--git-secret` flag to specify a secret containing your Git credentials, or use the `Depot Code` app installed in your GitHub organization. ```shell depot claude secrets add GITHUB_TOKEN depot claude --repository https://github.com/org/private-repo.git --git-secret GITHUB_TOKEN ``` Mix Depot flags with Claude flags: ```shell depot claude --session-id older-claude-pr-9953 --model claude-3-opus-20240229 -p "write tests" ``` Use in a script with piped input: ```shell cat code.py | depot claude -p "review this code" --session-id code-review ``` ### Flags for `claude` {/* */} | Name | Description | | ------------ | -------------------------------------------------------------------------------------------------------------------- | | `help` | Show help for claude command | | `local` | Run Claude locally instead of in a remote sandbox | | `org` | Organization ID (optional) | | `output` | Output format (json, csv) | | `repository` | Git repository URL for remote context (format: [https://github.com/user/repo.git](https://github.com/user/repo.git)) | | `branch` | Git branch to use (defaults to main) | | `git-secret` | Secret name containing Git credentials for private repositories if not using Depot Code app | | `resume` | Resume a session by ID | | `session-id` | Custom session ID for saving | | `token` | Depot API token | | `wait` | Wait for the remote Claude session to complete (by default exits after starting) | {/* */} ## `depot claude list-sessions` List all saved Claude sessions for the organization. In interactive mode, pressing Enter on a session will start Claude with that session. **Example** List sessions interactively: ```shell depot claude list-sessions ``` List sessions in JSON format: ```shell depot claude list-sessions --output json ``` ### Flags for `claude list-sessions` {/* */} | Name | Description | | -------- | --------------------------- | | `help` | Show help for list-sessions | | `org` | Organization ID | | `output` | Output format (json, csv) | | `token` | Depot API token | {/* */} ## `depot claude secrets` Manage secrets that can be used in Claude sandboxes. Secrets are stored securely and scoped to your organization, available as environment variables in sandbox sessions. ### `depot claude secrets add` Add a new secret to your organization. You'll be prompted to enter the secret value securely. **Example** ```shell # Add a secret interactively depot claude secrets add GITHUB_TOKEN # Add a secret with value (use with caution) depot claude secrets add API_KEY --value "secret-value" ``` ### `depot claude secrets list` List all secrets in your organization. Note that secret values are never displayed. **Example** ```shell depot claude secrets list ``` ### `depot claude secrets remove` Remove a secret from your organization. **Example** ```shell depot claude secrets remove GITHUB_TOKEN ``` ### Flags for `claude secrets` {/* */} | Name | Description | | ------- | ------------------------------------------------------------- | | `help` | Show help for secrets command | | `org` | Organization ID | | `token` | Depot API token | | `value` | Secret value (for add command only, prompted if not provided) | {/* */} ## Depot CLI: Container builds commands reference Reference for all `depot` commands related to container builds. To install the Depot CLI, see [Installation](/docs/cli/installation). Other Depot product CLI references: * [CLI overview and platform commands](/docs/cli/reference/overview) * [Depot CI commands](/docs/cli/reference/depot-ci) * [Agents commands](/docs/cli/reference/agents) ## Specifying a Depot project Some commands need to know which [project](/docs/container-builds/overview#projects) to route the build to. For interactive terminals calling [`build`](#depot-build) or [`bake`](#depot-bake), if you don't specify a project, you will be prompted to choose a project when using an interactive prompt and given the option to save that project for future use in a `depot.json` file. Alternatively, you can specify the Depot project for any command using any of the following methods: 1. Use the `--project` flag with the ID of the project you want to use 2. Set the `DEPOT_PROJECT_ID` environment variable to the ID of the project you want to use ## Authentication The Depot CLI supports different authentication mechanisms based on where you're running your build, you can read more about them in our [authentication docs](/docs/cli/authentication). ### Local builds with the CLI For the CLI running locally, you can use the `depot login` command to authenticate with your Depot account, and the `depot logout` command to log out. This will generate a [user token](/docs/cli/authentication#user-access-tokens) and store it on your local machine. We recommended only using this option when running builds locally. ### Build with the CLI in a CI environment When using the CLI in a CI environment like GitHub Actions, we recommend configuring your workflows to leverage our [OIDC trust relationships](/docs/cli/authentication#oidc-trust-relationships). These prevent the need to store user tokens in your CI environment and allow you to authenticate with Depot using your CI provider's identity. For CI providers that don't support OIDC, we recommended configuring your CI environment to use a [project token](/docs/cli/authentication#project-tokens). ### The `--token` flag A variety of Depot CLI calls accept a `--token` flag, which allows you to specify a **user or project token** to use for the command. If no token is specified, the CLI will attempt to use the token stored on your local machine or look for an environment variable called `DEPOT_TOKEN`. ## `depot bake` The `bake` command allows you to define all of your build targets in a central file, either HCL, JSON, or Compose. You can then pass that file to the `bake` command and Depot will build all of the target images with all of their options (i.e. platforms, tags, build arguments, etc.). By default, `depot bake` will leave the built image in the remote builder cache. If you would like to download the image to your local Docker daemon (for instance, to `docker run` the result), you can use the `--load` flag. In some cases it is more efficient to load from the registry, so this may result in the build getting saved to the Depot Registry. Alternatively, to push the image to a remote registry directly from the builder instance, you can use the `--push` flag. **Example** An example `docker-bake.hcl` file: ```hcl group "default" { targets = ["original", "db"] } target "original" { dockerfile = "Dockerfile" platforms = ["linux/amd64", "linux/arm64"] tags = ["example/app:test"] } target "db" { dockerfile = "Dockerfile.db" platforms = ["linux/amd64", "linux/arm64"] tags = ["example/db:test"] } ``` To build all of the images we just need to call `bake`: ```shell depot bake -f docker-bake.hcl ``` If you want to build different targets in the bake file with different Depot projects, you can specify the `project_id` in the `target` block: ```hcl group "default" { targets = ["original", "db"] } target "original" { dockerfile = "Dockerfile" platforms = ["linux/amd64", "linux/arm64"] tags = ["example/app:test"] project_id = "project-id-1" } target "db" { dockerfile = "Dockerfile.db" platforms = ["linux/amd64", "linux/arm64"] tags = ["example/db:test"] project_id = "project-id-2" } ``` If you want to build a specific target in the bake file, you can specify it in the `bake` command: ```shell depot bake -f docker-bake.hcl original ``` You can also save all of the targets built in a bake or compose file to the [Depot Registry](/docs/registry/overview) for later use with the `--save` flag: ```shell depot bake -f docker-bake.hcl --save ``` ### Docker Compose support Depot supports using bake to build [Docker Compose](/blog/depot-with-docker-compose) files. To use `depot bake` with a Docker Compose file, you can specify the file with the `-f` flag: ```shell depot bake -f docker-compose.yml ``` Compose files have special extensions prefixed with `x-` to give additional information to the build process. In this example, the `x-bake` extension is used to specify the tags for each service and the `x-depot` extension is used to specify different project IDs for each. ```yaml services: mydb: build: dockerfile: ./Dockerfile.db x-bake: tags: - ghcr.io/myorg/mydb:latest - ghcr.io/myorg/mydb:v1.0.0 x-depot: project-id: 1234567890 myapp: build: dockerfile: ./Dockerfile.app x-bake: tags: - ghcr.io/myorg/myapp:latest - ghcr.io/myorg/myapp:v1.0.0 x-depot: project-id: 9876543210 ``` ### Flags for `bake` This command accepts all the command line flags as Docker's `docker buildx bake` command. {/* */} | Name | Description | | ---------------- | --------------------------------------------------------------------------------------------------------- | | `build-platform` | Run builds on this platform ("dynamic", "linux/amd64", "linux/arm64") (default "dynamic") | | `file` | Build definition file | | `help` | Show the help doc for `bake` | | `lint` | Lint Dockerfiles of targets before the build | | `lint-fail-on` | Set the lint severity that fails the build ("info", "warn", "error", "none") (default "error") | | `load` | Shorthand for "--set=\*.output=type=docker" | | `metadata-file` | Write build result metadata to the file | | `no-cache` | Do not use cache when building the image | | `print` | Print the options without building | | `progress` | Set type of progress output ("auto", "plain", "tty"). Use plain to show container output (default "auto") | | `project` | Depot project ID | | `provenance` | Shorthand for "--set=\*.attest=type=provenance" | | `pull` | Always attempt to pull all referenced images | | `push` | Shorthand for "--set=\*.output=type=registry" | | `save` | Saves the build to the Depot Registry | | `save-tag` | Saves the tag prepended to each target to the Depot Registry | | `sbom` | Shorthand for "--set=\*.attest=type=sbom" | | `sbom-dir` | Directory to store SBOM attestations | | `set` | Override target value (e.g., "targetpattern.key=value") | | `token` | Depot token ([authentication docs](/docs/cli/authentication)) | {/* */} ## `depot build` Runs a Docker build using Depot's remote builder infrastructure. By default, `depot build` will leave the built image in the remote builder cache. If you would like to download the image to your local Docker daemon (for instance, to `docker run` the result), you can use the `--load` flag. In some cases it is more efficient to load from the registry, so this may result in the build getting saved to the Depot Registry. Alternatively, to push the image to a remote registry directly from the builder instance, you can use the `--push` flag. **Example** ```shell # Build remotely depot build -t repo/image:tag . ``` ```shell # Build remotely, download the container locally depot build -t repo/image:tag . --load ``` ```shell # Lint your dockerfile depot build -t repo/image:tag . --lint ``` ```shell # Build remotely, push to a registry depot build -t repo/image:tag . --push ``` ### Flags for `build` This command accepts all the command line flags as Docker's `docker buildx build` command. {/* */} | Name | Description | | ----------------- | --------------------------------------------------------------------------------------------------------- | | `add-host` | Add a custom host-to-IP mapping (format: "host:ip") | | `allow` | Allow extra privileged entitlement (e.g., "network.host", "security.insecure") | | `attest` | Attestation parameters (format: "type=sbom,generator=image") | | `build-arg` | Set build-time variables | | `build-context` | Additional build contexts (e.g., name=path) | | `build-platform` | Run builds on this platform ("dynamic", "linux/amd64", "linux/arm64") (default "dynamic") | | `cache-from` | External cache sources (e.g., "user/app:cache", "type=local,src=path/to/dir") | | `cache-to` | Cache export destinations (e.g., "user/app:cache", "type=local,dest=path/to/dir") | | `cgroup-parent` | Optional parent cgroup for the container | | `file` | Name of the Dockerfile (default: "PATH/Dockerfile") | | `help` | Show help doc for `build` | | `iidfile` | Write the image ID to the file | | `label` | Set metadata for an image | | `lint` | Lint Dockerfile before the build | | `lint-fail-on` | Set the lint severity that fails the build ("info", "warn", "error", "none") (default "error") | | `load` | Shorthand for "--output=type=docker" | | `metadata-file` | Write build result metadata to the file | | `network` | Set the networking mode for the "RUN" instructions during build (default "default") | | `no-cache` | Do not use cache when building the image | | `no-cache-filter` | Do not cache specified stages | | `output` | Output destination (format: "type=local,dest=path") | | `platform` | Set target platform for build | | `progress` | Set type of progress output ("auto", "plain", "tty"). Use plain to show container output (default "auto") | | `project` | Depot project ID | | `provenance` | Shorthand for "--attest=type=provenance" | | `pull` | Always attempt to pull all referenced images | | `push` | Shorthand for "--output=type=registry" | | `quiet` | Suppress the build output and print image ID on success | | `save` | Saves the build to the Depot Registry | | `save-tag` | Saves the tag provided to the Depot Registry | | `sbom` | Shorthand for "--attest=type=sbom" | | `sbom-dir` | Directory to store SBOM attestations | | `secret` | Secret to expose to the build (format: "id=mysecret\[,src=/local/secret]") | | `shm-size` | Size of "/dev/shm" | | `ssh` | SSH agent socket or keys to expose to the build | | `tag` | Name and optionally a tag (format: "name:tag") | | `target` | Set the target build stage to build | | `token` | Depot token | | `ulimit` | Ulimit options (default \[]) | {/* */} ## `depot cache` Interact with the cache associated with a Depot project. The `cache` command consists of subcommands for each operation. ### `depot cache reset` Reset the cache of the Depot project to force a new empty cache volume to be created. **Example** Reset the cache of the current project ID in the root `depot.json` ```shell depot cache reset . ``` Reset the cache of a specific project ID ```shell depot cache reset --project 12345678910 ``` ## `depot configure-docker` Configure Docker to use Depot's remote builder infrastructure. This command installs Depot as a Docker CLI plugin (i.e., `docker depot ...`), sets the Depot plugin as the default Docker builder (i.e., `docker build`), and activates a buildx driver (i.e. `docker buildx buildx ...`). ```shell depot configure-docker ``` If you want to uninstall the plugin, you can specify the `--uninstall` flag. ```shell depot configure-docker --uninstall ``` ## `depot gocache` Configure Go tools to use Depot Cache. The Go tools will use the remote cache service to store and retrieve build artifacts. *Note: This requires Go 1.24 or later.* Set the environment variable `GOCACHEPROG` to `depot gocache` to configure Go to use Depot Cache. ```shell export GOCACHEPROG='depot gocache' ``` Next, run your Go build commands as usual. ```shell go build ./... ``` To set verbose output, add the --verbose option: ```shell export GOCACHEPROG='depot gocache --verbose' ``` To clean the cache, you can use the typical `go clean` workflow: ```shell go clean -cache ``` If you are in multiple Depot organizations and want to specify the organization, you can use the `--organization` flag. ```shell export GOCACHEPROG='depot gocache --organization ORG_ID' ``` ## `depot init` Initialize an existing Depot project in the current directory. The CLI will display an interactive list of your Depot projects for you to choose from, then write a `depot.json` file in the current directory with the contents `{"id": "PROJECT_ID"}`. **Example** ```shell depot init ``` ## `depot list` Interact with Depot builds. ## `depot list builds` Display the latest Depot builds for a project. By default the command runs an interactive listing of depot builds showing status and build duration. To exit type `q` or `ctrl+c` **Example** List builds for the project in the current directory. ```shell depot list builds ``` **Example** List builds for a specific project ID ```shell depot list builds --project 12345678910 ``` **Example** The list command can output build information to stdout with the `--output` option. It supports `json` and `csv`. Output builds in JSON for the project in the current directory. ```shell depot list builds --output json ``` ## `depot projects create` Create a new project in your Depot organization. ```shell depot projects create "your-project-name" ``` Projects will be created with the default region `us-east-1` and cache storage policy of 50 GB per architecture. You can specify a different region and cache storage policy using the `--region` and `--cache-storage-policy` flags. ```shell depot projects create --region eu-central-1 --cache-storage-policy 100 "your-project-name" ``` If you are in more than one organization, you can specify the ID of the organization you want the project to be created in using the `--organization` flag. ```shell depot projects create ---organization 12345678910 "your-project-name" ``` ### Flags for `create` Additional flags that can be used with this command. {/* */} | Name | Description | | ---------------------- | -------------------------------------------------------------------- | | `platform` | Pulls image for specific platform ("linux/amd64", "linux/arm64") | | `organization` | Depot organization ID | | `region` | Build data will be stored in the chosen region (default "us-east-1") | | `cache-storage-policy` | Build cache to keep per architecture in GB (default 50) | | `token` | Depot token | {/* */} ## `depot projects delete` Delete a project from your Depot organization. This permanently removes the project and all associated build data. **Note: Only organization admins can delete projects.** **Example** ```shell depot projects delete ``` You can also use the `--project-id` flag to specify the project ID: ```shell depot projects delete --project-id ``` ### Flags for `delete` Additional flags that can be used with this command. {/* */} | Name | Description | | ------------ | ---------------------------------------------- | | `project-id` | Depot project ID | | `yes` | Confirm deletion, skip the confirmation prompt | | `token` | Depot token | {/* */} ## `depot projects list` Display an interactive listing of current Depot projects. Selecting a specific project will display the latest builds. To return from the latest builds to projects, press `ESC`. To exit type `q` or `ctrl+c` **Example** ```shell depot list projects ``` ## `depot pull` Pull an image from the Depot Registry by build ID in a project. **Example** ```shell depot pull --project ``` You can also specify the tag to assign to the image using the `-t` flag. **Example** ```shell depot pull --project -t : ``` There is also the option to pull an image for a specific platform. ```shell depot pull --project --platform linux/arm64 ``` ### Flags for `pull` Additional flags that can be used with this command. {/* */} | Name | Description | | ---------- | ------------------------------------------------------------------------------ | | `platform` | Pulls image for specific platform ("linux/amd64", "linux/arm64") | | `progress` | Set type of progress output ("auto", "plain", "tty", "quiet") (default "auto") | | `project` | Depot project ID | | `tag` | Optional tags to apply to the image | | `token` | Depot token | {/* */} ## `depot pull-token` Generate a short-lived token (valid for 1 hour) to pull an image from the Depot Registry. **Example** ```shell depot pull-token --project ``` You can also specify a build ID to generate a token for a specific build. **Example** ```shell depot pull-token --project ``` ### Flags for `pull-token` Additional flags that can be used with this command. {/* */} | Name | Description | | --------- | ---------------- | | `project` | Depot project ID | | `token` | Depot token | {/* */} ## `depot push` Push an image from the Depot Registry to another registry. It uses registry credentials stored in Docker when pushing to registries. If you have not already authenticated with your registry, you should do so with `docker login` before running `depot push`. Alternatively, you can specify the environment variables `DEPOT_PUSH_REGISTRY_USERNAME` and `DEPOT_PUSH_REGISTRY_PASSWORD` for the registry credentials. This allows you to skip the `docker login` step. **Example** ```shell depot push --project ``` You can also specify the tag to assign to the image that is being pushed by using the `-t` flag. **Example** ```shell depot push --project -t : ``` ### Flags for `push` Additional flags that can be used with this command. {/* */} | Name | Description | | ---------- | ------------------------------------------------------------------------------ | | `progress` | Set type of progress output ("auto", "plain", "tty", "quiet") (default "auto") | | `project` | Depot project ID | | `tag` | Optional tags to apply to the image | | `token` | Depot token | {/* */} ## Depot CLI: Depot CI commands reference Reference for all `depot ci` commands. To install the Depot CLI, see [Installation](/docs/cli/installation). Other Depot product CLI references: * [CLI overview and platform commands](/docs/cli/reference/overview) * [Container builds commands](/docs/cli/reference/container-builds) * [Agents commands](/docs/cli/reference/agents) ## `depot ci migrate` Migrates GitHub Actions workflows to Depot CI. The command runs two phases: it validates your environment with a preflight check, then copies and transforms your selected workflows into `.depot/workflows/`. ```bash depot ci migrate ``` After migration, the command reports any secrets and variables referenced by the migrated workflows and directs you to [`depot ci migrate secrets-and-vars`](#depot-ci-migrate-secrets-and-vars) for importing them. Each phase is also available as a standalone subcommand: * [`depot ci migrate preflight`](#depot-ci-migrate-preflight) — validate authentication and GitHub app access * [`depot ci migrate workflows`](#depot-ci-migrate-workflows) — copy and transform workflows * [`depot ci migrate secrets-and-vars`](#depot-ci-migrate-secrets-and-vars) — import GitHub secrets and variables into Depot CI ### Flags | Flag | Description | | ----------------- | -------------------------------------------------------------------------------------- | | `--yes` | Run in non-interactive mode, migrating all discovered workflows automatically | | `--overwrite` | Overwrite an existing `.depot/` directory without prompting | | `--org ` | Specify a Depot organization ID (required if you belong to more than one organization) | | `--token ` | Depot API token | *** ### `depot ci migrate preflight` Validates that you are authenticated, detects the GitHub repository from your git remote, and checks that the Depot Code Access GitHub App is installed with the correct permissions and repository access. ```bash depot ci migrate preflight ``` If the app is not installed or needs updated permissions, the command prints a link to configure it. #### Flags | Flag | Description | | ----------------- | -------------------------------------------------------------------------------------- | | `--org ` | Specify a Depot organization ID (required if you belong to more than one organization) | | `--token ` | Depot API token | *** ### `depot ci migrate workflows` Copies workflows from `.github/workflows/` into `.depot/workflows/`, applying Depot CI compatibility transformations and inline comments documenting any changes. ```bash depot ci migrate workflows ``` #### What `depot ci migrate workflows` does 1. Discovers all workflow files in `.github/workflows/`. 2. Analyzes each workflow for compatibility with Depot CI. 3. Prompts you to select which workflows to migrate. 4. Copies selected workflows to `.depot/workflows/` and any local actions from `.github/actions/` to `.depot/actions/`. 5. Applies compatibility fixes (for example, mapping `ubuntu-latest` to `depot-ubuntu-latest`). 6. Disables jobs that use unsupported features and adds inline comments explaining what changed. 7. Reports any secrets and variables detected in the migrated workflows. #### What gets copied | Source | Destination | | ---------------------------------- | --------------------------------- | | `.github/workflows/.yml` | `.depot/workflows/.yml` | | `.github/actions/` | `.depot/actions/` | #### Flags | Flag | Description | | ----------------- | -------------------------------------------------------------------------------------- | | `--yes` | Run in non-interactive mode, migrating all discovered workflows automatically | | `--overwrite` | Overwrite an existing `.depot/` directory without prompting | | `--org ` | Specify a Depot organization ID (required if you belong to more than one organization) | | `--token ` | Depot API token | #### What gets transformed The command applies three kinds of changes to migrated workflows, documented with inline comments: * **`runs-on` labels** are remapped from GitHub runner labels (like `ubuntu-latest`) to their Depot equivalents. * **Unsupported triggers** (like `release` or `schedule`) are removed from the `on:` block with a comment explaining why. * **Jobs with unsupported features** are commented out entirely, with a `DISABLED` comment noting the reason. * **`.github/` path references** in copied workflow and action files are rewritten to their `.depot/` equivalents. Each migrated file includes a header comment listing the source workflow and a summary of all changes made. For the full compatibility matrix, see [Compatibility with GitHub Actions](/docs/ci/compatibility). *** ### `depot ci migrate secrets-and-vars` Creates a one-shot GitHub Actions workflow that reads secrets and variables from your GitHub repository and imports them into Depot CI. ```bash depot ci migrate secrets-and-vars ``` The command pushes a temporary branch to your GitHub repository containing a workflow that runs on GitHub Actions. The workflow reads your existing GitHub secrets and variables and imports them into Depot CI using the Depot CLI. In interactive mode, you can preview the generated workflow before it is created. After the workflow is triggered, the command prints a URL where you can monitor the import. #### Flags | Flag | Description | | ------------------ | -------------------------------------------------------------------------------------- | | `--yes` | Skip preview and confirmation prompts | | `--branch ` | Override the branch name used for the migration workflow | | `--secrets ` | Secret name to include; can be repeated to select multiple. Omit to include all. | | `--vars ` | Variable name to include; can be repeated to select multiple. Omit to include all. | | `--org ` | Specify a Depot organization ID (required if you belong to more than one organization) | | `--token ` | Depot API token | *** ## `depot ci run` Submits a workflow to Depot CI and starts a run against your local working tree, without requiring a push to GitHub first. It's the fastest way to test a workflow against changes you're actively working on. ```bash depot ci run --workflow .depot/workflows/ci.yml ``` If you have local changes relative to your branch's remote state, the CLI automatically detects them, uploads a patch to Depot Cache, and injects a patch-application step after `actions/checkout` in each selected job. For branches that exist on the remote, the patch contains only unpushed changes. For local-only branches, the patch is relative to the default branch. ### Flags | Flag | Description | | ---------------------- | ------------------------------------------------------------------------------------------------------ | | `--workflow ` | Path to the workflow YAML file (required) | | `--job ` | Job name to run; can be repeated to select multiple jobs. Omit to run all jobs. | | `--ssh` | Start the run and connect to the job's sandbox via interactive terminal. Requires exactly one `--job`. | | `--ssh-after-step ` | Insert an SSH debug session (via tmate) after the nth step (1-based). Requires exactly one `--job`. | | `--follow`, `-f` | Stream the triggered run's logs once it starts. Cannot be combined with `--ssh` or `--ssh-after-step`. | | `--repo ` | GitHub repository to use instead of detecting from git remotes | | `--org ` | Organization ID (required when user is a member of multiple organizations) | | `--token ` | Depot API token | ### Run specific jobs Pass `--job` one or more times to run a subset of jobs defined in the workflow: ```bash depot ci run --workflow .depot/workflows/ci.yml --job build --job test ``` Jobs not listed are excluded from the submitted workflow. If a requested job name does not exist in the workflow, the command exits with an error listing the available jobs. ### Debug with SSH Use `--ssh` to start the run and immediately connect to the job's sandbox via an interactive terminal: ```bash depot ci run --workflow .depot/workflows/ci.yml --job build --ssh ``` Use `--ssh-after-step` to insert a [tmate](https://github.com/mxschmitt/action-tmate) debug session after a specific step in a single job. This lets you SSH into the runner at that point in the workflow to inspect state interactively. ```bash depot ci run --workflow .depot/workflows/ci.yml --job build --ssh-after-step 3 ``` Both `--ssh` and `--ssh-after-step` require exactly one `--job` to be specified. The two flags are mutually exclusive: pass one or the other, not both. ### Follow live logs Use `--follow` (or `-f`) to stream the run's logs as soon as it starts, without a separate `depot ci logs` call: ```bash depot ci run --workflow .depot/workflows/ci.yml --job test --follow ``` When you request a single `--job`, the command follows that job's logs. Otherwise it selects the job automatically when the run has only one, or prompts you to pick when several are running. `--follow` cannot be combined with `--ssh` or `--ssh-after-step`. ### What `depot ci run` does When you run `depot ci run` with local changes, the CLI automatically detects the changes and uploads a patch. For any job that has an `actions/checkout` step, the CLI injects a step into each job to apply that patch after checkout. The run reflects your local state without requiring a push. For branches that exist on the remote, the patch contains only unpushed changes. For local-only branches, the patch is relative to the default branch. Each time you run `depot ci run` locally, the CLI uploads a fresh patch, so you can keep iterating until the workflow passes. *** ### `depot ci run list` Lists CI runs for your organization. By default returns the 50 most recent queued and running runs. ```bash depot ci run list ``` Alias: `depot ci run ls`. #### Flags | Flag | Description | | --------------------- | ------------------------------------------------------------------------------------------------- | | `--status ` | Filter by status; can be repeated. Values: `queued`, `running`, `finished`, `failed`, `cancelled` | | `--repo ` | Filter by repository | | `--sha ` | Filter by commit SHA prefix | | `--trigger ` | Filter by trigger event, for example `push` or `workflow_dispatch` | | `--pr ` | Filter by pull request number (requires `--repo`) | | `-n ` | Number of runs to return (default: `50`) | | `--output json`, `-o` | Output as JSON instead of a table | | `--org ` | Organization ID (required when user is a member of multiple organizations) | | `--token ` | Depot API token | #### Examples ##### List failed runs: ```bash depot ci run list --status failed ``` ##### List failed runs for a pull request: ```bash depot ci run list --repo depot/api --status failed --pr 42 ``` ##### List workflow dispatch runs: ```bash depot ci run list --trigger workflow_dispatch ``` ##### List finished and failed runs: ```bash depot ci run list --status finished --status failed ``` ##### List the 5 most recent runs: ```bash depot ci run list -n 5 ``` ##### List runs as JSON: ```bash depot ci run list --output json ``` JSON response: ```json [ { "run_id": "", "repo": "depot/demo-app", "trigger": "push", "sha": "abc123def456", "status": "finished", "created_at": "2026-04-23T14:30:45Z" } ] ``` The `status` field is a string: `queued`, `running`, `finished`, `failed`, or `cancelled`. *** ### `depot ci run show` Shows a single CI run's identity, repo, ref, SHAs, trigger, status, and timing fields. ```bash depot ci run show ``` Alias: `depot ci run get`. For the run's nested workflow, job, and attempt status, use [`depot ci status`](#depot-ci-status). #### Flags | Flag | Description | | --------------------- | -------------------------------------------------------------------------- | | `--output json`, `-o` | Output as JSON instead of the text view | | `--org ` | Organization ID (required when user is a member of multiple organizations) | | `--token ` | Depot API token | #### Examples ##### Show a run: ```bash depot ci run show ``` ##### Show a run as JSON: ```bash depot ci run show --output json ``` JSON response: ```json { "org_id": "", "run_id": "", "repo": "depot/api", "ref": "refs/heads/main", "sha": "", "head_sha": "", "trigger": "push", "status": "finished", "created_at": "2026-04-30T14:01:00Z", "started_at": "2026-04-30T14:02:00Z", "finished_at": "2026-04-30T14:25:15Z" } ``` *** ## `depot ci workflow` Manages CI workflows. ### `depot ci workflow list` Lists recent CI workflow runs for your organization. By default returns the 50 most recent. ```bash depot ci workflow list ``` Alias: `depot ci workflow ls`. #### Flags | Flag | Description | | --------------------- | ------------------------------------------------------------------------------------------------- | | `-n ` | Number of recent workflows to return (default: `50`, max: `200`) | | `--name ` | Filter by workflow name | | `--repo ` | Filter by repository in `owner/name` format | | `--status ` | Filter by status; can be repeated. Values: `queued`, `running`, `finished`, `failed`, `cancelled` | | `--trigger ` | Filter by trigger event, for example `push` or `workflow_dispatch` | | `--sha ` | Filter by head SHA prefix | | `--pr ` | Filter by pull request number | | `--output json`, `-o` | Output as JSON instead of a table | | `--org ` | Organization ID (required when user is a member of multiple organizations) | | `--token ` | Depot API token | #### Examples ##### List recent workflows: ```bash depot ci workflow list ``` ##### List the 5 most recent workflows: ```bash depot ci workflow list -n 5 ``` ##### Filter by workflow name: ```bash depot ci workflow list --name deploy ``` ##### Filter workflows by repo, status, and SHA: ```bash depot ci workflow list --repo depot/api --status failed --sha abc123 ``` ##### List workflows as JSON: ```bash depot ci workflow list --output json ``` JSON response: ```json [ { "workflow_id": "", "name": "CI", "workflow_path": ".depot/workflows/ci.yml", "repo": "depot/api", "status": "finished", "trigger": "push", "run_id": "", "sha": "", "head_sha": "", "created_at": "2026-04-28T12:00:00Z", "job_counts": { "total": 5, "queued": 0, "waiting": 0, "running": 0, "finished": 5, "failed": 0, "cancelled": 0, "skipped": 0 } } ] ``` The `status` field is a string: `queued`, `running`, `finished`, `failed`, or `cancelled`. *** ### `depot ci workflow show` Shows a CI workflow, including the parent run context, executions, jobs, and per-job attempt details. ```bash depot ci workflow show ``` Alias: `depot ci workflow get`. #### Flags | Flag | Description | | --------------------- | -------------------------------------------------------------------------- | | `--output json`, `-o` | Output as JSON instead of a table | | `--org ` | Organization ID (required when user is a member of multiple organizations) | | `--token ` | Depot API token | #### Examples ##### Show a workflow: ```bash depot ci workflow show ``` The command prints: * Org, repo, run ID with status, workflow ID with status, name, path, ref, SHA, and trigger. * Each execution with its status, start time, finish time, and duration. * Each job with its status and duration. For each job, the command shows the latest attempt's ID, status, sandbox ID, session ID, and a ready-to-run `depot ci logs` command. If the job has more than one attempt, all attempts are listed. ##### Show a workflow as JSON: ```bash depot ci workflow show --output json ``` JSON response: ```json { "org_id": "", "run": { "run_id": "", "repo": "depot/api", "ref": "refs/heads/main", "sha": "", "head_sha": "", "trigger": "push", "status": "failed", "created_at": "2026-04-30T14:01:00Z", "started_at": "2026-04-30T14:02:00Z", "finished_at": "2026-04-30T14:25:15Z" }, "workflow": { "workflow_id": "", "name": "CI", "workflow_path": ".depot/workflows/ci.yml", "status": "failed", "error_message": "tests failed", "created_at": "2026-04-30T14:01:05Z", "started_at": "2026-04-30T14:02:11Z", "finished_at": "2026-04-30T14:25:15Z" }, "executions": [...], "jobs": [...] } ``` *** ## `depot ci dispatch` Triggers a workflow via `workflow_dispatch`. Inputs are validated against the workflow's declared input schema, so required inputs must be supplied and typed inputs (`boolean`, `number`, `choice`) are coerced on the server. ```bash depot ci dispatch --repo --workflow --ref ``` **Note**: `--workflow` takes the workflow file's basename (for example `deploy.yml`), not the full repo path `.depot/workflows/deploy.yml`. ### Flags | Flag | Description | | ----------------------- | ------------------------------------------------------------------------------ | | `--repo ` | Target GitHub repository (required) | | `--workflow ` | Workflow file basename (required), for example `deploy.yml`, not the full path | | `--ref ` | Branch or tag name to run the workflow on (required) | | `--input =` | Workflow input as `key=value`; repeat for multiple inputs | | `--output json`, `-o` | Output the RPC response as JSON | | `--org ` | Organization ID (required when user is a member of multiple organizations) | | `--token ` | Depot API token | ### Examples #### Dispatch a workflow on the main branch ```bash depot ci dispatch --repo depot/demo-app --workflow deploy.yml --ref main ``` ```bash depot ci dispatch --repo depot/demo-app --workflow deploy.yml --ref main --output json ``` JSON response: ```json { "org_id": "", "run_id": "" } ``` #### Pass inputs ```bash depot ci dispatch --repo depot/demo-app --workflow deploy.yml --ref main \ --input environment=staging --input dry_run=true ``` *** ## `depot ci status` Looks up the status of a Depot CI run and displays its workflows, jobs, and individual job attempts in a hierarchical view. ```bash depot ci status ``` Replace `` with the run ID returned by `depot ci run` or visible in the Depot dashboard. The command prints: * The organization and run ID with the overall run status. * Each workflow in the run, with its status and workflow file path. * Each job within a workflow, with its job ID, key, and status. * Each attempt within a job, with its attempt ID, attempt number, and status. Plus a ready-to-run `depot ci logs` command, a link to the attempt in the Depot dashboard, and (when applicable) `depot ci ssh` and log download commands. ### Flags | Flag | Description | | --------------------- | -------------------------------------------------------------------------- | | `--output json`, `-o` | Output as JSON instead of the hierarchical text view | | `--org ` | Organization ID (required when user is a member of multiple organizations) | | `--token ` | Depot API token | ### Examples #### Show the status as JSON ```bash depot ci status --output json ``` JSON response: ```json { "org_id": "", "run_id": "", "status": "running", "workflows": [ { "workflow_id": "", "status": "running", "workflow_path": ".depot/workflows/ci.yml", "name": "CI", "jobs": [ { "job_id": "", "job_key": "ci.yml:test", "status": "running", "attempts": [ { "attempt_id": "", "attempt": 1, "status": "running", "sandbox_id": "", "session_id": "", "logs_command": "depot ci logs ", "download_available": false, "view_url": "https://depot.dev/orgs//workflows/?job=&attempt=", "ssh_available": true, "ssh_command": "depot ci ssh --job ci.yml:test" } ] } ] } ] } ``` `download_available` becomes `true` and `download_command` appears once the attempt reaches `finished` status. `ssh_available` and `ssh_command` appear only while the attempt is running with a sandbox. *** ## `depot ci cancel` Cancels a queued or running run, an entire workflow (all its jobs), or a single job within a workflow. ```bash depot ci cancel depot ci cancel --workflow depot ci cancel --job ``` With no scope flags, the entire run is cancelled. Pass `--workflow` to cancel one workflow and all its jobs, or `--job` to cancel a single job. The `--workflow` and `--job` flags are mutually exclusive. When you pass `--job`, the CLI looks up the containing workflow via the run's status, so you do not need to also pass `--workflow`. Workflows and jobs that have already reached a terminal state (finished, failed, or cancelled) cannot be cancelled and will return an error. ### Flags | Flag | Description | | --------------------- | -------------------------------------------------------------------------- | | `--workflow ` | Workflow ID to cancel (mutually exclusive with `--job`) | | `--job ` | Job ID to cancel (mutually exclusive with `--workflow`) | | `--output json`, `-o` | Output the RPC response as JSON | | `--org ` | Organization ID (required when user is a member of multiple organizations) | | `--token ` | Depot API token | ### Examples #### Cancel an entire run (all workflows and jobs within it) ```bash depot ci cancel ``` ```bash depot ci cancel --output json ``` JSON response: ```json {"run_id": "", "status": "cancelled"} ``` #### Cancel an entire workflow (all jobs within it) ```bash depot ci cancel --workflow ``` ```bash depot ci cancel --workflow --output json ``` JSON response: ```json {"workflow_id": "", "status": "cancelled"} ``` #### Cancel a single job (workflow is resolved automatically) ```bash depot ci cancel --job ``` ```bash depot ci cancel --job --output json ``` JSON response: ```json {"job_id": "", "status": "cancelled"} ``` *** ## `depot ci rerun` Re-runs every job in a workflow that has reached a terminal state. Creates a new attempt for each job. ```bash depot ci rerun ``` If the run contains multiple workflows, pass `--workflow ` to select one. When the run contains a single workflow, the CLI resolves it automatically. Rerunning a workflow that is still running returns a precondition error — cancel it first if you want to restart. ### Flags | Flag | Description | | --------------------- | -------------------------------------------------------------------------- | | `--workflow ` | Workflow ID to rerun (required when the run contains multiple workflows) | | `--output json`, `-o` | Output the RPC response as JSON | | `--org ` | Organization ID (required when user is a member of multiple organizations) | | `--token ` | Depot API token | ### Examples #### Rerun the workflow in a run ```bash depot ci rerun ``` ```bash depot ci rerun --output json ``` JSON response: ```json {"workflow_id": "", "job_count": 5} ``` #### Rerun a specific workflow in a multi-workflow run ```bash depot ci rerun --workflow ``` ```bash depot ci rerun --workflow --output json ``` JSON response: ```json {"workflow_id": "", "job_count": 5} ``` *** ## `depot ci retry` Retries a single failed or cancelled job, or every failed and cancelled job in a workflow. ```bash depot ci retry --job depot ci retry --failed ``` Requires exactly one of `--job` or `--failed`. * `--job ` retries a single job. The workflow containing the job is resolved automatically from the run's status. * `--failed` retries every failed/cancelled job in the workflow. If the run contains multiple workflows, pass `--workflow `; otherwise the single workflow is resolved automatically. Each retry creates a new attempt for the selected job(s); the previous attempts are preserved and visible in `depot ci status`. ### Flags | Flag | Description | | --------------------- | ---------------------------------------------------------------------------------- | | `--job ` | Job ID to retry (mutually exclusive with `--failed`) | | `--failed` | Retry every failed/cancelled job in the workflow (mutually exclusive with `--job`) | | `--workflow ` | Workflow ID; required with `--failed` when the run has multiple workflows | | `--output json`, `-o` | Output the RPC response as JSON | | `--org ` | Organization ID (required when user is a member of multiple organizations) | | `--token ` | Depot API token | ### Examples #### Retry a single job ```bash depot ci retry --job ``` ```bash depot ci retry --job --output json ``` JSON response: ```json {"job_id": "", "attempt_id": "", "attempt": 2, "status": "queued"} ``` #### Retry every failed and cancelled job in the only workflow ```bash depot ci retry --failed ``` ```bash depot ci retry --failed --output json ``` JSON response: ```json {"workflow_id": "", "job_ids": ["", "..."], "job_count": 3} ``` #### Retry every failed and cancelled job in a specific workflow ```bash depot ci retry --failed --workflow ``` ```bash depot ci retry --failed --workflow --output json ``` JSON response: ```json {"workflow_id": "", "job_ids": ["", "..."], "job_count": 3} ``` *** ## `depot ci logs` Fetches and prints the log output for a CI job. Accepts a run ID, job ID, or attempt ID. When given a run or job ID, the command resolves to the latest attempt automatically. Use `--job` and `--workflow` to disambiguate when a run has multiple jobs. ```bash depot ci logs ``` ### Flags | Flag | Description | | ------------------------- | --------------------------------------------------------------------------------------------------------------------------------------------------------------------------------------------------------------------------------------------- | | `--job ` | Workflow job key to select when using a run ID. In a non-interactive context (piped output, `--output json`, or `--output-file`), it's required when the run has multiple jobs; in an interactive terminal, you can pick from a list instead. | | `--workflow ` | Workflow path to filter jobs (for example, `ci.yml`) | | `--follow`, `-f` | Follow live logs as they're produced | | `--timestamps` | Prefix plain log lines with UTC timestamps | | `--output `, `-o` | Output format: `text` (default) or `json` (newline-delimited events) | | `--output-file ` | Write a finite log export to the given file path | | `--org ` | Organization ID (required when user is a member of multiple organizations) | | `--token ` | Depot API token | ### Examples #### Fetch logs by attempt ID ```bash depot ci logs ``` #### Fetch logs for the latest attempt of a run ```bash depot ci logs ``` #### Fetch logs for a specific job in a run ```bash depot ci logs --job test ``` #### Disambiguate when job names overlap across workflows ```bash depot ci logs --job build --workflow ci.yml ``` #### Follow live logs ```bash depot ci logs --follow ``` If you pass a run or job ID that hasn't started yet, the command waits up to 30 seconds for the run to create jobs and start the latest attempt, then streams logs as they arrive. #### Prefix log lines with UTC timestamps ```bash depot ci logs --timestamps ``` #### Emit logs as newline-delimited JSON events ```bash depot ci logs --output json ``` The finite form emits one `line` event per log line, with `timestamp`, `timestamp_ms`, `stream` (`stdout` or `stderr`), `step_key`, `step_id`, `step_name`, `line_number`, and `body`. Combine with `--follow` to stream the live attempt as JSON. The streaming form emits the same `line` events plus two additional event types: ```bash depot ci logs --follow --output json ``` * `status`: signals an attempt status change (for example, `running`, `finished`, `failed`). * `end`: marks the end of the stream, with the final `status` and `line_count`. #### Download logs to a file ```bash depot ci logs --output-file logs.txt ``` Use `--output-file` together with `--output json` to download a JSONL export: ```bash depot ci logs --output json --output-file logs.jsonl ``` `--output-file` doesn't work with `--follow`. *** ## `depot ci metrics` Fetches CPU and memory metrics for a CI job attempt, job, or run. ```bash depot ci metrics ``` When given an attempt ID, the command prints a summary of CPU and memory utilization for that attempt. To inspect every attempt of a job or every job in a run, pass `--job ` or `--run ` instead. The positional attempt ID and the `--attempt`, `--job`, and `--run` flags are mutually exclusive. For full per-sample CPU and memory readings on a single attempt, add `--output json`. Job and run requests return per-attempt summary stats (no per-sample `samples` array) even with `--output json`. ### Flags | Flag | Description | | ------------------------- | -------------------------------------------------------------------------- | | `--attempt ` | Job attempt ID (alias for the positional argument) | | `--job ` | Show metrics for every attempt of the given job | | `--run ` | Show metrics for every job and attempt in the given run | | `--output `, `-o` | Output format: `text` (default) or `json` | | `--org ` | Organization ID (required when user is a member of multiple organizations) | | `--token ` | Depot API token | ### Examples #### Show metrics for an attempt ```bash depot ci metrics ``` #### Show metrics for every attempt of a job ```bash depot ci metrics --job ``` #### Show metrics for every job in a run ```bash depot ci metrics --run ``` #### Show full per-sample metrics as JSON ```bash depot ci metrics --output json ``` The JSON response describes the attempt's availability, summary stats (peak and average CPU and memory utilization, sample counts, observed start and finish times), downsampling cap metadata, and the time-series `samples` array. The shape of the JSON response depends on which form you use: * `--attempt` (or the positional form): top-level run, workflow, and job context, plus a single `attempt` object with the full `samples` array. * `--job`: top-level run, workflow, and job context, plus a flat `attempts` array of per-attempt summaries. * `--run`: top-level run context, plus nested `workflows`, `jobs`, and `attempts` arrays. For `--job` and `--run`, attempts include the same availability, summary stats, and cap metadata as `--attempt`, but not the `samples` array. *** ## `depot ci summary` Fetches the authored step summary markdown for a CI job attempt, or for the current or latest attempt of a job. ```bash depot ci summary ``` When given a job ID, the command resolves to the latest attempt automatically and prints a `Using attempt #N for job .` line to stderr (text mode only) before the markdown. If no summary was authored for the resolved attempt, the command prints a short explanation to stdout and exits successfully. The same applies when a job has no attempts yet. ### Flags | Flag | Description | | ------------------------- | -------------------------------------------------------------------------- | | `--output `, `-o` | Output format: `text` (default) or `json` | | `--org ` | Organization ID (required when user is a member of multiple organizations) | | `--token ` | Depot API token | ### Examples #### Fetch a summary for an attempt ```bash depot ci summary ``` #### Fetch the current or latest attempt's summary for a job ```bash depot ci summary ``` #### Output the summary as JSON ```bash depot ci summary --output json ``` JSON response: ```json { "org_id": "", "run_id": "", "workflow_id": "", "job_id": "", "attempt_id": "", "attempt": 1, "job_status": "finished", "attempt_status": "finished", "has_summary": true, "empty_reason": "", "step_count": 3, "markdown": "## Build\n\nok\n" } ``` When the attempt did not produce a summary, `has_summary` is `false` and `empty_reason` is set (for example, `no_summary` or `no_attempt`). *** ## `depot ci artifacts` Lists CI artifact metadata and downloads one artifact by ID. Download URLs are never returned by `list`; use `artifacts download` to fetch the file. ### `depot ci artifacts list` ```bash depot ci artifacts list ``` Lists artifacts produced by a CI run. Use `--workflow`, `--job`, or `--attempt` to narrow the result to one workflow, job, or attempt within the run. #### Flags | Flag | Description | | ------------------------- | -------------------------------------------------------------------------- | | `--workflow ` | Workflow ID to filter artifacts | | `--job ` | Job ID to filter artifacts | | `--attempt ` | Attempt ID to filter artifacts | | `--output `, `-o` | Output format: `text` (default) or `json` | | `--org ` | Organization ID (required when user is a member of multiple organizations) | | `--token ` | Depot API token | #### Examples ##### List every artifact for a run: ```bash depot ci artifacts list ``` ##### List artifacts for one job as JSON: ```bash depot ci artifacts list --job --output json ``` The JSON response is `{"artifacts": [...]}` where each artifact includes `artifact_id`, `run_id`, `workflow_id`, `workflow_path`, `job_id`, `job_key`, `attempt_id`, `attempt`, `name`, `size_bytes`, and `created_at`. *** ### `depot ci artifacts download` ```bash depot ci artifacts download ``` Downloads one CI artifact by its artifact ID. If `--output-file` is omitted, the file is written to the artifact's original name in the current directory; control characters and path separators in the name are sanitized to `_`. The command refuses to overwrite an existing file. #### Flags | Flag | Description | | ---------------------- | -------------------------------------------------------------------------- | | `--output-file ` | Write the artifact to this file path instead of the default name | | `--org ` | Organization ID (required when user is a member of multiple organizations) | | `--token ` | Depot API token | #### Examples ##### Download an artifact to its default filename: ```bash depot ci artifacts download ``` ##### Download an artifact to a specific file: ```bash depot ci artifacts download --output-file coverage.zip ``` *** ## `depot ci diagnose` Diagnoses a failed Depot CI run, workflow, job, or attempt using bounded stored failure context. The command groups similar failures across attempts and, where available, surfaces a diagnosis and a possible fix for each group, together with evidence lines and drill-down commands for the next step. ```bash depot ci diagnose --run depot ci diagnose --workflow depot ci diagnose --job depot ci diagnose --attempt ``` Exactly one of `--run`, `--workflow`, `--job`, or `--attempt` is required. Positional target IDs aren't accepted. The text output adapts to the diagnosis state: * **Grouped**: lists each failure group with the failure count, diagnosis, possible fix, and a small set of representative attempts and evidence lines. * **Focused**: a single representative attempt with its error, diagnosis, possible fix, and relevant log lines. * **Empty**: prints "No CI failures found for this target." with an optional reason. * **Over limit**: the target spans more failed candidates than the diagnosis bounds allow. The output includes a "Narrower targets" breakdown with ready-to-run drill-down commands. ### Flags | Flag | Description | | ------------------------- | -------------------------------------------------------------------------- | | `--run ` | Diagnose a run (mutually exclusive with the other target flags) | | `--workflow ` | Diagnose a workflow (mutually exclusive with the other target flags) | | `--job ` | Diagnose a job (mutually exclusive with the other target flags) | | `--attempt ` | Diagnose an attempt (mutually exclusive with the other target flags) | | `--output `, `-o` | Output format: `text` (default) or `json` | | `--org ` | Organization ID (required when user is a member of multiple organizations) | | `--token ` | Depot API token | ### Examples #### Diagnose a run ```bash depot ci diagnose --run ``` #### Diagnose a single attempt ```bash depot ci diagnose --attempt ``` #### Diagnose a job as JSON ```bash depot ci diagnose --job --output json ``` The JSON response includes `state` (`empty`, `grouped_failures`, `focused_failure`, or `over_limit`), `target`, `context` (run, repo, ref, SHA, workflow, job, and attempt identifiers with their statuses), `bounds` (diagnosis caps and omitted counts), `failure_groups` (with `diagnosis`, `possible_fix`, and representative attempts), `representative_attempts`, `next_commands` (drill-down command suggestions), and `over_limit_breakdown` when the result is over limit. *** ## `depot ci ssh` Opens an interactive terminal session to the sandbox running a CI job. Accepts a run ID or job ID. If the job hasn't started yet, the command waits for the sandbox to be provisioned. ```bash depot ci ssh ``` ### Flags | Flag | Description | | --------------------- | -------------------------------------------------------------------------- | | `--job ` | Job key to connect to (required when the run has multiple jobs) | | `--info` | Print SSH connection details instead of connecting interactively | | `--output json`, `-o` | Output SSH connection details as JSON (use with `--info`) | | `--org ` | Organization ID (required when user is a member of multiple organizations) | | `--token ` | Depot API token | ### Examples #### Connect to a job by job ID ```bash depot ci ssh ``` #### Connect to a specific job in a run ```bash depot ci ssh --job build ``` #### Print SSH connection details without connecting ```bash depot ci ssh --info ``` ```bash depot ci ssh --info --output json ``` JSON response: ```json { "host": "exec.depot.dev", "sandbox_id": "", "session_id": "", "ssh_command": "ssh @exec.depot.dev" } ``` *** ## `depot ci secrets` Manages secrets for your Depot CI workflows. Secrets are scoped to your Depot organization, encrypted at rest, and never readable after creation. Reference them in workflows as `${{ secrets.SECRET_NAME }}`. Each secret name groups one or more variants. A variant holds a value and an optional set of availability selectors (`--repo`, `--env`, `--branch`, `--workflow`) that match jobs by repository, GitHub environment, branch, and workflow file. A variant with no selectors applies to every job in the organization. For how Depot resolves matching variants at run time, see [Manage secrets and variables](/docs/ci/how-to-guides/manage-secrets-and-variables#secret-and-variable-variants). ### `depot ci secrets add` ```bash depot ci secrets add [variant] depot ci secrets add KEY=VALUE [KEY=VALUE...] ``` Adds a secret variant. Supports three modes: * Interactive prompt: `depot ci secrets add SECRET_NAME` prompts you to enter the value securely (input is hidden). * Piped stdin: `printf '%s' "$VALUE" | depot ci secrets add SECRET_NAME` reads the value from stdin. * Bulk KEY=VALUE pairs: `depot ci secrets add FOO=bar BAZ=qux` sets multiple secrets in one command. The `--description` flag isn't allowed in this mode. Pass an optional second positional argument to name the variant (for example, `production`). Without a variant name, the command writes to the `default` variant for that secret. Use `--repo`, `--env`, `--branch`, and `--workflow` to limit when the variant applies; repeat any flag to match multiple values. Without selectors, the variant applies to every job in the organization. #### Flags | Flag | Description | | ---------------------- | -------------------------------------------------------------------------- | | `--description ` | Description of the secret variant (single-secret mode only) | | `--repo ` | Apply variant to a repository (repeatable) | | `--env ` | Apply variant to a GitHub environment (repeatable) | | `--branch ` | Apply variant to a branch (repeatable, supports glob patterns) | | `--workflow ` | Apply variant to a workflow file (repeatable, supports glob patterns) | | `--org ` | Organization ID (required when user is a member of multiple organizations) | | `--token ` | Depot API token | #### Examples ##### Add an org-wide secret (prompts for value): ```bash depot ci secrets add MY_API_KEY ``` ##### Add a secret from piped stdin: ```bash printf '%s' "$MY_API_KEY" | depot ci secrets add MY_API_KEY ``` ##### Add a variant limited to a repo, branch, and environment: ```bash printf '%s' "$DEPLOY_KEY" | depot ci secrets add DEPLOY_KEY production \ --repo owner/repo --branch main --env production ``` ##### Add multiple secrets using KEY=VALUE pairs: ```bash depot ci secrets add GITHUB_TOKEN=ghp_xxx MY_API_KEY=secret-value ``` ### `depot ci secrets set` ```bash depot ci secrets set [variant] ``` Creates or updates a single secret variant. Unlike `add`, this command never accepts KEY=VALUE pairs and is the recommended form for scripts that pipe values: pass `--from-stdin` together with piped input, otherwise the command runs interactively. Pass an optional second positional argument to name the variant. Without a variant name, the command writes the `default` variant. Use `--repo`, `--env`, `--branch`, and `--workflow` to limit when the variant applies; repeat any flag to match multiple values. #### Flags | Flag | Description | | ---------------------- | -------------------------------------------------------------------------- | | `--from-stdin` | Read the secret value from stdin (required when stdin is piped) | | `--description ` | Description of the secret variant | | `--repo ` | Apply variant to a repository (repeatable) | | `--env ` | Apply variant to a GitHub environment (repeatable) | | `--branch ` | Apply variant to a branch (repeatable, supports glob patterns) | | `--workflow ` | Apply variant to a workflow file (repeatable, supports glob patterns) | | `--org ` | Organization ID (required when user is a member of multiple organizations) | | `--token ` | Depot API token | #### Examples ##### Set the default variant (prompts for value): ```bash depot ci secrets set MY_API_KEY ``` ##### Set a named variant from piped stdin: ```bash printf '%s' "$MY_API_KEY" | depot ci secrets set MY_API_KEY production --from-stdin ``` ##### Set a variant scoped to multiple branches: ```bash printf '%s' "$MY_API_KEY" | depot ci secrets set MY_API_KEY release --from-stdin \ --repo owner/repo --branch main --branch 'release/*' ``` ### `depot ci secrets bulk` ```bash depot ci secrets bulk [variant] --file depot ci secrets bulk [variant] --from-stdin ``` Imports CI secrets from a dotenv file or piped stdin. Input is parsed as `KEY=VALUE` entries; blank lines and `#` comments are ignored. The same variant name and availability selectors apply to every secret in the input. Exactly one of `--file` or `--from-stdin` is required. #### Flags | Flag | Description | | --------------------- | -------------------------------------------------------------------------- | | `--file ` | Read dotenv input from a file | | `--from-stdin` | Read dotenv input from stdin | | `--repo ` | Apply variant to a repository (repeatable) | | `--env ` | Apply variant to a GitHub environment (repeatable) | | `--branch ` | Apply variant to a branch (repeatable, supports glob patterns) | | `--workflow ` | Apply variant to a workflow file (repeatable, supports glob patterns) | | `--org ` | Organization ID (required when user is a member of multiple organizations) | | `--token ` | Depot API token | #### Examples ##### Import a `.env` file scoped to a repository: ```bash depot ci secrets bulk --file .env --repo owner/repo ``` ##### Pipe a `.env` file from stdin: ```bash cat .env | depot ci secrets bulk --from-stdin --repo owner/repo ``` ##### Import every entry as a named variant on release branches: ```bash depot ci secrets bulk production --file .env \ --repo owner/repo --branch main --branch 'release/*' ``` ### `depot ci secrets get` ```bash depot ci secrets get [variant] depot ci secrets get --variant-id ``` Shows one secret variant with full, untruncated attributes. Use selectors to disambiguate when a secret has multiple variants that could match. The command errors if zero or more than one variant matches. If multiple match, narrow the result with `--variant-id`, the optional variant positional, or additional `--repo`, `--env`, `--branch`, or `--workflow` flags. #### Flags | Flag | Description | | --------------------- | -------------------------------------------------------------------------- | | `--variant-id ` | Fetch a variant directly by ID (mutually exclusive with a name argument) | | `--repo ` | Select a variant matching a repository (repeatable) | | `--env ` | Select a variant matching a GitHub environment (repeatable) | | `--branch ` | Select a variant matching a branch (repeatable) | | `--workflow ` | Select a variant matching a workflow file (repeatable) | | `--output json` | Output as JSON instead of the text view | | `--org ` | Organization ID (required when user is a member of multiple organizations) | | `--token ` | Depot API token | #### Examples ##### Show a variant by secret and variant name: ```bash depot ci secrets get MY_API_KEY production ``` ##### Disambiguate with selectors: ```bash depot ci secrets get MY_API_KEY production --repo owner/repo --branch main ``` ##### Fetch by variant ID: ```bash depot ci secrets get --variant-id ``` ##### Output as JSON: ```bash depot ci secrets get MY_API_KEY production --output json ``` ### `depot ci secrets list` ```bash depot ci secrets list [] ``` Lists CI secrets and their variants for your organization. Secret values are never returned. Pass a secret name to scope the output to that secret and its variants. Alias: `depot ci secrets ls`. Use `--repo`, `--env`, `--branch`, and `--workflow` to filter the variant rows by their attributes; repeat any flag to widen the match. With no filters, every variant is shown. #### Flags | Flag | Description | | --------------------- | -------------------------------------------------------------------------- | | `--repo ` | Filter variants by repository (repeatable) | | `--env ` | Filter variants by GitHub environment (repeatable) | | `--branch ` | Filter variants by branch (repeatable) | | `--workflow ` | Filter variants by workflow file (repeatable) | | `--output json` | Output as JSON instead of a table | | `--org ` | Organization ID (required when user is a member of multiple organizations) | | `--token ` | Depot API token | #### Examples ##### List every secret and its variants: ```bash depot ci secrets list ``` ##### List variants filtered to a repo and branch: ```bash depot ci secrets list --repo owner/repo --branch main ``` ##### List one secret with all its variants: ```bash depot ci secrets list MY_API_KEY ``` ##### Output as JSON: ```bash depot ci secrets list --output json ``` ### `depot ci secrets remove` ```bash depot ci secrets remove [...] ``` Removes one or more CI secrets. Prompts for confirmation before deleting unless `--force` is set. Alias: `depot ci secrets rm`. By default, each positional argument is treated as a secret name and the command removes the entire secret with every variant under it. To remove a single variant, pass `--variant ` or use selectors (`--repo`, `--env`, `--branch`, `--workflow`) that uniquely identify one variant. `--all` makes whole-secret removal explicit and cannot be combined with selectors or `--variant`. #### Flags | Flag | Description | | --------------------- | -------------------------------------------------------------------------- | | `--variant ` | Remove a specific variant by name | | `--all` | Remove the secret and every variant (mutually exclusive with selectors) | | `--repo ` | Select a variant matching a repository (repeatable) | | `--env ` | Select a variant matching a GitHub environment (repeatable) | | `--branch ` | Select a variant matching a branch (repeatable) | | `--workflow ` | Select a variant matching a workflow file (repeatable) | | `--force` | Skip the confirmation prompt | | `--org ` | Organization ID (required when user is a member of multiple organizations) | | `--token ` | Depot API token | #### Examples ##### Remove a secret and every variant: ```bash depot ci secrets remove MY_API_KEY ``` ##### Remove a named variant: ```bash depot ci secrets remove MY_API_KEY --variant production ``` ##### Remove a variant by selectors: ```bash depot ci secrets remove DEPLOY_KEY --repo owner/repo --branch main ``` ##### Remove multiple secrets without the confirmation prompt: ```bash depot ci secrets remove GITHUB_TOKEN MY_API_KEY --force ``` *** ## `depot ci vars` Manages variables for your Depot CI workflows. Variables are non-secret configuration values, available in workflows as `${{ vars.VARIABLE_NAME }}`. Unlike secrets, variable values can be read back through the CLI or API. Like secrets, each variable name groups one or more variants, each with optional `--repo`, `--env`, `--branch`, and `--workflow` selectors. A variant with no selectors applies to every job in the organization. For how Depot resolves matching variants at run time, see [Manage secrets and variables](/docs/ci/how-to-guides/manage-secrets-and-variables#secret-and-variable-variants). ### `depot ci vars add` ```bash depot ci vars add [variant] depot ci vars add KEY=VALUE [KEY=VALUE...] ``` Adds a variable variant. Supports three modes: * Interactive prompt: `depot ci vars add VAR_NAME` prompts you to enter the value. * Flag value: `depot ci vars add VAR_NAME --value "val"`. * Bulk KEY=VALUE pairs: `depot ci vars add FOO=bar BAZ=qux` sets multiple variables in one command. The `--value` flag isn't allowed in this mode. Pass an optional second positional argument to name the variant. Without a variant name, the command writes the `default` variant. Use `--repo`, `--env`, `--branch`, and `--workflow` to limit when the variant applies; repeat any flag to match multiple values. #### Flags | Flag | Description | | --------------------- | -------------------------------------------------------------------------- | | `--value ` | Variable value (single-variable mode only; prompts if omitted) | | `--repo ` | Apply variant to a repository (repeatable) | | `--env ` | Apply variant to a GitHub environment (repeatable) | | `--branch ` | Apply variant to a branch (repeatable, supports glob patterns) | | `--workflow ` | Apply variant to a workflow file (repeatable, supports glob patterns) | | `--org ` | Organization ID (required when user is a member of multiple organizations) | | `--token ` | Depot API token | #### Examples ##### Add an org-wide variable with a flag value: ```bash depot ci vars add SERVICE_NAME --value "api" ``` ##### Add a named variant scoped to a repo: ```bash depot ci vars add DEPLOY_ENV production --repo owner/repo --value "production" ``` ##### Add a variant limited to a branch and environment: ```bash depot ci vars add DEPLOY_ENV production --repo owner/repo \ --branch main --env production --value "production" ``` ##### Add multiple variables using KEY=VALUE pairs: ```bash depot ci vars add REGION=us-east-1 ENV=prod ``` ### `depot ci vars set` ```bash depot ci vars set [variant] ``` Creates or updates a single variable variant. Unlike `add`, this command never accepts KEY=VALUE pairs and exposes `--description` for tagging the variant. Pass an optional second positional argument to name the variant. Without a variant name, the command writes the `default` variant. Use `--repo`, `--env`, `--branch`, and `--workflow` to limit when the variant applies; repeat any flag to match multiple values. #### Flags | Flag | Description | | ---------------------- | -------------------------------------------------------------------------- | | `--value ` | Variable value (prompts if omitted) | | `--description ` | Description of the variable variant | | `--repo ` | Apply variant to a repository (repeatable) | | `--env ` | Apply variant to a GitHub environment (repeatable) | | `--branch ` | Apply variant to a branch (repeatable, supports glob patterns) | | `--workflow ` | Apply variant to a workflow file (repeatable, supports glob patterns) | | `--org ` | Organization ID (required when user is a member of multiple organizations) | | `--token ` | Depot API token | #### Examples ##### Set the default variant: ```bash depot ci vars set DEPLOY_ENV --value "staging" ``` ##### Set a named variant with a description: ```bash depot ci vars set DEPLOY_ENV production --value "production" \ --description "Production deploy environment" ``` ##### Set a variant scoped to multiple branches: ```bash depot ci vars set DEPLOY_ENV release --value "release" \ --repo owner/repo --branch main --branch 'release/*' ``` ### `depot ci vars list` ```bash depot ci vars list [] ``` Lists CI variables and their variants for your organization, including the variant values. Pass a variable name to scope the output to that variable and its variants. Alias: `depot ci vars ls`. Use `--repo`, `--env`, `--branch`, and `--workflow` to filter the variant rows by their attributes; repeat any flag to widen the match. With no filters, every variant is shown. #### Flags | Flag | Description | | --------------------- | -------------------------------------------------------------------------- | | `--repo ` | Filter variants by repository (repeatable) | | `--env ` | Filter variants by GitHub environment (repeatable) | | `--branch ` | Filter variants by branch (repeatable) | | `--workflow ` | Filter variants by workflow file (repeatable) | | `--output json` | Output as JSON instead of a table | | `--org ` | Organization ID (required when user is a member of multiple organizations) | | `--token ` | Depot API token | #### Examples ##### List every variable and its variants: ```bash depot ci vars list ``` ##### List variants filtered to a repo and branch: ```bash depot ci vars list --repo owner/repo --branch main ``` ##### List one variable with all its variants: ```bash depot ci vars list DEPLOY_ENV ``` ##### Output as JSON: ```bash depot ci vars list --output json ``` ### `depot ci vars remove` ```bash depot ci vars remove [...] ``` Removes one or more CI variables. Prompts for confirmation before deleting unless `--force` is set. Alias: `depot ci vars rm`. By default, each positional argument is treated as a variable name and the command removes the entire variable with every variant under it. To remove a single variant, pass `--variant ` or use selectors (`--repo`, `--env`, `--branch`, `--workflow`) that uniquely identify one variant. `--all` makes whole-variable removal explicit and cannot be combined with selectors or `--variant`. #### Flags | Flag | Description | | --------------------- | -------------------------------------------------------------------------- | | `--variant ` | Remove a specific variant by name | | `--all` | Remove the variable and every variant (mutually exclusive with selectors) | | `--repo ` | Select a variant matching a repository (repeatable) | | `--env ` | Select a variant matching a GitHub environment (repeatable) | | `--branch ` | Select a variant matching a branch (repeatable) | | `--workflow ` | Select a variant matching a workflow file (repeatable) | | `--force` | Skip the confirmation prompt | | `--org ` | Organization ID (required when user is a member of multiple organizations) | | `--token ` | Depot API token | #### Examples ##### Remove a variable and every variant: ```bash depot ci vars remove DEPLOY_ENV ``` ##### Remove a named variant: ```bash depot ci vars remove DEPLOY_ENV --variant production ``` ##### Remove a variant by selectors: ```bash depot ci vars remove DEPLOY_ENV --repo owner/repo --branch main ``` ##### Remove multiple variables without the confirmation prompt: ```bash depot ci vars remove DEPLOY_ENV SERVICE_NAME --force ``` ## Depot CLI: Overview and platform commands The Depot CLI gives you command line access to Depot CI, container builds, and agent sandboxes. To install the Depot CLI, see [Installation](/docs/cli/installation). You can submit an issue or contribute to the Depot CLI in our public [GitHub repository](https://github.com/depot/cli). The following reference is for platform-wide Depot CLI commands. Other Depot product CLI references: * [Depot CI commands](/docs/cli/reference/depot-ci) * [Container builds commands](/docs/cli/reference/container-builds) * [Agents commands](/docs/cli/reference/agents) ## `depot login` Authenticates with your Depot account, automatically creating and storing a user token on your local machine. **Examples** ```shell # Login and select organization interactively $ depot login # Login and specify organization ID $ depot login --org-id 1234567890 # Clear existing token before logging in $ depot login --clear ``` ## `depot logout` Logout out of your Depot account, removing your user token from your local machine. **Example** ```shell depot logout ``` ## `depot org` Manage organizations you have access to in Depot. The `org` command group provides tools to list, switch, and show your current organization context. ### `depot org list` List organizations that you can access. By default, this command opens an interactive table. You can also output the list in `json` or `csv` format for scripting. **Usage** ```shell depot org list ``` ### `depot org switch` Set the current organization in your global Depot settings. This affects which organization is used by default for commands that support organization context. **Usage** ```shell depot org switch [org-id] ``` If you do not provide an `org-id`, you will be prompted to select one interactively. **Examples** ```shell # Switch to a specific organization by ID $ depot org switch 1234567890 # Select organization interactively $ depot org switch ``` ### `depot org show` Show the current organization set in your global Depot settings. **Usage** ```shell depot org show ``` **Example** ```shell $ depot org show 1234567890 ``` ## `depot tests` List parsed test results for a Depot CI or GitHub Actions job. Results come from the JUnit XML your jobs report with the [`depot/test-report-action`](https://github.com/depot/test-report-action), the same data shown in the dashboard. To set up reporting, see [Depot CI test results](/docs/ci/observability/depot-ci-test-results) and [GitHub Actions test results](/docs/github-actions/observability/github-actions-test-results). `depot tests split`, `depot tests run`, and `depot tests report` are supported only in Depot CI and Depot GitHub Actions runner jobs. Depot CI authenticates automatically. For Depot GitHub Actions runners, grant the workflow `id-token: write` permission. By default, Depot uses the given ID to retrieve Depot CI results, then falls back to GitHub Actions. Pass `--ci` or `--gha` to restrict the lookup to one source. For Depot CI, the ID may be a run, job, or attempt ID. A job ID resolves to its latest attempt, and an attempt ID points at one specific attempt. A run ID resolves to the latest attempt when the run has a single job: if the run has more than one job, narrow it with `--job` (and `--workflow` when the same job name appears in multiple workflows). For GitHub Actions, pass the GitHub Actions job ID with `--gha`. The command prints a table in a terminal and JSON when piped, so it drops straight into scripts. **Usage** ```shell depot tests ``` **Examples** ```shell # List Depot CI results for one attempt $ depot tests # List Depot CI results for one job in a run $ depot tests --job test # List failed GitHub Actions results for one job $ depot tests --gha --status failed # Emit JSON for automation $ depot tests --output json ``` **Flags** | Flag | Description | | ---------------------- | -------------------------------------------------------------------------------------- | | `--ci` | Restrict the lookup to Depot CI test results (mutually exclusive with `--gha`) | | `--gha` | Restrict the lookup to GitHub Actions test results (mutually exclusive with `--ci`) | | `--job ` | Depot CI job key to select when the ID is a run | | `--workflow ` | Depot CI workflow path to filter jobs (for example `ci.yml`) | | `--status ` | Test status to include (unknown, passed, failed, errored, skipped); repeatable | | `--suite ` | Test suite name to include | | `--test ` | Test case name to include | | `--class ` | Test class name to include | | `--file ` | Source filename to include | | `--page-size ` | Number of results to return per page (max 500, default 100) | | `--page-token ` | Token to fetch the next page | | `--output ` | Output format: `auto`, `table`, or `json` (default `auto`) | | `--org ` | Specify a Depot organization ID (required if you belong to more than one organization) | | `--token ` | Depot API token | ### `depot tests split` Print the candidates assigned to one timing-balanced test shard. Use `--candidates-command` to discover runnable candidates inline; standard input and `--candidates-file` remain supported alternatives. Use this lower-level command when your test runner needs direct control over how it receives candidates. ```shell depot tests split \ --candidates-command 'go list ./...' \ --index 0 --total 4 \ --timings-type testname ``` The command uses historical JUnit timings when available. Filename candidates without timing history fall back to file size; other candidates receive deterministic fallback weights until Depot has timing data. See [Split tests by timing](/docs/ci/how-to-guides/split-tests) for a complete workflow example. `--candidate-type` is optional. The CLI infers `filename` for recognized source or test-file paths and `classname` for other candidates. Set it when that apparent identity differs from the JUnit field used for timing lookup; for example, Vitest and Playwright accept file paths but write their timing identity to JUnit `classname`. `--timings-type` controls timing granularity. It defaults to the resolved candidate identity and uses whole-candidate timings; set it to `testname` to calculate each candidate's duration from individual JUnit test cases rather than the reported duration of the whole filename or classname unit. In Depot CI matrix jobs, omitted shard inputs use `DEPOT_MATRIX_JOB_INDEX` and `DEPOT_MATRIX_JOB_TOTAL`. Explicit flags override those values. The automatic values cover the immediate strategy's flattened matrix; use explicit values when only one matrix axis should split or when a reusable workflow needs a different split scope. **Flags** | Flag | Description | | -------------------------------- | ----------------------------------------------------------------------- | | `--index ` | Zero-based shard index; overrides the Depot CI matrix value. | | `--total ` | Total number of shards; overrides the Depot CI matrix value. | | `--candidate-type ` | Optional override for the runnable identity: `filename` or `classname`. | | `--timings-type ` | Timing granularity: `filename`, `classname`, or `testname`. | | `--candidates-command ` | Command that prints newline-delimited candidates. | | `--candidates-file ` | File containing newline-delimited candidates instead of standard input. | | `--key ` | Split-assignment key for distinct logical suites. | | `--output ` | Candidate output format: `text` (default) or `json`. | ### `depot tests run` Select a test shard, run a command with that shard's candidates on standard input, and upload the JUnit XML reports it creates. The command preserves the test command's exit code, after attempting to upload reports even when tests fail. In Depot CI matrix jobs, omitted shard inputs use `DEPOT_MATRIX_JOB_INDEX` and `DEPOT_MATRIX_JOB_TOTAL`. Explicit flags override those values. Automatic values cover the immediate strategy's flattened matrix, so use explicit values when only one axis should split or when a reusable workflow needs a different split scope. Set `--total 1` to run all supplied candidates, even inside a matrix. Candidates are optional only when the effective total is `1`; then the command runs with empty standard input if no candidate source is supplied. ```shell depot tests run \ --candidates-command 'go list ./...' \ --index 0 --total 4 \ --timings-type testname \ --command 'xargs gotestsum --junitfile reports/junit.xml --' \ --report-path reports/junit.xml ``` Use `--split-key` only to separate logical test suites that would otherwise share a split scope. `--report-key` identifies a report upload; use a distinct value only when one job uploads more than one report. For GitHub Actions and Depot CI workflows, see the [`depot/tests-run-action`](https://github.com/depot/tests-run-action) example in [Split tests by timing](/docs/ci/how-to-guides/split-tests). `--timings-type` controls timing granularity. It defaults to the resolved candidate identity and uses whole-candidate timings; set it to `testname` to calculate each candidate's duration from individual JUnit test cases rather than the reported duration of the whole filename or classname unit. **Flags** | Flag | Description | | -------------------------------- | ---------------------------------------------------------------------------------------------- | | `--index ` | Zero-based shard index; overrides the Depot CI matrix value. | | `--total ` | Total number of shards; overrides the Depot CI matrix value. `1` runs all supplied candidates. | | `--candidate-type ` | Optional override for the runnable identity: `filename` or `classname`. | | `--timings-type ` | Timing granularity: `filename`, `classname`, or `testname`. | | `--candidates-command ` | Command that prints newline-delimited candidates. | | `--candidates-file ` | File containing newline-delimited candidates instead of standard input. | | `--split-key ` | Split-assignment key. Share it across shards of one logical test suite. | | `--report-key ` | Report upload key; set it only for multiple uploads in one job. | | `--command ` | Required shell command that receives selected candidates on standard input. | | `--report-path ` | Required JUnit XML path, directory, or glob; repeatable. | ### `depot tests report` Upload JUnit XML files that a test command has already created. This is the reporting-only counterpart to `depot tests run`. ```shell depot tests report reports/junit.xml --key unit-tests ``` Pass report paths as positional arguments or with repeatable `--report-path`. Use `--key` to identify an upload invocation when the same job reports multiple independent suites. ## Depot Code {/* TODO: gated behind depot-code-private-beta until GA; revisit beta framing at GA. */} Depot Code is in private beta. Functionality and capabilities could change, and documentation might be out of date. [Request access](https://forms.gle/33jJc3uQFQqYhkKKA) to enable it for your organization. Depot Code is Depot's source control hosting. It's entirely Git under the hood, but the Git server is built on top of blob storage rather than a persistent file server, which makes it more reliable and scalable under heavy read and write load. Create a repository in Depot, push to it as your daily driver, and trigger [Depot CI](/docs/ci/overview) jobs without round-tripping to an external host. ## Why use Depot Code? * **Reliable at scale**: Git objects are stored in blob storage and Git servers run as stateless, horizontally scalable workers instead of a persistent file server, which decouples storage from compute. * **Fast with Depot CI**: when a Depot Code repository is [mirrored](#feature-summary), Depot CI serves clones and fetches from Depot's own infrastructure instead of round-tripping to GitHub, so jobs get your code faster. {/* TODO: verify the reliability/scale claims with engineering before GA. */} ## Feature summary {/* prettier-ignore */} {/* TODO: add rows as the beta matures (SDK, access control, self-hosting). */}
Diskless Git server
  • Git packfiles and indexes are stored as objects in blob storage instead of on a persistent file server.
  • Refs and metadata live in a transactional store, so Git servers are stateless, horizontally scalable workers.
Standalone and mirror repositories
  • Standalone : create a fresh repository in Depot and push your code directly.
  • Mirror : keep a synced copy of an upstream GitHub repository so clones and fetches are served by Depot.
Use a standard Git workflow
  • Create repositories from the Depot dashboard, then clone, push, and fetch with regular git commands.
  • Authenticate over HTTPS with a Depot access token.
Built for Depot CI
  • Trigger [Depot CI](/docs/ci/overview) workflows from your Depot Code repositories on every push. Jobs fetch code from Depot Code without a round-trip to GitHub.
## How Depot Code works Instead of the default Git server, Depot Code uses a diskless Git server that stores all content in blob storage (S3) and is fully horizontally scalable. It requires no distributed consensus and is optimized for throughput, uptime, and scale. The traditional hosting model uses a hub-and-spoke design that welds storage and compute together: pushes route through a proxy that streams updates across replicas running a multi-phase commit, and repos end up pinned to machines. You can't scale read/write capacity independently of storage capacity, so you have to provision for peak. Depot Code inverts the primitive. Git packfiles and their indexes become objects in blob storage, refs and metadata live in a transactional store, and Git servers become stateless workers you can scale horizontally. {/* TODO: add an architecture diagram and read/write path once internals are public. */} ## Running Depot CI workflows Depot Code repositories will initiate `push` triggers for Depot CI workflows defined in `.depot/workflows/`. Depot Code repositories currently do not initiate triggers of any other type. When you push to a Depot Code repository, Depot CI runs every workflow with an `on: push` trigger against the pushed commit. Each new commit included in a push starts its own set of runs. Additionally, Depot CI triggers are currently disabled by default for standalone repos. Many workflow scripts contain subtle dependencies on GitHub and require workarounds. Please reach out to opt-in to Depot CI triggers for standalone repos. ## Pricing {/* TODO: confirm beta pricing (free during beta? quotas/overage at GA). */} Depot Code is free to use during the private beta. Request access to the Depot Code private beta → ## FAQ Depot Code is Depot's source control hosting: a diskless Git server backed by blob storage that scales horizontally, mirrors your GitHub repositories, and plugs straight into Depot CI. It's entirely Git under the hood, so you clone, push, and fetch with regular Git commands. Traditional Git hosts pair storage and compute on persistent file servers and route every push through a multi-phase commit across replicas. Depot Code stores Git objects in blob storage and keeps refs and metadata in a transactional store, so Git servers are stateless, horizontally scalable workers. No. You can create a mirror repository that keeps a synced copy of an upstream GitHub repository, so your Depot CI workflows are served by Depot without round-tripping to GitHub.{' '} {/* TODO: confirm mirror replication direction/cadence and push-back to upstream. */} {/* TODO: add FAQ entries for self-hosting, access control, SDK. */} ## Next steps * [Quickstart for Depot Code](/docs/code/quickstart) * [Depot CI overview](/docs/ci/overview) ## Quickstart for Depot Code {/* TODO: gated behind depot-code-private-beta until GA; revisit beta framing at GA. */} Depot Code is in private beta. Functionality and capabilities could change, and documentation might be out of date. [Request access](https://forms.gle/33jJc3uQFQqYhkKKA) to enable it for your organization. Create a Git repository hosted on Depot's diskless Git server, then clone, push, and fetch with regular `git` commands. Once your code is in Depot, you can trigger [Depot CI](/docs/ci/overview) workflows against it. ## Prerequisites * A [Depot account](https://depot.dev/sign-up) with Depot Code enabled for your organization. * [Git](https://git-scm.com/) installed locally. * Optional: [Connect to GitHub](https://depot.dev/docs/ci/quickstart#connect-to-github) if you want to create a mirror repository in Depot Code. Check for an existing connection in your organization [**Settings**](/orgs/_/settings) under **GitHub Code Access**. ## Create a repository Create a repository from the Depot dashboard. 1. In the Depot dashboard, under **Code**, click **Repositories**. 2. Click **Create repository**. 3. Choose the repository type: * **Standalone**: enter a repository name and a default branch name. Depot Code creates a fresh, empty repository for you to push your code to. * **Mirror**: import a GitHub repository so Depot can serve clones and fetches. GitHub remains the source of truth because pushes through Depot are forwarded to GitHub. Upstream changes are imported when the mirror is refreshed. Repository names can include letters, numbers, dots, underscores, and hyphens, and can be namespaced with slashes, for example `team/service`. ## Create an access token Depot Code authenticates Git over HTTPS using a Depot access token as the password, with `x-token` as the username. 1. On the repository page in the Depot dashboard, click **Create access token**. 2. Copy the token immediately. For security, it's shown only once. {/* TODO: confirm where access tokens are managed and their scope (org vs repo). */} ## Clone or push Copy the repository's clone URL from the dashboard. It has the form `https://.code.depot.dev/`, where your organization ID is the subdomain. Clone a repository: ```bash git clone https://x-token@.code.depot.dev/ ``` Or add Depot as a remote on an existing local repository and push: ```bash git remote add depot https://x-token@.code.depot.dev/ git push -u depot main ``` The `x-token` username tells Git to prompt only for a password. Paste your [access token](#create-an-access-token) when prompted. To avoid re-entering it on every fetch and push, configure a [Git credential helper](https://git-scm.com/book/en/v2/Git-Tools-Credential-Storage). Pushing to the Depot remote for a GitHub mirror repository also pushes those changes to GitHub. If you want Depot-only writes, create a standalone repository. To trial Depot Code alongside GitHub, keep GitHub as your `origin` remote and add Depot as a second remote. Run `git remote -v` to list the remotes configured for the repository. ## Trigger Depot CI Depot Code repositories work with [Depot CI](/docs/ci/overview). To run CI, add a workflow file to `.depot/workflows/` in your repository, for example `.depot/workflows/ci.yml`, using GitHub Actions YAML syntax, then commit and push it. Depot Code workflows support the `push` trigger only. When you push, Depot CI runs every workflow with an `on: push` trigger against the pushed commit. Note: Depot CI triggers are currently disabled by default for standalone repos. Many workflow scripts contain subtle dependencies on GitHub and require workarounds. Please reach out to opt-in to Depot CI triggers for standalone repos. For workflow syntax and supported features, see the [Depot CI quickstart](/docs/ci/quickstart) and [compatibility reference](/docs/ci/compatibility). ## Build parallelism in Depot Depot uses BuildKit under the hood, which features a fully concurrent build graph solver that can run build steps in parallel when possible and optimize out commands that don't have an impact on the final result. This means that independent build stages, layers, and even separate builds can execute simultaneously. Understanding how parallelization works across different scenarios helps you structure your builds for maximum efficiency and speed. ## Choosing the right build configuration Before diving into how parallelism works, it's important to understand the optimal build configuration for your workload. Depot offers several configuration options to balance performance, cache utilization, and resource allocation based on your specific needs. **Configuration decision matrix:** | Workload type | Recommended configuration | Reasoning | | ---------------------------------------- | ----------------------------------------------------------- | ----------------------------------------- | | Frequent small builds | Larger builder instance, no auto-scaling | Better cache utilization | | Resource-intensive builds | Auto-scaling with Builds per instance = 2-3 | Each build gets full resources | | Mixed workloads | Use separate projects per target | Balance between isolation and cache | | Monorepo with shared dependencies (Bake) | Enable auto-scaling and/or use separate projects per target | Balance deduplication with resource needs | ## Parallelism scenarios ### One build per project When you run a single build in a Depot project, parallelism occurs at multiple levels: #### Stage-level parallelism If BuildKit sees that a stage depends on other stages which do not depend on each other, then it will run those stages in parallel. Consider this Dockerfile: ```dockerfile FROM node:20 AS frontend WORKDIR /app COPY frontend/ . RUN npm install && npm build FROM golang:1.21 AS backend WORKDIR /app COPY backend/ . RUN go build -o server FROM alpine AS final COPY --from=frontend /app/dist /static COPY --from=backend /app/server /usr/bin/ ``` Build execution flow: Stage level parallelism In this example, the `frontend` and `backend` stages run in parallel since they don't depend on each other. The `final` stage waits for both to complete. #### Multi-platform parallelism When building for multiple platforms (e.g., `linux/amd64` and `linux/arm64`), Depot runs native builders for each architecture in parallel. Each platform executes on its own dedicated build server with native CPU architecture, which enables true parallel builds at native speed. ```bash # Builds for both platforms simultaneously on separate native servers depot build --platform linux/amd64,linux/arm64 . ``` Multi-platform build architecture ### Multiple builds per project Each Depot project has dedicated BuildKit runners, with one runner per architecture by default. For example, if you're building for both `linux/amd64` and `linux/arm64`, you get two runners. All builds on the same architecture share that architecture's runner, enabling BuildKit to handle concurrent builds efficiently, whether they're for the same image or different images. Multiple concurrent builds on same builder This shared runner architecture enables several optimizations: **Same image, multiple builds:** When multiple builds of the same image run concurrently (e.g., different developers pushing to the same branch), BuildKit can: * Share cached layers across all builds * Deduplicate identical work happening simultaneously * Reduce overall build time through shared computation **Different images, shared dependencies:** When building different images that share common dependencies: * Base images are pulled once and shared * Common layers (like `npm install` or `apt-get update`) are computed once * BuildKit automatically identifies and shares identical work #### BuildKit deduplication BuildKit's deduplication is a key optimization that automatically identifies and eliminates redundant work. BuildKit uses checksums to identify identical layers and operations through content-addressable storage. The build graph solver identifies duplicate work before execution, and when multiple stages need the same layer, it's built once and shared. Examples of deduplication include the following: * Multiple stages using the same base image only pull it once * Repeated `RUN` commands with identical inputs are executed once * Common file copies across stages are cached and reused BuildKit deduplication within a build ```dockerfile FROM node:20 AS deps COPY package*.json ./ RUN npm ci # This layer is built once FROM node:20 AS deps COPY package*.json ./ RUN npm ci # Reuses the layer from Service A if cache is warm ``` In the preceding example, if both stages have identical `package.json` files, BuildKit recognizes that the `npm ci` command will produce the same result. Instead of running it twice, it executes once and reuses the cached layer for the second stage, saving build time and resources. This cache-based deduplication happens automatically across concurrent builds on the same runner, for builds triggered in any of the following ways: * Multiple `depot build` commands * `depot bake` with multiple targets * Parallel CI/CD jobs * Multiple developers building simultaneously the same Dockerfile **Waiting for shared layers** When the same instruction is being built multiple times on the same runner, you may notice delays even with high cache hit rates. The delay is due to BuildKit's step deduplication process: one build computes the step while others wait for it to complete. This process prevents redundant work but can cause apparent delays. Subsequent builds show as "waiting" even though they'll benefit from the computed result. Cross-build deduplication timeline When Build A starts building at 10:00 AM, it pulls the base image and runs `npm ci`, creating new layers. When Build B starts building just a minute later at 10:01 AM, BuildKit recognizes that it needs the same base image and has the same `npm ci` command. Instead of duplicating this work, Build B waits for Build A to complete those steps, then reuses the layers that Build A created. The deduplication process generally improves overall efficiency, but can be confusing when monitoring individual build times. To avoid overwhelming a single build server, you can enable [build auto-scaling](/docs/container-builds/how-to-guides/autoscaling) to some particular maximum parallelism value. #### Docker Bake for orchestrated builds Docker Bake provides a declarative way to build multiple images with a single command, taking full advantage of BuildKit's parallelism. By default, all Bake targets run on the same builder, which maximizes cache sharing and deduplication but means all targets share the same resources. Here's an example `docker-bake.hcl` configuration: ```hcl group "default" { targets = ["app", "db", "cron"] } target "base" { dockerfile = "Dockerfile.base" tags = ["myrepo/base:latest"] project-id = "project-base" } target "app" { contexts = { base = "target:base" } dockerfile = "Dockerfile.app" platforms = ["linux/amd64", "linux/arm64"] tags = ["myrepo/app:latest"] project-id = "project-app" } target "db" { contexts = { base = "target:base" } dockerfile = "Dockerfile.db" platforms = ["linux/amd64", "linux/arm64"] tags = ["myrepo/db:latest"] project-id = "project-db" } target "cron" { contexts = { base = "target:base" } dockerfile = "Dockerfile.cron" platforms = ["linux/amd64", "linux/arm64"] tags = ["myrepo/cron:latest"] project-id = "project-cron" } ``` When you run `depot bake`, all three services (`app`, `db`, `cron`) build concurrently for both architectures. With the `project-id` parameters specified, each target gets its own dedicated builder with separate resources. The base image is built once on its own project and the result is shared across the other targets via the contexts configuration. Bake: Shared project vs separate projects ### Auto-scaling enabled With build auto-scaling enabled, Depot will automatically spin up additional BuildKit builders when the concurrent build limit is reached. By default, all builds for a project are routed to a single BuildKit host per architecture you're building. When the concurrent build limit is reached, Depot provisions additional builders. Each additional builder operates on a clone of the main builder's layer cache. Auto-scaling behavior Benefits: * Each build gets dedicated resources (CPU, memory, I/O) * No resource contention between builds * Consistent, predictable build times * Better for resource-intensive builds Trade-offs: * Additional builders operate on cache clones that are not written back to the main cache, meaning work done on additional builders must be recomputed when subsequent builds run on the main builder * Builds on different builders cannot share work, even if they have similar layers #### Configuration For detailed instructions on enabling and configuring auto-scaling, see the [Auto-scaling documentation](/docs/container-builds/how-to-guides/autoscaling). **Poor cache performance with auto-scaling** Cache misses are expected behavior with cache clones. Consider if the speed benefit outweighs cache efficiency. Try the following solutions for poor cache performance: * Increase **Builds per instance** in your **Autoscaling** settings * Use a larger single instance instead of scaling out * If building multiple different images, consider using a separate Depot project for each image to isolate their caches and runners ## Docker Arm images ## Docker Arm images with Depot Building Docker images for Arm via `docker build` from a host architecture running an Intel chip is forced to use QEMU emulation to build Docker Arm images. It's also only possible to build multi-platform Docker images using emulation or running your own BuildKit builders. Depot removes emulation altogether. Depot is a remote Docker container build service that orchestrates optimized BuildKit builders on native CPUs for Intel (x86) and Arm (arm64). When a Docker image build is routed to Depot either via [`depot build`](/docs/cli/reference/container-builds#depot-build) or [`docker build`](/docs/container-builds/how-to-guides/docker-build#how-to-use-depot-with-docker), we launch optimized builders for each architecture requested with a persistent layer cache attached to them. Each image builder, by default, has 16 CPUs and 32GB of memory. If you're on a startup or business plan, you can configure your builders to be larger, with up to 64 CPUs and 128 GB of memory. Each builder also has a fast NVMe SSD with at least 50GB for layer caching. ## How to build Docker images for Arm CPUs like Apple Silicon or AWS Graviton With `depot build` or `docker build` configured to use Depot, it automatically detects the architecture you're building for and routes the build to the appropriate builder. So, if you're building a Docker image from a macOS device running Apple Silicon (M1, M2, M3, M4), there is nothing extra you need to do. We will detect the architecture and route the build to an Arm builder. ```shell depot build . ``` If you're building a Docker image from an Intel machine, like a CI provider, you can specify `--platform linux/arm64` to build a Docker Arm image. ```shell docker build --platform linux/arm64 . ``` We have integration guides for most of the CI providers: * [Bitbucket Pipelines](/docs/container-builds/integrations/bitbucket-pipelines) * [Buildkite](/docs/container-builds/integrations/buildkite) * [CircleCI](/docs/container-builds/integrations/circleci) * [GitHub Actions](/docs/container-builds/integrations/github-actions) * [GitLab CI](/docs/container-builds/integrations/gitlab-ci) * [Google Cloud Build](/docs/container-builds/integrations/google-cloud-build) * [Jenkins](/docs/container-builds/integrations/jenkins) * [Travis CI](/docs/container-builds/integrations/travis-ci) ## How to build multi-platform Docker images With Depot, we can launch multiple builders in parallel to build multi-platform Docker images concurrently. To build a multi-platform Docker image for both Intel & Arm, we can specify `--platform linux/amd64,linux/arm64` to `depot build` or `docker build`. ```shell depot build --platform linux/amd64,linux/arm64 . ``` ### Loading a multi-platform Docker image via `--load` If you want to load a multi-platform Docker image into your local Docker daemon, you will hit an error when using `docker buildx build --load`: ```shell docker exporter does not currently support exporting manifest lists ``` This is because the default behavior of load does not support loading multi-platform Docker images. To get around this, you can use [`depot build --load`](/docs/cli/reference/container-builds#depot-build) instead where we have made load faster & more intelligent. ```shell depot build --platform linux/amd64,linux/arm64 --load . ``` ## Build autoscaling Container build autoscaling allows you to automatically scale out your builds to multiple BuildKit builders based on the number of concurrent builds you want to process on a single builder. This feature is available on all Depot plans and can significantly speed up your container builds when you have multiple concurrent builds or resource-intensive builds. ## How build autoscaling works By default, all builds for a project are routed to a single BuildKit host per architecture you're building. Each BuildKit builder can process multiple jobs concurrently on the same host, which enables deduplication of work across builds that share similar steps and layers. With build autoscaling enabled, Depot will automatically spin up additional BuildKit builders when the concurrent build limit is reached. Here's how the process works: 1. You run `depot build`, which informs our control plane that you'd like to run a container build 2. The control plane checks your autoscaling configuration to determine the maximum concurrent builds per builder 3. If the current builder is at capacity, the provisioning system spins up additional BuildKit builders 4. Each additional builder operates on a clone of the main builder's layer cache 5. The `depot build` command connects directly to an available builder to run the build ## When to use build autoscaling Build autoscaling is particularly useful in these scenarios: * **High concurrent build volume**: When you have many builds running simultaneously that consume all resources of a single builder * **Resource-intensive builds**: When individual builds require significant CPU, memory, or I/O resources * **Time-sensitive builds**: When you need to reduce build queue times during peak periods * **CI/CD pipelines with parallel jobs**: When your pipeline triggers multiple builds at once ### When NOT to use build autoscaling Consider these tradeoffs before enabling autoscaling: * **Cache efficiency**: Additional builders operate on cache clones that are not written back to the main cache, reducing cache hit rates * **Deduplication loss**: Builds on different builders cannot share work, even if they have similar layers * **Small, infrequent builds**: If your builds are small and run infrequently, the overhead may not be worth it **Recommendation**: Before enabling autoscaling, first try sizing up your container builder. You can select larger builder sizes on our [pricing page](/pricing), which allows you to run larger builds on a single builder without needing to scale out. ## How to enable build autoscaling To enable container build autoscaling: 1. Navigate to your Depot project settings 2. Go to the **Settings** tab 3. Find the **Build autoscaling** section 4. Toggle **Enable horizontal autoscaling** 5. Set the **Maximum concurrent builds per builder** (default is 1) 6. Click **Save changes** The concurrent builds setting determines how many builds can run on a single builder before triggering a scale-out event. For example: * Setting it to `1` means each build gets its own dedicated builder * Setting it to `3` means up to 3 builds can share a builder before a new one is launched ## Cache behavior with autoscaling Understanding cache behavior is crucial when using autoscaling: ### Cache cloning When additional builders are launched due to autoscaling: 1. They receive a **read-only clone** of the main builder's layer cache 2. New layers built on scaled builders are stored locally but **not persisted** back to the main cache 3. When the scaled builder terminates, its local cache changes are lost ### Cache implications This means: * Builds on scaled builders can read from the main cache * They cannot contribute new layers back to the main cache * Subsequent builds may need to rebuild layers that were already built on scaled builders * Cache efficiency may decrease with heavy autoscaling usage ## Billing and costs Build autoscaling is available on **all Depot plans** at no additional cost: * **No extra charges**: Autoscaling itself doesn't incur additional fees * **Standard compute rates**: You pay the same per-minute rate for scaled builders as regular builders * **No cache storage charges**: Cache clones are temporary and don't count toward your storage quota * **Pay for what you use**: Scaled builders are terminated when not in use ## Best practices 1. **Monitor your builds**: Use Depot's build insights to understand your build patterns before enabling autoscaling 2. **Start conservative**: Begin with a higher concurrent build limit and decrease if needed 3. **Size up first**: Consider using larger builder sizes before enabling autoscaling 4. **Review cache hit rates**: Monitor if autoscaling significantly impacts your cache efficiency 5. **Adjust during peak times**: You can dynamically adjust settings based on your build patterns ## Example configuration Here's an example of when autoscaling might be beneficial: **Scenario**: Your team has resource-intensive builds that compile large applications with heavy dependencies. Each build requires significant CPU and memory resources, and you frequently have multiple builds running concurrently due to: * Multiple developers pushing code simultaneously * CI pipelines that build multiple variants of your application (different environments, architectures, or configurations) * Monorepo setups where changes trigger builds for multiple services **Without autoscaling**: * Multiple resource-intensive builds compete for CPU and memory on a single builder * Builds experience CPU throttling and memory pressure * Build times increase dramatically when multiple builds run concurrently * Builds may fail due to out-of-memory errors when too many run simultaneously **With autoscaling** (max 1 concurrent build per builder): * Each resource-intensive build gets its own dedicated builder with full access to 16 CPUs and 32GB RAM * No resource contention between builds * Consistent, predictable build times regardless of concurrent load * Builds can fully utilize available compute resources without interference **Example build characteristics that benefit from this configuration**: * Large Docker images with many layers (>50 layers) * Compilation of languages like Rust, C++, or Go with extensive dependencies * Machine learning model training or data processing during build * Multi-stage builds with resource-intensive compilation steps * Builds that require significant disk I/O for dependency installation Result: Each build runs with dedicated resources, preventing resource contention and ensuring optimal performance even during peak usage. ## Understanding `depot bake` and autoscaling A `depot bake` command is submitted as a single build request to BuildKit, regardless of how many targets are defined in the bake file. This means: * For autoscaling purposes, one `depot bake` command counts as one build, not multiple builds * For example, if your project has Autoscaling enabled with a value of `2` builds per instance, two concurrent `depot bake` commands will run on the same builder, but a third concurrent `depot bake` command will trigger the provisioning of a new builder * The number of targets inside a bake file doesn't affect the autoscaling count **Splitting bake builds across projects**: You can specify different project IDs to split a single bake into multiple builds (one per project). However, the number of targets inside the bake for each project has no impact on autoscaling. Each `depot bake` command for each project still counts as a single build. ## Troubleshooting If you're experiencing issues with autoscaling: 1. **Builds still queueing**: Verify autoscaling is enabled and check your concurrent build limit 2. **Increased cache misses**: This is expected behavior with cache clones - consider if the speed benefit outweighs cache efficiency 3. **Costs increasing**: Monitor your usage in the Depot dashboard and adjust concurrent limits if needed For additional help, reach out on [Discord](https://depot.dev/discord) or contact support. ## Continuous Integration ## Why use Depot with your CI provider? Depot provides a remote Docker build service that makes the image build process faster and more intelligent. By routing the image build step of your CI to Depot, you can complete the image build up to 40x faster than you could in your generic CI provider. Saving you build minutes in your existing CI provider and, more importantly, saving you developer time waiting for the build to finish. The `depot build` command is a drop-in replacement for `docker build` and `docker buildx build`. Alternatively, you can [configure your local Docker CLI to use Depot as the default builder](/docs/container-builds/how-to-guides/docker-build). Depot launches remote builders for both native Intel & Arm CPUs with, by default, 16 CPUs, 32 GB of memory, and a 50 GB persistent NVMe cache SSD. On a startup or business plan, in your project settings, you can configure your builders to be larger, with up to 64 CPUs and 128 GB of memory. Running `depot` in a continuous integration environment is a great way to get fast and consistent builds with any CI provider. See below for documentation on integrating Depot with your CI provider. ## Providers * [AWS CodeBuild](/docs/container-builds/integrations/aws-codebuild) * [Bitbucket Pipelines](/docs/container-builds/integrations/bitbucket-pipelines) * [Buildkite](/docs/container-builds/integrations/buildkite) * [CircleCI](/docs/container-builds/integrations/circleci) * [Depot CI](/docs/container-builds/integrations/depot-ci) * [GitHub Actions](/docs/container-builds/integrations/github-actions) * [GitLab CI](/docs/container-builds/integrations/gitlab-ci) * [Google Cloud Build](/docs/container-builds/integrations/google-cloud-build) * [Jenkins](/docs/container-builds/integrations/jenkins) * [Travis CI](/docs/container-builds/integrations/travis-ci) ## Dev Containers ## Why use Depot with Dev Containers? [Dev Containers](https://code.visualstudio.com/docs/devcontainers/containers) are becoming a popular way to leverage a container as a fully featured development environment directly integrated with Visual Studio Code. You can open any folder inside a container and use the full power of VS Code inside. With Depot, you can build your Dev Containers on demand with instant shared caching across your entire team. ## How to use Depot with Dev Containers First, you will need to make sure you have [installed the `depot` CLI](/docs/container-builds/quickstart#installing-the-cli) and [configured a project](/docs/container-builds/quickstart#creating-a-project). ### Connect to your Depot project from the `depot` CLI Once the CLI is installed, you can configure your environment: 1. Run `depot login` to login to your Depot account 2. Change into the root of your project directory 3. Run `depot init` to link your project to your repository; this will create a `depot.json` directory in the current directory **Note: You can also connect `depot` to your project by passing the `DEPOT_PROJECT_ID` environment variable** ### Configure Docker to use Depot Dev Containers uses the `docker buildx build` command internally to build the container image. You can configure Depot as a plugin for the Docker CLI and Buildx with the following command: ```bash depot configure-docker ``` The `configure-docker` command is a one-time operation that routes any `docker build` or `docker buildx build` commands to Depot builders. ### Build your Dev Container There are multiple options for building your Dev Container: 1. You can open an existing folder in VS Code in a container, [see these docs](https://code.visualstudio.com/docs/devcontainers/containers#_quick-start-open-an-existing-folder-in-a-container) 2. You can open a Git repo or Pull Request in an isolated container, [see these docs](https://code.visualstudio.com/docs/devcontainers/containers#_quick-start-open-a-git-repository-or-github-pr-in-an-isolated-container-volume) 3. You can also build your Dev container directly using the [`devcontainer` CLI](https://code.visualstudio.com/docs/devcontainers/devcontainer-cli#_prebuilding): ```bash devcontainer build --workspace-folder . [4 ms] @devcontainers/cli 0.50.0. Node.js v20.3.1. darwin 22.5.0 arm64. [1878 ms] Start: Run: docker buildx build --load --build-arg BUILDKIT_INLINE_CACHE=1 -f /var/folders/w9/8yw9qm955bqcdwphh62w6fvr0000gn/T/devcontainercli/container-features/0.50.0-1690365763237/Dockerfile-with-features -t vsc-example-241be831c2682292f834c48f737ab308a1e901188127c5444a37dd0c0a339c90 --target dev_containers_target_stage --build-arg _DEV_CONTAINERS_BASE_IMAGE=dev_container_auto_added_stage_label /Users/user1/projects/proj/example [+] Building 3.5s (19/19) FINISHED => [depot] build: https://depot.dev/orgs/orgid/projects/projectid/builds/9hh2rh7zkq 0.0s => [depot] launching arm64 builder 0.5s => [depot] connecting to arm64 builder 0.4s => [internal] load .dockerignore 0.4s => => transferring context: 116B 0.3s => [internal] load build definition from Dockerfile-with-features 0.3s => => transferring dockerfile: 601B 0.3s => [internal] load metadata for docker.io/library/node:16-alpine 0.4s => [build 1/5] FROM docker.io/library/node:16-alpine@sha256:6c381d5dc2a11dcdb693f0301e8587e43f440c90cdb8933eaaaabb905d44cdb9 0.0s .... ``` You should see something similar to the above in your VS Code or `devcontainer` build logs. You can see that the `docker buildx build` command is called, and then you see log lines for `[depot] ...` that confirm your Docker image build is routed to Depot builders. ## Docker Bake Building multiple Docker images that share common dependencies? Need to build all your services at once? `depot bake` lets you build multiple images in parallel from a single file, dramatically speeding up your builds while taking advantage of shared work between images. ## Why use bake? Traditional approaches to building multiple images often involve sequential builds using tools like `make` or shell scripts. This means waiting for each image to complete before starting the next one, and rebuilding shared dependencies multiple times. With `depot bake`, you can: * Build all images in parallel on dedicated BuildKit builders * Automatically deduplicate shared work across images * Define all your builds in a single HCL, JSON, or Docker Compose file * Get native Intel and Arm builds without emulation * Leverage persistent caching across all your builds ## How to use depot bake ### Basic usage By default, `depot bake` looks for these files in your project root: * `compose.yaml`, `compose.yml`, `docker-compose.yml`, `docker-compose.yaml` * `docker-bake.json`, `docker-bake.override.json` * `docker-bake.hcl`, `docker-bake.override.hcl` Run bake with no arguments to build the default group or all services: ```shell depot bake ``` ### Specifying a bake file Use the `-f` flag to specify a custom bake file: ```shell depot bake -f my-bake-file.hcl ``` ### Building specific targets Build only specific targets instead of all: ```shell depot bake app db ``` ## HCL bake file format HCL is the recommended format for bake files as it provides the most features and flexibility. ### Basic example ```hcl group "default" { targets = ["app", "db", "cron"] } target "app" { dockerfile = "Dockerfile.app" platforms = ["linux/amd64", "linux/arm64"] tags = ["myrepo/app:latest"] } target "db" { dockerfile = "Dockerfile.db" platforms = ["linux/amd64", "linux/arm64"] tags = ["myrepo/db:latest"] } target "cron" { dockerfile = "Dockerfile.cron" platforms = ["linux/amd64", "linux/arm64"] tags = ["myrepo/cron:latest"] } ``` You can think of each `target` as a Docker build command, where you specify the Dockerfile, platforms, and tags for the image. These targets can be grouped together in a `group` to build them all at once. Our optimized instances of BuildKit will build these images in parallel, automatically deduplicating work across targets. ### Using variables Make your bake files more flexible with variables: ```hcl variable "TAG" { default = "latest" } variable "REGISTRY" { default = "myrepo" } target "app" { dockerfile = "Dockerfile.app" platforms = ["linux/amd64", "linux/arm64"] tags = ["${REGISTRY}/app:${TAG}"] } ``` Override variables from the command line: ```shell TAG=v1.0.0 REGISTRY=mycompany depot bake ``` ### Sharing base images Use `contexts` to specify dependencies between targets in a bake file. A common use of this is to highlight that targets share a base image, so you can deduplicate work by only building that base image once: ```hcl target "base" { dockerfile = "Dockerfile.base" platforms = ["linux/amd64", "linux/arm64"] } target "app" { contexts = { base = "target:base" } dockerfile = "Dockerfile.app" platforms = ["linux/amd64", "linux/arm64"] tags = ["myrepo/app:latest"] } target "worker" { contexts = { base = "target:base" } dockerfile = "Dockerfile.worker" platforms = ["linux/amd64", "linux/arm64"] tags = ["myrepo/worker:latest"] } ``` In your Dockerfiles, reference the base context: ```dockerfile # Dockerfile.app FROM base # ... rest of your app Dockerfile ``` ### Matrix builds You can use the matrix key to parameterize a single target to build images for different inputs. This can be helpful if you have a lot of similarities between targets in your bake file. ```hcl target "service" { name = "service-${item}" matrix = { item = ["frontend", "backend", "api"] } dockerfile = "Dockerfile.${item}" platforms = ["linux/amd64", "linux/arm64"] tags = ["myrepo/${item}:latest"] } ``` **Note: The name property is required when using the matrix property to create the unique image build for each value in the matrix.** ## Docker Compose bake format You can use your existing Docker Compose files as a bake file. There are limitations compared to HCL, like not supporting `inherits` or variable blocks. But it's a great way to build all of your services in parallel without needing to rewrite your existing Compose files. ```yaml services: app: build: dockerfile: Dockerfile.app platforms: - linux/amd64 - linux/arm64 image: myrepo/app:latest db: build: dockerfile: Dockerfile.db platforms: - linux/amd64 - linux/arm64 image: myrepo/db:latest worker: build: dockerfile: Dockerfile.worker platforms: - linux/amd64 - linux/arm64 image: myrepo/worker:latest ``` Build all services defined in the Docker Compose file with: ```shell depot bake -f docker-compose.yml ``` ## Advanced features ### Using multiple Depot projects in a bake file In some cases you may want to shard your container builds out across different Depot projects so you can have the full BuildKit host dedicated to the build. For compose, you can specify different Depot projects per service. ```yaml services: frontend: build: dockerfile: ./Dockerfile.frontend x-depot: project-id: project-id-1 backend: build: dockerfile: ./Dockerfile.backend x-depot: project-id: project-id-2 ``` You can also specify the project ID in HCL for each `target`: ```hcl target "app" { dockerfile = "Dockerfile.app" platforms = ["linux/amd64", "linux/arm64"] tags = ["myrepo/app:latest"] project_id = "project-id-1" } target "db" { dockerfile = "Dockerfile.db" platforms = ["linux/amd64", "linux/arm64"] tags = ["myrepo/db:latest"] project_id = "project-id-2" } target "worker" { dockerfile = "Dockerfile.worker" platforms = ["linux/amd64", "linux/arm64"] tags = ["myrepo/worker:latest"] project_id = "project-id-3" } ``` **Note:** When you use the `depot/bake-action` in a GitHub Actions workflow, the `x-depot.project-id` in your Docker Compose file or `project_id` in your HCL bake file take precedence over the `project` input in the action configuration. ### Understanding bake and autoscaling A `depot bake` command is submitted as a single build request to BuildKit, regardless of how many targets are defined in the bake file. This has important implications for [build autoscaling](/docs/container-builds/how-to-guides/autoscaling): * For autoscaling purposes, one `depot bake` command counts as one build, not multiple builds * For example, if your project has Autoscaling enabled with a value of `2` builds per instance, two concurrent `depot bake` commands will run on the same builder, but a third concurrent `depot bake` command will trigger the provisioning of a new builder * The number of targets inside a bake file has no impact on the autoscaling count **Splitting bake builds across projects**: You can specify different project IDs (as shown in the section above) to split a single bake into multiple builds (one per project). However, the number of targets inside the bake for each project has no impact on autoscaling. Each `depot bake` command for each project still counts as a single build. ### Loading images locally Load specific targets to your local Docker daemon by including the target name after the load flag: ```shell depot bake --load app ``` This only loads the specified target, not all targets in the bake file. ### Using the Depot Registry with bake You can save built images to the [Depot Registry](/docs/registry/overview) for later use: ```shell depot bake --save --metadata-file=build.json ``` If you want to specify a specific tag for the images being stored in the registry, you can do so by using the `--save-tag` flag: ```shell depot bake --save --save-tag myrepo/app:v1.0.0 ``` You can pull specific targets out of the Depot Registry later using the [`depot pull`](/docs/cli/reference/container-builds#depot-pull) command: ```shell depot pull --project --target app,db ``` Or push to your registry after tests pass: ```shell depot push --project --target app \ --tag myregistry/app:v1.0.0 ``` ### Passing build arguments (i.e. `--build-arg`) to a target You can pass build arguments to your targets in the bake file using the `args` block. This is useful for passing environment variables or other configuration options to your Docker builds. ```hcl target "app" { args = { NODE_VERSION = "18" ENV = "production" } } ``` ## GitHub Actions integration You can use the [`depot/bake-action`](https://github.com/depot/bake-action) in your GitHub Actions workflows to leverage `depot bake` for building your bake files with our [Docker build service](/products/container-builds): ```yaml name: Build images on: push jobs: bake: runs-on: ubuntu-latest permissions: id-token: write contents: read steps: - uses: actions/checkout@v4 - uses: depot/setup-action@v1 - uses: depot/bake-action@v1 with: file: docker-bake.hcl push: true ``` ## Tips and best practices 1. **Use groups** to organize related targets and build them together 2. **Leverage inheritance** with `inherits` to reduce duplication 3. **Use contexts** for shared base images to maximize deduplication 4. **Set platforms explicitly** to ensure consistent multi-platform builds 5. **Use variables** for configuration that changes between environments 6. **Use multiple Depot projects** to shard builds across different BuildKit hosts for resource intensive builds 7. **Save to ephemeral registry** in CI to build once and push after tests ## Next steps * Learn more about [BuildKit parallelization](/blog/buildkit-in-depth) * Explore the [full bake syntax reference](/blog/buildx-bake-deep-dive) * Check out how to get faster container builds with [`depot/bake-action`](/docs/container-builds/integrations/github-actions) ## Docker ## Running builds with Depot To run builds with Depot via `docker`, you still need to connect the build to an active Depot project via the `depot init` and `depot.json` files or via the `DEPOT_PROJECT_ID` environment variable. ## How to use Depot with Docker Depot can directly integrate with your existing Docker workflows via a one-time configuration command from our `depot` CLI. See [our instructions for installing our CLI](/docs/cli/installation) if you still need to do so. With the CLI installed, you can run `configure-docker` to configure your Docker CLI to use Depot as the default handler for `docker build` and `docker buildx build`: ```shell depot configure-docker ``` Underneath the hood, the `configure-docker` command installs Depot as a Docker CLI plugin and sets the plugin as the default Docker builder (i.e., `docker build`). In addition, the command also installs a Depot `buildx` driver and sets that driver as the default driver for `docker buildx build`. ### `docker build` Once your `docker` environment is configured to use Depot, you can run your builds as usual. ```shell docker build --platform linux/amd64,linux/arm64 . ``` If you have correctly configured your Depot project via `depot init` or `DEPOT_PROJECT_ID`, your build will automatically be sent to Depot for execution. You can confirm this by looking for log lines in the output that are prefixed with `[depot]`. ### `docker buildx build` Similarly, once your environment is configured to use Depot, you can run your `docker buildx build` commands as usual. ```shell docker buildx build --platform linux/amd64,linux/arm64 . ``` Again, you can confirm that builds are going to your Depot project by looking for log lines that are prefixed with `[depot]` or by checking out the [builds for your project](/orgs). ## Using Depot with Docker Compose You can efficiently build Compose service images in parallel with Depot, with either `depot bake --load -f ./docker-compose.yml` or `docker compose build`. See [the Docker Compose integration guide](/docs/container-builds/how-to-guides/docker-compose) for more information. ## Docker Compose Depot can be used with Docker Compose to efficiently build images for all the services in your `docker-compose.yml` file using Depot's accelerated container build infrastructure. There are two ways to use Depot with Docker Compose: 1. Using `depot bake --load` with a `docker-compose.yml` file to build all images in parallel and load them back into your local Docker daemon. 2. Using `docker compose build` with `depot configure-docker` to use Depot as a Docker Buildx driver inside Docker Compose. ## Building images with `depot bake --load` The `depot bake` command is a powerful and efficient way to build multiple container images in parallel with a single command. The command implements the features of [docker buildx bake](https://docs.docker.com/build/bake/), but optimized to work with Depot infrastructure. With `depot bake` you can provide a `docker-compose.yml` file, and Depot will build all service images specified in the compose file in parallel. Additionally by specifying the `--load` flag, those images will be efficiently pulled back into your local Docker daemon: ```yaml # docker-compose.yml services: app: build: context: . dockerfile: Dockerfile backend: build: context: ./backend dockerfile: Dockerfile ``` ```shell # Will build both the app and backend images in parallel $ depot bake -f ./docker-compose.yml --load ``` Once the images are loaded into your local Docker daemon, they are ready to be used by Docker Compose. For instance, you could run `docker compose up` and Compose would use the images just built by Depot. **This is the preferred way to build images with Depot for Docker Compose.** The `depot bake` command is optimized to work with Depot infrastructure and is able to efficiently load images back into your local Docker daemon. However if you need to use `docker compose build` specifically and cannot call `depot bake`, see below for information on how to integrate Depot as a Docker Buildx driver. See the [bake deep dive](https://depot.dev/blog/buildx-bake-deep-dive) for more information about `depot bake`. ### Using multiple Depot projects with `depot bake` As a more advanced use-case, it's possible to use different Depot projects to build the different services in a Compose file. To specify different projects, you can use the `x-depot.project-id` extension value in the Compose service build configuration: ```yaml # docker-compose.yml services: app: build: context: . dockerfile: Dockerfile x-depot: project-id: abc123456 backend: build: context: ./backend dockerfile: Dockerfile x-depot: project-id: xyz123456 ``` With the above configuration, the `app` service will be built in the `abc123456` Depot project and the `backend` service will be built in the `xyz123456` Depot project when running `depot bake`. **Note:** When you use the `depot/bake-action` in a GitHub Actions workflow, the `x-depot.project-id` in your Docker Compose file takes precedence over the `project` input in the action configuration. ## Building images with `docker compose build` If you are unable to use `depot bake --load` and need to use `docker compose build` directly, you can still use Depot to accelerate your builds. Docker Compose can use Docker Buildx to build the requested images in the `docker-compose.yml` file, and Depot can be installed as a Buildx driver serve those build requests. To do so, first run `depot configure-docker`. This configures Depot as the default handler for `docker build` and `docker buildx build`: ```shell $ depot configure-docker ``` Once configured, you can use `docker compose build` as usual. The `build` command will use the Depot Buildx driver to build the images specified in the `docker-compose.yml` file: ```shell $ docker compose build ``` See the [Docker integration guide](/docs/container-builds/how-to-guides/docker-build) for more information about `depot configure-docker`. ### Caveats When using `docker compose build` with Depot, there are a few things to be aware of: 1. Buildx requires that the entire image be converted into a tarball and downloaded from the remote build server to the local Docker daemon before it can be used. This is less efficient than using `depot bake --load`, which is able to efficiently pull only the missing layers of an image back into the local Docker daemon. 2. Buildx will create a new Depot build request for each service image, so the Depot console will not display the `docker compose build` as a single unified request. 3. It's not possible to use multiple different Depot projects for different Compose services with `docker compose build`. However, `depot configure-docker` does directly integrate with any tools that use Docker Buildx, so if you are unable to use `depot bake --load` or otherwise need full Buildx compatibility with other tools, this is a good option. ## Building and testing `docker compose` on GitHub Actions With the `depot/bake-action` action and the `--save` flag, we can build all of the services in a Compose file in parallel and save them to the Depot Registry. Then, with the `depot/pull-action`, we can pull all of the images back into the local Docker daemon for testing in subsequent jobs. ```yaml name: Depot example compose on: push permissions: contents: read id-token: write packages: write jobs: build-services: runs-on: ubuntu-24.04 outputs: build-id: ${{ steps.bake.outputs.build-id }} steps: - uses: actions/checkout@v4 - uses: depot/setup-action@v1 - name: Build, cache, and save all compose images to the Depot Registry. uses: depot/bake-action@v1 id: bake with: files: docker-compose.yml save: true test: runs-on: depot-ubuntu-24.04 needs: [build-services] steps: - uses: actions/checkout@v4 - uses: depot/setup-action@v1 - name: Pull all compose service images locally from the Depot Registry. uses: depot/pull-action@v1 with: build-id: ${{ needs.build-services.outputs.build-id }} - name: Run compose up (images should not rebuild) run: | docker compose up -d - name: If successful, push the srv1 compose service target image to ghcr.io from Depot Registry run: | echo ${{ secrets.GITHUB_TOKEN }} | docker login ghcr.io -u $ --password-stdin depot push --target srv1 -t ghcr.io/depot/srv1:latest ${{ steps.build.outputs.build-id }} ``` ## Local Development ## Why use Depot for local development? Using Depot's remote builders for local development allows you to get faster Docker image builds with the entire Docker layer cache instantly available across builds. The cache is shared across your entire team who has access to a given Depot project, allowing you to reuse build results and cache across your entire team for faster local development. Additionally, routing the image build to remote builders frees your local machine's CPU and memory resources. ### Cache sharing with local builds There is nothing additional you need to configure to share your build cache across your team for local builds. If your team members can access the Depot project, they will automatically share the same build cache. So, if you build an image locally, your team members can reuse the layers you built in their own builds. ## How to use Depot for local development To leverage Depot locally, [install the `depot` CLI tool](/docs/cli/installation) and [configure your Depot project](/docs/container-builds/quickstart#creating-a-project), if you haven't already. With those two things complete, you can then login to Depot via the CLI: ```bash depot login ``` Once you're logged in, you can configure Depot inside of your git repository by running the `init` command: ```bash depot init ``` The `init` command writes a `depot.json` file to the root of your repository with the Depot project ID that you selected. Alternatively, you can skip the `init` command if you'd like and use the `--project` flag on the `build` command to specify the project ID. You can run a build with Depot locally by running the [`build` command](/docs/cli/reference/container-builds#depot-build): ```bash depot build -t my-image:latest . ``` By default, Depot won't return you the built image locally. Instead, the built image and the layers produced will remain in the build cache. However, if you'd like to download the image locally, for instance, so you can `docker run` it, you can specify the `--load` flag: ```bash depot build -t my-image:latest --load . ``` ### Using `docker build` You can also run a build with Depot locally via the `docker build` or `docker buildx build` commands. To do so, you'll need to run `depot configure-docker` to configure your Docker CLI to use Depot as the default builder: ```bash depot configure-docker docker build -t my-image:latest . ``` For a full guide on using Depot via your existing `docker build` of `docker compose` commands, see our [Docker integration guide](/docs/container-builds/how-to-guides/docker-build#docker-compose-build). ## Access private registries The Depot CLI uses your local Docker credentials provider. To allow your Depot build to access a private image registry, log into the registry with `docker login registry.example.com` on the same machine where you'll run `depot build`. Use the private registry in your Dockerfile as you normally would: ```dockerfile FROM my-private-registry/project/image:version # rest of your Dockerfile ``` Then run `depot build .`. You should be able to use any registry with no additional Depot configuration. If you're having issues accessing private registries from your builds, see [Cannot pull from private registry during build](/docs/container-builds/troubleshooting#cannot-pull-from-private-registry-during-build). ## AWS CodeBuild ## Authentication For AWS CodeBuild, you can use project or user access tokens for authenticating your build with Depot. We recommend using project tokens as they are scoped to the specific project and are owned by the organization. ### [Project token](/docs/cli/authentication#project-tokens) You can inject project access tokens into the CodeBuild environment for `depot` CLI authentication. Project tokens are tied to a specific project in your organization and not a user. ### [User access token](/docs/cli/authentication#user-access-tokens) You can inject a user access token into the CodeBuild environment for `depot` CLI authentication. User tokens are tied to a specific user and not a project. Therefore, it can be used to build all projects across all organizations which the user has access. ## Configuration To build a Docker image from AWS CodeBuild, you must set the `DEPOT_TOKEN` environment variable by [injecting it from Secrets Manager](https://docs.aws.amazon.com/codebuild/latest/userguide/build-spec-ref.html#secrets-manager-build-spec). Note that you also need to grant your IAM service role for CodeBuild permission to access the secret. ```yaml { 'Version': '2012-10-17', 'Statement': [ { 'Sid': 'Statement1', 'Effect': 'Allow', 'Action': 'secretsmanager:GetSecretValue', 'Resource': '', }, ], } ``` ### CodeBuild EC2 compute type With a project or user token stored in Secrets Manager, you can add the `DEPOT_TOKEN` environment variable to your `buildspec.yml` file, install the `depot` CLI, and run `depot build` to build your Docker image. The following example shows the configuration steps when using the EC2 compute type. ```yaml showLineNumbers version: 0.2 env: secrets-manager: DEPOT_TOKEN: '' phases: pre_build: commands: - echo Installing Depot CLI... - curl -L https://depot.dev/install-cli.sh | DEPOT_INSTALL_DIR="/usr/local/bin" sh build: commands: - depot build . ``` ### CodeBuild Lambda compute type The CodeBuild Lambda compute type requires installing the `depot` CLI in a different directory that is in the `$PATH` by default. The following example shows the configuration steps when using the Lambda compute type. ```yaml showLineNumbers version: 0.2 env: secrets-manager: DEPOT_TOKEN: '' phases: pre_build: commands: - echo Installing Depot CLI... - curl -L https://depot.dev/install-cli.sh | DEPOT_INSTALL_DIR="/tmp/codebuild/bin" sh build: commands: - depot build . ``` **Note:** The CodeBuild Lambda compute type does not support privileged mode. Therefore, you cannot use the `--load` flag to load the image back into the Docker daemon as there is no Docker daemon running in the Lambda environment. ## Examples ### Build multi-platform images natively without emulation This example shows how you can use the `--platform` flag to build a multi-platform image for Intel and Arm architectures natively without emulation. ```yaml showLineNumbers version: 0.2 env: secrets-manager: DEPOT_TOKEN: '' phases: pre_build: commands: - echo Installing Depot CLI... - curl -L https://depot.dev/install-cli.sh | DEPOT_INSTALL_DIR="/usr/local/bin" sh build: commands: - depot build --platform linux/amd64,linux/arm64 . ``` ### Build and push to AWS ECR This example demonstrates building and pushing a Docker image to AWS ECR from AWS CodeBuild via Depot. Note that you need to grant your IAM service role for CodeBuild permission to access the ECR repository by adding the following statement to its IAM policy: ```json { "Action": [ "ecr:BatchCheckLayerAvailability", "ecr:CompleteLayerUpload", "ecr:GetAuthorizationToken", "ecr:InitiateLayerUpload", "ecr:PutImage", "ecr:UploadLayerPart" ], "Resource": "*", "Effect": "Allow" } ``` ### Logging into ECR with the EC2 compute type When using the EC2 compute type in CodeBuild, you can login to your ECR registry with `docker login` via the [documented methods](https://docs.aws.amazon.com/codebuild/latest/userguide/sample-docker.html#sample-docker-files) provided by ECR. To access `docker login`, you must make sure that you're CodeBuild environment is configured with Privileged mode turned on. ```yaml showLineNumbers version: 0.2 env: secrets-manager: DEPOT_TOKEN: '' phases: pre_build: commands: - echo Installing Depot CLI... - curl -L https://depot.dev/install-cli.sh | DEPOT_INSTALL_DIR="/usr/local/bin" sh - echo Logging in to Amazon ECR... - aws ecr get-login-password --region | docker login --username AWS --password-stdin build: commands: - depot build -t : --push . ``` ### Logging into ECR with the Lambda compute type You can build a Docker image with the Lambda compute type in CodeBuild and push it to ECR without using the `docker login` command by writing the Docker authentication file yourself at `$HOME/.docker/config.json` and use the [`--push`](/docs/cli/reference/container-builds#depot-build) flag. Note that you can't load the image back into the Docker daemon with the Lambda compute type. ```yaml showLineNumbers version: 0.2 env: secrets-manager: DEPOT_TOKEN: '' phases: pre_build: commands: - ecr_stdin=$(aws ecr get-login-password --region ) - registry_auth=$(printf "AWS:$ecr_stdin" | openssl base64 -A) - mkdir $HOME/.docker - echo "{\"auths\":{\"\":{\"auth\":\"$registry_auth\"}}}" > $HOME/.docker/config.json - echo Installing Depot CLI... - curl -L https://depot.dev/install-cli.sh | DEPOT_INSTALL_DIR="/tmp/codebuild/bin" sh build: commands: - depot build -t :latest --push . ``` #### Obtaining an authenticated Docker config.json Alternatively, you can copy a pre-configured, authenticated `config.json` by logging into the Docker registry and copying the `config.json` file. ```bash $ docker login -u your-username Password: $ cat ~/.docker/config.json ``` You can now copy the contents of the `config.json` file and use it in your CodeBuild configuration. ### Build and load the image back for testing You can download the built container image into the workflow using the [`--load` flag](/docs/cli/reference/container-builds#depot-build). ```yaml showLineNumbers version: 0.2 env: secrets-manager: DEPOT_TOKEN: '' phases: pre_build: commands: - echo Installing Depot CLI... - curl -L https://depot.dev/install-cli.sh | DEPOT_INSTALL_DIR="/usr/local/bin" sh build: commands: - depot build --load . ``` ### Build, push, and load the image back in one command You can simultaneously push the built image to a registry and load it back into the CI job using the [`--load` and `--push`](/docs/cli/reference/container-builds#depot-build) flags together. ```yaml showLineNumbers version: 0.2 env: secrets-manager: DEPOT_TOKEN: '' phases: pre_build: commands: - echo Installing Depot CLI... - curl -L https://depot.dev/install-cli.sh | DEPOT_INSTALL_DIR="/usr/local/bin" sh - echo Logging in to Amazon ECR... - aws ecr get-login-password --region | docker login --username AWS --password-stdin build: commands: - depot build -t : --push --load . ``` ## Bitbucket Pipelines ## Authentication For Bitbucket Pipelines, you can use project or user access tokens for authenticating your build with Depot. We recommend using project tokens as they are scoped to a specific project and owned by the organization. **Note:** The CLI looks for the `DEPOT_TOKEN` environment variable by default. For both token options, you should configure this variable for your build environment via [repository variables](https://support.atlassian.com/bitbucket-cloud/docs/variables-and-secrets/). ### [Project token](/docs/cli/authentication#project-tokens) You can inject project access tokens into the Pipeline environment for `depot` CLI authentication. These tokens are tied to a specific project in your organization and not a user. ### [User access token](/docs/cli/authentication#user-access-tokens) It is also possible to generate a user access token to inject into the Pipeline environment for `depot` CLI authentication. This token is tied to a specific user and not a project. Therefore, it can be used to build all projects across all organizations that the user can access. ## Configuration To build a Docker image from Bitbucket Pipelines, you must set the `DEPOT_TOKEN` environment variable in your repository settings. You can do this through the UI for your repository via the [`Repository Settings > Pipelines > Repository variables`](https://support.atlassian.com/bitbucket-cloud/docs/variables-and-secrets/#Variablesinpipelines-Repositoryvariables). In addition, you must also install the `depot` CLI before you run `depot build`. ```yaml showLineNumbers pipelines: branches: master: - step: name: Install Depot CLI and build script: - curl -L https://depot.dev/install-cli.sh | DEPOT_INSTALL_DIR=/usr/local/bin sh - depot build . ``` ## Examples ### Build multi-platform images natively without emulation This example shows how you can use the `--platform` flag to build a multi-platform image for Intel and Arm architectures natively without emulation. ```yaml showLineNumbers pipelines: branches: master: - step: name: Build multi-architecture image script: - curl -L https://depot.dev/install-cli.sh | DEPOT_INSTALL_DIR=/usr/local/bin sh - depot build --platform linux/amd64,linux/arm64 . ``` ### Build and push to Docker Hub This example installs the `depot` CLI to be used directly in the pipeline. Then, `docker login` is invoked with the environment variables for `DOCKERHUB_USERNAME` and `DOCKERHUB_TOKEN` for the authentication context of the build to push to the registry. ```yaml showLineNumbers pipelines: branches: master: - step: name: Authenticate, Build, Push to Docker Hub script: - curl -L https://depot.dev/install-cli.sh | DEPOT_INSTALL_DIR=/usr/local/bin sh - docker login --username $DOCKERHUB_USERNAME --password $DOCKERHUB_TOKEN - depot build -t : --push . services: - docker # Needed just for logging the Docker build context into a registry ``` ### Build and push to Amazon ECR This example installs the `depot` and `aws` CLIs to be used directly in the pipeline. Then, `aws ecr get-login-password` is piped into `docker login` for the authentication context of the build to push to the registry. ```yaml showLineNumbers pipelines: branches: master: - step: name: Authenticate, Build, Push to ECR script: - curl -L https://depot.dev/install-cli.sh | DEPOT_INSTALL_DIR=/usr/local/bin sh - curl "https://awscli.amazonaws.com/awscli-exe-linux-x86_64.zip" -o "awscliv2.zip" - unzip awscliv2.zip - ./aws/install - aws --version - aws ecr get-login-password --region | docker login --username AWS --password-stdin - depot build -t : --push . services: - docker # Needed just for logging the Docker build context into a registry ``` ### Build and load the image back into the Pipeline for testing You can use the [`--load` flag](/docs/cli/reference/container-builds#depot-build) to download the built container image into the workflow. ```yaml showLineNumbers pipelines: branches: master: - step: name: Install Depot CLI, build, load image back into the Pipeline script: - curl -L https://depot.dev/install-cli.sh | DEPOT_INSTALL_DIR=/usr/local/bin sh - depot build --load . ``` ### Build, push, and load the image back in one command You can simultaneously push the built image to a registry and load it back into the CI job by using the [`--load` and `--push`](/docs/cli/reference/container-builds#depot-build) flag together. ```yaml showLineNumbers pipelines: branches: master: - step: name: Install Depot CLI, build, load image back into the Pipeline script: - curl -L https://depot.dev/install-cli.sh | DEPOT_INSTALL_DIR=/usr/local/bin sh - depot build -t --push --load . ``` ## Buildkite ## Authentication For Buildkite, you can use OIDC, project, or user access tokens for authenticating your build with Depot. Because Buildkite supports the OIDC flow, we recommend using that for the best experience. ### [OIDC token](/docs/cli/authentication#oidc-trust-relationships) The easiest option is to use a [Buildkite OIDC token](https://buildkite.com/docs/agent/v3/cli-oidc) as authentication for `depot build`. Our CLI supports authentication via OIDC by default in Buildkite when you have a trust relationship configured for your project. ### [Project token](/docs/cli/authentication#project-tokens) You can inject a project access token into the pipeline for `depot` CLI authentication. Project tokens are tied to a specific project in your organization and not a user. ### [User access token](/docs/cli/authentication#user-access-tokens) You can inject a user access token into the pipeline for `depot` CLI authentication. User tokens are tied to a specific user and not a project. Therefore, it can be used to build all projects across all organizations that the user can access. ## Configuration To build a Docker image from Buildkite, you must either configure an OIDC trust relationship for your project or set the `DEPOT_TOKEN` environment variable via a Buildkite [`environment` hook](https://buildkite.com/docs/pipelines/security/secrets/managing#exporting-secrets-with-environment-hooks). This guide also assumes that you are defining a `pipeline.yml` configuration file located in a `.buildkite` directory at the root of your repository. See the [Buildkite documentation](https://buildkite.com/docs/pipelines/defining-steps#step-defaults-pipeline-dot-yml-file) for more information on how to configure your pipeline this way. To build a Docker image with Depot inside of your Buildkite pipeline, you must first install the `depot` CLI, and then you can run `depot build`. ```yaml showLineNumbers steps: - label: 'Build image with Depot' command: - 'curl -L https://depot.dev/install-cli.sh | DEPOT_INSTALL_DIR=/usr/local/bin sh' - 'depot build .' ``` ## Examples ### Build multi-platform images natively without emulation This example shows how you can use the `--platform` flag to build a multi-platform image for Intel and Arm architectures natively without emulation. ```yaml showLineNumbers steps: - label: 'Build image with Depot' command: - 'curl -L https://depot.dev/install-cli.sh | DEPOT_INSTALL_DIR=/usr/local/bin sh' - 'depot build --platform linux/amd64,linux/arm64 .' ``` ### Build and push to Docker Hub This example assumes you have set the `DOCKERHUB_USERNAME` and `DOCKERHUB_TOKEN` environment variables as part of the [`environment` hook](https://buildkite.com/docs/pipelines/security/secrets/managing#exporting-secrets-with-environment-hooks) and you have the `docker` CLI installed in your Buildkite agent. We then install the `depot` CLI to be used directly in the pipeline. Then, `docker login` is invoked with the environment variables for `DOCKERHUB_USERNAME` and `DOCKERHUB_TOKEN` for the authentication context of the build to push to the registry. ```yaml showLineNumbers steps: - label: 'Build image with Depot and push to Docker Hub' command: - 'curl -L https://depot.dev/install-cli.sh | DEPOT_INSTALL_DIR=/usr/local/bin sh' - 'docker login --username $DOCKERHUB_USERNAME --password $DOCKERHUB_TOKEN' - 'depot build -t : --push .' ``` ### Build and push to Amazon ECR This example installs the `depot` and `aws` CLIs to be used directly. Then, `aws ecr get-login-password` is piped into `docker login` for the authentication context of the build to push to the registry. ```yaml showLineNumbers steps: - label: 'Build image with Depot and push to Docker Hub' command: - 'curl -L https://depot.dev/install-cli.sh | DEPOT_INSTALL_DIR=/usr/local/bin sh' - 'curl https://awscli.amazonaws.com/awscli-exe-linux-x86_64.zip -o awscliv2.zip' - 'unzip awscliv2.zip' - './aws/install' - 'aws ecr get-login-password --region | docker login --username AWS --password-stdin ' - 'depot build -t : --push .' ``` ### Build and load the image back for testing You can use the [`--load` flag](/docs/cli/reference/container-builds#depot-build) to download the built container image into the workflow. ```yaml showLineNumbers steps: - label: 'Build image with Depot' command: - 'curl -L https://depot.dev/install-cli.sh | DEPOT_INSTALL_DIR=/usr/local/bin sh' - 'depot build --load .' ``` ### Build, push, and load the image back in one command You can simultaneously push the built image to a registry and load it back into the CI job by using the [`--load` and `--push`](/docs/cli/reference/container-builds#depot-build) flag together. ```yaml showLineNumbers steps: - label: 'Build image with Depot' command: - 'curl -L https://depot.dev/install-cli.sh | DEPOT_INSTALL_DIR=/usr/local/bin sh' - 'depot build -t --push --load .' ``` ## CircleCI ## Authentication For CircleCI, you can use OIDC, project, or user access tokens for authenticating your build with Depot. We recommend OIDC tokens for the best experience, as they work automatically without provisioning a static access token. ### [OIDC token](/docs/cli/authentication#oidc-trust-relationships) The easiest option is to use a [CircleCI OIDC token](https://circleci.com/docs/openid-connect-tokens/) as authentication for `depot build`. Our CLI supports authentication via OIDC by default in CircleCI when you have a trust relationship configured for your project. ### [Project token](/docs/cli/authentication#project-tokens) You can set the `DEPOT_TOKEN` environment variable to a project access token in your [CircleCI environment variable settings](https://circleci.com/docs/set-environment-variable/#set-an-environment-variable-in-a-project). Project tokens are tied to a specific project in your organization and not a user. ### [User access token](/docs/cli/authentication#user-access-tokens) You can also set the `DEPOT_TOKEN` environment variable to a user access token in your [CircleCI environment variable settings](https://circleci.com/docs/set-environment-variable/#set-an-environment-variable-in-a-project). User tokens are tied to a specific user and not a project. Therefore, it can be used to build all projects across all organizations that the user has access. ## Configuration To build a Docker image from CircleCI, you must set the `DEPOT_TOKEN` environment variable in your project settings. This is done through the [UI for your project](https://circleci.com/docs/set-environment-variable/#set-an-environment-variable-in-a-project). CircleCI has two executor types that allow you to build Docker images. The `machine` executor runs your job on the entire VM with `docker` pre-installed. The `docker` executor runs your job in a container. Depot can be used in either executor type. ### Using the CircleCI machine executor To install `depot` and run a Docker image build in CircleCI, add the following to your `config.yml` file: ```yaml showLineNumbers version: 2.1 jobs: build: machine: true resource_class: medium steps: - checkout - run: name: Install Depot command: | curl -L https://depot.dev/install-cli.sh | sudo env DEPOT_INSTALL_DIR=/usr/local/bin sh - run: name: Build with Depot command: | depot build . ``` ### Using the CircleCI docker executor If you would prefer to use the `docker` executor, you can use the following configuration: ```yaml showLineNumbers version: 2.1 jobs: build: docker: - image: cimg/node:lts resource_class: small steps: - checkout - setup_remote_docker - run: name: Install Depot command: | curl -L https://depot.dev/install-cli.sh | sudo env DEPOT_INSTALL_DIR=/usr/local/bin sh - run: name: Build with Depot command: depot build . workflows: run_build: jobs: - build ``` **Note:** The `setup_remote_docker` step is required for the `docker` executor if you want to execute Docker commands in your build before or after the `depot` CLI builds your image. See the examples below ## Examples The examples below use the machine executor. However, the same commands can be used with the docker executor as well. ### Build multi-platform images without emulation in CircleCI This example shows how you can use the `--platform` flag to build a multi-platform image for Intel and Arm architectures natively without emulation. ```yaml showLineNumbers version: 2.1 jobs: build: machine: true resource_class: medium steps: - checkout - run: name: Install Depot command: | curl -L https://depot.dev/install-cli.sh | sudo env DEPOT_INSTALL_DIR=/usr/local/bin sh - run: name: Build multi-architecture image command: | depot build --platform linux/amd64,linux/arm64 . workflows: run_build: jobs: - build ``` ### Build and push to Docker Hub This examples assumes you have set the `DOCKERHUB_PASS` and `DOCKERHUB_USERNAME` environment variables in your CircleCI project settings. ```yaml showLineNumbers version: 2.1 jobs: build: machine: true resource_class: medium steps: - checkout - run: name: Install Depot command: | curl -L https://depot.dev/install-cli.sh | sudo env DEPOT_INSTALL_DIR=/usr/local/bin sh - run: name: Build and push to Docker Hub with Depot command: | echo "$DOCKERHUB_PASS" | docker login -u "$DOCKERHUB_USERNAME" --password-stdin depot build -t --push . workflows: run_build: jobs: - build ``` ### Build and push to Amazon ECR This examples assumes you have set the `AWS_ACCESS_KEY_ID`, `AWS_SECRET_ACCESS_KEY`, and `AWS_ECR_REGISTRY_ID` environment variables in your CircleCI project settings. See the [`circleci/aws-ecr` orb documentation](https://circleci.com/developer/orbs/orb/circleci/aws-ecr) for more information. ```yaml showLineNumbers version: 2.1 orbs: aws-ecr: circleci/aws-ecr@8.2.1 jobs: build: machine: true resource_class: medium steps: - checkout - aws-ecr/ecr-login: region: us-east-1 - run: name: Install Depot command: | curl -L https://depot.dev/install-cli.sh | sudo env DEPOT_INSTALL_DIR=/usr/local/bin sh - run: name: Build and push to Amazon ECR with Depot command: | depot build -t --push . workflows: run_build: jobs: - build ``` ### Build and load the image back into the CircleCI job for testing You can use the [`--load` flag](/docs/cli/reference/container-builds#depot-build) to download the built container image into the workflow. ```yaml showLineNumbers version: 2.1 jobs: build: machine: true resource_class: medium steps: - checkout - run: name: Install Depot command: | curl -L https://depot.dev/install-cli.sh | sudo env DEPOT_INSTALL_DIR=/usr/local/bin sh - run: name: Build and push to Docker Hub with Depot command: | depot build --load . workflows: run_build: jobs: - build ``` ### Build, push, and load the image back in one command You can simultaneously push the built image to a registry and load it back into the CI job by using the [`--load` and `--push`](/docs/cli/reference/container-builds#depot-build) flag together. ```yaml showLineNumbers version: 2.1 jobs: build: machine: true resource_class: medium steps: - checkout - run: name: Install Depot command: | curl -L https://depot.dev/install-cli.sh | sudo env DEPOT_INSTALL_DIR=/usr/local/bin sh - run: name: Build and push to Docker Hub with Depot command: | echo "$DOCKERHUB_PASS" | docker login -u "$DOCKERHUB_USERNAME" --password-stdin depot build -t --push --load . workflows: run_build: jobs: - build ``` ## Container builds in Depot CI You can use Depot for your container image builds inside Depot CI workflows. If you haven't migrated your GitHub Actions workflows to Depot CI yet, see the [Depot CI quickstart](/docs/ci/quickstart). Depot CI workflows are compatible with GitHub Actions YAML. For details, see the [Depot CI compatibility reference](/docs/ci/compatibility). ## Configuration You can trigger Depot container builds in Depot CI using a dedicated build action, a bake action, or the Depot CLI directly. ### Depot build-push action The [`depot/build-push-action`](https://github.com/depot/build-push-action) implements the same inputs and outputs as `docker/build-push-action` but uses the Depot CLI to run the build. Use [`depot/setup-action`](https://github.com/depot/setup-action) to install the Depot CLI first. ```yaml jobs: build: runs-on: depot-ubuntu-latest steps: - uses: actions/checkout@v4 - uses: depot/setup-action@v1 - uses: depot/build-push-action@v1 with: project: context: . ``` ### Depot bake action The [`depot/bake-action`](https://github.com/depot/bake-action) builds all images defined in an HCL, JSON, or Docker Compose file. Use it when you need to build multiple images in a single build request. ```yaml jobs: build: runs-on: depot-ubuntu-latest steps: - uses: actions/checkout@v4 - uses: depot/setup-action@v1 - uses: depot/bake-action@v1 with: project: files: docker-bake.hcl ``` ### Depot CLI The [`depot/setup-action`](https://github.com/depot/setup-action) installs the `depot` CLI so you can run builds directly from your existing workflows. ```yaml jobs: build: runs-on: depot-ubuntu-latest steps: - uses: actions/checkout@v4 - uses: depot/setup-action@v1 - run: depot build --project --push --tag repo/image:tag . ``` ## Authentication Depot CI automatically injects `DEPOT_TOKEN` into every job as a short-lived CI job token with full access to your organization's projects and registry. You don't need to configure OIDC trust relationships or store any secrets, the build authenticates without additional setup. If you set `DEPOT_TOKEN` as a workflow secret yourself, your value overrides the auto-injected token. This commonly happens after migrating from GitHub Actions, where `DEPOT_TOKEN` was a project token. A project token is scoped to a single project's repositories in the Depot Registry, so pushes to repositories that don't begin with that project ID will fail. To restore the auto-injected behavior, remove the `DEPOT_TOKEN` secret from the dashboard or with `depot ci secrets remove DEPOT_TOKEN`. ## Pulling private base images Dockerfiles that start with `FROM` referencing a private registry need credentials when Depot builds the image. You have two options. ### Pull through Depot Registry (recommended) Configure your private registry as an upstream once from [Registry settings](/orgs/_/registry/settings), then create a Depot repository that mirrors the upstream and reference the Depot Registry URL in your Dockerfile: ```dockerfile FROM .registry.depot.dev/: ``` Depot fetches the image from your upstream registry, caches layers on its global CDN, and serves subsequent pulls from the cache. The auto-injected `DEPOT_TOKEN` handles pull authentication, so no login step is needed in the workflow. See [Pull-through cache](/docs/registry/pull-through-cache) for setup details and supported providers. ### Authenticate to the upstream registry If pull-through isn't an option, log in to the upstream registry before the build step using `docker/login-action`. The Depot remote builder picks up the credentials and uses them for `FROM` pulls. ```yaml jobs: build: runs-on: depot-ubuntu-latest steps: - uses: actions/checkout@v4 - uses: depot/setup-action@v1 - name: Login to private registry uses: docker/login-action@v3 with: registry: private-registry.example.com username: ${{ secrets.REGISTRY_USERNAME }} password: ${{ secrets.REGISTRY_PASSWORD }} - uses: depot/build-push-action@v1 with: project: context: . ``` ## Registry examples ### Depot Registry Use the `save` input to store the built image in the [Depot Registry](/docs/registry/overview) without any additional login steps. You can tag the image with `save-tag` or `save-tags` to retrieve it later with `depot pull` or `docker pull`. ```yaml name: Build image on: push: branches: - main jobs: build: runs-on: depot-ubuntu-latest steps: - uses: actions/checkout@v4 - uses: depot/setup-action@v1 - name: Build and save to Depot Registry uses: depot/build-push-action@v1 with: project: context: . save: true save-tags: | latest ${{ github.sha }} ``` The saved image can then be pulled from the Depot Registry: ```shell # Using the Depot CLI (uses existing CLI credentials) depot pull --project latest # Using Docker (requires docker login first) docker login registry.depot.dev -u x-token -p $(depot pull-token --project ) docker pull registry.depot.dev/:latest ``` ### Amazon ECR Use the [`aws-actions/configure-aws-credentials`](https://github.com/aws-actions/configure-aws-credentials) and [`aws-actions/amazon-ecr-login`](https://github.com/aws-actions/amazon-ecr-login) actions to authenticate to your ECR registry, then build and push with `depot/build-push-action`. AWS authentication uses the OIDC token Depot CI issues when you set `id-token: write`. ```yaml name: Build image on: push: branches: - main jobs: build: runs-on: depot-ubuntu-latest permissions: contents: read id-token: write steps: - uses: actions/checkout@v4 - uses: depot/setup-action@v1 - name: Configure AWS Credentials uses: aws-actions/configure-aws-credentials@v4 with: role-to-assume: arn:aws:iam:::role/ aws-region: - name: Login to Amazon ECR id: ecr-login uses: aws-actions/amazon-ecr-login@v2 - name: Build and push uses: depot/build-push-action@v1 with: project: context: . push: true tags: ${{ steps.ecr-login.outputs.registry }}/:latest ``` For the OIDC trust relationship setup on the AWS side, see [OIDC with Depot CI](/docs/ci/oidc). ### GCP Artifact Registry Use the [`google-github-actions/auth`](https://github.com/google-github-actions/auth) and [`google-github-actions/setup-gcloud`](https://github.com/google-github-actions/setup-gcloud) actions to authenticate to your Artifact Registry, then build and push with `depot/build-push-action`. ```yaml name: Build image on: push: branches: - main jobs: build: runs-on: depot-ubuntu-latest permissions: contents: read id-token: write steps: - uses: actions/checkout@v4 - uses: depot/setup-action@v1 - uses: google-github-actions/auth@v3 with: service_account: '...' workload_identity_provider: '...' - uses: google-github-actions/setup-gcloud@v3 with: project_id: - name: Configure docker for GCP run: gcloud auth configure-docker -docker.pkg.dev --quiet - name: Build and push uses: depot/build-push-action@v1 with: project: context: . push: true tags: -docker.pkg.dev//:latest provenance: false ``` ### Azure Container Registry Use the [`azure/login`](https://github.com/azure/login) action to authenticate with Azure, then `az acr login` to obtain a registry token before building and pushing with `depot/build-push-action`. ```yaml name: Build image on: push: branches: - main jobs: build: runs-on: depot-ubuntu-latest permissions: contents: read id-token: write steps: - uses: actions/checkout@v4 - uses: depot/setup-action@v1 - name: Login to Azure uses: azure/login@v2 with: client-id: ${{ secrets.AZURE_CLIENT_ID }} tenant-id: ${{ secrets.AZURE_TENANT_ID }} subscription-id: ${{ secrets.AZURE_SUBSCRIPTION_ID }} - name: Login to Azure Container Registry run: az acr login --name - name: Build and push uses: depot/build-push-action@v1 with: project: context: . push: true tags: .azurecr.io/: ``` ### Docker Hub Use the [`docker/login-action`](https://github.com/docker/login-action) to authenticate to Docker Hub, then build and push with `depot/build-push-action`. ```yaml name: Build image on: push: branches: - main jobs: build: runs-on: depot-ubuntu-latest steps: - uses: actions/checkout@v4 - uses: depot/setup-action@v1 - name: Login to DockerHub uses: docker/login-action@v3 with: username: ${{ secrets.DOCKERHUB_USERNAME }} password: ${{ secrets.DOCKERHUB_TOKEN }} - name: Build and push uses: depot/build-push-action@v1 with: project: context: . push: true tags: user/app:latest ``` ### Multiple registries Log in to each registry individually and pass multiple tags to push the image to all of them. ```yaml name: Build image on: push: branches: - main jobs: build: runs-on: depot-ubuntu-latest permissions: contents: read id-token: write steps: - uses: actions/checkout@v4 - uses: depot/setup-action@v1 - name: Configure AWS Credentials uses: aws-actions/configure-aws-credentials@v4 with: role-to-assume: arn:aws:iam:::role/ aws-region: - name: Login to DockerHub uses: docker/login-action@v3 with: username: ${{ secrets.DOCKERHUB_USERNAME }} password: ${{ secrets.DOCKERHUB_TOKEN }} - name: Login to Amazon ECR id: ecr-login uses: aws-actions/amazon-ecr-login@v2 - name: Build and push uses: depot/build-push-action@v1 with: project: context: . push: true tags: | /:latest ${{ steps.ecr-login.outputs.registry }}/:latest ``` ## Other examples ### Multi-platform images Use the `platforms` input to build for Intel and Arm architectures natively without emulation. ```yaml name: Build image on: push: branches: - main jobs: build: runs-on: depot-ubuntu-latest steps: - uses: actions/checkout@v4 - uses: depot/setup-action@v1 - name: Login to DockerHub uses: docker/login-action@v3 with: username: ${{ secrets.DOCKERHUB_USERNAME }} password: ${{ secrets.DOCKERHUB_TOKEN }} - name: Build and push uses: depot/build-push-action@v1 with: project: context: . platforms: linux/amd64,linux/arm64 push: true tags: user/app:latest ``` ### Export an image to Docker By default, Depot doesn't return the built image to the client. Pass `load: true` to make the image available in your workflow for subsequent steps like integration tests. ```yaml name: Build image on: push: branches: - main jobs: build: runs-on: depot-ubuntu-latest steps: - uses: actions/checkout@v4 - uses: depot/setup-action@v1 - name: Build and load uses: depot/build-push-action@v1 with: project: context: . load: true tags: test-container - name: Run integration test with built container run: ... ``` ### Software Bill of Materials Use the `sbom` and `sbom-dir` inputs to generate an SBOM for the image and output it to a directory. You can then upload it as a build artifact with `actions/upload-artifact`. ```yaml name: Build image with SBOM on: push: branches: - main jobs: build: runs-on: depot-ubuntu-latest steps: - uses: actions/checkout@v4 - uses: depot/setup-action@v1 - name: Build with SBOM uses: depot/build-push-action@v1 with: project: context: . sbom: true sbom-dir: ./sbom-output - name: Upload SBOM uses: actions/upload-artifact@v4 with: path: ./sbom-output name: sbom ``` ## Fly.io You can use Depot to build your container images for Fly.io. This guide will show you how to integrate Depot into your Fly.io deployment pipeline. ## Getting started with Fly.io Once you have a Fly.io account, you can create and deploy a new app using the Fly CLI. You can install the Fly CLI using the methods described in the [Fly.io documentation](https://fly.io/docs/flyctl/install/). You have two options for integrating Depot with Fly.io, you may build the image with `depot build` using your Depot account and push it to Fly.io, or you can use the `--depot` flag with the `flyctl deploy` command to use Depot as the builder on Fly. ## Getting started with Depot Before you can build and push your container images with Depot to your Fly registry, you need an account with Depot. If you don't already have one, you can sign up at [depot.dev/start](/start). Once you have an account, you need to create a Depot project for accelerated Docker image builds. With an account and project, all that is left is [installing the Depot CLI](/docs/cli/installation) by running the following command: ```shell brew install depot/tap/depot # for Mac curl -L https://depot.dev/install-cli.sh | sh # for Linux ``` ## Using Depot with Fly.io ### Fly CLI When using Depot as the builder for your Fly.io apps, you will not need to connect a Depot account. Simply specify Depot as the builder with the `--depot` flag when deploying and automatically take advantage of Depot's accelerated builds. ```shell flyctl deploy --depot ``` Alternatively, if you are running Fly machines directly you can use the `--build-depot` flag. ```shell flyctl machine run --build-depot ``` Depot's optimized build process will provide instant caching across all builds within your Fly.io organization, sharing layers between all your apps and deployments. ### Using Depot to build and push images to Fly.io Once an app is created in Fly.io, you will also have a container registry at `registry.fly.io/`. You can push your container images to Fly.io from Depot. #### Authenticate to Depot If you haven't already, run `depot init` in the root directory of the container image you're building with Depot. This will prompt you to authenticate your CLI and choose the project you created earlier. #### Authenticate to Fly.io registry Next, you need to authenticate to the Fly registry for your app using the Fly CLI. You can do this by running: ```shell flyctl auth docker ``` #### Build and push the image Using Depot, you can now build and push your container image to the Fly registry. Replace `` with the name of your Fly.io app and `` with the tag you want to use for the image. ```shell depot build -t registry.fly.io/: --platform linux/amd64 --push . ``` #### Deploy the image Finally, using the Fly CLI, you can deploy the image to your Fly.io app. Replace `` with the name of your Fly.io app and `` with the tag you used for the image. ```shell flyctl deploy --image registry.fly.io/: ``` ## Container builds in GitHub Actions If you're looking to use our fully managed GitHub Actions Runners as a drop-in replacement for your existing runners, head over to [Quickstart for GitHub Actions Runners](/docs/github-actions/quickstart). If you're looking to use Depot for your container image builds in GitHub Actions, read on. ## Configuration You can trigger Depot container builds in GitHub Actions using a dedicated build action, a bake action, or the Depot CLI directly. Before configuring your workflow, [set up authentication](#authentication). ### Depot build-push action The [`depot/build-push-action`](https://github.com/depot/build-push-action) implements the same inputs and outputs as `docker/build-push-action` but uses the Depot CLI to run the build. Use [`depot/setup-action`](https://github.com/depot/setup-action) to install the Depot CLI first. ```yaml jobs: build: runs-on: ubuntu-latest permissions: contents: read id-token: write steps: - uses: actions/checkout@v4 - uses: depot/setup-action@v1 - uses: depot/build-push-action@v1 with: project: context: . ``` The `permissions` block grants the workflow access to the repository contents and allows it to authenticate with Depot via OIDC, so you don't need any secret tokens. ### Depot bake action The [`depot/bake-action`](https://github.com/depot/bake-action) builds all images defined in an HCL, JSON, or Docker Compose file. Use it when you need to build multiple images in a single build request. ```yaml jobs: build: runs-on: ubuntu-latest permissions: contents: read id-token: write steps: - uses: actions/checkout@v4 - uses: depot/setup-action@v1 - uses: depot/bake-action@v1 with: project: files: docker-bake.hcl ``` The `permissions` block grants the workflow access to the repository contents and allows it to authenticate with Depot via OIDC, so you don't need any secret tokens. ### Depot CLI The [`depot/setup-action`](https://github.com/depot/setup-action) installs the `depot` CLI so you can run builds directly from your existing workflows. ```yaml jobs: build: runs-on: ubuntu-latest permissions: contents: read id-token: write steps: - uses: actions/checkout@v4 - uses: depot/setup-action@v1 - run: depot build --project --push --tag repo/image:tag . ``` The `permissions` block grants the workflow access to the repository contents and allows it to authenticate with Depot via OIDC, so you don't need any secret tokens. ## Authentication [OIDC](/docs/cli/authentication#oidc-trust-relationships) is the recommended authentication method for GitHub Actions. To set it up, add an OIDC trust relationship between your workflow and Depot: 1. Go to your Depot project **Settings**. 2. Click **Add trust relationship**. 3. Select **GitHub** as the provider. 4. Enter the GitHub user or organization name. 5. Enter the repository name (not the full URL, it must match exactly the repository name in GitHub). 6. Click **Add trust relationship**. 7. Add `id-token: write` and `contents: read` to the `permissions` block in your workflow so GitHub can issue the OIDC token. If you can't use OIDC, you can pass a [project token](/docs/cli/authentication#project-tokens) or [user access token](/docs/cli/authentication#user-access-tokens) via the `token` input or `DEPOT_TOKEN` environment variable instead. ## Registry examples ### Depot Registry Use the `save` input to store the built image in the [Depot Registry](/docs/registry/overview) without any additional login steps. You can tag the image with `save-tag` or `save-tags` to retrieve it later with `depot pull` or `docker pull`. ```yaml name: Build image on: push: branches: - main jobs: build: runs-on: ubuntu-latest permissions: contents: read id-token: write steps: - uses: actions/checkout@v4 - uses: depot/setup-action@v1 - name: Build and save to Depot Registry uses: depot/build-push-action@v1 with: project: context: . save: true save-tags: | latest ${{ github.sha }} ``` The saved image can then be pulled from the Depot Registry: ```shell # Using the Depot CLI (uses existing CLI credentials) depot pull --project latest # Using Docker (requires docker login first) docker login registry.depot.dev -u x-token -p $(depot pull-token --project ) docker pull registry.depot.dev/:latest ``` ### Amazon ECR Use the [`aws-actions/configure-aws-credentials`](https://github.com/aws-actions/configure-aws-credentials) and [`aws-actions/amazon-ecr-login`](https://github.com/aws-actions/amazon-ecr-login) actions to authenticate to your ECR registry, then build and push with `depot/build-push-action`. ```yaml name: Build image on: push: branches: - main jobs: build: runs-on: ubuntu-latest permissions: contents: read id-token: write steps: - uses: actions/checkout@v4 - uses: depot/setup-action@v1 - name: Configure AWS Credentials uses: aws-actions/configure-aws-credentials@v1.6.1 with: aws-access-key-id: ${{ secrets.AWS_ACCESS_KEY_ID }} aws-secret-access-key: ${{ secrets.AWS_SECRET_ACCESS_KEY }} aws-region: - name: Login to Amazon ECR id: ecr-login uses: aws-actions/amazon-ecr-login@v1.5.0 - name: Build and push uses: depot/build-push-action@v1 with: project: context: . push: true tags: ${{ steps.ecr-login.outputs.registry }}/:latest ``` ### GCP Artifact Registry Use the [`google-github-actions/auth`](https://github.com/google-github-actions/auth) and [`google-github-actions/setup-gcloud`](https://github.com/google-github-actions/setup-gcloud) actions to authenticate to your Artifact Registry, then build and push with `depot/build-push-action`. ```yaml name: Build image on: push: branches: - main jobs: build: runs-on: ubuntu-latest permissions: contents: read id-token: write steps: - uses: actions/checkout@v4 - uses: depot/setup-action@v1 - uses: google-github-actions/auth@v3 with: service_account: '...' workload_identity_provider: '...' - uses: google-github-actions/setup-gcloud@v3 with: project_id: - name: Configure docker for GCP run: gcloud auth configure-docker -docker.pkg.dev --quiet - name: Build and push uses: depot/build-push-action@v1 with: project: context: . push: true tags: -docker.pkg.dev//:latest provenance: false ``` ### Azure Container Registry Use the [`azure/login`](https://github.com/azure/login) action to authenticate with Azure, then `az acr login` to obtain a registry token before building and pushing with `depot/build-push-action`. ```yaml name: Build image on: push: branches: - main jobs: build: runs-on: ubuntu-latest permissions: contents: read id-token: write steps: - uses: actions/checkout@v4 - uses: depot/setup-action@v1 - name: Login to Azure uses: azure/login@v2 with: client-id: ${{ secrets.AZURE_CLIENT_ID }} tenant-id: ${{ secrets.AZURE_TENANT_ID }} subscription-id: ${{ secrets.AZURE_SUBSCRIPTION_ID }} - name: Login to Azure Container Registry run: az acr login --name - name: Build and push uses: depot/build-push-action@v1 with: project: context: . push: true tags: .azurecr.io/: ``` ### Docker Hub Use the [`docker/login-action`](https://github.com/docker/login-action) to authenticate to Docker Hub, then build and push with `depot/build-push-action`. ```yaml name: Build image on: push: branches: - main jobs: build: runs-on: ubuntu-latest permissions: contents: read id-token: write steps: - uses: actions/checkout@v4 - uses: depot/setup-action@v1 - name: Login to DockerHub uses: docker/login-action@v2 with: username: ${{ secrets.DOCKERHUB_USERNAME }} password: ${{ secrets.DOCKERHUB_TOKEN }} - name: Build and push uses: depot/build-push-action@v1 with: project: context: . push: true tags: user/app:latest ``` ### Multiple registries Log in to each registry individually and pass multiple tags to push the image to all of them. ```yaml name: Build image on: push: branches: - main jobs: build: runs-on: ubuntu-latest permissions: contents: read id-token: write steps: - uses: actions/checkout@v4 - uses: depot/setup-action@v1 - name: Configure AWS Credentials uses: aws-actions/configure-aws-credentials@v1.6.1 with: aws-access-key-id: ${{ secrets.AWS_ACCESS_KEY_ID }} aws-secret-access-key: ${{ secrets.AWS_SECRET_ACCESS_KEY }} aws-region: - name: Login to DockerHub uses: docker/login-action@v2 with: username: ${{ secrets.DOCKERHUB_USERNAME }} password: ${{ secrets.DOCKERHUB_TOKEN }} - name: Login to Amazon ECR id: ecr-login uses: aws-actions/amazon-ecr-login@v1.5.0 - name: Build and push uses: depot/build-push-action@v1 with: project: context: . push: true tags: | /:latest ${{ steps.ecr-login.outputs.registry }}/:latest ``` ## Other examples ### Multi-platform images Use the `platforms` input to build for Intel and Arm architectures natively without emulation. ```yaml name: Build image on: push: branches: - main jobs: build: runs-on: ubuntu-latest permissions: contents: read id-token: write steps: - uses: actions/checkout@v4 - uses: depot/setup-action@v1 - name: Login to DockerHub uses: docker/login-action@v2 with: username: ${{ secrets.DOCKERHUB_USERNAME }} password: ${{ secrets.DOCKERHUB_TOKEN }} - name: Build and push uses: depot/build-push-action@v1 with: project: context: . platforms: linux/amd64,linux/arm64 push: true tags: user/app:latest ``` ### Export an image to Docker By default, Depot doesn't return the built image to the client. Pass `load: true` to make the image available in your workflow for subsequent steps like integration tests. ```yaml name: Build image on: push: branches: - main jobs: build: runs-on: ubuntu-latest permissions: contents: read id-token: write steps: - uses: actions/checkout@v4 - uses: depot/setup-action@v1 - name: Build and load uses: depot/build-push-action@v1 with: project: context: . load: true tags: test-container - name: Run integration test with built container run: ... ``` ### Software Bill of Materials Use the `sbom` and `sbom-dir` inputs to generate an SBOM for the image and output it to a directory. You can then upload it as a build artifact with `actions/upload-artifact`. ```yaml name: Build image with SBOM on: push: branches: - main jobs: build: runs-on: ubuntu-latest permissions: contents: read id-token: write steps: - uses: actions/checkout@v4 - uses: depot/setup-action@v1 - name: Build with SBOM uses: depot/build-push-action@v1 with: project: context: . sbom: true sbom-dir: ./sbom-output - name: Upload SBOM uses: actions/upload-artifact@v3.1.0 with: path: ./sbom-output name: sbom ``` ## GitLab CI ## Authentication For GitLab, you can use OIDC, project, or user access tokens for authenticating your build with Depot. We recommend OIDC tokens because they avoid storing static Depot credentials in GitLab. ### [OIDC token](/docs/cli/authentication#oidc-trust-relationships) The easiest option is to use a [GitLab CI ID token](https://docs.gitlab.com/ci/secrets/id_token_authentication/) as authentication for `depot build`. Our CLI supports authentication via OIDC by default in GitLab CI when you have a trust relationship configured for your project. ### [Project token](/docs/cli/authentication#project-tokens) A project access token can be injected into your GitLab job for `depot` CLI authentication via [CI/CD variables](https://docs.gitlab.com/ee/ci/variables/) or [external secrets](https://docs.gitlab.com/ee/ci/secrets/). Project tokens are tied to a specific project in your organization and not a user. ### [User access token](/docs/cli/authentication#user-access-tokens) It is also possible to generate a user access token that can be injected into your GitLab job for `depot` CLI authentication via [CI/CD variables](https://docs.gitlab.com/ee/ci/variables/) or [external secrets](https://docs.gitlab.com/ee/ci/secrets/). User tokens are tied to a specific user and not a project. Therefore, it can be used to build all projects across all organizations the user can access. ## Configuration To build a Docker image from GitLab, configure a Depot trust relationship for your GitLab namespace and project, then request an ID token named `DEPOT_OIDC_TOKEN` in your GitLab job. You can also select **Restrict to protected refs** when creating the trust relationship. When enabled, Depot only accepts GitLab ID tokens whose `ref_protected` claim is `true`. In addition, you must also install the `depot` CLI before you run `depot build`. ```yaml showLineNumbers build-image: id_tokens: DEPOT_OIDC_TOKEN: aud: https://depot.dev before_script: - curl https://depot.dev/install-cli.sh | DEPOT_INSTALL_DIR=/usr/local/bin sh script: - depot build . ``` ## Examples ### Build and push to GitLab registry To build a Docker image from GitLab and push it to a registry, you have two options to choose from because of how GitLab CI/CD with Docker allows you to build Docker images. #### Option 1: Use the `DOCKER_AUTH_CONFIG` variable This example demonstrates how you can use the CI/CD variable `DOCKER_AUTH_CONFIG` ([see these docs](https://docs.gitlab.com/ee/ci/docker/using_docker_images.html#determine-your-docker_auth_config-data)) to inject a [GitLab Deploy Token](https://docs.gitlab.com/ee/user/project/deploy_tokens/) you have created that can read/write to the GitLab registry. You then inject that file before the build, which allows `depot build . --push` to authenticate to your registry. **Note:** This requires configuring an additional CI/CD variable, but it avoids using Docker-in-Docker. ```yaml showLineNumbers build-image: id_tokens: DEPOT_OIDC_TOKEN: aud: https://depot.dev before_script: - curl https://depot.dev/install-cli.sh | DEPOT_INSTALL_DIR=/usr/local/bin sh - mkdir -p $HOME/.docker - echo $DOCKER_AUTH_CONFIG > $HOME/.docker/config.json script: - depot build -t registry.gitlab.com/repo/image:tag . --push ``` #### Option 2: Using Docker-in-Docker This example demonstrates using the [Docker-in-Docker](https://docs.gitlab.com/ee/ci/docker/using_docker_build.html#use-docker-in-docker-executor) executor. This method allows you to install the `depot` CLI in the `before_script` block and use `docker login` to authenticate to whichever registry you use. ```yaml showLineNumbers image: docker:20.10.16 services: - docker:20.10.16-dind variables: DOCKER_HOST: tcp://docker:2376 DOCKER_TLS_CERTDIR: '/certs' build-image: id_tokens: DEPOT_OIDC_TOKEN: aud: https://depot.dev before_script: - apk add --no-cache curl - curl https://depot.dev/install-cli.sh | DEPOT_INSTALL_DIR=/usr/local/bin sh script: - echo "$DOCKER_REGISTRY_PASS" | docker login registry.gitlab.com --username --password-stdin - depot build --project -t registry.gitlab.com/repo/image:tag . --push ``` ### Build multi-platform images natively without emulation This example shows how you can use the `platforms` flag to build a multi-platform image for Intel and Arm architectures natively without emulation. ```yaml showLineNumbers build-image: id_tokens: DEPOT_OIDC_TOKEN: aud: https://depot.dev before_script: - curl https://depot.dev/install-cli.sh | DEPOT_INSTALL_DIR=/usr/local/bin sh - mkdir -p $HOME/.docker - echo $DOCKER_AUTH_CONFIG > $HOME/.docker/config.json script: - depot build -t registry.gitlab.com/repo/image:tag --platform linux/amd64,linux/arm64 . --push ``` ### Export an image to Docker By default, like `docker buildx`, Depot doesn't return the built image to the client. However, for cases where you need the built image in your GitLab workflow, you can pass the `--load` flag, and Depot will return the image to the workflow. ```yaml showLineNumbers build-image: before_script: - curl https://depot.dev/install-cli.sh | DEPOT_INSTALL_DIR=/usr/local/bin sh - mkdir -p $HOME/.docker - echo $DOCKER_AUTH_CONFIG > $HOME/.docker/config.json script: - depot build -t your-tag --load . variables: # Pass project token or user access token DEPOT_TOKEN: $DEPOT_TOKEN ``` ### Build an image with Software Bill of Materials Build an image with a Software Bill of Materials (SBOM) using the `--sbom` and `--sbom-dir` flags. The `sbom` flag will generate an SBOM for the image, and the `sbom-dir` flag will output the SBOM to the specified directory. ```yaml showLineNumbers build-image: before_script: - curl https://depot.dev/install-cli.sh | DEPOT_INSTALL_DIR=/usr/local/bin sh - mkdir -p $HOME/.docker - echo $DOCKER_AUTH_CONFIG > $HOME/.docker/config.json script: - depot build -t your-tag --sbom=true --sbom-dir=sboms . variables: # Pass project token or user access token DEPOT_TOKEN: $DEPOT_TOKEN ``` ## Google Cloud Build ## Authentication For Google Cloud Build, you can use project or user access tokens for authenticating your build with Depot. We recommend using project tokens as they are scoped to the specific project and are owned by the organization. ### [Project token](/docs/cli/authentication#project-tokens) You can inject project access tokens into the Cloud Build environment for `depot` CLI authentication. Project tokens are tied to a specific project in your organization and not a user. ### [User access token](/docs/cli/authentication#user-access-tokens) You can also inject a user access token into the Cloud Build environment for `depot` CLI authentication. User tokens are tied to a specific user and not a project. Therefore, it can be used to build all projects across all organizations that the user has access. ## Configuration To build a Docker image from Google Cloud Build, you must set the `DEPOT_TOKEN` environment variable by [injecting it from Secrets Manager](https://cloud.google.com/build/docs/securing-builds/use-secrets#example_accessing_secrets_from_scripts_and_processes). We publish a [container image](https://github.com/depot/cli/pkgs/container/cli) of the `depot` CLI that you can use to run Docker builds from your existing Cloud Build config file. ```yaml showLineNumbers steps: - name: ghcr.io/depot/cli:latest id: Build with Depot args: - build - --project - - . secretEnv: ['DEPOT_TOKEN'] availableSecrets: secretManager: - versionName: projects//secrets//versions/latest env: DEPOT_TOKEN ``` ## Examples ### Build multi-platform images natively without emulation This example shows how you can use the `--platform` flag to build a multi-platform image for Intel and Arm architectures natively without emulation. ```yaml showLineNumbers steps: - name: ghcr.io/depot/cli:latest id: Build with Depot args: - build - --project - - --platform - linux/amd64,linux/arm64 - . secretEnv: ['DEPOT_TOKEN'] availableSecrets: secretManager: - versionName: projects//secrets//versions/latest env: DEPOT_TOKEN ``` ### Build and push to Artifact Registry This example demonstrates how you can use the `depot/cli` image inside of Cloud Build to build and push a Docker image to an Artifact Registry in the same GCP project. ```yaml showLineNumbers steps: - name: ghcr.io/depot/cli:latest id: Build with Depot args: - build - --project - - -t - us-docker.pkg.dev/$PROJECT_ID//:$COMMIT_SHA - --push - . secretEnv: ['DEPOT_TOKEN'] availableSecrets: secretManager: - versionName: projects//secrets//versions/latest env: DEPOT_TOKEN ``` ### Build and load the image back for testing You can use the [`--load` flag](/docs/cli/reference/container-builds#depot-build) to download the built container image into the workflow. ```yaml showLineNumbers steps: - name: ghcr.io/depot/cli:latest id: Build with Depot args: - build - --project - - --load - . secretEnv: ['DEPOT_TOKEN'] availableSecrets: secretManager: - versionName: projects//secrets//versions/latest env: DEPOT_TOKEN ``` ### Build, push, and load the image back in one command You can simultaneously push the built image to a registry and load it back into the CI job by using the [`--load` and `--push`](/docs/cli/reference/container-builds#depot-build) flag together. ```yaml showLineNumbers steps: - name: ghcr.io/depot/cli:latest id: Build with Depot args: - build - --project - - -t - us-docker.pkg.dev/$PROJECT_ID//:$COMMIT_SHA - --push - --load - . secretEnv: ['DEPOT_TOKEN'] availableSecrets: secretManager: - versionName: projects//secrets//versions/latest env: DEPOT_TOKEN ``` ## Jenkins ## Authentication For Jenkins, you can use project or user access tokens for authenticating your build with Depot. We recommend using project tokens as they are scoped to a specific project and owned by the organization. **Note:** The CLI looks for the `DEPOT_TOKEN` environment variable by default. For both token options, you should configure this variable for your build environment via [global credentials](https://www.jenkins.io/doc/book/using/using-credentials/#configuring-credentials). ### [Project token](/docs/cli/authentication#project-tokens) You can inject project access tokens into the Pipeline environment for `depot` CLI authentication. These tokens are tied to a specific project in your organization and not a user. ### [User access token](/docs/cli/authentication#user-access-tokens) It is also possible to generate a user access token to inject into the Pipeline environment for `depot` CLI authentication. This token is tied to a specific user and not a project. Therefore, it can be used to build all projects across all organizations that the user can access. ## Configuration To build a Docker image from Jenkins, you must set the `DEPOT_TOKEN` environment variable in your global credentials. You can do this through the UI for your Pipeline via [`Manage Jenkins > Manage Credentials`](https://www.jenkins.io/doc/book/using/using-credentials/#configuring-credentials). In addition, you must also install the `depot` CLI before you run `depot build`. ```groovy showLineNumbers pipeline { agent any environment { DEPOT_TOKEN = credentials('depot-token') } stages { stage('Build') { steps { sh 'curl -L https://depot.dev/install-cli.sh | DEPOT_INSTALL_DIR=/usr/local/bin sh' sh 'depot build .' } } } } ``` ## Examples ### Build multi-platform images natively without emulation in Jenkins This example shows how you can use the `--platform` flag to build a multi-platform image for Intel and Arm architectures natively without emulation. ```groovy showLineNumbers pipeline { agent any environment { DEPOT_TOKEN = credentials('depot-token') } stages { stage('Build') { steps { sh 'curl -L https://depot.dev/install-cli.sh | DEPOT_INSTALL_DIR=/usr/local/bin sh' sh 'depot build --platform linux/amd64,linux/arm64 .' } } } } ``` ### Build and push to Docker Hub This example installs the `depot` CLI to be used directly in the pipeline. Then, `docker login` is invoked with the environment variables for `DOCKERHUB_USERNAME` and `DOCKERHUB_TOKEN` for the authentication context of the build to push to the registry. ```groovy showLineNumbers pipeline { agent any environment { DEPOT_TOKEN = credentials('depot-token') DOCKERHUB_USERNAME = credentials('dockerhub-username') DOCKERHUB_TOKEN = credentials('dockerhub-token') } stages { stage('Build') { steps { sh 'curl -L https://depot.dev/install-cli.sh | DEPOT_INSTALL_DIR=/usr/local/bin sh' sh 'docker login --username $DOCKERHUB_USERNAME --password $DOCKERHUB_TOKEN' sh 'depot build -t : --push .' } } } } ``` ### Build and push to Amazon ECR This example installs the `depot` and `aws` CLIs to be used directly in the pipeline. Then, `aws ecr get-login-password` is piped into `docker login` for the authentication context of the build to push to the registry. ```groovy showLineNumbers pipeline { agent any environment { DEPOT_TOKEN = credentials('depot-token') DOCKERHUB_USERNAME = credentials('dockerhub-username') DOCKERHUB_TOKEN = credentials('dockerhub-token') } stages { stage('Build') { steps { sh 'curl -L https://depot.dev/install-cli.sh | DEPOT_INSTALL_DIR=/usr/local/bin sh' sh 'curl "https://awscli.amazonaws.com/awscli-exe-linux-x86_64.zip" -o "awscliv2.zip"' sh 'unzip awscliv2.zip' sh 'aws ecr get-login-password --region | docker login --username AWS --password-stdin ' sh 'depot build -t : --push .' } } } } ``` ### Build and load the image back into the Pipeline for testing You can download the built container image into the workflow using the [`--load` flag](/docs/cli/reference/container-builds#depot-build). ```groovy showLineNumbers pipeline { agent any environment { DEPOT_TOKEN = credentials('depot-token') } stages { stage('Build') { steps { sh 'curl -L https://depot.dev/install-cli.sh | DEPOT_INSTALL_DIR=/usr/local/bin sh' sh 'depot build --load .' } } } } ``` ### Build, push, and load the image back in one command You can simultaneously push the built image to a registry and load it back into the CI job using the [`--load` and `--push`](/docs/cli/reference/container-builds#depot-build) flags together. ```groovy showLineNumbers pipeline { agent any environment { DEPOT_TOKEN = credentials('depot-token') } stages { stage('Build') { steps { sh 'curl -L https://depot.dev/install-cli.sh | DEPOT_INSTALL_DIR=/usr/local/bin sh' sh 'depot build -t --load --push .' } } } } ``` ## Travis CI ## Authentication For Travis CI, you can use project or user access tokens for authenticating your build with Depot. We recommend using project tokens as they are scoped to the specific project and are owned by the organization. ### [Project token](/docs/cli/authentication#project-tokens) You can inject project access tokens into the Travis CI environment for `depot` CLI authentication. Project tokens are tied to a specific project in your organization and not a user. ### [User access token](/docs/cli/authentication#user-access-tokens) You can also inject user access tokens into the Travis CI environment for `depot` CLI authentication. User tokens are tied to a specific user and not a project. Therefore, it can be used to build all projects across all organizations that the user has access. ## Configuration To build a Docker image from Travis CI, you must set the `DEPOT_TOKEN` environment variable in your repository settings. This can be done through the [UI for your repository](https://docs.travis-ci.com/user/environment-variables#defining-variables-in-repository-settings) or via the Travis CLI: ```bash travis env set DEPOT_TOKEN your-user-access-token ``` In addition, you must also install the `depot` CLI before you run `depot build`. ```yaml showLineNumbers sudo: required env: - DEPOT_INSTALL_DIR=/usr/local/bin before_install: - curl -L https://depot.dev/install-cli.sh | sudo sh script: - depot build . ``` ## Examples ### Build multi-platform images natively without emulation This example shows how you can use the `--platform` flag to build a multi-platform image for Intel and Arm architectures natively without emulation. ```yaml showLineNumbers sudo: required env: - DEPOT_INSTALL_DIR=/usr/local/bin before_install: - curl -L https://depot.dev/install-cli.sh | sudo sh script: - depot build --platform linux/amd64,linux/arm64 . ``` ### Build and push to Docker Hub This example installs the `depot` CLI to be used directly in the pipeline. Then, `docker login` is invoked with the environment variables for `DOCKERHUB_USERNAME` and `DOCKERHUB_TOKEN` for the authentication context of the build to push to the registry. ```yaml showLineNumbers sudo: required # Needed just for logging the Docker build context into a registry services: - docker env: - DEPOT_INSTALL_DIR=/usr/local/bin before_install: - curl -L https://depot.dev/install-cli.sh | sudo sh script: - docker login --username $DOCKERHUB_USERNAME --password $DOCKERHUB_TOKEN - depot build -t : --push . ``` ### Build and push to Amazon ECR This example installs the `depot` and `aws` CLIs to be used directly in the pipeline. Then, `aws ecr get-login-password` is piped into `docker login` for the authentication context of the build to push to the registry. ```yaml showLineNumbers sudo: required # Needed just for logging the Docker build context into a registry services: - docker env: - DEPOT_INSTALL_DIR=/usr/local/bin before_install: - curl -L https://depot.dev/install-cli.sh | sudo sh - curl "https://awscli.amazonaws.com/awscli-exe-linux-x86_64.zip" -o "awscliv2.zip" - unzip awscliv2.zip - ./aws/install script: - aws ecr get-login-password --region | docker login --username AWS --password-stdin - depot build -t : --push . ``` ### Build and load the image back for testing You can use the [`--load` flag](/docs/cli/reference/container-builds#depot-build) to download the built container image into the workflow. ```yaml showLineNumbers sudo: required env: - DEPOT_INSTALL_DIR=/usr/local/bin before_install: - curl -L https://depot.dev/install-cli.sh | sudo sh script: - depot build --load . ``` ### Build, push, and load the image back in one command You can simultaneously push the built image to a registry and load it back into the CI job by using the [`--load` and `--push`](/docs/cli/reference/container-builds#depot-build) flag together. ```yaml showLineNumbers sudo: required # Needed just for logging the Docker build context into a registry services: - docker env: - DEPOT_INSTALL_DIR=/usr/local/bin before_install: - curl -L https://depot.dev/install-cli.sh | sudo sh script: - docker login --username $DOCKERHUB_USERNAME --password $DOCKERHUB_TOKEN - depot build -t : --push --load . ``` ## Container build logs Build logs show the detailed execution output for each container build, including all build steps, cache hits, and any errors encountered during the build process. In the Depot dashboard, you can drill into container build logs down to detailed info about individual steps. ## View logs for a build To view logs for a specific build, open the build details page. 1. Go to your organization's [projects page](/orgs/_/projects). 2. Click a project. 3. Click the build you want to inspect. The build page displays the **Logs** tab by default, showing all build steps. Project build details page with resource utilization graph, build details, and steps ## Understanding the logs view The logs page displays all build steps in order of execution. For each step, you can see: * Platform and stage: The target architecture if building for multiple platforms (linux/amd64, linux/arm64) and the stage name defined in the Dockerfile for multi-stage builds. * Step: The Dockerfile instruction (FROM, RUN, COPY, etc.) or build operation. * Status: Whether the step was cached, deduplicated, or executed (with duration). Project build steps Cached steps show a **cached** badge instead of execution time. Deduplicated steps show a **deduplicated** badge indicating the matching step, either from earlier in the build or from other parallel builds. ## Filter and search logs Use the search box at the top of the page to filter steps by name. The search supports fuzzy matching, so you don't need to type the exact step name. Press **esc** to clear the filter search. You can also filter steps by status using the filter dropdown: * All steps * Successful steps * Failed steps * Canceled steps * Cached steps * Uncached steps ## View detailed step information To see more details about a specific build step, click on the step name. Project builds list with duration and cache metrics The build step panel shows the following: * Status, duration (if not cached), target name (if applicable), platform, and step number. * Graphs for layer size, step duration, and cache hits for the last 50 builds. * Dependency graphic showing which steps feed into this step and what this step outputs. * Console output (if any) generated by the step. ## Share build logs To share logs with others, click **Share build** in the sidebar to generate a public URL. This URL allows anyone with the link to view the build details and logs without requiring authentication. To stop sharing a build, click **Stop sharing** in the sidebar. ## Container build metrics Depot tracks detailed metrics for every container build, including duration, cache performance, resource usage, and build health. You can view metrics at both the project level and [organization level](/docs/observability). ## View project-level build statistics From your organization's [projects page](/orgs/_/projects), click on a project to view a list of recent builds. Project builds list with duration and cache metrics The project page displays a build duration chart and a cache hit rate chart for the last 30 builds. These charts can help you spot builds that took unusually long, sudden drops in cache performance, and build health trends. You can see the following at a glance for each build: * Status * Who or what triggered the build * Total execution time (and time saved) * Platforms and hardware * Image tags * Visual indicator icons for Depot registry saves, cache hits, and push and load actions ## View metrics per build To view metrics for a specific build, go to the build details page. 1. Go to your organization's [projects page](/orgs/_/projects). 2. Click a project. 3. Click a build. The build details page opens to the **Logs** view by default. Project build details page with resource utilization graph, build details, and steps The build details page displays the following: * Resource utilization * Build status * Build steps * Build information and metrics in the sidebar ### Monitor resource utilization The Resource Utilization graph at the top of the build details page shows if and when your build reaches CPU and memory limits. You can use it to monitor resource utilization across your build steps. Notification banners display when Depot detects out of memory (OOM) events and when utilization peaks exceed 90% of allocated CPU or memory. For example: Project build with high utilization notification banner For multi-architecture builds, click the architecture selector to view graphs for each one. ### View metrics and logs for each build step Build step metrics help you identify steps that have recently slowed down, cache invalidation issues affecting specific steps, and unusual performance patterns. To view performance metrics and details for individual build steps, click a step in the build **Logs** view. Project builds list with duration and cache metrics The build step panel shows the following: * Status, duration (if not cached), target name (if applicable), platform, and step number. * Graphs for layer size, step duration, and cache hits for the last 50 builds. * Dependency graphic showing which steps feed into this step and what this step outputs. * Console output (if any) generated by the step. ## Track monthly project usage To view aggregate statistics for a project over time, go to the project's Usage page. 1. Go to your organization's [projects page](/orgs/_/projects). 2. Click a project. 3. Click the **Usage** tab. 4. Select a month. Project usage page showing monthly build statistics The usage page summarizes the following for the selected month: * Number of builds * Total build time * Time saved by cache * Number of successful and unsuccessful builds by day * Build duration total by day * Cache storage used by day Hover on any day in the charts to filter the view and see statistics for that day. ## Analyze and optimize container build performance The following are some common scenarios for analyzing and optimizing container build performance. ## Identify slow builds To find builds that are taking longer than expected: 1. Go to your organization's [projects page](/orgs/_/projects). 2. Click a project. 3. Review the **Build duration** chart for bars that are noticeably higher than others. 4. Click on slow builds to investigate. In the build details, examine: * Which steps took the longest (shown in the Logs view). * Whether cache performance is good (number of steps cached). * The build context size and composition (**Context** tab visible when builds send files to the builder). Click on [individual steps to see their runtime trends](#view-metrics-and-logs-for-each-build-step). Steps that have recently slowed down might indicate: * Dependency updates, build context changes, or other cache invalidation issues that increased build time. * Network issues affecting package downloads. * Resource constraints on the builder. ## Debug build failures When builds fail, Depot provides metrics to help you understand the scope and cause. ### Recent build health The project builds page (Go to [projects page](/orgs/_/projects) and click a project) shows status indicators for all recent builds. Multiple consecutive failures might indicate: * Broken Dockerfile or build configuration. * Missing dependencies or registry access issues. * Resource constraints causing builds to fail. ### Build health visualization On the organization usage page, each project displays a health bar showing the outcomes of the last 30 builds. This visual indicator helps you quickly identify projects with: * Consistent failures (many red indicators). * Recent failure spikes (sudden appearance of red indicators). * Generally healthy builds (mostly green indicators). Once you've identified a problematic build, investigate the causes: * Use the build [logs](/docs/container-builds/observability/container-build-logs) to see error messages. * Refer to the [troubleshooting guide](/docs/container-builds/troubleshooting) for solutions to common errors. ## Optimal Dockerfiles for .NET We've assembled some optimal Dockerfiles for building Docker images for .NET using different application types. These Dockerfiles are what we recommend when building Docker images for .NET applications, but may require modifications based on your specific use case. ## Guides * [Dockerfile for .NET ASP.NET Core](/docs/container-builds/optimal-dockerfiles/dotnet-aspnetcore-dockerfile) * [Dockerfile for .NET Worker Service](/docs/container-builds/optimal-dockerfiles/dotnet-worker-dockerfile) ## Optimal Dockerfile for .NET ASP.NET Core Below is an example `Dockerfile` that we recommend at Depot for building images for .NET ASP.NET Core applications. ```dockerfile # syntax=docker/dockerfile:1 FROM mcr.microsoft.com/dotnet/sdk:8.0 AS build WORKDIR /src COPY src/WebApp/WebApp.csproj src/WebApp/ COPY src/WebApp.Core/WebApp.Core.csproj src/WebApp.Core/ COPY Directory.Build.props ./ COPY *.sln ./ RUN --mount=type=cache,target=/root/.nuget/packages \ --mount=type=cache,target=/root/.local/share/NuGet/v3-cache \ --mount=type=cache,target=/root/.local/share/NuGet/plugins-cache \ --mount=type=cache,target=/tmp/NuGetScratchroot \ dotnet restore COPY src/ src/ RUN --mount=type=cache,target=/root/.nuget/packages \ --mount=type=cache,target=/root/.local/share/NuGet/v3-cache \ --mount=type=cache,target=/root/.local/share/NuGet/plugins-cache \ --mount=type=cache,target=/tmp/NuGetScratchroot \ dotnet publish "src/WebApp/WebApp.csproj" \ --no-restore \ --configuration Release \ --output /app/publish FROM mcr.microsoft.com/dotnet/aspnet:8.0 AS runtime RUN groupadd -g 1001 appgroup && \ useradd -u 1001 -g appgroup -m -d /app -s /bin/false appuser WORKDIR /app COPY --from=build --chown=appuser:appgroup /app/publish . USER appuser ENV DOTNET_RUNNING_IN_CONTAINER=true \ DOTNET_EnableDiagnostics=0 \ HTTP_PORT=8080 \ ASPNETCORE_ENVIRONMENT=Production ENTRYPOINT ["dotnet", "WebApp.dll"] ``` ## Explanation of the Dockerfile At a high level, here are the things we're optimizing in our Docker build for a .NET ASP.NET Core application: * Multi-stage builds for smaller final images * NuGet cache mounts for dependency caching * Security optimizations with non-root users * Production-optimized ASP.NET Core configuration ### Stage 1: `FROM mcr.microsoft.com/dotnet/sdk:8.0 AS build` ```dockerfile FROM mcr.microsoft.com/dotnet/sdk:8.0 AS build WORKDIR /src ``` We use the official .NET 8 SDK image for the build stage, providing all necessary tools for compilation and publishing. #### Project file and dependency restoration ```dockerfile COPY src/WebApp/WebApp.csproj src/WebApp/ COPY src/WebApp.Core/WebApp.Core.csproj src/WebApp.Core/ COPY Directory.Build.props ./ COPY *.sln ./ RUN --mount=type=cache,target=/root/.nuget/packages \ --mount=type=cache,target=/root/.local/share/NuGet/v3-cache \ --mount=type=cache,target=/root/.local/share/NuGet/plugins-cache \ --mount=type=cache,target=/tmp/NuGetScratchroot \ dotnet restore ``` We copy only the project files and solution file first for optimal layer caching. This pattern ensures that package restoration only runs when dependencies change, not when source code changes. The cache mount persists NuGet packages between builds. #### Source code and publishing ```dockerfile COPY src/ src/ RUN --mount=type=cache,target=/root/.nuget/packages \ --mount=type=cache,target=/root/.local/share/NuGet/v3-cache \ --mount=type=cache,target=/root/.local/share/NuGet/plugins-cache \ --mount=type=cache,target=/tmp/NuGetScratchroot \ dotnet publish "src/WebApp/WebApp.csproj" \ --no-restore \ --configuration Release \ --output /app/publish ``` After copying the source code, we publish the application: * `--no-restore` skips restoration since we've already restored packages * `--configuration Release` builds in release mode for production * `--output /app/publish` specifies the output directory for the published files ### Stage 2: `FROM mcr.microsoft.com/dotnet/aspnet:8.0 AS runtime` ```dockerfile FROM mcr.microsoft.com/dotnet/aspnet:8.0 AS runtime RUN groupadd -g 1001 appgroup && \ useradd -u 1001 -g appgroup -m -d /app -s /bin/false appuser WORKDIR /app COPY --from=build --chown=appuser:appgroup /app/publish . ``` The runtime stage uses the ASP.NET Core runtime image, which is much smaller than the SDK. We create a non-root user for security and copy only the published application files. #### Runtime configuration ```dockerfile USER appuser ENV DOTNET_RUNNING_IN_CONTAINER=true \ DOTNET_EnableDiagnostics=0 \ HTTP_PORT=8080 \ ASPNETCORE_ENVIRONMENT=Production ENTRYPOINT ["dotnet", "WebApp.dll"] ``` We configure the runtime environment: * Run as non-root user for security * `DOTNET_RUNNING_IN_CONTAINER=true` enables container-optimized settings * `DOTNET_EnableDiagnostics=0` disables diagnostics for production * `HTTP_PORT=8080` sets the HTTP port * `ASPNETCORE_ENVIRONMENT=Production` sets the environment ## Understanding BuildKit Cache Mounts Cache mounts in this Dockerfile speed up builds by persisting the package manager cache. This means that even when a layer needs to be rebuilt, your package manager only fetches what's new or updated. This Dockerfile uses the following cache mount syntax: ```dockerfile RUN --mount=type=cache,target=/root/.nuget/packages \ --mount=type=cache,target=/root/.local/share/NuGet/v3-cache \ --mount=type=cache,target=/root/.local/share/NuGet/plugins-cache \ --mount=type=cache,target=/tmp/NuGetScratchroot \ dotnet restore ``` ### Cache Mount Parameters Explained * **`type=cache`**: Specifies this is a cache mount that persists across builds. * **Multiple cache targets**: * **`/root/.nuget/packages`**: Global NuGet package cache * **`/root/.local/share/NuGet/v3-cache`**: NuGet v3 API cache * **`/root/.local/share/NuGet/plugins-cache`**: NuGet plugins cache * **`/tmp/NuGetScratchroot`**: Temporary extraction directory For more information regarding NuGet cache mounts, please visit the official [Microsoft documentation](https://learn.microsoft.com/en-us/nuget/consume-packages/managing-the-global-packages-and-cache-folders). ## Optimal Dockerfile for .NET Worker Service Below is an example `Dockerfile` that we recommend at Depot for building images for .NET Worker Service applications. ```dockerfile # syntax=docker/dockerfile:1 FROM mcr.microsoft.com/dotnet/sdk:8.0 AS build WORKDIR /src COPY src/WorkerService/WorkerService.csproj src/WorkerService/ COPY *.sln ./ RUN --mount=type=cache,target=/root/.nuget/packages \ --mount=type=cache,target=/root/.local/share/NuGet/v3-cache \ --mount=type=cache,target=/root/.local/share/NuGet/plugins-cache \ --mount=type=cache,target=/tmp/NuGetScratchroot \ dotnet restore COPY src/ src/ RUN --mount=type=cache,target=/root/.nuget/packages \ --mount=type=cache,target=/root/.local/share/NuGet/v3-cache \ --mount=type=cache,target=/root/.local/share/NuGet/plugins-cache \ --mount=type=cache,target=/tmp/NuGetScratchroot \ dotnet publish "src/WorkerService/WorkerService.csproj" \ --no-restore \ --configuration Release \ --self-contained true \ --output /app/publish \ /p:PublishSingleFile=true FROM mcr.microsoft.com/dotnet/runtime-deps:8.0 AS runtime WORKDIR /app RUN groupadd -g 1001 appgroup \ && useradd -u 1001 -g appgroup -m -d /app -s /bin/false appuser COPY --from=build --chown=appuser:appgroup /app/publish/WorkerService . USER appuser ENV DOTNET_RUNNING_IN_CONTAINER=true \ DOTNET_EnableDiagnostics=0 ENTRYPOINT ["./WorkerService"] ``` ## Explanation of the Dockerfile At a high level, here are the things we're optimizing in our Docker build for a .NET Worker Service: * Self-contained deployment for standalone executables * Minimal runtime dependencies * Single-file publishing for simplified deployment * Security optimizations with non-root users ### Stage 1: `FROM mcr.microsoft.com/dotnet/sdk:8.0 AS build` ```dockerfile FROM mcr.microsoft.com/dotnet/sdk:8.0 AS build WORKDIR /src COPY src/WorkerService/WorkerService.csproj src/WorkerService/ COPY *.sln ./ ``` We use the .NET 8 SDK image and set up the build environment for building the Worker Service application. #### Dependency restoration ```dockerfile RUN --mount=type=cache,target=/root/.nuget/packages \ --mount=type=cache,target=/root/.local/share/NuGet/v3-cache \ --mount=type=cache,target=/root/.local/share/NuGet/plugins-cache \ --mount=type=cache,target=/tmp/NuGetScratchroot \ dotnet restore ``` We restore NuGet packages with cache mounts to persist dependencies between builds, improving build performance on subsequent runs. #### Self-contained publishing ```dockerfile COPY src/ src/ RUN --mount=type=cache,target=/root/.nuget/packages \ --mount=type=cache,target=/root/.local/share/NuGet/v3-cache \ --mount=type=cache,target=/root/.local/share/NuGet/plugins-cache \ --mount=type=cache,target=/tmp/NuGetScratchroot \ dotnet publish "src/WorkerService/WorkerService.csproj" \ --no-restore \ --configuration Release \ --self-contained true \ --output /app/publish \ /p:PublishSingleFile=true ``` The publish command includes several important options: * `--no-restore` skips package restoration since we already restored dependencies * `--self-contained true` includes the .NET runtime in the output * `/p:PublishSingleFile=true` creates a single executable file * `--configuration Release` builds in release mode for production ### Stage 2: `FROM mcr.microsoft.com/dotnet/runtime-deps:8.0 AS runtime` ```dockerfile FROM mcr.microsoft.com/dotnet/runtime-deps:8.0 AS runtime WORKDIR /app RUN groupadd -g 1001 appgroup \ && useradd -u 1001 -g appgroup -m -d /app -s /bin/false appuser ``` The runtime stage uses the `runtime-deps` image, which contains only the native dependencies needed by self-contained .NET applications. We create a non-root user for security. #### Runtime configuration ```dockerfile COPY --from=build --chown=appuser:appgroup /app/publish/WorkerService . USER appuser ENV DOTNET_RUNNING_IN_CONTAINER=true \ DOTNET_EnableDiagnostics=0 ENTRYPOINT ["./WorkerService"] ``` We copy only the single executable file from the build stage, switch to a non-root user, and configure the .NET runtime for container environments. ## Benefits of self-contained deployment Self-contained deployment offers several advantages for Worker Services: * **No runtime dependencies**: The image doesn't need the .NET runtime installed * **Smaller attack surface**: Fewer components in the final image * **Version consistency**: The exact .NET version is bundled with the application * **Simplified deployment**: Single executable file is easier to manage ## Runtime dependencies explained The `runtime-deps` image provides only the native dependencies required by .NET: * **Minimal base**: Essential system libraries for .NET execution * **No .NET runtime**: The runtime is included in the self-contained executable ## Understanding BuildKit Cache Mounts Cache mounts in this Dockerfile speed up builds by persisting the package manager cache. This means that even when a layer needs to be rebuilt, your package manager only fetches what's new or updated. This Dockerfile uses the following cache mount syntax: ```dockerfile RUN --mount=type=cache,target=/root/.nuget/packages \ --mount=type=cache,target=/root/.local/share/NuGet/v3-cache \ --mount=type=cache,target=/root/.local/share/NuGet/plugins-cache \ --mount=type=cache,target=/tmp/NuGetScratchroot \ dotnet restore ``` ### Cache Mount Parameters Explained * **`type=cache`**: Specifies this is a cache mount that persists across builds. * **Multiple NuGet cache targets**: * **`/root/.nuget/packages`**: Global NuGet package cache * **`/root/.local/share/NuGet/v3-cache`**: NuGet v3 API metadata cache * **`/root/.local/share/NuGet/plugins-cache`**: NuGet plugins cache * **`/tmp/NuGetScratchroot`**: Temporary extraction directory For more information regarding NuGet cache mounts, please visit the official [Microsoft documentation](https://learn.microsoft.com/en-us/nuget/consume-packages/managing-the-global-packages-and-cache-folders). ## Optimal Dockerfile for Go Below is an example `Dockerfile` that we recommend at Depot for building images for Go applications. ```dockerfile # syntax=docker/dockerfile:1 FROM golang:1.25 AS build WORKDIR /src COPY go.mod go.sum ./ COPY vendor* ./vendor/ RUN --mount=type=cache,target=/go/pkg/mod \ --mount=type=cache,target=/root/.cache/go-build \ if [ -d "vendor" ]; then \ echo "Using vendored dependencies" && \ go mod verify; \ else \ echo "Downloading dependencies" && \ go mod download && go mod verify; \ fi COPY . . RUN --mount=type=cache,target=/go/pkg/mod \ --mount=type=cache,target=/root/.cache/go-build \ go build \ -o /bin/app \ ./cmd/server FROM ubuntu:24.04 AS runtime RUN groupadd -g 1001 appgroup && \ useradd -u 1001 -g appgroup -m -d /app -s /bin/false appuser COPY --from=build --chown=appuser:appgroup /bin/app /usr/local/bin/app USER appuser ENV TZ=UTC \ GOMAXPROCS=0 ENTRYPOINT ["/usr/local/bin/app"] ``` ## Explanation of the Dockerfile At a high level, here are the things we're optimizing in our Docker build for a Go application: * Multi-stage builds for clean separation * Cache mounts for Go modules and build cache * Support for vendored dependencies * Ubuntu-based runtime for reliability * Security optimizations with non-root users ### Stage 1: `FROM golang:1.25 AS build` ```dockerfile FROM golang:1.25 AS build WORKDIR /src COPY go.mod go.sum ./ COPY vendor* ./vendor/ ``` We use the official Go 1.25 image as the base for reliable builds. We copy Go module files and optional vendor directory first for better layer caching. #### Dependency management ```dockerfile RUN --mount=type=cache,target=/go/pkg/mod \ --mount=type=cache,target=/root/.cache/go-build \ if [ -d "vendor" ]; then \ echo "Using vendored dependencies" && \ go mod verify; \ else \ echo "Downloading dependencies" && \ go mod download && go mod verify; \ fi ``` The conditional logic supports both vendored and non-vendored dependency workflows. If a vendor directory exists, we verify the vendored dependencies. Otherwise, we download dependencies from the Go module proxy. #### Building the application ```dockerfile COPY . . RUN --mount=type=cache,target=/go/pkg/mod \ --mount=type=cache,target=/root/.cache/go-build \ go build \ -o /bin/app \ ./cmd/server ``` After copying the source code, we build the application using the same cache mounts. This ensures fast rebuilds by reusing both downloaded modules and compiled packages. ### Stage 2: `FROM ubuntu:24.04 AS runtime` ```dockerfile FROM ubuntu:24.04 AS runtime RUN groupadd -g 1001 appgroup && \ useradd -u 1001 -g appgroup -m -d /app -s /bin/false appuser COPY --from=build --chown=appuser:appgroup /bin/app /usr/local/bin/app USER appuser ENV TZ=UTC \ GOMAXPROCS=0 ENTRYPOINT ["/usr/local/bin/app"] ``` The runtime stage uses Ubuntu 24.04 for a reliable runtime environment. We create a non-root user for security, copy the compiled binary from the build stage, and configure the application to run with proper environment variables. ## Understanding BuildKit Cache Mounts Cache mounts in this Dockerfile speed up builds by persisting the package manager cache. This means that even when a layer needs to be rebuilt, your package manager only fetches what's new or updated. This Dockerfile uses multiple cache mounts for Go's different caching needs: ```dockerfile RUN --mount=type=cache,target=/go/pkg/mod \ --mount=type=cache,target=/root/.cache/go-build \ go mod download && go mod verify ``` ### Cache Mount Parameters Explained * **`type=cache`**: Specifies this is a cache mount that persists across builds. * **`target=/go/pkg/mod`**: Mount point for Go's module cache where downloaded dependencies are stored. * **`target=/root/.cache/go-build`**: Mount point for Go's build cache containing compiled packages and build artifacts. For more information regarding Go build caching, please visit the official [Go documentation](https://pkg.go.dev/cmd/go#hdr-Build_and_test_caching). ## Optimal Dockerfiles for Java We've assembled some optimal Dockerfiles for building Docker images for Java using different build tools. These Dockerfiles are what we recommend when building Docker images for Java applications, but may require modifications based on your specific use case. ## Guides * [Dockerfile for Java using `Maven`](/docs/container-builds/optimal-dockerfiles/java-maven-dockerfile) * [Dockerfile for Java using `Gradle`](/docs/container-builds/optimal-dockerfiles/java-gradle-dockerfile) ## Optimal Dockerfile for Java with Gradle Below is an example `Dockerfile` that we recommend at Depot for building images for Java applications with Gradle. ```dockerfile # syntax=docker/dockerfile:1 FROM eclipse-temurin:21-jdk AS build ENV GRADLE_HOME=/opt/gradle \ GRADLE_USER_HOME=/cache/.gradle \ GRADLE_OPTS="-Dorg.gradle.daemon=false \ -Dorg.gradle.parallel=true \ -Dorg.gradle.caching=true \ -Xmx2g" ARG GRADLE_VERSION=8.10 RUN apt-get update && apt-get install -y --no-install-recommends unzip \ && wget -q https://services.gradle.org/distributions/gradle-${GRADLE_VERSION}-bin.zip \ && unzip gradle-${GRADLE_VERSION}-bin.zip -d /opt \ && ln -s /opt/gradle-${GRADLE_VERSION} /opt/gradle \ && rm gradle-${GRADLE_VERSION}-bin.zip \ && apt-get remove -y unzip \ && rm -rf /var/lib/apt/lists/* ENV PATH="${GRADLE_HOME}/bin:${PATH}" WORKDIR /app COPY build.gradle ./ RUN --mount=type=cache,target=/cache/.gradle \ gradle dependencies --no-daemon --stacktrace COPY src/ src/ RUN --mount=type=cache,target=/cache/.gradle \ gradle build -x test --no-daemon --stacktrace --build-cache FROM eclipse-temurin:21-jre AS runtime RUN groupadd -g 1001 appgroup && \ useradd -u 1001 -g appgroup -m -d /app -s /bin/false appuser WORKDIR /app COPY --from=build --chown=appuser:appgroup /app/build/libs/*.jar app.jar ENV JAVA_OPTS="-server \ -XX:+UseContainerSupport \ -XX:MaxRAMPercentage=75.0 \ -XX:+UseG1GC \ -Djava.security.egd=file:/dev/./urandom" USER appuser ENTRYPOINT ["sh", "-c", "java $JAVA_OPTS -jar app.jar"] ``` ## Explanation of the Dockerfile At a high level, here are the things we're optimizing in our Docker build for a Java application with Gradle: * Multi-stage builds for smaller final images * Gradle cache mounts for dependency and build caching * Gradle build optimizations for container environments * Security optimizations with non-root users ### Stage 1: `FROM eclipse-temurin:21-jdk AS build` ```dockerfile FROM eclipse-temurin:21-jdk AS build ENV GRADLE_HOME=/opt/gradle \ GRADLE_USER_HOME=/cache/.gradle \ GRADLE_OPTS="-Dorg.gradle.daemon=false \ -Dorg.gradle.parallel=true \ -Dorg.gradle.caching=true \ -Xmx2g" ``` We use Eclipse Temurin 21 JDK and configure Gradle with optimized settings: * `GRADLE_USER_HOME=/cache/.gradle` points to our cache mount location * `gradle.daemon=false` disables the daemon (not beneficial in containers) * `gradle.parallel=true` enables parallel execution for faster builds * `gradle.caching=true` enables Gradle's build cache * `-Xmx2g` sets maximum heap size for Gradle #### Installing Gradle ```dockerfile ARG GRADLE_VERSION=8.10 RUN apt-get update && apt-get install -y --no-install-recommends unzip \ && wget -q https://services.gradle.org/distributions/gradle-${GRADLE_VERSION}-bin.zip \ && unzip gradle-${GRADLE_VERSION}-bin.zip -d /opt \ && ln -s /opt/gradle-${GRADLE_VERSION} /opt/gradle \ && rm gradle-${GRADLE_VERSION}-bin.zip \ && apt-get remove -y unzip \ && rm -rf /var/lib/apt/lists/* ENV PATH="${GRADLE_HOME}/bin:${PATH}" ``` We install a specific Gradle version for reproducible builds and clean up build tools afterward to keep the layer small. #### Dependency resolution and caching ```dockerfile WORKDIR /app COPY build.gradle ./ RUN --mount=type=cache,target=/cache/.gradle \ gradle dependencies --no-daemon --stacktrace ``` We copy only the `build.gradle` first to leverage Docker layer caching. The `dependencies` task downloads all dependencies, with a cache mount to persist between builds. #### Building the application ```dockerfile COPY src/ src/ RUN --mount=type=cache,target=/cache/.gradle \ gradle build -x test --no-daemon --stacktrace --build-cache ``` After copying the source code, we build the application with the same cache mount. Key options: * `-x test` excludes tests from the build (run in CI/CD pipeline) * `--no-daemon` ensures no daemon process is left running * `--build-cache` enables Gradle's build cache for faster incremental builds ### Stage 2: `FROM eclipse-temurin:21-jre AS runtime` ```dockerfile FROM eclipse-temurin:21-jre AS runtime RUN groupadd -g 1001 appgroup && \ useradd -u 1001 -g appgroup -m -d /app -s /bin/false appuser WORKDIR /app COPY --from=build --chown=appuser:appgroup /app/build/libs/*.jar app.jar ENV JAVA_OPTS="-server \ -XX:+UseContainerSupport \ -XX:MaxRAMPercentage=75.0 \ -XX:+UseG1GC \ -Djava.security.egd=file:/dev/./urandom" USER appuser ENTRYPOINT ["sh", "-c", "java $JAVA_OPTS -jar app.jar"] ``` The runtime stage uses Eclipse Temurin 21 JRE for a reliable runtime environment. We create a non-root user for security and copy the built JAR file. The JVM is configured with production settings: * `-server` enables server mode for better long-running performance * `UseContainerSupport` and `MaxRAMPercentage` for container-aware memory management * `UseG1GC` enables the G1 garbage collector for better performance * `java.security.egd` uses `/dev/urandom` for faster startup ## Understanding BuildKit Cache Mounts Cache mounts in this Dockerfile speed up builds by persisting the package manager cache. This means that even when a layer needs to be rebuilt, your package manager only fetches what's new or updated. This Dockerfile uses the following cache mount syntax: ```dockerfile RUN --mount=type=cache,target=/cache/.gradle \ gradle dependencies --no-daemon --stacktrace ``` ### Cache Mount Parameters Explained * **`type=cache`**: Specifies this is a cache mount that persists across builds. * **`target=/cache/.gradle`**: The mount point for Gradle's cache directory (configured via `GRADLE_USER_HOME`). For more information regarding Gradle cache mounts, please visit the official [Gradle documentation](https://docs.gradle.org/current/userguide/build_cache.html). ## Optimal Dockerfile for Java with Maven Below is an example `Dockerfile` that we recommend at Depot for building images for Java applications with Maven. ```dockerfile # syntax=docker/dockerfile:1 FROM eclipse-temurin:21-jdk AS build ENV JAVA_OPTS="-XX:+UseContainerSupport \ -XX:MaxRAMPercentage=75.0 \ -XX:InitialRAMPercentage=50.0 \ -XX:+UseG1GC \ -XX:+UseStringDeduplication" \ MAVEN_HOME=/opt/maven \ MAVEN_CONFIG=/root/.m2 \ MAVEN_OPTS="-XX:+TieredCompilation -XX:TieredStopAtLevel=1" ARG MAVEN_VERSION=3.9.11 RUN wget -q https://archive.apache.org/dist/maven/maven-3/${MAVEN_VERSION}/binaries/apache-maven-${MAVEN_VERSION}-bin.tar.gz \ && tar -xzf apache-maven-${MAVEN_VERSION}-bin.tar.gz -C /opt \ && ln -s /opt/apache-maven-${MAVEN_VERSION} /opt/maven \ && rm apache-maven-${MAVEN_VERSION}-bin.tar.gz ENV PATH="${MAVEN_HOME}/bin:${PATH}" WORKDIR /app COPY pom.xml ./ RUN --mount=type=cache,target=/root/.m2 \ mvn dependency:go-offline -B -q COPY src/ src/ RUN --mount=type=cache,target=/root/.m2 \ mvn clean package -B -DskipTests FROM eclipse-temurin:21-jre AS runtime RUN groupadd -g 1001 appgroup && \ useradd -u 1001 -g appgroup -m -d /app -s /bin/false appuser WORKDIR /app COPY --from=build --chown=appuser:appgroup /app/target/*.jar app.jar ENV JAVA_OPTS="-server \ -XX:+UseContainerSupport \ -XX:MaxRAMPercentage=75.0 \ -XX:+UseG1GC \ -Djava.security.egd=file:/dev/./urandom" USER appuser ENTRYPOINT ["sh", "-c", "java $JAVA_OPTS -jar app.jar"] ``` ## Explanation of the Dockerfile At a high level, here are the things we're optimizing in our Docker build for a Java application with Maven: * Multi-stage builds for smaller final images * Maven cache mounts for dependency caching * JVM performance tuning for containers * Security optimizations with non-root users ### Stage 1: `FROM eclipse-temurin:21-jdk AS build` ```dockerfile FROM eclipse-temurin:21-jdk AS build ENV JAVA_OPTS="-XX:+UseContainerSupport \ -XX:MaxRAMPercentage=75.0 \ -XX:InitialRAMPercentage=50.0 \ -XX:+UseG1GC \ -XX:+UseStringDeduplication" \ MAVEN_HOME=/opt/maven \ MAVEN_CONFIG=/root/.m2 \ MAVEN_OPTS="-XX:+TieredCompilation -XX:TieredStopAtLevel=1" ``` We use Eclipse Temurin 21 JDK for the build stage and configure JVM options for optimal build performance: * `UseContainerSupport` enables container-aware memory settings * `MaxRAMPercentage=75.0` limits heap to 75% of container memory * `UseG1GC` enables the G1 garbage collector for better performance * `TieredCompilation` with `TieredStopAtLevel=1` speeds up build times #### Installing Maven ```dockerfile ARG MAVEN_VERSION=3.9.11 RUN wget -q https://archive.apache.org/dist/maven/maven-3/${MAVEN_VERSION}/binaries/apache-maven-${MAVEN_VERSION}-bin.tar.gz \ && tar -xzf apache-maven-${MAVEN_VERSION}-bin.tar.gz -C /opt \ && ln -s /opt/apache-maven-${MAVEN_VERSION} /opt/maven \ && rm apache-maven-${MAVEN_VERSION}-bin.tar.gz ENV PATH="${MAVEN_HOME}/bin:${PATH}" ``` We install a specific Maven version for reproducible builds and clean up the downloaded archive to keep the layer small. #### Dependency resolution and caching ```dockerfile WORKDIR /app COPY pom.xml ./ RUN --mount=type=cache,target=/root/.m2 \ mvn dependency:go-offline -B -q ``` We copy only the `pom.xml` first to leverage Docker layer caching. The `dependency:go-offline` goal downloads all dependencies to the local repository, with a cache mount to persist between builds. #### Building the application ```dockerfile COPY src/ src/ RUN --mount=type=cache,target=/root/.m2 \ mvn clean package -B -DskipTests ``` After copying the source code, we build the application with the same cache mount. The `-B` flag enables batch mode, and `-DskipTests` skips running tests during the build (tests should be run in CI/CD pipeline). ### Stage 2: `FROM eclipse-temurin:21-jre AS runtime` ```dockerfile FROM eclipse-temurin:21-jre AS runtime RUN groupadd -g 1001 appgroup && \ useradd -u 1001 -g appgroup -m -d /app -s /bin/false appuser WORKDIR /app COPY --from=build --chown=appuser:appgroup /app/target/*.jar app.jar ``` The runtime stage uses Eclipse Temurin JRE for a reliable runtime environment. We create a non-root user for security and copy only the built JAR file from the build stage. #### Runtime JVM configuration ```dockerfile ENV JAVA_OPTS="-server \ -XX:+UseContainerSupport \ -XX:MaxRAMPercentage=75.0 \ -XX:+UseG1GC \ -Djava.security.egd=file:/dev/./urandom" USER appuser ENTRYPOINT ["sh", "-c", "java $JAVA_OPTS -jar app.jar"] ``` We configure production JVM settings: * `-server` enables server mode for better long-running performance * `UseContainerSupport` and `MaxRAMPercentage` for container-aware memory management * `UseG1GC` enables the G1 garbage collector for better performance * `java.security.egd` uses `/dev/urandom` for faster startup ## Understanding BuildKit Cache Mounts Cache mounts in this Dockerfile speed up builds by persisting the package manager cache. This means that even when a layer needs to be rebuilt, your package manager only fetches what's new or updated. This Dockerfile uses the following cache mount syntax: ```dockerfile RUN --mount=type=cache,target=/root/.m2 \ mvn dependency:go-offline -B -q ``` ### Cache Mount Parameters Explained * **`type=cache`**: Specifies this is a cache mount that persists across builds. * **`target=/root/.m2`**: The mount point for Maven's local repository where all downloaded JARs, POMs, and metadata are stored. For more information regarding Maven cache mounts, please visit the official [Maven documentation](https://maven.apache.org/settings.html). ## Optimal Dockerfiles for Node.js We've assembled some optimal Dockerfiles for building Docker images for Node.js using different package managers. These Dockerfiles are what we recommend when building Docker images for Node applications, but they are not the only way to do it, so your mileage may vary. ## Guides * [Dockerfile for Node.js using `npm`](/docs/container-builds/optimal-dockerfiles/node-npm-dockerfile) * [Dockerfile for Node.js using `pnpm`](/docs/container-builds/optimal-dockerfiles/node-pnpm-dockerfile) ## Optimal Dockerfile for Node.js with npm Below is an example `Dockerfile` that we recommend at Depot for building images for Node.js applications with npm. ```dockerfile # syntax=docker/dockerfile:1 FROM node:lts AS build WORKDIR /app COPY package.json package-lock.json ./ RUN --mount=type=cache,target=/root/.npm \ npm ci --only=production --no-audit --no-fund RUN --mount=type=cache,target=/root/.npm \ npm ci --no-audit --no-fund COPY . . RUN npm run build FROM node:lts AS runtime RUN groupadd -g 1001 appgroup && \ useradd -u 1001 -g appgroup -m -d /app -s /bin/false appuser WORKDIR /app COPY --from=build --chown=appuser:appgroup /app . ENV NODE_ENV=production \ NODE_OPTIONS="--enable-source-maps" USER appuser ENTRYPOINT ["node", "server.js"] ``` ## Explanation of the Dockerfile At a high level, here are the things we're optimizing in our Docker build for a Node.js application: * Multi-stage builds via multiple `FROM` statements * npm cache mounts for dependency caching * Security optimizations with non-root users ### Stage 1: `FROM node:lts AS build` ```dockerfile FROM node:lts AS build WORKDIR /app COPY package.json package-lock.json ./ RUN --mount=type=cache,target=/root/.npm \ npm ci --only=production --no-audit --no-fund ``` We start with the Node.js LTS image as our build stage base. We copy only the package files first to leverage Docker's layer caching. The `npm ci` command is used for faster, reliable, reproducible builds with a cache mount to persist downloaded packages. We first install production dependencies only. #### Installing all dependencies ```dockerfile RUN --mount=type=cache,target=/root/.npm \ npm ci --no-audit --no-fund ``` We then install all dependencies (including dev dependencies) needed for building the application, using the same cache mount for efficiency. #### Building the application ```dockerfile COPY . . RUN npm run build ``` After copying the source code, we build the application. This step is separate from dependency installation to maximize cache efficiency. ### Stage 2: `FROM node:lts AS runtime` ```dockerfile FROM node:lts AS runtime RUN groupadd -g 1001 appgroup && \ useradd -u 1001 -g appgroup -m -d /app -s /bin/false appuser WORKDIR /app COPY --from=build --chown=appuser:appgroup /app . ENV NODE_ENV=production \ NODE_OPTIONS="--enable-source-maps" USER appuser ENTRYPOINT ["node", "server.js"] ``` The runtime stage uses the Node.js LTS image and creates a non-root user for security. We copy the entire built application from the build stage, setting appropriate ownership. ## Understanding BuildKit Cache Mounts Cache mounts in this Dockerfile speed up builds by persisting the package manager cache. This means that even when a layer needs to be rebuilt, your package manager only fetches what's new or updated. This Dockerfile uses the following cache mount syntax: ```dockerfile RUN --mount=type=cache,target=/root/.npm \ npm ci --no-audit --no-fund ``` ### Cache Mount Parameters Explained * **`type=cache`**: Specifies this is a cache mount. The cache persists across builds and is managed by BuildKit (and Depot's distributed cache system). * **`target=/root/.npm`**: The mount point inside the container where npm's default cache is located. This uses npm's standard cache directory without requiring additional configuration. For more information regarding npm cache mounts, please visit the official [npm documentation](https://docs.npmjs.com/cli/v11/commands/npm-cache). ## Optimal Dockerfile for Node.js with pnpm Below is an example `Dockerfile` that we recommend at Depot for building Docker images for Node applications that use `pnpm` as their package manager. ```dockerfile # syntax=docker/dockerfile:1 FROM node:lts AS build RUN corepack enable ENV PNPM_HOME="/pnpm" ENV PATH="$PNPM_HOME:$PATH" WORKDIR /app COPY pnpm-lock.yaml ./ RUN --mount=type=cache,target=/pnpm/store \ pnpm fetch COPY package.json ./ RUN --mount=type=cache,target=/pnpm/store \ pnpm install --frozen-lockfile --prod --offline COPY . . RUN pnpm build FROM node:lts AS runtime RUN groupadd -g 1001 appgroup && \ useradd -u 1001 -g appgroup -m -d /app -s /bin/false appuser WORKDIR /app COPY --from=build --chown=appuser:appgroup /app ./ ENV NODE_ENV=production \ NODE_OPTIONS="--enable-source-maps" USER appuser ENTRYPOINT ["node", "server.js"] ``` ## Explanation of the Dockerfile This Dockerfile uses an optimized multi-stage build approach that leverages pnpm's features for efficient dependency management and caching. We use Node.js LTS and implement security optimizations. At a high level, here are the things we're optimizing in our Docker build for a Node.js application with pnpm: * Multi-stage builds via multiple `FROM` statements * pnpm cache mounts for dependency caching * Offline installation for improved reliability * Security optimizations with non-root users ### Stage 1: `FROM node:lts AS build` ```dockerfile FROM node:lts AS build RUN corepack enable ENV PNPM_HOME="/pnpm" ENV PATH="$PNPM_HOME:$PATH" WORKDIR /app ``` We start with the Node.js LTS image as our build stage base. We enable [`corepack`](https://nodejs.org/api/corepack.html) to use pnpm without manual installation, and we set up the proper environment variables for pnpm's home directory. #### Production dependency installation ```dockerfile COPY pnpm-lock.yaml ./ RUN --mount=type=cache,target=/pnpm/store \ pnpm fetch --frozen-lockfile COPY package.json ./ RUN --mount=type=cache,target=/pnpm/store \ pnpm install --frozen-lockfile --prod --offline ``` We copy the lockfile first to leverage Docker's layer caching. The installation process uses two optimized commands: 1. `pnpm fetch --frozen-lockfile` is a [pnpm feature](https://pnpm.io/cli/fetch) that fetches packages from the lockfile into the pnpm store without installing them. This optimizes the Docker layer cache. 2. `pnpm install --frozen-lockfile --prod --offline` installs only production dependencies using the cached packages from the previous step. The `--offline` flag ensures we use only cached packages. #### Building the application ```dockerfile COPY . . RUN pnpm build ``` After copying the source code, we build the application using pnpm. ### Stage 2: `FROM node:lts AS runtime` ```dockerfile FROM node:lts AS runtime RUN groupadd -g 1001 appgroup && \ useradd -u 1001 -g appgroup -m -d /app -s /bin/false appuser WORKDIR /app COPY --from=build --chown=appuser:appgroup /app ./ ENV NODE_ENV=production \ NODE_OPTIONS="--enable-source-maps" USER appuser ENTRYPOINT ["node", "server.js"] ``` The runtime stage uses the Node.js LTS image and creates a non-root user for security. We copy the entire built application from the build stage, setting appropriate ownership. ## Understanding BuildKit Cache Mounts Cache mounts in this Dockerfile speed up builds by persisting the package manager cache. This means that even when a layer needs to be rebuilt, your package manager only fetches what's new or updated. This Dockerfile uses the following cache mount syntax: ```dockerfile RUN --mount=type=cache,target=/pnpm/store \ pnpm fetch --frozen-lockfile ``` ### Cache Mount Parameters Explained * **`type=cache`**: Specifies this is a cache mount. The cache persists across builds and is managed by BuildKit (and Depot's distributed cache system). * **`target=/pnpm/store`**: The mount point inside the container where pnpm's store is located. Unlike npm, pnpm uses a content-addressable store that can be shared efficiently across projects. For more information regarding pnpm cache mounts, please visit the official [pnpm documentation](https://pnpm.io/configuring). ## Optimal Dockerfiles The following guides provide optimal Dockerfiles that are tailored for Depot container build cache and your preferred programming language. You can use these Dockerfiles as reference implementations or starting points for your own projects. If you already have a Dockerfile and want to optimize it for your Depot builds, refer to the *Understanding BuildKit Cache Mounts* section in each guide. This section explains: * How to add cache mounts to your existing `RUN` commands * Cache mount parameters (`id`, `target`, `sharing`) * Language-specific cache strategies and optimization techniques The cache mount integration is the core enhancement that makes builds significantly faster on Depot, and these sections provide everything you need to retrofit your existing Dockerfiles. For more in-depth information on BuildKit cache mounts, please refer to the blog post [How to use cache mounts to speed up Docker builds](https://depot.dev/blog/how-to-use-cache-mount-to-speed-up-docker-builds). ## Guides ### Node.js * [Node.js Dockerfiles](/docs/container-builds/optimal-dockerfiles/node) ### Python * [Python Dockerfiles](/docs/container-builds/optimal-dockerfiles/python) ### Java * [Java Dockerfiles](/docs/container-builds/optimal-dockerfiles/java) ### .NET * [.NET Dockerfiles](/docs/container-builds/optimal-dockerfiles/dotnet) ### Other Languages * [Dockerfile for Go](/docs/container-builds/optimal-dockerfiles/go-dockerfile) * [Dockerfile for PHP using Composer](/docs/container-builds/optimal-dockerfiles/php-composer-dockerfile) * [Dockerfile for Ruby using Bundler](/docs/container-builds/optimal-dockerfiles/ruby-bundler-dockerfile) * [Dockerfile for Rust](/docs/container-builds/optimal-dockerfiles/rust-dockerfile) ## Optimal Dockerfile for PHP with Composer Below is an example `Dockerfile` that we recommend at Depot for building images for PHP applications with Composer. ```dockerfile # syntax=docker/dockerfile:1 FROM php:8.4-fpm RUN apt-get update && apt-get install -y --no-install-recommends \ libzip-dev \ nginx \ supervisor \ && rm -rf /var/lib/apt/lists/* WORKDIR /app COPY --from=composer/composer:2.8-bin /composer /usr/bin/composer COPY composer.json ./ RUN --mount=type=cache,target=/root/.composer/cache \ composer install \ --no-dev \ --no-interaction \ --no-progress \ --optimize-autoloader \ --apcu-autoloader RUN apt-get update && apt-get install -y --no-install-recommends $PHPIZE_DEPS && \ docker-php-ext-install -j$(nproc) \ opcache \ zip && \ apt-get remove --purge -y $PHPIZE_DEPS && \ apt-get autoremove -y && \ apt-get clean && \ rm -rf /var/lib/apt/lists/* COPY php-production.ini /usr/local/etc/php/conf.d/99-production.ini COPY nginx.conf /etc/nginx/http.d/default.conf COPY supervisord.conf /etc/supervisor/conf.d/supervisord.conf COPY public ./public ENTRYPOINT ["supervisord", "-c", "/etc/supervisor/conf.d/supervisord.conf"] ``` ## Explanation of the Dockerfile This Dockerfile uses a streamlined single-stage build approach for a PHP application with Composer: * Single-stage build for simplicity * Composer cache mounts for faster dependency installation * PHP-FPM with Nginx for production-ready web serving * Process management with Supervisor ### Base Image and Dependencies ```dockerfile FROM php:8.4-fpm RUN apt-get update && apt-get install -y --no-install-recommends \ libzip-dev \ nginx \ supervisor \ && rm -rf /var/lib/apt/lists/* WORKDIR /app ``` We start with PHP 8.4 FPM for a reliable base image. We install the essential packages: * `libzip-dev` for ZIP file handling * `nginx` for web server * `supervisor` for process management ### Composer Setup ```dockerfile COPY --from=composer/composer:2.8-bin /composer /usr/bin/composer COPY composer.json ./ RUN --mount=type=cache,target=/root/.composer/cache \ composer install \ --no-dev \ --no-interaction \ --no-progress \ --optimize-autoloader \ --apcu-autoloader ``` Instead of using a separate composer stage, we copy the composer binary directly from the official composer image. We then copy the `composer.json` file and install dependencies with cache mounting for faster subsequent builds. The installation uses production-optimized flags. ### PHP Extensions ```dockerfile RUN apt-get update && apt-get install -y --no-install-recommends $PHPIZE_DEPS && \ docker-php-ext-install -j$(nproc) \ opcache \ zip && \ apt-get remove --purge -y $PHPIZE_DEPS && \ apt-get autoremove -y && \ apt-get clean && \ rm -rf /var/lib/apt/lists/* ``` We install PHP extensions efficiently by installing build dependencies, compiling extensions, and then removing build dependencies in a single RUN command to minimize image layers and size: * `opcache` for bytecode caching * `zip` for ZIP file operations ### Configuration and Application Files ```dockerfile COPY php-production.ini /usr/local/etc/php/conf.d/99-production.ini COPY nginx.conf /etc/nginx/http.d/default.conf COPY supervisord.conf /etc/supervisor/conf.d/supervisord.conf COPY public ./public ENTRYPOINT ["supervisord", "-c", "/etc/supervisor/conf.d/supervisord.conf"] ``` We copy the necessary configuration files for PHP, Nginx, and Supervisor, then copy only the public directory of our application. The container uses Supervisor to manage both PHP-FPM and Nginx processes. ## Understanding BuildKit Cache Mounts Cache mounts in this Dockerfile speed up builds by persisting the package manager cache. This means that even when a layer needs to be rebuilt, your package manager only fetches what's new or updated. This Dockerfile uses the following cache mount syntax: ```dockerfile RUN --mount=type=cache,target=/root/.composer/cache \ composer install \ --no-dev \ --no-interaction \ --no-progress \ --optimize-autoloader \ --apcu-autoloader ``` ### Cache Mount Parameters Explained * **`type=cache`**: Specifies this is a cache mount. The cache persists across builds and is managed by BuildKit (and Depot's distributed cache system). * **`target=/root/.composer/cache`**: The mount point inside the container where the cache is accessible. This matches Composer's default cache directory. For more information regarding Composer cache mounts, please visit the official [Composer documentation](https://getcomposer.org/doc/06-config.md#cache-dir). ## Optimal Dockerfiles for Python We've assembled some optimal Dockerfiles for building Docker images for Python using different package managers. These Dockerfiles are what we recommend when building Docker images for Python applications, but may require modifications based on your specific use case. ## Guides * [Dockerfile for Python using `pip`](/docs/container-builds/optimal-dockerfiles/python-pip-dockerfile) * [Dockerfile for Python using `poetry`](/docs/container-builds/optimal-dockerfiles/python-poetry-dockerfile) * [Dockerfile for Python using `uv`](/docs/container-builds/optimal-dockerfiles/python-uv-dockerfile) ## Optimal Dockerfile for Python with pip **Looking for faster Python builds?** We recommend using [UV](./python-uv-dockerfile) instead of pip for significantly faster dependency installation and better caching. UV is a drop-in replacement for pip that can speed up your builds by 10-100x. Below is an example `Dockerfile` that we recommend at Depot for building images for Python applications with pip. ```dockerfile # syntax=docker/dockerfile:1 FROM python:3.13-slim AS build RUN pip install --upgrade pip setuptools wheel WORKDIR /app RUN python -m venv .venv ENV PATH="/app/.venv/bin:$PATH" COPY requirements.txt ./ RUN --mount=type=cache,target=/root/.cache/pip \ pip install -r requirements.txt COPY . . FROM python:3.13-slim AS runtime ENV PATH="/app/.venv/bin:$PATH" RUN groupadd -g 1001 appgroup && \ useradd -u 1001 -g appgroup -m -d /app -s /bin/false appuser WORKDIR /app COPY --from=build --chown=appuser:appgroup /app . USER appuser ENTRYPOINT ["python", "-m", "uvicorn", "app.main:app", "--host", "0.0.0.0", "--port", "8000"] ``` ## Explanation of the Dockerfile At a high level, here are the things we're optimizing in our Docker build for a Python application with pip: * Multi-stage builds for smaller final images * Pip cache mounts for dependency caching * Virtual environments for dependency isolation * Security optimizations with non-root users ### Stage 1: `FROM python:3.13-slim AS build` ```dockerfile FROM python:3.13-slim AS build RUN pip install --upgrade pip setuptools wheel WORKDIR /app RUN python -m venv .venv ENV PATH="/app/.venv/bin:$PATH" COPY requirements.txt ./ RUN --mount=type=cache,target=/root/.cache/pip \ pip install -r requirements.txt ``` We start with Python 3.13 slim for a smaller base image and upgrade pip with essential build tools. We create a virtual environment in the project directory, copy only the requirements file first for better layer caching, and install dependencies using a cache mount to speed up subsequent builds. #### Source code installation ```dockerfile COPY . . ``` After dependencies are installed, we copy the source code. ### Stage 2: `FROM python:3.13-slim AS runtime` ```dockerfile FROM python:3.13-slim AS runtime ENV PATH="/app/.venv/bin:$PATH" RUN groupadd -g 1001 appgroup && \ useradd -u 1001 -g appgroup -m -d /app -s /bin/false appuser WORKDIR /app COPY --from=build --chown=appuser:appgroup /app . USER appuser ENTRYPOINT ["python", "-m", "uvicorn", "app.main:app", "--host", "0.0.0.0", "--port", "8000"] ``` The runtime stage starts with a clean slim image and creates a non-root user for security. We copy the entire application including the virtual environment from the build stage and set proper ownership. ## Understanding BuildKit Cache Mounts Cache mounts in this Dockerfile speed up builds by persisting the package manager cache. This means that even when a layer needs to be rebuilt, your package manager only fetches what's new or updated. This Dockerfile uses the following cache mount syntax: ```dockerfile RUN --mount=type=cache,target=/root/.cache/pip \ pip install -r requirements.txt ``` ### Cache Mount Parameters Explained * **`type=cache`**: Specifies this is a cache mount that persists across builds. * **`target=/root/.cache/pip`**: The mount point inside the container where pip's cache is stored. This is pip's default cache location. For more information regarding pip cache mounts, please visit the official [pip documentation](https://pip.pypa.io/en/stable/topics/caching/). ## Optimal Dockerfile for Python with poetry **Looking for faster Python builds?** We recommend using [uv ](/docs/container-builds/optimal-dockerfiles/python-uv-dockerfile) for significantly faster dependency installation and better caching. uv supports Poetry projects natively and can speed up your builds by 10-100x while maintaining full compatibility with your `pyproject.toml` and `poetry.lock` files. Below is an example `Dockerfile` that we recommend at Depot for building Docker images for Python applications that use `poetry` as their package manager. ```dockerfile # syntax=docker/dockerfile:1 FROM python:3.13-slim AS build ENV POETRY_VERSION=2.2.1 \ PYTHONUNBUFFERED=1 \ PYTHONDONTWRITEBYTECODE=1 \ PIP_NO_CACHE_DIR=off \ PIP_DISABLE_PIP_VERSION_CHECK=on \ PIP_DEFAULT_TIMEOUT=100 \ POETRY_HOME="/opt/poetry" \ POETRY_VIRTUALENVS_IN_PROJECT=true \ POETRY_NO_INTERACTION=1 \ PYSETUP_PATH="/opt/pysetup" \ VENV_PATH="/opt/pysetup/.venv" ENV PATH="$POETRY_HOME/bin:$VENV_PATH/bin:$PATH" RUN pip install "poetry==$POETRY_VERSION" WORKDIR $PYSETUP_PATH COPY poetry.lock pyproject.toml ./ RUN --mount=type=cache,target=/root/.cache/pypoetry \ poetry install --no-root COPY . . FROM python:3.13-slim AS runtime ENV VENV_PATH="/opt/pysetup/.venv" \ PATH="/opt/pysetup/.venv/bin:$PATH" RUN groupadd -g 1001 appgroup && \ useradd -u 1001 -g appgroup -m -d /home/appuser -s /bin/bash appuser WORKDIR /app COPY --from=build --chown=appuser:appgroup /opt/pysetup/.venv /opt/pysetup/.venv COPY --from=build --chown=appuser:appgroup /opt/pysetup/ ./ USER appuser ENTRYPOINT ["python", "-m", "uvicorn", "app.main:app", "--host", "0.0.0.0", "--port", "8000", "--workers", "4"] ``` ## Explanation of the Dockerfile This Dockerfile uses an optimized approach for Python applications using Poetry, featuring multi-stage builds and security optimizations. At a high level, here are the things we're optimizing in our Docker build for a Python application with Poetry: * Multi-stage builds for smaller final images * Poetry cache mounts for dependency caching * Security optimizations with non-root users ### Stage 1: `FROM python:3.13-slim AS build` ```dockerfile FROM python:3.13-slim AS build ENV POETRY_VERSION=2.2.1 \ PYTHONUNBUFFERED=1 \ PYTHONDONTWRITEBYTECODE=1 \ PIP_NO_CACHE_DIR=off \ PIP_DISABLE_PIP_VERSION_CHECK=on \ PIP_DEFAULT_TIMEOUT=100 \ POETRY_HOME="/opt/poetry" \ POETRY_VIRTUALENVS_IN_PROJECT=true \ POETRY_NO_INTERACTION=1 \ PYSETUP_PATH="/opt/pysetup" \ VENV_PATH="/opt/pysetup/.venv" ENV PATH="$POETRY_HOME/bin:$VENV_PATH/bin:$PATH" ``` We start with Python 3.13 slim for a smaller base image and configure Poetry with specific environment variables: * `POETRY_VERSION=2.2.1` pins the Poetry version for reproducible builds * `POETRY_VIRTUALENVS_IN_PROJECT=true` creates virtual environments inside the project * `POETRY_NO_INTERACTION=1` disables interactive prompts * `PYTHONUNBUFFERED=1` ensures logs are output in real-time #### Installing Poetry ```dockerfile RUN --mount=type=cache,target=/root/.cache \ pip install "poetry==$POETRY_VERSION" ``` We install Poetry using pip with cache mounts for efficiency. #### Dependency installation ```dockerfile WORKDIR $PYSETUP_PATH COPY poetry.lock pyproject.toml ./ RUN --mount=type=cache,target=/root/.cache/pypoetry \ poetry install --no-root ``` We copy the Poetry configuration files and install dependencies without installing the project itself first. #### Source code installation ```dockerfile COPY . . ``` After dependencies are installed, we copy the source code. ### Stage 2: `FROM python:3.13-slim AS runtime` ```dockerfile FROM python:3.13-slim AS runtime ENV VENV_PATH="/opt/pysetup/.venv" \ PATH="/opt/pysetup/.venv/bin:$PATH" RUN groupadd -g 1001 appgroup && \ useradd -u 1001 -g appgroup -m -d /home/appuser -s /bin/bash appuser WORKDIR /app COPY --from=build --chown=appuser:appgroup /opt/pysetup/.venv /opt/pysetup/.venv COPY --from=build --chown=appuser:appgroup /opt/pysetup/ ./ USER appuser ENTRYPOINT ["python", "-m", "uvicorn", "app.main:app", "--host", "0.0.0.0", "--port", "8000", "--workers", "4"] ``` The runtime stage starts with a clean slim image and creates a non-root user for security. We copy the virtual environment and project files from the build stage and set proper ownership. ## Understanding BuildKit Cache Mounts Cache mounts in this Dockerfile speed up builds by persisting the package manager cache. This means that even when a layer needs to be rebuilt, your package manager only fetches what's new or updated. This Dockerfile uses multiple cache mounts: ```dockerfile RUN --mount=type=cache,target=/root/.cache \ pip install "poetry==$POETRY_VERSION" RUN --mount=type=cache,target=/root/.cache/pypoetry \ poetry install --no-root ``` ### Cache Mount Parameters Explained * **`type=cache`**: Specifies this is a cache mount that persists across builds. * **`target=/root/.cache`**: Mount point for pip's cache directory when installing Poetry. * **`target=/root/.cache/pypoetry`**: Mount point for Poetry's cache directory where downloaded dependencies are stored. For more information regarding Poetry cache mounts, please visit the official [Poetry documentation](https://python-poetry.org/docs/configuration/#cache-dir). ## Optimal Dockerfile for Python with uv Below is an example `Dockerfile` that we use and recommend at Depot when we are building Docker images for Python applications that use `uv` as their package manager. ```dockerfile # syntax=docker/dockerfile:1 FROM python:3.13-slim AS build COPY --from=ghcr.io/astral-sh/uv:0.8.21 /uv /uvx /bin/ WORKDIR /app ENV UV_COMPILE_BYTECODE=1 UV_LINK_MODE=copy COPY uv.lock pyproject.toml ./ RUN --mount=type=cache,target=/root/.cache/uv \ uv sync --no-install-project --no-dev COPY . . RUN --mount=type=cache,target=/root/.cache/uv \ uv sync --frozen --no-dev FROM python:3.13-slim AS runtime ENV PATH="/app/.venv/bin:$PATH" RUN groupadd -g 1001 appgroup && \ useradd -u 1001 -g appgroup -m -d /app -s /bin/false appuser WORKDIR /app COPY --from=build --chown=appuser:appgroup /app . USER appuser ENTRYPOINT ["python", "-m", "uvicorn", "app.main:app", "--host", "0.0.0.0", "--port", "8000"] ``` ## Explanation of the Dockerfile Using a multi-stage build, we can separate our build from our deployment, taking full advantage of Docker's layer caching to speed up our builds and produce a smaller final image. ### Stage 1: Build Stage (`FROM python:3.13-slim AS build`) ```dockerfile FROM python:3.13-slim AS build COPY --from=ghcr.io/astral-sh/uv:0.8.21 /uv /uvx /bin/ WORKDIR /app ENV UV_COMPILE_BYTECODE=1 UV_LINK_MODE=copy ``` We use Python 3.13 slim for a smaller base image. We copy the uv binary from the official uv container image, which is more efficient than installing it via pip. Key environment variables: * `UV_COMPILE_BYTECODE=1`: Tells uv to compile Python files to bytecode for faster startup * `UV_LINK_MODE=copy`: Ensures uv copies files instead of creating symlinks #### Dependency installation ```dockerfile COPY uv.lock pyproject.toml ./ RUN --mount=type=cache,target=/root/.cache/uv \ uv sync --no-install-project --no-dev ``` First, we copy the lock file and project configuration, then install dependencies without the project itself. This layer caches dependencies separately from application code. #### Project installation ```dockerfile COPY . . RUN --mount=type=cache,target=/root/.cache/uv \ uv sync --frozen --no-dev ``` After copying the full application, we install the project itself using the frozen lock file to ensure reproducible builds. ### Stage 2: Runtime Stage (`FROM python:3.13-slim AS runtime`) ```dockerfile FROM python:3.13-slim AS runtime ENV PATH="/app/.venv/bin:$PATH" RUN groupadd -g 1001 appgroup && \ useradd -u 1001 -g appgroup -m -d /app -s /bin/false appuser WORKDIR /app COPY --from=build --chown=appuser:appgroup /app . USER appuser ENTRYPOINT ["python", "-m", "uvicorn", "app.main:app", "--host", "0.0.0.0", "--port", "8000"] ``` The runtime stage uses a clean slim image and creates a non-root user for security. We copy the entire application including the virtual environment from the build stage and set proper ownership. ## Understanding BuildKit Cache Mounts Cache mounts in this Dockerfile speed up builds by persisting the package manager cache. This means that even when a layer needs to be rebuilt, your package manager only fetches what's new or updated. This Dockerfile uses the following cache mount syntax: ```dockerfile RUN --mount=type=cache,target=/root/.cache/uv \ uv sync --no-install-project --no-dev ``` ### Cache Mount Parameters Explained * **`type=cache`**: Specifies this is a cache mount that persists across builds. * **`target=/root/.cache/uv`**: The mount point for uv's cache directory where downloaded packages and compiled wheels are stored. For more information regarding uv cache mounts, please visit the official [uv documentation](https://docs.astral.sh/uv/concepts/cache/#cache-directory). ## Optimal Dockerfile for Ruby on Rails with Bundler Below is an example `Dockerfile` that we recommend at Depot for building images for Ruby on Rails applications with Bundler. ```dockerfile # syntax=docker/dockerfile:1 FROM ruby:3.4 AS build WORKDIR /app ENV RAILS_ENV=production COPY Gemfile ./ RUN bundle config set --local without 'development test' && \ bundle config set --local jobs $(nproc) RUN --mount=type=cache,target=/usr/local/bundle/cache \ --mount=type=cache,target=/app/vendor/cache \ bundle cache && \ bundle install && \ bundle clean --force COPY . . FROM ruby:3.4-slim AS runtime RUN groupadd -g 1001 appgroup && \ useradd -u 1001 -g appgroup -m -d /home/appuser -s /bin/bash appuser WORKDIR /app COPY --from=build --chown=appuser:appgroup /app . COPY --from=build --chown=appuser:appgroup /usr/local/bundle /usr/local/bundle RUN mkdir -p tmp/pids tmp/cache log storage && \ chown -R appuser:appgroup tmp log storage ENV RAILS_ENV=production \ RUBY_YJIT_ENABLE=1 \ BUNDLE_WITHOUT=development:test USER appuser ENTRYPOINT ["bundle", "exec", "puma", "-C", "config/puma.rb"] ``` ## Explanation of the Dockerfile At a high level, here are the things we're optimizing in our Docker build for a Ruby application with Bundler: * Multi-stage builds for cleaner separation * Bundler cache mounts for faster dependency installation * YJIT enabled for improved Ruby performance * Security optimizations with non-root users ### Stage 1: `FROM ruby:3.4 AS build` ```dockerfile FROM ruby:3.4 AS build ``` We use the official Ruby 3.4 image as our build stage base. This provides a full Ruby environment with all necessary build tools for compiling native gems. #### Environment and dependency configuration ```dockerfile WORKDIR /app ENV RAILS_ENV=production COPY Gemfile ./ RUN bundle config set --local without 'development test' && \ bundle config set --local jobs $(nproc) ``` We set the production environment and configure Bundler: * `without 'development test'` excludes development and test gems * `jobs $(nproc)` enables parallel gem installation using all available CPU cores #### Gem installation with caching ```dockerfile RUN --mount=type=cache,target=/usr/local/bundle/cache \ --mount=type=cache,target=/app/vendor/cache \ bundle cache && \ bundle install && \ bundle clean --force ``` We install gems with dual cache mounts for maximum build efficiency: * `bundle cache` downloads and caches gems locally before installation * `bundle install` installs the cached gems * `bundle clean --force` removes any gems not in the current Gemfile, keeping the installation clean The dual cache mounts optimize both Bundler's internal cache and the vendor cache directory. ```dockerfile COPY . . ``` ### Stage 2: `FROM ruby:3.4-slim AS runtime` ```dockerfile FROM ruby:3.4-slim AS runtime RUN groupadd -g 1001 appgroup && \ useradd -u 1001 -g appgroup -m -d /home/appuser -s /bin/bash appuser ``` The runtime stage uses Ruby 3.4 slim image for a smaller footprint and creates a non-root user for security: * `groupadd` creates a group with GID 1001 * `useradd` creates a user with UID 1001, home directory, and bash shell ```dockerfile WORKDIR /app COPY --from=build --chown=appuser:appgroup /app . COPY --from=build --chown=appuser:appgroup /usr/local/bundle /usr/local/bundle ``` We copy the application and installed gems from the build stage with proper ownership. #### Application setup and permissions ```dockerfile RUN mkdir -p tmp/pids tmp/cache log storage && \ chown -R appuser:appgroup tmp log storage ENV RAILS_ENV=production \ RUBY_YJIT_ENABLE=1 \ BUNDLE_WITHOUT=development:test USER appuser ENTRYPOINT ["bundle", "exec", "puma", "-C", "config/puma.rb"] ``` We create necessary directories for Rails runtime files (PIDs, cache, logs, storage) with correct permissions and configure the runtime environment: * `RAILS_ENV=production` sets the Rails environment * `RUBY_YJIT_ENABLE=1` enables YJIT for improved Ruby performance (Ruby 3.1+) * `BUNDLE_WITHOUT=development:test` ensures development gems aren't loaded * Puma web server with configuration file ## Understanding BuildKit Cache Mounts Cache mounts in this Dockerfile speed up builds by persisting the package manager cache. This means that even when a layer needs to be rebuilt, your package manager only fetches what's new or updated. This Dockerfile uses dual cache mounts: ```dockerfile RUN --mount=type=cache,target=/usr/local/bundle/cache \ --mount=type=cache,target=/app/vendor/cache \ bundle cache && \ bundle install && \ bundle clean --force ``` ### Cache Mount Parameters Explained * **`type=cache`**: Specifies this is a cache mount that persists across builds. * **Bundler cache mounts**: * **`target=/usr/local/bundle/cache`**: Mount point for Bundler's internal gem cache * **`target=/app/vendor/cache`**: Mount point for vendored gem cache For more information regarding Bundler cache mounts, please visit the official [Bundler documentation](https://bundler.io/man/bundle-cache.1.html). ## Optimal Dockerfile for Rust with cargo-chef and sccache Below is an example `Dockerfile` that we recommend at Depot for building images for Rust applications. ```dockerfile # syntax=docker/dockerfile:1 FROM rust:1.90 AS build RUN cargo install cargo-chef sccache --locked ENV RUSTC_WRAPPER=sccache \ SCCACHE_DIR=/sccache WORKDIR /app COPY Cargo.toml Cargo.lock ./ RUN cargo chef prepare --recipe-path recipe.json RUN --mount=type=cache,target=/usr/local/cargo/registry,sharing=locked \ --mount=type=cache,target=/usr/local/cargo/git,sharing=locked \ --mount=type=cache,target=$SCCACHE_DIR,sharing=locked \ cargo chef cook --release --recipe-path recipe.json COPY . . RUN --mount=type=cache,target=/usr/local/cargo/registry,sharing=locked \ --mount=type=cache,target=/usr/local/cargo/git,sharing=locked \ --mount=type=cache,target=$SCCACHE_DIR,sharing=locked \ cargo build --release --bin app FROM ubuntu:24.04 AS runtime RUN groupadd -g 1001 appgroup && \ useradd -u 1001 -g appgroup -m -d /home/appuser -s /bin/bash appuser COPY --from=build --chown=appuser:appgroup /app/target/release/app /usr/local/bin/app USER appuser ENTRYPOINT ["/usr/local/bin/app"] ``` ## Explanation of the Dockerfile At a high level, here are the things we're optimizing in our Docker build for a Rust application: * Multi-stage builds with standard Rust base and Ubuntu runtime * cargo-chef for dependency separation and caching * sccache for individual compilation artifact caching * BuildKit cache mounts for persistent caching * Security optimizations with non-root users ### Stage 1: `FROM rust:1.90 AS build` ```dockerfile FROM rust:1.90 AS build RUN cargo install cargo-chef sccache --locked ``` We use the official Rust 1.90 image as the base for reliable builds. We install cargo-chef for dependency management and sccache for compilation artifact caching. #### sccache configuration ```dockerfile ENV RUSTC_WRAPPER=sccache \ SCCACHE_DIR=/sccache ``` We configure sccache by setting `RUSTC_WRAPPER=sccache` to wrap Rust compiler calls and `SCCACHE_DIR=/sccache` to specify the cache directory location. #### Dependency preparation with cargo-chef ```dockerfile WORKDIR /app COPY Cargo.toml Cargo.lock ./ RUN cargo chef prepare --recipe-path recipe.json ``` cargo-chef creates a recipe from the dependency files, enabling Docker to cache dependency builds separately from source code changes. #### Dependency compilation with cache mounts ```dockerfile RUN --mount=type=cache,target=/usr/local/cargo/registry,sharing=locked \ --mount=type=cache,target=/usr/local/cargo/git,sharing=locked \ --mount=type=cache,target=$SCCACHE_DIR,sharing=locked \ cargo chef cook --release --recipe-path recipe.json ``` Dependencies are compiled using cargo-chef with three types of cache mounts: * Registry cache: Downloaded crate files from crates.io * Git cache: Git-based dependencies * sccache: Individual compilation artifacts #### Application compilation ```dockerfile COPY . . RUN --mount=type=cache,target=/usr/local/cargo/registry,sharing=locked \ --mount=type=cache,target=/usr/local/cargo/git,sharing=locked \ --mount=type=cache,target=$SCCACHE_DIR,sharing=locked \ cargo build --release --bin app ``` The application is compiled using the same cache mounts as dependency compilation. This ensures that sccache can reuse compilation artifacts between dependency and application builds. ### Stage 2: `FROM ubuntu:24.04 AS runtime` ```dockerfile FROM ubuntu:24.04 AS runtime RUN groupadd -g 1001 appgroup && \ useradd -u 1001 -g appgroup -m -d /home/appuser -s /bin/bash appuser COPY --from=build --chown=appuser:appgroup /app/target/release/app /usr/local/bin/app USER appuser ENTRYPOINT ["/usr/local/bin/app"] ``` The runtime stage uses Ubuntu 24.04 for a reliable runtime environment. We create a non-root user for security and copy the compiled binary from the build stage. ## Understanding BuildKit Cache Mounts Cache mounts in this Dockerfile speed up builds by persisting the package manager cache. This means that even when a layer needs to be rebuilt, your package manager only fetches what's new or updated. This Dockerfile uses the following cache mount syntax: ```dockerfile RUN --mount=type=cache,target=/usr/local/cargo/registry,sharing=locked \ --mount=type=cache,target=/usr/local/cargo/git,sharing=locked \ --mount=type=cache,target=$SCCACHE_DIR,sharing=locked \ cargo chef cook --release --recipe-path recipe.json ``` ### Cache Mount Parameters Explained * **`type=cache`**: Specifies this is a cache mount that persists across builds. * **Multiple cache targets**: * **`/usr/local/cargo/registry`**: Cargo package registry cache * **`/usr/local/cargo/git`**: Git-based dependency cache * **`$SCCACHE_DIR`**: sccache compilation artifact cache (resolves to `/sccache`) * **`sharing=locked`**: Ensures exclusive access during compilation, preventing cache corruption. ## Using cargo-chef for dependency management cargo-chef solves a fundamental caching problem in Rust Docker builds. When you run `cargo build`, Docker treats the entire compilation as a single operation. Any change to your source code invalidates the cache and forces recompilation of all dependencies. [cargo-chef](https://github.com/LukeMathWalker/cargo-chef) separates dependency compilation from source compilation by: 1. **`cargo chef prepare`**: Analyzes `Cargo.toml` and `Cargo.lock` to create a dependency recipe 2. **`cargo chef cook`**: Compiles only the dependencies based on the recipe 3. **`cargo build`**: Compiles the application code using cached dependencies This separation allows Docker to cache dependency compilation independently, only rebuilding dependencies when they actually change. ## Using sccache for additional optimization Even with cargo-chef separating dependencies from source code, compiling dependencies is still treated as a single operation. If a single dependency changes, all dependencies need to be recompiled. [sccache](https://github.com/mozilla/sccache) provides fine-grained caching at the compiler level by: 1. **Wrapping rustc calls**: The `RUSTC_WRAPPER=sccache` environment variable intercepts compiler invocations 2. **Caching compilation artifacts**: Individual object files and compilation outputs are cached 3. **Reusing artifacts**: Unchanged code can reuse cached compilation results 4. **Cross-context sharing**: Artifacts can be shared between dependency and application builds This means only the specific crates that have changed need to be recompiled, while unchanged crates can reuse their cached artifacts. For more information regarding Rust cache mounts, please visit the official [sccache documentation](https://github.com/mozilla/sccache) and [cargo-chef documentation](https://doc.rust-lang.org/cargo/guide/cargo-home.html#caching-the-cargo-home-in-ci). ## Depot container builds Building a Docker image using Depot is up to 40x faster than on your local machine or CI provider. See a live [benchmark](https://depot.dev/benchmark/posthog). At a high level, here's what happens when you run `depot build`: 1. We send your build context to a remote builder instance running an optimized [BuildKit](/blog/buildkit-in-depth) implementation. 2. BuildKit performs the build and sends the resulting image back to your machine or a remote registry (according to the options you passed in the build command). 3. Your [Depot project's](#projects) persistent cache stores the resulting layer cache from the build automatically. 4. Your team or CI provider accesses the persistent cache for subsequent builds. ## Switching to Depot Switching to Depot for your container builds is usually a one-line code change: replace `docker build` with `depot build`. For example, if you're running `build` or `bake` commands locally, you can switch to using the same commands with the Depot CLI: ```sh # to replace docker build depot build -t my-image:latest --platform linux/amd64,linux/arm64 . # to replace docker bake depot bake -f docker-bake.hcl ``` The `depot build` command accepts the same arguments as `docker build`, so you can use it in your existing workflows without any changes. Depot's build infrastructure for container builds requires zero configuration and automatically includes a persistent build cache and support for native multi-platform image builds. To see a Depot container build in action, try the [quickstart](/docs/container-builds/quickstart). ## Use cases for Depot container builds Depot container builds benefit any team that builds and ships containerized applications. Opportunities to optimize your development workflows include: * **Building your Docker image is slow in CI**: Many CI providers force you to save and load your Docker layer cache via bulky tarballs over slow, flaky networks. Sometimes CI providers offer limited resources like slower CPUs, memory, and disks that result in longer overall build times. Depot works within your existing workflows: When you replace `docker build` with `depot build`, your Docker layer cache is automatically persisted to a fast NVMe SSD and your build runs on a remote BuildKit host. You don't need to save and load layer cache over networks. For more information, see [Continuous integration](/docs/container-builds/how-to-guides/continuous-integration). * **You're building images for multiple platforms or multiple architectures**: Maybe you're stuck with managing your own build runner or relying on slow emulation to build multi-platform images (x86 and ARM). For example, CI providers usually run their workflows on Intel (x86) machines. If you want to create a Docker image for ARM, you either have to launch your own BuildKit builder for ARM and connect to it from your CI provider, or build your ARM image with slow QEMU emulation. Depot can [build multi-platform and ARM images](/docs/container-builds/how-to-guides/arm-containers) natively with zero emulation and without running additional infrastructure. * **Building your Docker image on your local machine is slow or expensive**: Docker can hog resources on developer machines, taking up valuable network, CPU, and memory resources. Depot executes builds on remote compute infrastructure and the remote builder instance takes care of the CPU, memory, disk, and network resources required for your builds. Learn more about [local development with Depot](/docs/container-builds/how-to-guides/local-development). * **You want to share build results with a team**: Without shared infrastructure, each developer and CI job has to rebuild Docker layers that teammates have already built, wasting time and compute resources. Depot projects provide persistent, remotely accessible build caches. Your whole team can send builds to the same project and automatically reuse each other's Docker layer cache. If your coworker has already built an image, your `depot build` command for the same image reuses those layers without rebuilding them. ## Feature summary The following table summarizes the key features of Depot container builds. {/* prettier-ignore */}
Build isolation and acceleration
  • Builds run on ephemeral EC2 instances with an optimized version of BuildKit.
  • Builder instances launch on-demand and terminate when complete.
  • You pay only for compute used, and instances are never shared across customers or projects.
  • Default instance size: 16 CPUs, 32 GB memory. Startup and Business plan customers can configure larger [builder instances](#builder-instances) .
  • Each builder instance has a fast NVMe SSD for layer caching (50 GB default, expandable to 500 GB).
Native x86 and ARM builds
  • Native multi-platform Docker image builds for x86 and ARM.
  • Build multi-platform images with zero emulation and no additional infrastructure.
Faster container startup
  • Generate SOCI (Seekable OCI) v2 index metadata at build time so a compatible runtime can lazy-load images and start large containers faster.
  • Also supports other lazy-pulling output formats, including eStargz and Nydus.
Persistent shared caching
  • Automatically persist Docker layer cache to fast NVMe storage with instant availability across builds.
  • Your entire team shares the layer cache by project.
Drop-in replacement
  • Replace docker build with depot build , or docker bake with {' '} depot bake , and use the same flags and options.
  • For GitHub Actions, use the drop-in replacements: depot/build-push-action and depot/bake-action . Learn more about using Depot for container builds in GitHub Actions .
CI provider integrations
  • Integrations available for AWS CodeBuild, Bitbucket Pipelines, Buildkite, CircleCI, GitHub Actions, GitLab CI, Google Cloud Build, Jenkins, and Travis CI. See the {' '} CI integration guides .
  • OpenID Connect (OIDC) support for GitHub, CircleCI, Buildkite, and RWX eliminates the need for static access tokens. Learn more about OIDC trust relationships .
Dev tools integrations
  • Faster builds for [Dev Containers](/docs/container-builds/how-to-guides/devcontainers) and [Docker Compose](/docs/container-builds/how-to-guides/docker-compose) .
Build autoscaling
  • Use autoscaling to configure maximum builds per builder instance before launching another builder instance with a copy of your layer cache. Learn more about [Build autoscaling](/docs/container-builds/how-to-guides/autoscaling) .
  • Parallelize builds across multiple builder instances with dedicated resources for faster build times.
Depot Registry
  • Built-in registry for saving images from depot build and depot bake commands.
  • Pull images back down or push to your final registry.
  • Learn more about the Depot Registry .
Build metrics
  • Track build duration, cache hit rates, and resource utilization (CPU/memory) with performance trend charts.
  • Step-level metrics to identify slow steps and build health visualization for success/failure rates.
  • Learn more about container build metrics .
## How Depot container builds work Understand the core concepts of Depot container builds. ### Projects A project in Depot is a cache namespace that's isolated from other projects in your [organization](/docs/account#organizations) at a cache and hardware level. You can use a project for a single application, git repository, or Dockerfile. All your container builds run within a project. You can create multiple projects within an organization to manage your container builds. Once you create a project, you can use Depot container builds from your local machine or an existing CI workflow by swapping `docker` for `depot`. ### Builds Builder instances are ephemeral. They terminate after each build. Your build cache is persistent and remains available across builds. Within a project, every new builder instance uses the project's persistent cache. #### Builder instances Builder instances run an optimized version of [BuildKit](https://github.com/moby/buildkit). Builder instances come in the following sizes, configurable by project: | Builder size | CPUs | Memory | Plans | | ------------ | ---- | ------ | -------------------- | | Default | 16 | 32 GB | All | | Large | 32 | 64 GB | Startup and Business | | Extra large | 64 | 128 GB | Startup and Business | For pricing by size, see [Builder instance pricing by size](#builder-instance-pricing-by-size). By default, all builds for a project route to a single builder instance per architecture you're building. Depot can build images on both `x86` and `ARM` machines supporting the following platforms: * `linux/amd64` * `linux/arm64` * `linux/ARM/v6` * `linux/ARM/v7` * `linux/386` Both architectures build native multi-platform images with zero emulation. #### Open-source repository build isolation For open-source repositories, builds launched by fork pull requests are isolated to ephemeral builder instances with no read or write access to the project cache. Isolating these builds prevents cache poisoning and protects sensitive data from untrusted code. You'll see these types of builds labeled as `isolated` in the Depot dashboard. ### Cache By default, the image built on a Depot builder instance stays in your project's persistent build cache for reuse in future builds. You can also download the image to your local Docker daemon with `depot build --load` or push it directly to a registry with `depot build --push`. When you use `--push`, we push the image directly from the remote builder instance to your registry over high-speed network links, not through your local network. Learn more about [pushing to private Docker registries like Amazon ECR or Docker Hub](/docs/container-builds/how-to-guides/private-registries). #### Configurable cache policies per project When you trigger a build and the cache is full, BuildKit automatically removes layers based on two configurable policies: * **Cache Retention Policy**: Cache layers older than 7, 14, or 30 days are automatically removed. * **Cache Storage Policy**: When the cache volume reaches the set limit, the least recently used layers are removed first. The default cache size for a Depot project is 50 GB. You can specify a cache storage policy up to 1000 GB in your project settings. Configure these settings in the project settings page. Removing layers won't cause builds to fail, the layers get rebuilt on the next build that needs them. #### Cache removal criteria BuildKit stores layers as differentials, where each layer depends on underlying layers. BuildKit won't remove an underlying layer that a recently used layer depends on. Those underlying layers remain in the cache even when they haven't been directly accessed within the retention policy timeframe. For example, base image layers often appear as "last used over a month ago", but are retained in the cache because other layers depend on them. For the same reason, it's possible that your cache size exceeds your cache storage policy setting. To fully remove parent layers, click **Reset cache** in the **Danger Area** section of the project settings page. ## Faster container startup with SOCI Depot container builds can generate [SOCI](https://github.com/awslabs/soci-snapshotter) (Seekable OCI) v2 index metadata at build time. A compatible runtime uses the index to lazy-load an image, downloading only the files it needs to start the container instead of pulling and decompressing the whole image first. This speeds up startup for large images, such as those with CUDA or PyTorch. SOCI is opt-in. Enable it by adding `soci=true` to the `--output` flag: ```shell depot build -t repo/image:tag --push \ --output type=image,soci=true,compression=gzip,force-compression=true,oci-mediatypes=true \ . ``` `soci=true` generates the SOCI index. SOCI only indexes gzip layers, so `compression=gzip` is required, and `force-compression=true` ensures every layer, including base-image layers, is gzip so the whole image is indexed. The index is written alongside your unchanged image layers in the registry, so there's no separate post-push indexing step. By default, layers smaller than 10 MB are skipped, configurable with `soci-min-layer-size`. To get the startup benefit, the platform pulling the image must be configured to use the SOCI snapshotter. AWS Fargate does this automatically. On Amazon EKS with EC2 nodes, or your own hosts, enable the soci-snapshotter in containerd; recent EKS AMIs include it but don't turn it on by default. Depot also supports other lazy-pulling formats like [eStargz](/blog/booting-containers-faster-with-estargz) and Nydus, see the [FAQ](#faq) for those output options. ## Deep dive: Technical architecture A deeper dive into the design and architecture of Depot container builds. The architecture for Depot remote container builds consists of the Depot CLI, a control plane, an open-source `cloud-agent`, and builder instances (virtual machines) running our open-source `machine-agent` and BuildKit with associated cache volumes. Depot architecture The flow of a Docker image build using Depot looks like this: 1. The Depot CLI asks the Depot API for a new builder machine connection (with organization ID, project ID, and the required architecture) and polls the API for when a machine is ready. 2. The Depot API stores the pending request for a builder. 3. A `cloud-agent` process periodically reports the current status to the Depot API and asks for any pending infrastructure changes. 4. For a pending build, the `cloud-agent` process receives a description of the machine to start and then launches it. 5. When the machine launches, a `machine-agent` process running inside the virtual machine registers itself with the Depot API and receives the instruction to launch BuildKit with specific mTLS certificates provisioned for the build. 6. After the `machine-agent` reports that BuildKit is running, the Depot API returns a successful response to the Depot CLI, along with new mTLS certificates to secure and authenticate the build connection. 7. The Depot CLI uses the new mTLS certificates to directly connect to the builder instance, using that machine and cache volume for the build. We use the same architecture for [Depot Managed](/docs/managed/overview) builders, the only difference being where the `cloud-agent` and builder virtual machines launch. ## Pricing Container builds are tracked by the second, with no one-minute minimum per build. We calculate total minutes used at the end of the billing period. | | Developer plan | Startup plan | Business plan | | ----------------- | -------------------------------------------- | ---------------------------------------------- | ------------- | | **Plan cost** | $20/month | $200/month | Custom | | **Build minutes** | 500 included/month
+ $0.04/minute after | 5,000 included/month
+ $0.04/minute after | Custom | | **Cache** | 25 GB included
+ $0.20/GB/month after | 250 GB included
+ $0.20/GB/month after | Custom | Try out Depot free for 7 days, no credit card required → All plans include: * Unlimited concurrency * Native multi-platform builds * Default builder instances with 16 CPUs and 32 GB of memory Plans also include [Depot CI](/docs/ci/overview) minutes and [GitHub Actions runner](/docs/github-actions/overview) minutes. See [Pricing](/pricing) for more about plan features and costs. ### Builder instance pricing by size Startup and Business plan customers can configure larger builder instances. Large and Extra large builder instances consume your included build minutes faster (via multipliers) and cost more per minute. | Builder size | CPUs | Memory | Per-minute price | Minutes multiplier | | ------------ | ---- | ------ | ---------------- | ------------------ | | Default | 16 | 32 GB | $0.04 | 1x | | Large | 32 | 64 GB | $0.08 | 2x | | Extra large | 64 | 128 GB | $0.16 | 4x | ### Additional container build minutes Included monthly build minutes are not a hard cap. You can pay for additional container build minutes on a per-minute basis. ## FAQ You can run unlimited concurrent builds against a single Depot project. By default, all builds for the same architecture run on a single VM with fixed resources (16 CPUs, 32 GB RAM), so concurrent builds share these resources. To give each build dedicated resources, enable autoscaling in your project settings. For more information, see [Build parallelism in Depot](/docs/container-builds/build-parallelism). You can use the `--push` flag to push your images to a private registry. Our `depot` CLI uses your local Docker credentials provider. So, any registry you've logged into with `docker login` or similar will be available when running a Depot build. For more information, see [Private registries](/docs/container-builds/how-to-guides/private-registries). Yes! Depot supports native ARM container builds out of the box. We detect the architecture of the machine requesting a build via `depot build`. If that architecture is ARM, we route the build to a builder running ARM natively. You can build Docker images for M4 macOS devices and run the resulting image immediately, as it is made specifically for your architecture. Learn more about [building Docker ARM images with Depot](/docs/container-builds/how-to-guides/arm-containers). Yes! Check out our [integration guide](/docs/container-builds/how-to-guides/arm-containers#what-about-multi-architecture-containers). If you're building multiple images from a single monorepo, and the builds are lightweight, we tend to recommend using a single project. But we detail some other options in our [monorepo guide](/blog/how-to-use-depot-in-monorepos). Yes! We have a [`depot configure-docker`](/docs/cli/reference/container-builds#depot-configure-docker) command that configures Depot as a plugin for the Docker CLI and sets Depot as the default builder for both `docker build` and `docker buildx build`. For more information, see our [Docker build docs](/docs/container-builds/how-to-guides/docker-build). Registries like Amazon Elastic Container Registry (ECR) and Google Container Registry (GCR) don't accurately display provenance information for a given image. Provenance is a set of metadata that describes how an image was built. This metadata is stored in the registry alongside the image. It's enabled by default in `docker build` and thus by default in `depot build` as well. If you would like to clean up the clutter, you can run your build with `--provenance=false`: ```shell depot build -t --push --provenance=false . ``` Depot supports building images in any lazy-pulling compatible format. You can build an estargz image by setting the `--output` flag at build time: ```shell depot build \ --output "type=image,name=repo/image:tag,push=true,compression=estargz,oci-mediatypes=true,force-compression=true" \ . ``` Yes. Depot can generate [SOCI](https://github.com/awslabs/soci-snapshotter) v2 index metadata at build time, so a compatible runtime can lazy-load your image and download only the file bytes it needs to start the container. AWS Fargate uses SOCI automatically; on Amazon EKS or your own hosts you enable the soci-snapshotter in containerd. SOCI v2 keeps your existing compressed layers unchanged and writes the index alongside the image in the registry, which means you don't need a separate post-push indexing pipeline. SOCI is opt-in. Enable it by setting `soci=true` on the `--output` flag at build time: ```shell depot build -t repo/image:tag --push \ --output type=image,soci=true,compression=gzip,force-compression=true,oci-mediatypes=true \ . ``` `soci=true` turns on SOCI index generation. SOCI only indexes gzip layers, so `compression=gzip` is required, and `force-compression=true` ensures base-image layers are gzip too. To get the startup benefit, the platform pulling the image must be configured for SOCI: AWS Fargate does this automatically, while on Amazon EKS or your own hosts you enable the soci-snapshotter in containerd. Depot supports building images with `zstd` compression, a popular compression format to help speed up the launching of containers in AWS Fargate and Kubernetes. You can build an image with zstd compression by setting the `--output` flag at build time: ```shell depot build \ --output type=image,name=$IMAGE_URI:$IMAGE_TAG,oci-mediatypes=true,compression=zstd,compression-level=3,force-compression=true,push=true \ . ``` We label builds as `isolated` in the Depot dashboard when they're launched by GitHub Actions for an open-source pull request. It's a build that didn't have access to read from or write to the project cache, to prevent untrusted code from accessing sensitive data. ## Next steps * [Quickstart](/docs/container-builds/quickstart) for Depot container builds * [Optimal Dockerfiles](/docs/container-builds/optimal-dockerfiles/overview) for Depot container build cache * [Local development](/docs/container-builds/how-to-guides/local-development) with Depot container builds ## Quickstart for faster Docker image builds Get faster container image builds by replacing `docker build` with `depot build` using the Depot CLI. If you want to trigger Depot container builds from GitHub Actions, see the [GitHub Actions integration guide](/docs/container-builds/integrations/github-actions). ## Prerequisites You'll need a [Depot account](https://depot.dev/sign-up). ## Install the Depot CLI Install the [Depot CLI](/docs/cli/reference) on your machine to run local builds. * **macOS** Install the Depot CLI with Homebrew: ```shell brew install depot/tap/depot ``` * **Linux** Install the Depot CLI with the installation script: ```shell curl -L https://depot.dev/install-cli.sh | sh ``` * **All platforms** Download the binary file for your platform from the [Depot CLI releases page](https://github.com/depot/cli/releases) in GitHub. ## Run a local build The [`depot build` command](/docs/cli/reference/container-builds#depot-build) accepts the same parameters as the `docker build` command. ```shell depot build -t repo/image:tag . ``` When you run `depot build` locally for the first time, you're prompted to do the following: * authenticate with Depot * choose the project for your build * save the project in a `depot.json` file in your repository (to remember your project for future builds) ## Run a build in CI Depot integrates with any CI provider. Use the following guides to help you get started: * [AWS CodeBuild](/docs/container-builds/integrations/aws-codebuild) * [Bitbucket Pipelines](/docs/container-builds/integrations/bitbucket-pipelines) * [Buildkite](/docs/container-builds/integrations/buildkite) * [CircleCI](/docs/container-builds/integrations/circleci) * [Depot CI](/docs/container-builds/integrations/depot-ci) * [GitHub Actions](/docs/container-builds/integrations/github-actions) * [GitLab CI](/docs/container-builds/integrations/gitlab-ci) * [Google Cloud Build](/docs/container-builds/integrations/google-cloud-build) * [Jenkins](/docs/container-builds/integrations/jenkins) * [Travis CI](/docs/container-builds/integrations/travis-ci) ## Add a build minute usage cap Organizations have unlimited monthly build minutes by default. To make costs predictable, configure a usage cap for your organization: 1. Log in to your [Depot dashboard](/orgs) and select your organization. 2. Click **Settings**. 3. In the **Usage caps** section, click **Limit build minutes**. 4. Enter the number of minutes the organization is allowed to use in a month in the **Container Build Minutes** field. 5. Click **Update limit**. When your organization reaches the build limit, builds won't start until the next billing period or until you raise the limit. ## Troubleshooting container builds This page provides an overview of common errors encountered when building container images with Depot, along with steps to resolve them. ## Error: `Keep alive ping failed to receive ACK within timeout` This error occurs when BuildKit is shut down due to runner resource starvation, often caused by an Out of Memory (OOM) condition. ### How to resolve To resolve this issue, try one of the following configuration changes: * **Scale up your worker size:** Increase the resources available to each build by selecting a larger worker size in your project settings. * **Enable auto-scaling:** Limit the number of builds running simultaneously on a given worker to prevent resource contention. For more information about auto-scaling, see the [Auto-scaling Guide](https://depot.dev/docs/container-builds/how-to-guides/autoscaling). If you continue to experience this error after adjusting your worker configuration, [reach out to support](/help) with your project ID and build details so we can help investigate resource usage patterns. ## Error: `Our services aren't available right now` When building images with Depot, you may see an error message similar to: ```text Error: failed to solve: failed to parse error response 400: Our services aren't available right now ``` This error typically occurs when trying to export build cache to GitHub Actions cache (`type=gha`) while using Depot builders. Depot builds automatically enable layer caching. You don't need to export cache to GitHub Actions cache, and attempting to do so can cause conflicts. ### How to resolve Remove both `--cache-from` and `--cache-to` from your build configuration: ```bash # Remove these flags: depot build \ --cache-from type=gha \ --cache-to type=gha \ . # Use this instead (Depot handles caching automatically): depot build . ``` Once removed, your builds will use Depot's native caching, which is faster and more reliable than GitHub Actions cache. If you continue seeing this error after removing the cache configurations, [reach out to support](/help) with your project ID and build details. ## Error: `client version 1.43 is too old` when using `--load` When running `depot build --load`, you may encounter an error like: ```text Error: failed to solve: failed to copy to tar: rpc error: code = Unknown desc = Error response from daemon: client version 1.43 is too old. Minimum supported API version is 1.44, please upgrade your client to a newer version ``` Docker Engine v29 raised its minimum supported API version to 1.44, but the Depot CLI may negotiate an older API version by default. This mismatch causes the Docker daemon to reject the image load request. ### How to resolve Use one of the following workarounds: * **Set `DOCKER_API_VERSION` environment variable** Force the CLI to negotiate a compatible API version: ```bash DOCKER_API_VERSION=1.52 depot build --load . ``` * **Lower the minimum API version in Docker Engine config** Add `{"min-api-version": "1.43"}` to your Docker Engine daemon configuration (for example `/etc/docker/daemon.json` on Linux, or via Docker Desktop’s **Docker Engine** settings), then restart the Docker daemon. ```json { "min-api-version": "1.43" } ``` * **Push to a registry and pull instead** Instead of loading the image directly, push it to a registry and pull it back: ```bash depot build --push -t your-registry/your-image:tag . docker pull your-registry/your-image:tag ``` If none of these workarounds resolve the issue, [reach out to support](/help) with your Docker Engine version and CLI version. ## Error: `failed to mount /tmp/buildkit-mount` If you see an error message like: ```text Error: failed to mount /tmp/buildkit-mountXXXXXXX: [{Type:overlay Source:overlay Target: Options:[lowerdir=/b/runc-stargz/snapshots/snapshotter/snapshots/XXXXX/fs ``` This indicates that BuildKit's snapshot manager cannot properly mount an overlay filesystem layer. This error commonly occurs when: * Cache layers become corrupted or inconsistent * Snapshot metadata is out of sync with the actual filesystem state * Previous builds left the cache in an inconsistent state * Storage backend issues affect the overlay filesystem ### How to resolve Reset your project's build cache to clear the corrupted layers: 1. Navigate to your [Depot Dashboard](https://depot.dev) 2. Go to your project settings 3. Locate the **Cache Management** section 4. Click **Reset Cache** or **Clear Build Cache** 5. Confirm the cache reset operation 6. Retry your container build After resetting the cache, your build should complete successfully. The first build after a cache reset may take slightly longer as the cache rebuilds. If the error persists after resetting the cache, [reach out to support](/help) with: * Your project ID * The full error message from your build logs * Whether this happens consistently or intermittently ## Error: `401 Unauthorized` during Docker pull If you encounter an error during container builds similar to: ```text Error: failed to solve: debian:trixie-slim: failed to resolve source metadata for http://docker.io/library/debian:trixie-slim: unexpected status from HEAD request to https://registry-1.docker.io/v2/library/debian/manifests/trixie-slim: 401 Unauthorized ``` This error typically indicates an issue with accessing Docker Hub. ### How to resolve This error can occur due to Docker Hub outages, rate limiting, or authentication issues. Try these solutions: **1. Check Docker Hub status** First, check if Docker Hub is experiencing an outage or service disruption by visiting: [Docker's official status page](https://status.docker.com/) If Docker Hub is experiencing issues, you can continue your workflow by temporarily switching to AWS's public Docker mirror (see option 2 below). **2. Switch to AWS Docker Mirror** 1. Identify the Docker image you need. For example, if you are using the Ubuntu image, the typical Docker Hub path would be `docker.io/library/ubuntu:latest`. 2. Replace the Docker Hub path with AWS's Docker mirror path. For Ubuntu, use: `public.ecr.aws/docker/library/ubuntu:latest`. 3. Update your Dockerfile or Docker commands to pull from the AWS mirror: ```dockerfile # Instead of: FROM ubuntu:latest # Use: FROM public.ecr.aws/docker/library/ubuntu:latest ``` Once Docker Hub is back online, you can switch back to the standard Docker Hub paths. **3. Authenticate with Docker Hub for higher rate limits** If you're hitting Docker Hub rate limits, you can authenticate with a Docker Hub account to increase your pull limits. Free Docker Hub accounts get higher limits than anonymous pulls, and paid accounts get even higher limits. To authenticate, create a Docker Hub account if you don't have one, then set up authentication in your build environment. ## Error: `failed to load ref` If you encounter a warning during container builds similar to: ```text ERROR: failed to load ref: 05e0j9uordhz0b72g9h3e32an: not found ``` This error indicates that BuildKit couldn't find a cached layer that it expected to exist. While this appears as an error in the logs, BuildKit typically recovers by rebuilding the missing layer, so your build should still complete successfully. ### How to resolve If you observe this warning frequently, increase the cache storage allocation: 1. Log in to your [Depot Dashboard](https://depot.dev). 2. Select the project and click **Settings**. 3. Increase one or both of **Cache Storage Policy** and **Cache Retention Policy** values. 4. Monitor your builds to verify if the fix worked. If you continue to see this warning after adjusting your cache settings, [reach out to support](/help) with your project ID and build details. ## Error: `.git directory not found in build context` When using Depot's `build-push-action` for Docker builds, you might encounter an error such as: ```text Error: "/.git/refs/heads": not found. Please check if the files exist in the context. ``` By default, BuildKit does not include the `.git` directory in the build context, and uses the `git://` protocol instead. This can cause issues if your build process needs access to git information (for example, to determine commit hashes or branch names). ### How to resolve Set the `BUILDKIT_CONTEXT_KEEP_GIT_DIR=1` build argument to tell BuildKit to keep the git repository in the context: ```yaml jobs: build: runs-on: ubuntu-latest permissions: contents: read id-token: write packages: write steps: - name: Check out uses: actions/checkout@v4 with: fetch-depth: 2 - name: Set up Depot CLI uses: depot/setup-action@v1 - name: Build and push container image uses: depot/build-push-action@v1 with: project: your_project_id push: true platforms: linux/arm64,linux/amd64 build-args: | COMMIT_HASH=${{ github.sha }} BUILDKIT_CONTEXT_KEEP_GIT_DIR=1 ``` For more information, refer to the [Docker documentation on keeping the git directory in the build context](https://docs.docker.com/build/building/context/#keep-git-directory). If you continue to see git-related errors after adding this build argument, verify that your checkout step is fetching the necessary git history and [reach out to support](/help) if needed. ## Error: `cannot merge resource due to conflicting Schema URL` When running `depot build` or `depot bake`, you may encounter an error message like: ```text Error: cannot merge resource due to conflicting Schema URL ``` This error is typically caused by conflicting OpenTelemetry (OTEL) environment variables set in your local build environment. These environment variables can interfere with Depot's internal telemetry system. ### How to resolve Set the environment variable `DEPOT_DISABLE_OTEL=1` in your environment before running `depot build`. This variable disables the embedded OpenTelemetry tracing in Depot CLI. Use this to prevent conflicts when your environment has existing OpenTelemetry instrumentation: ```bash export DEPOT_DISABLE_OTEL=1 depot build . ``` Alternatively, you can set it inline with your build command: ```bash DEPOT_DISABLE_OTEL=1 depot build . ``` If you're using a CI/CD environment, add `DEPOT_DISABLE_OTEL=1` to your environment variables for the build step. If the error persists after setting this environment variable, [reach out to support](/help) with your project ID and build details. ## Error: `remote error: tls: bad record MAC` When building container images, you may encounter an error like: ```text Error: failed to receive status: rpc error: code = Unavailable desc = error reading from server: remote error: tls: bad record MAC ``` This error indicates that the connection between Depot CLI and the Depot builder dropped during the build. BuildKit requires the client to remain connected throughout the build process. Once the Depot runner detects that BuildKit is running, our API establishes a connection with the host running Depot CLI. This connection must remain stable for the duration of the build. If the connection drops (even briefly), BuildKit interprets this as the client disconnecting and cancels the build. ### How to resolve This error is typically caused by network instability on the client side. Check for: * **VPN connections:** Virtual private networks can cause intermittent connection drops, especially when switching networks or during reconnection events * **Firewall rules:** Aggressive firewalls may terminate long-lived connections * **Wi-Fi instability:** Weak or congested wireless connections can cause packet loss * **Router issues:** Some routers have connection timeout settings that affect long-running connections * **ISP issues:** Internet service provider outages or routing problems can cause intermittent connectivity If you continue experiencing connection issues from your local machine, consider triggering builds from a CI platform instead. CI environments typically have more stable network connections and are better suited for running longer builds. See our [CI integration guides](/docs/container-builds/quickstart#continuous-integration) for setup instructions. ## Error: `timed out connecting to machine: failed to create temp file` When running a build with Depot CLI, you may encounter an error similar to: ```text Error: timed out connecting to machine: failed to create temp file: open /var/folders/zz/zyxvpxvq6csfxvn_n0000000000000/T/depot-cert4068571078: permission denied ``` This error indicates that Depot CLI is unable to write the TLS certificate file to a temporary directory on your local machine. The client-side TLS certificate is required to establish secure communication with the remote build server. ### How to resolve * Try restarting your terminal session * Check available disk space on your local machine * Verify your user has write permissions to the directory shown in the error message * If using an antivirus or other security software, check if it's blocking file operations on the temporary directory If the issue persists, [reach out to support](/help) with your OS version and any security software you're running. ## Build hangs or builder won't start If your build hangs or a builder isn't coming online to serve build requests, this may be caused by: * A deadlock in BuildKit * A builder that isn't coming online to serve the build request * Build cache is full and needs to be cleared If you see any of these issues, you can reset the build cache for a project. ### How to resolve Resetting the build cache purges the cache volume and launches a new build machine with a clean slate: 1. Go to the project's `Settings` page 2. Click the `Reset build cache` button at the bottom ## Multi-platform/multi-architecture image has a 3rd image with platform `unknown/unknown` Docker introduced a new [provenance feature](https://docs.docker.com/build/attestations/slsa-provenance/) that tracks some info about the build itself, and it's implemented by attaching the data to the final image "manifest list". Many registries like GitHub Container Registry display the provenance data as an `unknown/unknown` image architecture. ### How to resolve If you don't care about provenance or want a cleaner list in your registry, you can disable provenance during your image build: ```bash depot build --provenance false ``` **When using `depot/build-push-action` or `depot/bake-action`:** You can set `provenance` to `false` in your workflow step to disable provenance: ```yaml - uses: depot/build-push-action@v1 with: ... provenance: false ... ``` ## Cannot pull from private registry during build When building container images that need to pull from private registries (like in a `FROM` statement), you may need to provide authentication credentials to Depot. ### How to resolve The `depot` CLI automatically uses your local Docker credentials provider. Any registry you've logged into with `docker login` is available when running a Depot build. For example, if your Dockerfile references a private registry: ```dockerfile FROM my-private-registry/project/image:version ... ``` Ensure you're logged into the registry from the machine where you're running `depot build`: ```bash docker login my-private-registry depot build . ``` If you're still experiencing authentication issues: 1. Confirm you're logged into the registry on the machine running `depot build` 2. Test that you can pull the image directly: `docker pull my-private-registry/project/image:version` 3. If the pull succeeds but the build fails, [reach out to support](/help) with your project ID and build details ## Environment variables This reference lists environment variables that you can set directly, that Depot tools read, or that Depot runtime environments provide to your jobs. It does not include Depot service-internal variables or CI provider runtime variables that Depot tools consume automatically. ## Authentication and identity | Variable | Products | Description | | ------------------- | ------------------------------------------------------------------------------------ | ---------------------------------------------------------------------------------------------------------------------------------------------------------------------------------- | | `DEPOT_TOKEN` | CLI, Container Builds, Depot CI, Depot Cache, Depot Registry, Remote Agents, API/SDK | Depot auth token. The CLI reads this after explicit `--token` flags and before locally stored login credentials. In Depot CI, Depot injects a short-lived job token automatically. | | `DEPOT_CACHE_TOKEN` | Depot Cache, Depot CI, GitHub Actions runners | Short-lived Depot Cache auth token. In Depot CI jobs and Depot GitHub Actions runner jobs, Depot injects it automatically. The CLI can also read it as a fallback auth token. | | `DEPOT_ORG_ID` | Depot Cache, Depot CI, GitHub Actions runners, Remote Agents | Depot organization ID. Cache integrations use it as organization context; Depot CI and GitHub Actions runners set it for jobs automatically. | ## Project and build selection | Variable | Products | Description | | ---------------------- | ------------------------------ | ---------------------------------------------------------------------------------------------------------------------------------------------------------------------- | | `DEPOT_PROJECT_ID` | CLI, Container Builds, API/SDK | Depot project ID. Used by `depot build`, `depot bake`, build API examples, and other project-scoped commands when a `--project` flag or `depot.json` file is not used. | | `DEPOT_BUILD_ID` | CLI, Container Builds, API/SDK | Existing build ID created by the Depot API. When set, `depot build` attaches to that build instead of creating a new one. | | `DEPOT_BUILD_PLATFORM` | CLI, Container Builds | Default build machine platform for commands that support platform selection. Supported values are `dynamic`, `linux/amd64`, and `linux/arm64`. | ## CLI behavior | Variable | Products | Description | | -------------------------- | --------------------- | ---------------------------------------------------------------------------------------------- | | `DEPOT_DISABLE_OTEL` | CLI, Container Builds | Disables Depot CLI OpenTelemetry tracing. | | `DEPOT_NO_SUMMARY_LINK` | CLI, Container Builds | Suppresses Depot build summary links and update notices in CLI output. | | `DEPOT_NO_UPDATE_NOTIFIER` | CLI | Disables Depot CLI update notifications. | | `DEPOT_ERROR_TELEMETRY` | CLI | Set to `0` to disable Depot CLI error telemetry. | | `DEPOT_DEBUG` | CLI | Enables Depot CLI debug logging. | | `DEPOT_DEBUG_OIDC` | CLI | Prints OIDC provider lookup details while the CLI attempts to authenticate through CI OIDC. | | `DEPOT_INSTALL_DIR` | CLI installer | Directory where the shell installer places the `depot` binary. Defaults to `$HOME/.depot/bin`. | | `DEPOT_BINARY_PATH` | npm package | Overrides the binary path used by the `@depot/cli` npm package. | ## Container registry credentials | Variable | Products | Description | | ------------------------------ | ------------------------------------- | ----------------------------------------------------------------------------------------------------------------------------------- | | `DEPOT_PUSH_REGISTRY_USERNAME` | CLI, Container Builds, Depot Registry | Username used by `depot push` when pushing from the Depot Registry to another registry without relying on local Docker credentials. | | `DEPOT_PUSH_REGISTRY_PASSWORD` | CLI, Container Builds, Depot Registry | Password used with `DEPOT_PUSH_REGISTRY_USERNAME`. | | `DEPOT_PUSH_REGISTRY_AUTH` | CLI, Container Builds, Depot Registry | Base64-encoded `username:password` auth string used by `depot push` as an alternative to separate username and password variables. | ## Depot Cache These variables are useful when configuring build tools to use Depot Cache. Some are set by users for specific tools, and others are injected automatically in Depot CI jobs and Depot GitHub Actions runner jobs. | Variable | Products | Description | | ------------------------- | --------------------------------------------- | ------------------------------------------------------------------------------------------------------------------------- | | `GOCACHEPROG` | Depot Cache, Depot CI, GitHub Actions runners | Go cache program hook. Set it to `depot gocache` to use Depot Cache for Go builds. | | `SCCACHE_WEBDAV_ENDPOINT` | Depot Cache, Depot CI, GitHub Actions runners | WebDAV endpoint used by `sccache` to read and write cache entries in Depot Cache. | | `SCCACHE_WEBDAV_TOKEN` | Depot Cache, Depot CI, GitHub Actions runners | Bearer-style token used by `sccache` with `SCCACHE_WEBDAV_ENDPOINT`. | | `SCCACHE_WEBDAV_USERNAME` | Depot Cache | Username-style `sccache` auth value. Use the Depot organization ID when configuring this manually. | | `SCCACHE_WEBDAV_PASSWORD` | Depot Cache | Password-style `sccache` auth value. Use a Depot user or organization token when configuring this manually. | | `TURBO_API` | Depot Cache, Depot CI, GitHub Actions runners | Turborepo remote cache endpoint. | | `TURBO_TEAM` | Depot Cache, Depot CI, GitHub Actions runners | Turborepo team value. In Depot CI jobs and Depot GitHub Actions runner jobs, this is set to the Depot organization ID. | | `TURBO_TEAMID` | Depot Cache, Depot CI, GitHub Actions runners | Turborepo team ID alias. In Depot CI jobs and Depot GitHub Actions runner jobs, this is set to the Depot organization ID. | | `TURBO_TOKEN` | Depot Cache, Depot CI, GitHub Actions runners | Turborepo remote cache auth token. | ## Depot CI Depot CI jobs provide CI-specific variables, plus the authentication and identity variables listed in [Authentication and identity](#authentication-and-identity). | Variable | Description | | ------------------------ | ---------------------------------------------------------------------------------------------------------------------------------------------------------------------------------------------- | | `DEPOT_JOB_URL` | Direct link to the current Depot CI job attempt in the Depot dashboard. See [Link to a job from within a workflow](/docs/ci/observability/depot-ci-logs#link-to-a-job-from-within-a-workflow). | | `DEPOT_MATRIX_JOB_INDEX` | Zero-based index of the job in its resolved strategy. `0` for jobs without a matrix. | | `DEPOT_MATRIX_JOB_TOTAL` | Number of jobs in the resolved strategy. `1` for jobs without a matrix. | | `GITHUB_ENVIRONMENT` | Workflow-derived environment name. Set when the job uses a static `environment:` value, such as `environment: production`. | Depot CI also supports GitHub Actions-compatible runtime variables and environment-file variables such as `GITHUB_ENV`, `GITHUB_OUTPUT`, `GITHUB_PATH`, `GITHUB_STATE`, and `GITHUB_STEP_SUMMARY` so existing GitHub Actions workflows and actions can pass environment variables, outputs, paths, state, and job summaries between steps. `DEPOT_MATRIX_JOB_INDEX` and `DEPOT_MATRIX_JOB_TOTAL` mirror `strategy.job-index` and `strategy.job-total`. Composite actions inherit the calling job's values; jobs in reusable workflows use their own resolved strategy. For full GitHub Actions compatibility details in Depot CI, see [Compatibility](/docs/ci/compatibility). ## Related reference * [CLI authentication](/docs/cli/authentication) * [Container builds CLI reference](/docs/cli/reference/container-builds) * [Depot Cache authentication](/docs/cache/authentication) * [Depot CI compatibility](/docs/ci/compatibility) ## Access private resources from Depot runners Depot GitHub Actions runners can access your private resources, like internal APIs, databases, or other services. By default, each Depot runner launches with a unique public IP address from the AWS (Amazon Web Services) address pool. This approach has the following implications: * Every build job gets a different public IP address. * Third-party services that rate-limit by IP address generally don't rate-limit your jobs because they have different IP addresses. * You can't allowlist Depot runners by IP address to access private resources. ## Do you really need static IP addresses for your Depot runners? If you need to securely access your private resources from your Depot runner, then we recommend choosing from several alternatives to static IP addresses. In general, options like placing your runners on your VPN or VPC peering (if you use AWS) perform better, are easier to maintain, and cost less. ## How to access private resources securely We recommend the following approaches to securely connect Depot runners to your private resources. You can adapt these patterns to your infrastructure and requirements. ### Tailscale integration The Tailscale integration allows Depot CI runners and container build runners to join your private Tailscale network, giving them secure access to internal resources without any infrastructure changes. When to use this approach: * You're already using Tailscale or are willing to adopt it. * You need to access private resources across different cloud providers. * You don't want to make any significant infrastructure changes. How it works: * Runners automatically join your Tailscale network at the start of each build. * You configure access rules in your Tailscale ACL to control which resources runners can access. Setup: * For setup instructions, see the [Tailscale integration documentation](https://depot.dev/docs/integrations/tailscale). ### Cloudflare Warp If you're using Cloudflare for authentication and access control, you can install Cloudflare Warp within your CI runners to give them a verifiable identity in your Zero Trust configuration. When to use this approach: * You're already using Cloudflare Zero Trust for your private resources. * You want identity-based access control rather than IP-based allowlisting. How it works: * Set up Cloudflare Warp in your GitHub Actions workflow using the [setup-cloudflare-warp action](https://github.com/marketplace/actions/setup-cloudflare-warp). * Runners receive a Cloudflare identity that you can reference in your Zero Trust policies. * Control access to internal services through your Cloudflare Zero Trust configuration. Example usage: ```yaml steps: - uses: actions/checkout@v4 - uses: cloudflare/warp-action@v1 with: organization: your-org - run: curl https://internal-service.example.com ``` ### VPC peering with AWS For AWS-based infrastructure, Depot can establish direct VPC peering between your AWS account and the VPC where your runners operate. Depot configures a peering connection between VPCs, allowing runners to access resources in your private subnets and ensuring that traffic stays within the AWS network. When to use this approach: * Your private resources are in AWS. * You need low-latency access to AWS resources. * You prefer AWS-native networking solutions. Requirements: * Depot [Business plan](https://depot.dev/pricing) * Existing AWS infrastructure Deployment options: * Custom deployment with dedicated infrastructure in our cloud. * Depot Managed deployment in your AWS organization. ## Static IP addresses If you have an absolute requirement for static IP addresses, you can consider upgrading to our Business plan for a custom deployment. Depot provisions dedicated infrastructure with dedicated VPCs for your runners. All runners either peer with your AWS account or are configured to use a NAT gateway for static outbound IP addresses. These IPs can then be allowlisted in your firewall or security policies. When to use this approach: * None of the VPN-based options (Tailscale, Cloudflare Warp) work for your security policies. * VPC peering isn't applicable (non-AWS infrastructure). Tradeoffs compared to our default IP addressing model: * Traffic is limited by the NAT gateway's bandwidth. * Since all builds share the same IP addresses, third-party services like Docker Hub are more likely to rate-limit your requests. * Requires dedicated infrastructure and NAT gateway resources. Requirements: * Depot [Business plan](https://depot.dev/pricing) Deployment options: * Custom deployment with dedicated infrastructure in our cloud. * Depot Managed deployment in your AWS organization. ## Get help Reach out if you're not sure which option is right for your use case. * Join our [Discord community](https://discord.gg/depot) to ask questions and see what other developers are doing with Depot. * [Contact us](mailto:help@depot.dev) for help or to learn more about plans and options. ## Use egress filters for GitHub Actions runners Configure egress filtering to control which external services your GitHub Actions runners can connect to by blocking or allowing connections at the network level. Egress filtering helps prevent data exfiltration and reduces the attack surface of your CI infrastructure. ### Configuration Configure egress rules on your organization's [settings page](/orgs/_/settings), in the **GitHub Actions Runners** section under **Egress Rules**. By default, Depot runners allow outbound connections to any external service. You can set the default rule (target `*`) to either `Deny` or `Allow`. You can add more rules to allow or deny connections to specific IPs, CIDRs, or hostnames. The following example shows a set of rules to get a Docker build with Golang working: [A screenshot of the egress filter rules settings in use](/images/egress-filter-rules.webp) This example first applies a blanket deny rule, which blocks all outbound connections by default. Then, it allows connections to the following: * `auth.docker.io` and `docker.io` for Docker Hub authentication and registry access * `sum.golang.org` and `proxy.golang.org` for Go modules and proxy access * `storage.googleapis.com` for Google Cloud Storage access ### How the runner applies the rules The runner applies the filtering rules in the following order: 1. Allow all loopback traffic (127.0.0.1, ::1) to prevent breaking localhost services. 2. Apply Deny rules: denied IPs and CIDR blocks take precedence. 3. Apply Allow rules: explicitly permitted IP addresses and CIDR blocks. 4. Apply the default policy (ALLOW or DENY) to all other traffic. When you specify a hostname in your rules, it's resolved to IP addresses and pinned in `/etc/hosts` to ensure consistent filtering. ### Pre-configured rules To ensure that runners can still connect to necessary services, we automatically add certain IPs and hosts to the allowlist: * depot.dev domains * GitHub Actions service IPs * AWS service IPs Container builds with `depot build` also work with egress filtering enabled. Depot dynamically adds BuildKit machine IPs to the allowlist as they're allocated. ### Limitations Keep the following limitations in mind when you use egress filtering: * You can't use Tailscale with egress filters because each modifies the network config in incompatible ways. * Any process with root access can modify the egress filter rules. Ensure that untrusted processes don't run with higher privileges than necessary. * The egress filter is currently supported only on Linux runners. ## Dagger Dagger Engine support on Depot GitHub Actions Runners is deprecated and will be removed in a future update. If you are currently using this integration, please [contact support](/help) for guidance. Connect with Dagger Cloud and run your Dagger Engine builds on Depot's [Ultra Runners for GitHub Actions](/products/github-actions) with our accelerated cache enabled. ## Authentication Accessing Dagger Engines in Depot requires that you connect Depot to your Dagger Cloud account and access the Engine via Depot GitHub Actions Runners. ### Connect to Dagger Cloud From the [Dagger Cloud](https://dagger.cloud/) UI, generate a [Dagger Cloud token](https://docs.dagger.io/configuration/cloud) and copy it to your clipboard. From your [Depot Dashboard](/orgs), you will see "Dagger" listed in the left-hand navigation under "CI Runners". Click on "Dagger" and in the top right corner you will see the "Add Token" button. Add your token, and you should see a message that you have successfully connected. ### Connect to GitHub Finally, ensure you are connected to GitHub. Under the "CI Runners" section, click on "GitHub Actions" and connect your GitHub account. You will be prompted to connect with your GitHub organization and specify all or specific repositories to enable access to Depot Runners. ## Configuration In your GitHub Actions workflow, you can specify both the [**Depot Runner** label](/docs/github-actions/runner-types) and the **Dagger Engine** version directly in the `runs-on` key using a comma-separated format. `,dagger=`. ```yaml {6} name: dagger on: push jobs: build: runs-on: depot-ubuntu-latest,dagger=0.18.4 steps: - uses: actions/checkout@v4 - run: dagger -m github.com/kpenfound/dagger-modules/golang@v0.2.0 call \ build --source=https://github.com/dagger/dagger --args=./cmd/dagger \ export --path=./build ``` You can locate the latest Dagger Engine release version and all potentially breaking changes in the [Dagger Engine Changelog](https://github.com/dagger/dagger/blob/main/CHANGELOG.md). The Dagger CLI will be available and pre-authenticated with your Dagger Cloud token. Once a Dagger request is made, Depot initializes a new Dagger project for that repository without additional configuration. With these steps, your workflow is now ready to run on Depot’s accelerated infrastructure using Dagger and GitHub Actions. ## How does it work? Using Dagger engines via Depot GitHub Actions Runners allows you to execute your Dagger pipelines and functions inside of a dedicated VM with a persistent NVMe device for cache storage that lives next to the GitHub Actions runners without having to do any additional configuration outside of the above. ### Architecture Depot GitHub Actions Runners with Dagger architecture The general architecture allows for fast persistent cache for your Dagger projects automatically across builds. Here is the flow of information and what happens at each step when you specify `runs-on: depot-ubuntu-latest,dagger=` in your GitHub Actions workflow: 1. The Depot control plane receives the request for your GitHub Actions job and takes note of your request for a Dagger engine as well. We launch the Dagger Engine VM at the specified version next to your GitHub Actions runner, attaching your cache volume from previous builds to that VM. We then tell the GitHub Actions runner to pre-configure the GitHub Actions environment, installing the specific `dagger` CLI version for you and point it at the Dagger Engine running next door, and automatically authenticate to your Dagger Cloud account for logs and telemetry. 2. The GitHub Actions runner starts up and runs the job, which includes the Dagger CLI. The Dagger CLI is pre-configured to use the Dagger Engine running next door, the `dagger` step is thus kicked off on the separate Dagger Engine VM with it's persistent cache. The Dagger execution runs to completion and logs + telemetry are shipped to your Dagger Cloud account. 3. The Dagger Engine VM is automatically shut down after the job completes, and the cache volume is detached from the VM and returned to Depot's control plane for future use. 4. The GitHub Actions runner completes the job and returns the results to GitHub. ## Pricing Dagger engines accessed via our GitHub Actions Runners are charged by the build minute at $0.04/minute, in addition to the GitHub Actions Runner build time. ## Dependabot Depot GitHub Actions runners support running Dependabot jobs, allowing your dependency update workflows to benefit from the same performance improvements as your regular workflows. ## Overview When Dependabot is configured to run on self-hosted runners, it can automatically use Depot runners for all dependency update jobs. This provides several benefits: * **Faster dependency resolution** - Leverage Depot's optimized CPU and memory resources * **Private registry access** - Access dependencies from private registries within your network (e.g. via [Tailscale](/docs/integrations/tailscale)) * **Consistent infrastructure** - Use the same high-performance runners for both regular workflows and dependency updates ## Setup To enable Dependabot on Depot runners: ### 1\. Enable Dependabot on self-hosted runners Navigate to your repository or organization settings and enable "Dependabot on self-hosted runners". This setting allows Dependabot to use your configured self-hosted runners instead of GitHub's hosted runners. For detailed instructions, see [GitHub's documentation on enabling self-hosted runners for Dependabot updates](https://docs.github.com/en/code-security/dependabot/maintain-dependencies/managing-dependabot-on-self-hosted-runners#enabling-self-hosted-runners-for-dependabot-updates). ### 2\. Configure Depot runners Ensure your organization is already configured to use Depot runners. If not, follow the [quickstart guide](/docs/github-actions/quickstart) to set up Depot runners with your organization. ### 3\. Add Depot token as a Dependabot secret (optional) If you're using the Depot CLI or Depot actions (like `depot/build-push-action`) in your Dependabot workflows, you'll need to explicitly provide a Depot token. Dependabot workflows don't support GitHub's OpenID Connect (OIDC) authentication, so you must use a token-based approach. Follow GitHub's instructions to [add a repository secret for Dependabot](https://docs.github.com/en/code-security/dependabot/working-with-dependabot/configuring-access-to-private-registries-for-dependabot#adding-a-repository-secret-for-dependabot). Name the secret `DEPOT_TOKEN` and set its value to your Depot API token. Then pass the token explicitly in your workflows. For Depot actions, pass it to `depot/build-push-action`: ```yaml steps: - uses: depot/setup-action@v1 - uses: depot/build-push-action@v1 with: token: ${{ secrets.DEPOT_TOKEN }} ``` For the Depot CLI, pass it to `depot/setup-action`: ```yaml steps: - uses: depot/setup-action@v1 with: token: ${{ secrets.DEPOT_TOKEN }} - run: depot build . ``` If you encounter authentication errors, see [Dependabot authentication troubleshooting](/docs/github-actions/troubleshooting#error-unable-to-get-actions_id_token_request_url-env-variable). ### 4\. Automatic routing Once configured, Dependabot jobs automatically run on `depot-ubuntu-latest` runners without requiring any additional workflow configuration. ## GitHub Actions logs To view and search GitHub Actions logs, go to your organization's GitHub Actions page and click [**Logs**](/orgs/_/github-actions/logs). GitHub Actions logs in Depot Scrolling to the bottom of the page automatically loads additional logs. To open a new window with workflow metrics and logs, click **View job details**. You can share a log search view with others in your organization by copying the URL. ## Search logs by keyword To search for specific keywords, use the search bar. The results highlight the search term and show all matching log lines across your previous workflow runs. ## Filter logs by time range By default, you'll see GitHub Actions logs across all your repositories for the past hour. To filter by time range, select a timeframe or configure a custom range using the **Timeframe** dropdown in the upper right corner of the page. ## Filter logs by repository, workflow, action, and runner type Use filters to return results for specific repositories, workflows, actions, and runner types. You can select multiple items for each filter. For example, select multiple repositories to view logs from several projects at the same time. When you apply filters, the options available in other filters update automatically. For example: * **Repository**: Lists only repositories with CI builds during your selected timeframe. * **Workflow** and **Action**: Lists only the workflows and actions that run in your selected repositories. * **Runner**: Lists only runner types used by your selected repositories. You can start with any filter. Whether you start with **Repository** or **Runner**, the other filters adjust to show only relevant options based on your selections. ## View logs in context To view more context around your search matches, click the three dots next to the search bar and enter the number of lines you want to show above and below each result. Seeing the logs immediately before and after your match makes troubleshooting easier. ## View logs for the whole workflow run To view a match in the context of the whole workflow run, click on a specific log line to load the complete set of logs for that run. ## GitHub Actions metrics and analytics ## View GitHub Actions metrics in the Depot dashboard Use the following pages to monitor and analyze your GitHub Actions jobs. * **Monitor active jobs**: The [GitHub Actions main page](/orgs/_/github-actions) shows queued, running, and completed jobs across all repositories with live runner status. * **Analyze performance**: The [GitHub Actions analytics page](/orgs/_/github-actions/analytics) visualizes job metrics, identifies slowest jobs, and shows CPU/memory utilization trends over time. * **Optimize runner sizes**: The [GitHub Actions insights page](/orgs/_/github-actions/analytics/recommendations) provides automated recommendations based on your job performance and resource utilization. * **Track usage and costs**: The [organization usage page](/orgs/_/usage) displays monthly billable minutes, job counts, and storage metrics across all Depot products. ## Analyze and optimize GitHub Actions job performance The following are some common scenarios for analyzing and optimizing GitHub Actions job performance. ### Identify slow jobs If you're seeing consistently slow builds or recent performance regressions, Depot's analytics can help you identify the cause. First, go to your organization's [GitHub Actions Analytics page](/orgs/_/github-actions/analytics). The page displays a **Top 5 Slowest Jobs** list of your most time-consuming jobs across all repositories and workflows. Use the duration trends graph to spot jobs that have recently slowed down or to identify patterns over time. Analytics page showing Top 5 Slowest Jobs list and duration trend graph To narrow your investigation, use the filter controls to select specific repositories, workflows, or time ranges. Filter controls for repository, workflow, and timeframe selection Scatter plots for CPU utilization and memory usage help identify jobs with unusual resource patterns that could indicate constraints. Click a job in the **Top 5 Slowest Jobs** list to view the 50 slowest runs for that job. Then click a specific run to open the detailed job view. Job detail view with step timing breakdown and CPU/memory utilization graphs This page provides step-level timing breakdowns and resource utilization graphs, helping you identify common bottlenecks like dependency installation, test execution, or cache misses. For deeper investigation, use the [Logs page](/docs/github-actions/observability/github-actions-logs) to search across multiple job runs by keyword. ### Right-size your runners If your jobs are consistently underutilizing or maxing out CPU and memory resources, you may be over-provisioned or under-provisioned. Depot analyzes your resource usage patterns to recommend optimal runner sizes and surfaces the recommendations on the Insights page. Insights appear when there's a consistent pattern of resource over- or underutilization. From the GitHub Actions analytics page, click [Insights](/orgs/_/github-actions/analytics/recommendations) on the upper right. Insights button in the upper right of the analytics page The Insights page provides two types of recommendations based on historical job performance data. The following example shows both size-up and size-down recommendations. Insights page displaying size-up and size-down runner recommendations **Size-up recommendations** identify jobs that are constrained by their current runner size. These jobs show signs of resource exhaustion (high CPU or memory utilization) that could be slowing down execution. Upgrading to a larger runner can reduce build times for these workloads. **Size-down recommendations** identify jobs that consistently use much fewer than their allocated resources. These jobs could run on smaller, more cost-effective runners without impacting performance. Downsizing reduces billable minutes and optimizes your infrastructure spend. Recommendations include the current runner label, the suggested runner label, and the resource utilization patterns that informed the recommendation. If you have multiple recommendations across your organization, use the filter controls to focus on specific repositories or workflows. ### Debug failures When multiple jobs fail repeatedly or show unexpected failure patterns, it can help to review your analytics for trends before diving into individual logs. Go to your organization's [GitHub Actions Analytics page](/orgs/_/github-actions/analytics) and review the failure rate metrics. The **Overview** section displays your average failure rate with a trend indicator showing whether failures are increasing or decreasing. The failure count shows the total number of failures during your selected timeframe. Scroll down to the **Job Failure Rates** chart to identify which jobs are failing most frequently. Job failure rates chart showing the incidence of failed jobs over time The scatter plot shows failure rates over time for each job, so you can spot jobs with consistent failures or recent spikes. Click individual data points to filter the view and focus on specific jobs. Below the **Job Failure Rates** chart, expand the **Job Failure Summary** to view an aggregated list of jobs sorted by failure rate. Use the filter controls at the top of the Analytics page to narrow your investigation to specific repositories, workflows, or time ranges where failures occurred. Once you've identified problematic jobs or patterns in the metrics, investigate the specific causes: * Use the [Logs page](/docs/github-actions/observability/github-actions-logs) to search for error messages and keywords across failed job runs. The logs page supports filtering by repository, workflow, and time range to help you find relevant failures. * Refer to the [Troubleshooting guide](/docs/github-actions/troubleshooting) for solutions to common errors like disk space issues, connectivity problems, memory exhaustion, and runner allocation failures. ## GitHub Actions test results Test results are in beta and free to use during the beta period. If you have suggestions to make this feature better, [reach out](/help) and let us know. Depot can ingest JUnit XML test reports from your GitHub Actions jobs and display them in the Depot dashboard. Add the `depot/test-report-action` to your workflow after your test step, pointed at your test runner's JUnit XML output. The action is supported on jobs using Depot GitHub Actions runners. Unsupported runner environments log a warning and skip upload. Depot can also use the timing data in these reports to balance parallel test jobs. See [Split tests by timing](/docs/ci/how-to-guides/split-tests) for setup, including the GitHub Actions runner shard inputs. ## Report test results from a GitHub Actions job Add the [`depot/test-report-action`](https://github.com/depot/test-report-action) action to your workflow after the step that runs your tests. Point it at the directory, file, or glob containing the JUnit XML output: ```yaml jobs: test: runs-on: depot-ubuntu-24.04 permissions: contents: read id-token: write steps: - uses: actions/checkout@v4 - name: Run tests run: | mkdir -p test-results pnpm exec vitest run \ --reporter=default \ --reporter=junit \ --outputFile.junit=test-results/junit.xml - name: Report tests uses: depot/test-report-action@v1 if: ${{ !cancelled() }} with: path: test-results/ ``` `id-token: write` lets the action authenticate to Depot using GitHub's OIDC token. Set it on the job or at the workflow level when using Depot GitHub Actions runners. Workflow authors do not pass a token to this action. `if: ${{ !cancelled() }}` makes sure the action runs even when an earlier step (like your tests) fails, which is when you most want the results uploaded. The action still skips when the job is cancelled. `path:` is the path or glob the action uses for JUnit XML files. When `path` points at a directory, the action uploads XML files under that directory recursively. Newline-separated values are valid if you want to report multiple paths in one step. See the action's [README](https://github.com/depot/test-report-action) for examples. ### Supported JUnit XML producers Depot accepts JUnit XML directly, so most test runners work when they can write that format. These runners, adapters, and more work out of the box: * Node.js built-in test runner (`node:test`) * Vitest * Jest (via `jest-junit`) * Playwright * pytest * RSpec * gotestsum ### Reporting multiple test suites from one job If a job produces JUnit XML in more than one location, pass them all to a single step via the `path:` input: ```yaml - name: Report tests uses: depot/test-report-action@v1 if: ${{ !cancelled() }} with: path: | test-results/unit.xml test-results/integration/ test-results/e2e/**/*.xml ``` If the same job calls the action more than once, use one step per upload and set the action's `key:` input to a unique value so each upload invocation can be deduplicated separately. Test suites are still derived from the JUnit XML contents. ```yaml - name: Report unit tests uses: depot/test-report-action@v1 if: ${{ !cancelled() }} with: key: unit path: test-results/unit/ - name: Report integration tests uses: depot/test-report-action@v1 if: ${{ !cancelled() }} with: key: integration path: test-results/integration/ ``` If `key:` isn't set, the action falls back to `$GITHUB_ACTION`, then to `default`. ## View results in the Depot dashboard You can view test results in the Depot dashboard in three places: inline on each job, on a per-job test results page, and on an org-wide analytics dashboard that tracks failure rates, flaky tests, slow tests, and recurring failures over time. ### Inline on a job From the [GitHub Actions page](/orgs/_/github-actions), open a job to see its detail view. When test results have been reported for the job, a test results section appears in the job's detail panel with pass/fail/error/skip counts and a short list of failing tests, each with its failure details inlined. Click the section link (**View failures**, **View errors**, or **View all** depending on what's reported) to open the full results page. ### Per-job test results page The per-job test results page (linked from the inline section above) lists every test in the most recent run of the job. Use the filters at the top to narrow by status (passed, failed, errored, skipped) and search by test name, suite, class, or file. Each failing row expands to show the failure message, failure type, stack trace, and captured `stdout` and `stderr`. The page includes the following historical context for each test: * **Recurring**: A badge showing how often this test has failed across recent jobs for the same test identity. * **Latest occurrence**: Marks the row as the most recent run where the test had this status. * **View latest failure**: A link to the most recent failure when you're viewing an older one. * **Passed on rerun**: A badge indicating a failure that was resolved by a later rerun on the same SHA. ### Org-wide analytics For trends across all your test runs, open the [Test Results Analytics page](/orgs/_/test-results/analytics). The page analyzes test results ingested from GitHub Actions jobs and Depot CI jobs in the organization, so you can step out of a single job and look for patterns over time. Use the **CI** filter at the top of the page to scope the dashboard to **GitHub Actions** only, or compare GitHub Actions against Depot CI side by side. Some analytics are more complete for Depot CI because Depot has more run and attempt metadata available. In particular, the **Possibly flaky tests** card is based on Depot CI attempts. Common reasons to open the analytics page: * A test is failing and you want to know if it's a one-off or a recurring problem. The **Most frequent test failures** card ranks tests by failure count, and the **Recent events** table links each failure back to its source run. * You're looking for repeated failures in GitHub Actions jobs. The **Most frequent test failures** and **Recent events** sections include GitHub Actions jobs. * A job feels slow and you want to find the bottleneck. The **Test duration trends** chart and **Top 5 slowest tests** list rank by P95 duration so you can target the tests costing the most time. Filter by timeframe (past 7, 30, 60, or 90 days, or month to date), repository, branch, suite, file, class, or test name. Filter state is stored in the URL, so you can share a link to a specific view. For a full breakdown of every section on the page, see [Test results analytics by organization](/docs/observability#test-results-analytics-by-organization). ## View results from the CLI The `depot tests` command lists parsed test results from your terminal, so you can pull up a failure without leaving the shell. For GitHub Actions jobs, pass the GitHub Actions job ID with `--gha`: ```bash # List results for a GitHub Actions job depot tests --gha # Show only failures depot tests --gha --status failed ``` * `--gha` restricts the lookup to GitHub Actions results, since Depot otherwise tries the ID as both GitHub Actions and Depot CI results. The `--job` and `--workflow` flags are Depot CI only and don't apply here. * `--status` (passed, failed, errored, or skipped, repeatable), `--suite`, `--test`, `--class`, and `--file` narrow the output. * `--output` sets the format: a table in a terminal, JSON when piped, or JSON always with `--output json`. * `--token` and `--org` handle auth: the command uses your `depot login` session unless you pass `--token`, and `--org` is required when you belong to more than one organization. For the full list of flags and usage, see [`depot tests`](/docs/cli/reference/overview#depot-tests) in the CLI reference. ## Pricing Test results are free to use during the beta period. ## Depot GitHub Actions runners Depot GitHub Actions runners are a drop-in replacement for your existing runners in any GitHub Actions job. Our [runners](/docs/github-actions/runner-types) are up to 3x faster than a GitHub-hosted runner. Depot runners are integrated into our cache orchestration system, so you also get 10x faster caching without having to change anything in your jobs. To use Depot runners, your repository must be owned by a GitHub organization (not a personal account). ## Switching to Depot After you connect your Depot organization to your GitHub repository, switching to Depot is a one-line change to your runner label in your GitHub actions workflow file. For example: ```diff jobs: build: name: Build - runs-on: ubuntu-24.04 + runs-on: depot-ubuntu-24.04 steps: ... ``` For a step-by-step guide, see the [quickstart](/docs/github-actions/quickstart). ## Feature summary {/* prettier-ignore */}
Single tenant infrastructure
  • Builds run on ephemeral EC2 instances that are never reused.
  • GitHub Actions runners launch on-demand in response to webhook events from your organization.
Accelerated caching
  • Runners are automatically integrated into our distributed cache architecture for upload and download speeds up to 1000 MiB/s on 12.5 Gbps of network throughput.
  • Uses the same cache orchestration system as our Docker image builds for 10x faster caching in GitHub Actions jobs.
  • Zero configuration required to benefit from faster caching.
High-performance compute
  • Portion of memory reserved for disk to maximize performance.
  • Intel runners (x86 architecture) use 4th Gen AMD EPYC Genoa CPUs.
  • Arm runners use AWS Graviton4 CPUs.
No limits
  • No concurrency limits, cache size limits, or network limits.
  • Run as many jobs as you want in parallel.
Flexible cache isolation
  • Cache isn't isolated by branch. Cache entries from main and other branches contribute to the same namespace, making them accessible to all jobs.
  • Control your cache isolation based on how you format your cache keys.
Cache scoped by repository
  • We scope cache entries stored in the Depot GitHub Actions cache by repository. Cache entries are accessible only by the same repository that saved them.
  • Repositories don't have key collisions when using the same cache key.
  • One repository can't unexpectedly read cache entries from another repository of a different trust level (for example, a public repository reading from or writing to a private repository).
Per second usage tracking
  • We track builds by the second and bill for whole minutes used at the end of the month.
  • No one minute minimum enforced.
Self-hostable
  • Run optimized runners in our cloud or your AWS account for additional security and compliance.
  • Support for dedicated infrastructure and VPC peering options for custom configurations.
Custom runner images
  • For Business plan customers, we can create custom runner AMIs with pre-installed software tailored to your specific requirements.
  • Useful for specific tools, dependencies, or configurations not included in our standard runner images.
  • Contact us at [contact@depot.dev](mailto:contact@depot.dev) to discuss your needs.
Egress filtering
  • Control which external services your GitHub Actions runners can connect to with configurable allow and deny rules for IPs, CIDRs, or hostnames. For details, see [Apply egress filters to GitHub Actions runners](/docs/github-actions/how-to-guides/egress-filtering) .
Docker image builds integration
  • If you use Depot for faster Docker image builds via our remote container builds , your BuildKit builder runs right next to your managed GitHub Action runner.
  • Minimizes network latency and data transfer for faster CI builds.
Analytics and metrics
  • Job performance analytics with CPU/memory utilization tracking and automated runner sizing recommendations.
  • Step-level timing breakdowns, failure rate tracking, and live runner status.
  • Learn more about GitHub Actions metrics and analytics .
## How Depot GitHub Actions runners work Depot GitHub Actions runners use a webhook-driven architecture that launches ephemeral, single-tenant EC2 instances in response to your GitHub workflow jobs. When you run a GitHub Actions job with a Depot label (like `runs-on: depot-ubuntu-latest`), the job runs on a Depot runner. When you start a workflow run in GitHub, the platform sends `workflow_job` webhook events to Depot's control plane. For each new job, Depot: 1. Receives the webhook event from GitHub indicating a new job needs to run. 2. Assigns a fresh EC2 instance from a pre-provisioned standby pool matching your requested runner type (for example, `depot-ubuntu-24.04`). 3. Registers the runner in your GitHub organization's default runner group. 4. Runs the entire job using GitHub's standard runner image on the instance. 5. Terminates the instance when the job completes. ### Integration with Docker image builds Depot GitHub Actions runners and [Depot's remote container builds](/docs/container-builds/overview) run in the same private network. If you use Depot for Docker image builds (via `depot build`), your BuildKit builders run right next to your GitHub Actions runners, minimizing network latency and accelerating workflows that build images and load them back into the job for testing. ### Cache storage When you use Depot GitHub Actions runners, we store the cache entries in a distributed storage system optimized for high throughput and low latency. The cache storage is encrypted at rest and in transit. To learn more and to configure the cache retention policy, see the [Depot Cache overview](/docs/cache/overview). ## Pricing Runners usage is tracked by the second, with no one-minute minimum per run. We calculate total minutes used at the end of the billing period. | | Developer plan | Startup plan | Business plan | | -------------------------- | ----------------------------------------------- | ------------------------------------------------ | --------------------- | | **Plan cost** | $20/month | $200/month | Custom | | **GitHub Actions minutes** | 2,000 included/month
+ $0.004/minute after | 20,000 included/month
+ $0.004/minute after | Custom | | **Cache** | 25 GB included
+ $0.20/GB/month after | 250 GB included
+ $0.20/GB/month after | Custom | | **Runner types** | Linux, Windows, macOS | Linux, Windows, macOS | Linux, Windows, macOS | Try out Depot on any plan free for 7 days, no credit card required → Plans also include [Depot CI](/docs/ci/overview) minutes and [container build](/docs/container-builds/overview) minutes. See [Pricing](/pricing) for more about plan features and costs. ### Runner pricing by type and size Larger runners consume your included GitHub Actions minutes faster (via multipliers) and cost more per minute. For per-minute pricing, see [GitHub Actions runner types](/docs/github-actions/runner-types). ### Additional GitHub Actions minutes Included monthly minutes are not a hard cap. You can pay for additional GitHub Actions minutes on a per-minute basis. For per-minute pricing, see [GitHub Actions runner types](/docs/github-actions/runner-types). ### Estimate your cost savings To estimate the potential cost savings by switching to Depot GitHub Action runners, enter your current usage by runner type on our [GitHub Actions Price calculator](/github-actions-price-calculator). ## FAQ Depot's GitHub Actions runners offer several advantages: * Faster compute: Up to 3x faster than standard GitHub-hosted runners. * Up to 10x faster caching: Integrated with Depot's cache orchestration system. * Cost-effective: Half the cost of GitHub-hosted runners, billed by the second. * Variety of runner types: Support for Intel (x86), ARM, macOS, Windows, and GPU-enabled runners (Business plan only). * No concurrency limits: Run as many jobs as you want in parallel. To use Depot's GitHub Actions runners, you need to: 1. Connect your GitHub organization to Depot. 2. Use the Depot label in your workflow file. For example, change: ```yaml runs-on: ubuntu-24.04 ``` to: ```yaml runs-on: depot-ubuntu-24.04 ``` See [Quickstart for GitHub Actions runners](/docs/github-actions/quickstart). We offer a variety of runner types, including: * Ubuntu (from 2 vCPUs/2 GB RAM to 64 vCPUs/256 GB RAM) * macOS * ARM * Intel (x86) * Windows * GPU-enabled runners (available on the Business plan) See [GitHub Actions runner types](/docs/github-actions/runner-types). Depot runners are half the cost of GitHub-hosted runners. Each plan comes with a set of included minutes as follows: * Developer plan: 2,000 minutes included, $0.004/minute after * Startup plan: 20,000 minutes included, $0.004/minute after * Business plan: Custom minute allocation Pricing is based on a per-minute basis, tracked per second, with no enforced one-minute minimum. See [Pricing](#pricing). Yes, you can integrate our runners into your existing GitHub Actions workflows. You'll need to connect a GitHub organization-owned repository to Depot. Then change the `runs-on` label in your workflow file to use a Depot runner. See [Quickstart for GitHub Actions runners](/docs/github-actions/quickstart). Our high-performance caching system is automatically integrated with our GitHub Actions runners. It provides up to 10x faster caching speeds compared to standard GitHub-hosted runners, with no need to change anything in your jobs. See [Use GitHub Actions cache with Depot Cache](/docs/cache/integrations/github-actions). We provide detailed usage analytics for GitHub Actions on your organization's [usage page](/orgs/_/usage/) and on the [GitHub analytics page](/orgs/_/github-actions/analytics). You can track minutes used, job duration, and other metrics. Yes, custom runner AMIs with pre-installed software are available on the Business plan. This is useful if you need specific tools, dependencies, or configurations that aren't included in our standard runner images. With a custom runner AMI, we maintain a separate image specifically for your organization with your required software pre-installed. This can significantly reduce workflow execution time for dependencies that take time to install. To request a custom runner AMI, [contact us](mailto:contact@depot.dev) with details about your requirements. ## Next steps * [Quickstart for GitHub Actions runners](/docs/github-actions/quickstart) * [GitHub Actions runner types](/docs/github-actions/runner-types) ## Quickstart for GitHub Actions runners Connect your Depot organization to GitHub and configure your GitHub Actions to use Depot managed runners. ## Prerequisites You'll need a [Depot account](https://depot.dev/sign-up). ## Connect to GitHub To configure Depot GitHub Action Runners, you must have the organization owner role. Connect to your GitHub organization and install the Depot GitHub App: 1. Log in to your [Depot dashboard](/orgs). 2. Click **GitHub Actions**. 3. Click **Connect to GitHub**.\ The install form opens in GitHub. 4. Install or install and authorize the Depot app. #### Private repository approval Some GitHub organizations require an Organization Administrator to approve the new Depot GitHub app before jobs can run on Depot runners. To confirm the app is active and approved: 1. Log in to your [Depot dashboard](/orgs). 2. Click **Settings**. 3. In the **GitHub Actions runners** section, view **GitHub Connections**. #### Public repository permissions If you're using Depot runners with public repositories, update your Actions runner group to allow runners to be used in public repositories. In the **Actions > Runner groups** section in your GitHub organization settings, select **Allow public repositories**. Allow runners to be used in public repositories ## Configure your GitHub Actions workflow Depot supports a variety of [runner types and sizes](/docs/github-actions/runner-types), including Intel and Arm runners with up to 64 CPUs. To configure your GitHub Actions to use Depot runners, specify the runner label in your workflow YAML file under `.github/workflows/`. For example: ```diff jobs: build: name: Build - runs-on: ubuntu-24.04 + runs-on: depot-ubuntu-24.04 steps: ... ``` ## View GitHub Actions jobs To view jobs that have run on Depot runners, go to the [GitHub Actions page](/orgs/_/github-actions) in your Depot dashboard. View GitHub Actions jobs To view job metrics, CPU/memory utilization trends over time, and to identify your slowest jobs, go to the [GitHub Actions Analytics page](/orgs/_/github-actions/analytics). ## View GitHub Actions usage To view GitHub Actions usage for your organization, go to the **GitHub Actions** section of the [Usage page](/orgs/_/usage/) in your Depot dashboard. View GitHub Actions usage Learn more about [GitHub Action metrics and analytics](/docs/github-actions/observability/github-actions-metrics). ## Depot GitHub Actions runner types This page lists Depot GitHub Actions runner types and sizes. For Depot CI, see [Depot CI sandboxes](/docs/ci/overview#depot-ci-sandboxes). Depot offers several different types of GitHub Actions runners. You can choose the type on a per-job basis by specifying the runner label in your `.github/workflows/*.yaml` file: ```yaml jobs: build: runs-on: depot-ubuntu-24.04 ``` **Note**: We support the `depot-ubuntu-latest` alias for the current Ubuntu Long-Term Support (LTS) release if you prefer to use an evergreen version. **In-memory Disk Accelerator**: Depot Linux and macOS runners reserve a portion of the memory on the runner host for a disk accelerator, backed by a RAM disk. The accelerator acts as buffer between reading and writing to the root disk, which allows Actions runs to perform incredibly fast I/O operations, much quicker than the physical disk would allow. ## Intel runners Intel runners use AMD EC2 instances. Their EBS volume is provisioned with 8000 IOPS and 250 MB/s throughput. The following labels are available: | Label | CPUs | Memory | Disk size | Disk accelerator size | Per-minute price | Minutes multiplier | | :---------------------- | :--- | :----- | :-------- | :-------------------- | :--------------- | :----------------- | | `depot-ubuntu-24.04` | 2 | 8 GB | 100 GB | 2GB | $0.004 | 1x | | `depot-ubuntu-24.04-4` | 4 | 16 GB | 130 GB | 4GB | $0.008 | 2x | | `depot-ubuntu-24.04-8` | 8 | 32 GB | 150 GB | 8GB | $0.016 | 4x | | `depot-ubuntu-24.04-16` | 16 | 64 GB | 180 GB | 8GB | $0.032 | 8x | | `depot-ubuntu-24.04-32` | 32 | 128 GB | 200 GB | 16GB | $0.064 | 16x | | `depot-ubuntu-24.04-64` | 64 | 256 GB | 250 GB | 32GB | $0.128 | 32x | ## Arm runners Arm runners use Graviton4 EC2 instances. Their EBS volume is provisioned with 8000 IOPS and 250 MB/s throughput. The following labels are available: | Label | CPUs | Memory | Disk size | Disk accelerator size | Per-minute price | Minutes multiplier | | :-------------------------- | :--- | :----- | :-------- | :-------------------- | :--------------- | :----------------- | | `depot-ubuntu-24.04-arm` | 2 | 8 GB | 100 GB | 2GB | $0.004 | 1x | | `depot-ubuntu-24.04-arm-4` | 4 | 16 GB | 130 GB | 4GB | $0.008 | 2x | | `depot-ubuntu-24.04-arm-8` | 8 | 32 GB | 150 GB | 8GB | $0.016 | 4x | | `depot-ubuntu-24.04-arm-16` | 16 | 64 GB | 180 GB | 8GB | $0.032 | 8x | | `depot-ubuntu-24.04-arm-32` | 32 | 128 GB | 200 GB | 16GB | $0.064 | 16x | | `depot-ubuntu-24.04-arm-64` | 64 | 256 GB | 250 GB | 32GB | $0.128 | 32x | ## Ubuntu 22.04 runners These runners use the same instances as the Ubuntu 24.04 runners. The following labels are available: | Label | CPUs | Memory | Disk size | Disk accelerator size | Per-minute price | Minutes multiplier | | :-------------------------- | :--- | :----- | :-------- | :-------------------- | :--------------- | :----------------- | | `depot-ubuntu-22.04` | 2 | 8 GB | 100 GB | 2GB | $0.004 | 1x | | `depot-ubuntu-22.04-4` | 4 | 16 GB | 130 GB | 4GB | $0.008 | 2x | | `depot-ubuntu-22.04-8` | 8 | 32 GB | 150 GB | 8GB | $0.016 | 4x | | `depot-ubuntu-22.04-16` | 16 | 64 GB | 180 GB | 8GB | $0.032 | 8x | | `depot-ubuntu-22.04-32` | 32 | 128 GB | 200 GB | 16GB | $0.064 | 16x | | `depot-ubuntu-22.04-64` | 64 | 256 GB | 250 GB | 32GB | $0.128 | 32x | | `depot-ubuntu-22.04-arm` | 2 | 8 GB | 100 GB | 2GB | $0.004 | 1x | | `depot-ubuntu-22.04-arm-4` | 4 | 16 GB | 130 GB | 4GB | $0.008 | 2x | | `depot-ubuntu-22.04-arm-8` | 8 | 32 GB | 150 GB | 8GB | $0.016 | 4x | | `depot-ubuntu-22.04-arm-16` | 16 | 64 GB | 180 GB | 8GB | $0.032 | 8x | | `depot-ubuntu-22.04-arm-32` | 32 | 128 GB | 200 GB | 16GB | $0.064 | 16x | | `depot-ubuntu-22.04-arm-64` | 64 | 256 GB | 250 GB | 32GB | $0.128 | 32x | ## Windows runners Windows runners use instances with Intel chips running Windows Server 2022 or Windows Server 2025. **Note**: We support the `depot-windows-latest` if you prefer to use an evergreen version. This label is currently an alias for Window Server 2025. ### Windows Server 2025 runners The following labels are available: | Label | CPUs | Memory | Disk size | Per-minute price | Minutes multiplier | | :---------------------- | :--- | :----- | :-------- | :--------------- | :----------------- | | `depot-windows-2025` | 2 | 8 GB | 100 GB | $0.008 | 2x | | `depot-windows-2025-4` | 4 | 16 GB | 130 GB | $0.016 | 4x | | `depot-windows-2025-8` | 8 | 32 GB | 150 GB | $0.032 | 8x | | `depot-windows-2025-16` | 16 | 64 GB | 180 GB | $0.064 | 16x | | `depot-windows-2025-32` | 32 | 128 GB | 200 GB | $0.128 | 32x | | `depot-windows-2025-64` | 64 | 256 GB | 250 GB | $0.256 | 64x | ### Windows Server 2022 runners The following labels are available: | Label | CPUs | Memory | Disk size | Per-minute price | Minutes multiplier | | :---------------------- | :--- | :----- | :-------- | :--------------- | :----------------- | | `depot-windows-2022` | 2 | 8 GB | 100 GB | $0.008 | 2x | | `depot-windows-2022-4` | 4 | 16 GB | 130 GB | $0.016 | 4x | | `depot-windows-2022-8` | 8 | 32 GB | 150 GB | $0.032 | 8x | | `depot-windows-2022-16` | 16 | 64 GB | 180 GB | $0.064 | 16x | | `depot-windows-2022-32` | 32 | 128 GB | 200 GB | $0.128 | 32x | | `depot-windows-2022-64` | 64 | 256 GB | 250 GB | $0.256 | 64x | **Note**: Windows runners don't come equipped with Hyper-v because of an AWS limitation on EC2. Therefore, if you use things that require it like `docker`, than Depot Windows Runners are unlikely to work for you. ## macOS runners macOS runners use instances with M2 chips running macOS 14 or 15, or M4 chips running macOS 26. Their EBS volume is provisioned with 12000 IOPS and 1000 MB/s throughput. Like the Linux runners, the macOS runners also have a disk accelerator. The following labels are available: | Label | CPUs | Memory | Disk size | Disk accelerator size | Per-minute price | | :-------------------------------------- | :--- | :----- | :-------- | :-------------------- | :--------------- | | `depot-macos-26` | 8 | 24 GB | 400 GB | 2 GB | $0.08 | | `depot-macos-15` (`depot-macos-latest`) | 8 | 24 GB | 400 GB | 2 GB | $0.08 | | `depot-macos-14` | 8 | 24 GB | 400 GB | 2 GB | $0.08 | **Note:** due to licensing constraints from Apple, our macOS runner capacity is not fully elastic like our other runner types. We periodically update capacity to match demand, but macOS jobs can experience longer queue times during times of high demand. ## Billing Note that on your Billing summary, costs are broken down by `Billed minutes` and `Elapsed minutes`. Here are several things to know about the difference: * `Elapsed minutes` is the clock time spent executing your jobs. * `Billed minutes` multiples the `Minutes multiplier` (from the table above) by the `Elapsed minutes`. * The rate at which `Billed minutes` accumulates is based on the size of the `Minutes multiplier`. * What you pay is the total `Billed minutes` minus the included minutes of your plan. ## What software and tools are included? If you'd like to see what tools and software are installed in each runner image, please see the links to the `README` in GitHub's repository: * [`depot-ubuntu-24.04`](https://github.com/actions/runner-images/blob/main/images/ubuntu/Ubuntu2404-Readme.md) and `depot-ubuntu-latest` * [`depot-ubuntu-22.04`](https://github.com/actions/runner-images/blob/main/images/ubuntu/Ubuntu2204-Readme.md) * [`depot-macos-15`](https://github.com/actions/runner-images/blob/main/images/macos/macos-15-Readme.md) and `depot-macos-latest` * [`depot-macos-14`](https://github.com/actions/runner-images/blob/main/images/macos/macos-14-Readme.md) * [`depot-windows-2025`](https://github.com/actions/runner-images/blob/main/images/windows/Windows2025-Readme.md) and `depot-windows-latest` * [`depot-windows-2022`](https://github.com/actions/runner-images/blob/main/images/windows/Windows2022-Readme.md) *Note: We do our best to keep our images in sync with GitHub's, but there may be a slight delay between when GitHub updates their images and when we update ours. If you need a specific version of a tool or software, please check the links above to see if it's available in the image you're using.* ## Custom runner images If you need specific software pre-installed that isn't included in our standard runner images, custom runner AMIs are available on the Business plan. This is particularly useful for: * Large dependencies that take significant time to install * Proprietary software or custom configurations * Corporate security or compliance tools Contact us at [contact@depot.dev](mailto:contact@depot.dev) to discuss custom runner image requirements. ## Troubleshooting GitHub Actions runners This guide provides troubleshooting steps for common issues when using Depot-hosted GitHub Actions runners. ## Runner startup time When you start a new GitHub job using Depot GitHub Actions runners, you'll notice a brief delay before the runner is ready. Expect typical startup times to range from 10 to 45 seconds. The startup process involves two main steps: * **Provision AWS hardware (approximately 15 seconds):** Depot provisions fresh compute instances for each job with significant optimizations to the AWS startup process and pre-caching. * **Register the GitHub Actions runner (variable time):** GitHub's control plane needs to register, authorize, and connect the runner. This timing varies based on GitHub's current load and rate limiting. Depot typically expects GitHub's control plane to take less than 1 second to send a job request to Depot API. Depot then allocates AWS hardware in approximately 15 seconds. After that, GitHub usually connects to the runner in under 7 seconds, and sends the job to the runner in under a second. You can check the detailed timing breakdown for the last jobs in your Depot dashboard in the graph at the top of the [GitHub Actions](/orgs/_/github-actions) page. Depot bills only for the time after the job has started running (tracked by the second), not provisioning time. ### When to contact support If you consistently see allocation times longer than 1 minute during normal operation, reach out to support for investigation. ## Workflows not starting on initial configuration If your GitHub Actions workflow remains in a queued state when first setting up Depot runners, the runner likely can't be allocated to your job. ### How to resolve #### Check your runner labels Use a single runner label in your workflow configuration. While GitHub Actions supports specifying multiple labels in an array, this can cause stability issues. Correct usage: ```yaml runs-on: depot-ubuntu-24.04-4 ``` Avoid using multiple labels: ```yaml # Do *not* do this: runs-on: [self-hosted, depot-ubuntu-24.04] ``` #### Verify repository access Depot runners register in the "default runner group" in GitHub. Check the repository access settings for the runner group to ensure your repo can use these runners: 1. Go to your GitHub organization settings 2. Navigate to Actions > Runner groups 3. Select the "Default" runner group 4. Verify the allowed repositories list includes your repository. For public repositories, enable **Allow public repositories**. **Note:** If you've configured the [Selected workflows](https://docs.github.com/en/enterprise-cloud@latest/actions/how-tos/manage-runners/self-hosted-runners/manage-access#changing-which-workflows-can-access-a-runner-group) filter for your runner group, an incorrect workflow reference pattern can prevent jobs from starting even when runners are available. #### Confirm app permissions The "Depot Managed Runners" GitHub app must have permission to see your repo. You can confirm your app is active in the [organization settings](https://depot.dev/orgs/_/settings) under **GitHub Actions Runners** If your workflow still gets stuck after checking these settings, reach out to support with your workflow run URL and repository name for investigation of the runner allocation issue. ## Jobs appear as long-running in the dashboard Sometimes jobs may appear as long-running in the Depot dashboard even though they've completed on GitHub. This happens when GitHub doesn't correctly inform Depot that a job has finished. **Important:** Billing isn't affected by stale jobs. Depot only bills for the time the job actually runs on a runner instance. Stale jobs eventually time out on their own. However, if you need immediate resolution, Depot can manually run a resync with GitHub to clear the job and update the UI to reflect the correct status. ### How to resolve Check the job status directly in your GitHub Actions tab to confirm its cancellation or completion. If the job remains stale in the Depot dashboard and you need it cleared immediately, [reach out to support](/help) with: * Your organization name * The repository and workflow run URL * The job name or ID that appears stale The support team will trigger a manual resync with GitHub to update the job status. ## Error: `Failed to write to Depot job log - No space left on device` This error occurs when your build process needs more disk space than your runner has available. Each Depot runner type has a set amount of disk space. The OS and pre-installed software consumes approximately 70 GB, and the remaining space is available for your builds. For runner specifications, see [Depot Runner Types](/docs/github-actions/runner-types). ### How to resolve #### Upgrade to a larger runner size To use a runner with more disk capacity, specify a larger runner type in your workflow configuration: ```yaml runs-on: depot-ubuntu-24.04-8 # 8 vCPU, more disk space ``` If you continue to hit disk space limits even on larger runner sizes, [reach out to support](/help) with your workflow details for help optimizing your build process or discussing custom runner configurations. #### Disk space cleanup Clean up unnecessary files before and during your build process. For example, you can remove temporary files and clean package caches on Linux workflows: ```yaml - name: Clean up disk space run: | rm -rf /tmp/* sudo apt-get clean ``` #### Use disk cleanup actions Several GitHub Actions can help manage disk space automatically. Popular options include actions that remove unused tools, or clear system caches. ## Error: `Failed to open the device 'kvm': No such file or directory` This error occurs when a workflow tries to use KVM hardware acceleration on a runner that doesn't expose `/dev/kvm`. You may see one of these errors: ```text Failed to open the device 'kvm': No such file or directory Error: Process completed with exit code 1. ``` ```text Could not access KVM kernel module: No such file or directory qemu-system-x86_64: failed to initialize kvm: No such file or directory ``` Depot GitHub Actions runners don't currently provide `/dev/kvm`. Nested virtualization support is available only in [Depot CI sandboxes](/docs/ci/overview#depot-ci-sandboxes), where `/dev/kvm` is enabled by default with no extra configuration. ### How to resolve If the job requires KVM hardware acceleration, consider moving that workflow job to Depot CI. This is common for Android Emulator tests, QEMU/KVM workloads, VM-based end-to-end test environments, and other tools that require hardware virtualization inside the CI job: ```yaml jobs: android-tests: runs-on: depot-ubuntu-24.04 steps: - uses: actions/checkout@v4 - run: ./gradlew connectedAndroidTest ``` For migration steps, see the [Depot CI quickstart](/docs/ci/quickstart). ## Error: `The self-hosted runner lost communication with the server` The following error typically indicates a temporary connectivity issue between the Depot runner and GitHub's servers: ```text The self-hosted runner lost communication with the server. Verify the machine is running and has a healthy network connection. Anything in your workflow that terminates the runner process, starves it for CPU/Memory, or blocks its network access can cause this error. ``` ### How to resolve #### Check for service outages Check [status.depot.dev](https://status.depot.dev) and [GitHub's status page](https://www.githubstatus.com/) for any reported outages. If Depot or GitHub is experiencing an incident, monitor the status pages and wait for the resolution. Once the issue resolves, retry your workflow run. #### Check resource usage Check the CPU and memory usage of your build process. Open the job details in your Depot dashboard and look at the resource usage graphs at the top of the page. If your build consumes excessive CPU or memory, consider optimizing your build steps to reduce resource consumption. #### Check your organization's usage limits This error can occur when your organization has reached its self-imposed usage limit. When you reach the limit, builds won't start until the next billing period or until you adjust the limit. To check and update your usage limits: 1. Open the [organization settings page](/orgs/_/settings) in your Depot dashboard. 2. In the **Usage caps** section, review your current GitHub Actions minutes limit. 3. Either remove the limit or increase it to allow builds to continue. 4. Click **Update limit**. If you continue to see this error, reach out to support with your workflow run URL and the approximate time the error occurred for investigation of specific connectivity issues affecting your builds. ## Error: `Step canceled by GitHub` This error indicates that GitHub terminated your job before it completed. Some common reasons for workflow cancellation include manual cancellation, workflow concurrency settings, or memory exhaustion. ### How to resolve #### Manual cancellation Manual cancellation through the GitHub UI causes this error most commonly. Check your workflow run history to confirm whether someone clicked the cancel button for this job or workflow run. #### Workflow concurrency settings If you set `cancel-in-progress: true` in your workflow's concurrency settings, GitHub automatically cancels running workflows when a new run starts: ```yaml concurrency: group: ${{ github.workflow }}-${{ github.ref }} cancel-in-progress: true ``` If you're seeing unexpected cancellations, review your concurrency configuration to ensure it matches your desired behavior. #### Memory exhaustion Memory exhaustion on the runner can also cause this error. To investigate: 1. Open your job details page in the Depot dashboard 2. Review the memory usage graph at the top of the page 3. Check if memory consumption reached or exceeded the available capacity If memory usage consistently runs high or maxes out: * Upgrade to a larger runner type with more memory capacity. See [Depot Runner Types](/docs/github-actions/runner-types) for available options. * Optimize your build process to reduce memory consumption * Split large jobs into smaller, parallel jobs If you've verified these causes and the issue persists, [reach out to support](/help) with your workflow run URL and job details for further investigation. ## Error: `Unable to get ACTIONS_ID_TOKEN_REQUEST_URL env variable` This error occurs when using the Depot CLI or Depot actions (like `depot/build-push-action`) in Dependabot workflows. Depot uses the `ACTIONS_ID_TOKEN_REQUEST_URL` environment variable to fetch JWTs from GitHub's OpenID Connect (OIDC) provider for authentication. Because Dependabot workflows don't support OIDC authentication, GitHub doesn't set this variable. ### How to resolve Follow GitHub's instructions to [add a repository secret for Dependabot](https://docs.github.com/en/code-security/dependabot/working-with-dependabot/configuring-access-to-private-registries-for-dependabot#adding-a-repository-secret-for-dependabot). Name the secret `DEPOT_TOKEN` and set its value to a Depot organization token. Then pass the token explicitly in your workflow: **For Depot actions:** ```yaml steps: - uses: depot/setup-action@v1 - uses: depot/build-push-action@v1 with: token: ${{ secrets.DEPOT_TOKEN }} ``` **For Depot CLI:** ```yaml steps: - uses: depot/setup-action@v1 with: token: ${{ secrets.DEPOT_TOKEN }} - run: depot build . ``` Providing the token in your workflow bypasses OIDC authentication and allows Dependabot workflows to authenticate with Depot. ## Unable to cancel GitHub Actions workflow Unrelated to Depot, GitHub Actions workflows sometimes become stuck and don't respond to normal cancel requests through the GitHub UI. When this happens, you can use the [GitHub REST API to force cancel the workflow run](https://docs.github.com/en/rest/actions/workflow-runs#force-cancel-a-workflow-run). ### How to resolve Find the run ID of the stuck workflow from your GitHub Actions page. It's in the URL: `github.com/{owner}/{repo}/actions/runs/{run_id}` After obtaining the run ID, you can use the GitHub API to attempt a regular cancel: ```bash curl -X POST \ -H "Accept: application/vnd.github+json" \ -H "Authorization: Bearer YOUR_TOKEN" \ https://api.github.com/repos/{owner}/{repo}/actions/runs/{run_id}/cancel ``` If the workflow doesn't respond, use the force cancel option: ```bash curl -X POST \ -H "Accept: application/vnd.github+json" \ -H "Authorization: Bearer YOUR_TOKEN" \ https://api.github.com/repos/{owner}/{repo}/actions/runs/{run_id}/force-cancel ``` **Important:** Use force cancel only when necessary, as it bypasses normal workflow conditions and cleanup steps. For more details, see [GitHub's official REST API documentation](https://docs.github.com/en/rest/actions/workflow-runs). If you frequently encounter stuck workflows with Depot runners specifically, reach out to support for investigation of potential underlying issues. ## SSH access to Depot GitHub Actions runners Sometimes you may need to inspect the running environment to diagnose an issue. Depot GitHub Actions runners are compatible with [action-tmate](https://github.com/mxschmitt/action-tmate), a GitHub Action that allows you to create an SSH session during your workflow run. ### How to set up SSH access #### Add `action-tmate` to your workflow Integrate `action-tmate` into your CI pipeline by adding it as a step in your workflow file: ```yaml steps: - uses: actions/checkout@v4 - name: Setup tmate session uses: mxschmitt/action-tmate@v3 - name: Run tests run: npm test ``` #### Connect to your runner When your job reaches the `action-tmate` step, open the Checks tab in your Pull Request and scroll to the bottom. You can connect either directly per SSH or via a web based terminal. #### Debug and exit Inspect the environment, run commands, and debug as needed. Once done, you can exit the SSH session and let the CI job continue. For additional information and usage scenarios, visit the [action-tmate GitHub page](https://github.com/mxschmitt/action-tmate). **Note:** Depot doesn't maintain the `action-tmate` action. Please report any issues or problems on the [project GitHub page](https://github.com/mxschmitt/action-tmate/issues). ## Delayed allocation for macOS runners macOS build jobs may experience longer wait times to start processing when demand is higher than normal. Apple's licensing requires a minimum 24-hour lease for macOS instances, which results in the following constraints: * **No autoscaling:** Unlike Linux and Windows runners that can spin up and down based on demand, macOS instances can't be dynamically provisioned. * **Fixed pool size:** Depot maintains a constant number of macOS runners that operate continuously. * **First In, First Out (FIFO) processing:** Jobs process in the order they arrive. * **Jobs queue if demand spikes unexpectedly:** When demand exceeds the fixed macOS runner capacity, jobs enter a queue and wait for the next available runner. ### Dedicated macOS runners For organizations requiring more predictable build times, Depot offers the option to reserve dedicated macOS runner instances exclusively for your organization. Your jobs run immediately on your dedicated runners when available. If all your dedicated runners are busy processing jobs, additional jobs can still fall back to the shared pool. Dedicated runners require an annual commitment for fixed capacity tailored to your concurrent job needs. [Contact our support team](/help) to learn more about dedicated macOS runners and pricing. ## Additional support If you can't find a solution in this guide or the [Depot GitHub Actions documentation](/docs/github-actions/overview), [reach out to support](/help). ## Tailscale [Tailscale](https://tailscale.com/) is a zero-config VPN that connects your devices, services, and cloud networks to enable secure access to resources on any infrastructure. By connecting Depot to your Tailscale network, you can enable secure access to private services, such as databases, within your tailnet without opening up those services to the public internet and without maintaining static IP allow lists. Using Tailscale, Depot GitHub Actions runners, container builders, and CI jobs join your tailnet as [ephemeral nodes](https://tailscale.com/kb/1111/ephemeral-nodes), and you can control their access to the rest of your infrastructure using Tailscale ACLs. **Note**: Tailscale integration with Depot Windows runners is not supported. ## Connecting Depot to your tailnet Connecting your Depot organization to a Tailscale tailnet is a three-step process: 1. Configure your Tailnet ACLs to define a tag for your Depot runners 2. Generate new OAuth client credentials using this new tag 3. Configure your Depot organization to use those OAuth client credentials ### Step 1: Create a new tag in your Tailnet ACLs First, you will need to create a tag that will be assigned to all Depot runners. [Tailscale tags](https://tailscale.com/kb/1068/tags) are used by Tailscale to group non-user devices, such as Depot runners, and let you manage access control policies based on these tags. We recommend creating a new tag named `tag:depot-runner` for this purpose. This tag will later be used in your ACL rules to determine what Depot runners should have access to. In your Tailscale [admin console](https://login.tailscale.com/admin/acls/file) access controls, [define a new tag under `tagOwners`](https://tailscale.com/kb/1337/acl-syntax#tag-owners): ```json { "tagOwners": { "tag:depot-runner": ["group:platform-team"] } } ``` ### Step 2: Generate a new OAuth client Next, [generate a new OAuth client](https://login.tailscale.com/admin/settings/oauth) from your tailnet's settings. This client can be given a descriptive name and should be granted Write access to the `Keys > Auth Keys` scope. You should select the tag you created in the previous step as chosen tag for this scope: Generating a Tailscale OAuth client You will be given a client ID and client secret that you can use in the next step. ### Step 3: Configure Depot to use the new OAuth client Finally, you will need to configure your Depot organization to use the new OAuth client credentials. From your organization settings page, navigate to the Tailscale section and click **Connect to Tailscale**. Enter the client ID and secret from the previous step and click **Connect**: Connecting your Depot org to Tailscale Your Depot organization is now connected to your Tailscale tailnet. Depot runners, container builders, and CI jobs will now join your tailnet as [ephemeral nodes](https://tailscale.com/kb/1111/ephemeral-nodes), using the tag you have created. ## Granting access to private services Now that your Depot runners are connected to your tailnet, you can use Tailscale ACLs to control their access to the rest of your infrastructure. Depot runners will be [tagged](https://tailscale.com/kb/1068/tags) with your chosen tag, which you can then reference in your ACL rules. For example, you can grant your Depot runners access to a private database service by creating a new [ACL rule](https://tailscale.com/kb/1337/acl-syntax#access-rules) in the [admin console](https://login.tailscale.com/admin/acls/file): ```json { "acls": [{"action": "accept", "src": ["tag:depot-runner"], "dst": ["database-hostname"]}] } ``` Using [Tailscale subnet routers](https://tailscale.com/kb/1019/subnets), you can additionally grant your Depot runners access to entire subnets in any cloud provider VPC or on-premises network. ```json { "acls": [{"action": "accept", "src": ["tag:depot-runner"], "dst": ["192.0.2.0/24:*"]}] } ``` ## Disconnecting from Tailscale If you wish to disconnect your Depot organization from Tailscale, navigate to the Tailscale section in your organization settings and click **Disconnect from Tailscale**. This will remove the OAuth client credentials from your organization and your Depot runners will no longer join your tailnet as ephemeral nodes: Tailscale management Note: disconnecting prevents new Depot runners from joining your tailnet. Any in-flight Actions jobs, container builds, or CI jobs will remain connected until they complete. To immediately disconnect any running jobs, you can remove any of the connected nodes from your [Tailscale admin console](https://login.tailscale.com/admin/machines). ## Depot Managed on AWS With Depot Managed on Amazon Web Services (AWS), the Depot data plane is deployed within an isolated sub-account of your AWS organization. You can use the Depot CLI, web application, and API, but the underlying build compute and cache infrastructure reside entirely within your own AWS account. ## Architecture [self-hosted architecture diagram](/images/self-hosted-architecture.png) ## Setup and Usage **NOTE:** This guide is intended for Depot customers who are working with the Depot team, you cannot deploy Depot Managed on AWS without it being enabled for your Depot organization. [Contact us](mailto:contact@depot.dev) if you are interested in using Depot Managed. ### Step 1: Create a dedicated sub-account Depot Managed requires the use of a dedicated sub-account within your AWS organization. This should be a new account containing no other resources or services. Follow the [AWS documentation](https://docs.aws.amazon.com/organizations/latest/userguide/orgs_manage_accounts_create.html#orgs_manage_accounts_create-new) to create a new account within your organization. ### Step 2: CloudFormation stack deployment Once you have created a new sub-account, you can deploy the following CloudFormation template to provision the required IAM permissions in the AWS sub-account. First, save the following as a file named `depot-managed-bootstrap.json`: ```json { "Resources": { "GrantProvisionerAccess": { "Type": "AWS::IAM::Role", "DeletionPolicy": "Retain", "Properties": { "RoleName": "DepotProvisioner", "ManagedPolicyArns": ["arn:aws:iam::aws:policy/AdministratorAccess"], "AssumeRolePolicyDocument": { "Statement": [ { "Action": ["sts:AssumeRole"], "Effect": "Allow", "Principal": { "AWS": [ "arn:aws:iam::375021575472:role/aws-reserved/sso.amazonaws.com/AWSReservedSSO_Provisioner_572dd0a52dd9fc8e" ] } } ] } } }, "GrantOpsAccess": { "Type": "AWS::IAM::Role", "DeletionPolicy": "Retain", "Properties": { "RoleName": "DepotOps", "ManagedPolicyArns": ["arn:aws:iam::aws:policy/AdministratorAccess"], "AssumeRolePolicyDocument": { "Statement": [ { "Action": ["sts:AssumeRole"], "Effect": "Allow", "Principal": { "AWS": [ "arn:aws:iam::375021575472:role/aws-reserved/sso.amazonaws.com/AWSReservedSSO_Ops_e45adfee11ab7421" ] } } ] } } } } } ``` Next, deploy the CloudFormation stack in the new sub-account: ```bash aws cloudformation create-stack \ --stack-name depot-managed-bootstrap \ --template-body file://depot-managed-bootstrap.json \ --capabilities CAPABILITY_NAMED_IAM ``` ### Step 3: Notify Depot Finally, let the Depot team know that the CloudFormation stack has been deployed, and they will initiate the deployment of the Depot data plane into the new sub-account. The Depot team will additionally work with you on any follow-up steps, including: * AWS quota increases to match your expected usage * Configuring KMS keys for encryption * Configuring S3 buckets for cache storage * Configuring VPC peering for private networking * Configuring AWS PrivateLink for secure API access * Enabling enforced usage of Depot Managed in your Depot organization ## Additional questions If you have any questions, please [contact us](mailto:contact@depot.dev), and we'll be happy to help. ## Depot Managed Overview With Depot Managed, the Depot data plane can be deployed in your own Amazon Web Services (AWS) account. You can still use the Depot CLI, web application, and API, however the underlying build compute and cache data reside entirely within your own cloud account. *We are considering support for additional cloud providers like Google Cloud (GCP) in the future. If you are interested in this, please [let us know](mailto:help@depot.dev).* ## How Depot Managed works Depot Managed is the entirety of the Depot [data plane](https://en.wikipedia.org/wiki/Forwarding_plane#Data_plane), deployed in a single-tenant isolated sub-account within your AWS organization. Once deployed, you have the option of using Depot Managed with some or all of your Depot organization's projects. You will continue to use the same Depot CLI and web application, but the CLI will communicate directly with the compute and cache infrastructure running in your AWS account. If you are an existing Depot user, moving to a Depot Managed deployment requires no changes to your existing developer workflows or CI pipelines. Depot Managed is still a fully managed service and comes with the full support and SLA of the Depot Business plan. The Depot team is on-call for any issues that arise with the Depot Managed deployment. For more information, see: * [Depot Managed on AWS](/docs/managed/on-aws) ## Benefits of Depot Managed Depot Managed comes with a few key benefits: * **Data residency**: All build data and cache data reside within your own cloud account, ensuring that you have full control over your data. * **Compliance**: For organizations that have strict compliance requirements. * **VPC peering & IAM**: You can configure VPC peering and IAM roles to allow the Depot data plane to access your private cloud resources. * **AWS PrivateLink**: You can use AWS PrivateLink to keep all communication between the Depot data plane and control plane within the AWS network. * **Cost control**: You can take advantage of any existing cloud discounts or credits you have, and you can control the size and type of instances used for builds. * **GPU support**: If you have GPU capacity in your AWS account, you can use it to accelerate AI/ML and GPU-intensive workflows. * **AWS Marketplace**: You can pay for Depot Managed through the AWS Marketplace and take advantage of any existing AWS billing arrangements you have. ## How to get started Depot Managed is available on the Depot Business plan. If you are interested in Depot Managed, please [contact us](mailto:contact@depot.dev) to chat with us and see if Depot Managed is a good fit for your organization. ## Using GPUs with Depot Managed Depot Managed allows you to leverage your own GPU resources on AWS to accelerate AI/ML and GPU-intensive GitHub Actions workflows. If you have GPU capacity in your AWS account, we’ll collaborate with you to create a custom runner AMI, finely tuned to meet your specific GPU needs. ## Steps to Enable GPU Support 1. **Become a Depot Managed User:** Run the Depot data plane in your own AWS account by joining Depot Managed. If you are not already a Depot Managed user, you can [contact us](mailto:contact@depot.dev) to get started. 2. **Verify GPU Capacity Access:** Confirm that your AWS account has the necessary permissions and capacity to launch GPU instances. You can check your available instance types through the AWS Management Console. 3. **Contact the Depot Team:** Existing Depot Managed users can reach out to the Depot support team at [contact@depot.dev](mailto:contact@depot.dev) to request a GPU-accelerated AMI. Provide details about the types of GPU instances you plan to use and any specific requirements for your builds. 4. **AMI Deployment:** Once your request is processed, the Depot team will build and deploy a custom AMI to your Depot Managed environment. You will receive confirmation once the AMI is available for use. 5. **Monitoring and Optimization:** Monitor your builds to ensure that they are performing as expected with GPU support. We'll be available to assist with any questions or requests. ## Run Depot Managed GPU Accelerated Workflows If your projects require GPU support, we’re here to assist. When joining Depot Managed, let us know about your GPU requirements. For existing users, you can request GPU support by contacting our team at [contact@depot.dev](mailto:contact@depot.dev). We will collaborate with you to create a custom Depot runner AMI that includes the necessary GPU drivers and any other components tailored to your needs. Once your GPU-accelerated environment is ready, we’ll provide you with a unique label to use in your GitHub Actions workflows. This will allow you to leverage GPU-accelerated instances. Here’s an example of how to incorporate this into your workflow: ```yaml jobs: python-job: runs-on: # Use the GPU label provided by Depot steps: - uses: actions/checkout@v4 - uses: actions/setup-python@v5 with: python-version: '3.9' cache: 'pip' # caching pip dependencies - run: pip install -r requirements.txt ``` ## Additional questions If you have any questions, please [contact us](mailto:contact@depot.dev), and we'll be happy to help. ## Depot observability overview Metrics, logs, and analytics in the Depot dashboard. ## Organization-wide usage View your organization's monthly usage across all Depot services from the [organization usage page](/orgs/_/usage). At the top of the usage page, you can view a monthly summary of your organization's key metrics across products: Summary of all usage for an organization ## Exploring usage metrics Filter data and interact with charts to explore metrics: * View usage for a specific month. Click the month label to return to the current month. * Click on chart bars to filter related tables by specific days. * Hover over charts to see tooltips with exact values. * Filter tables using the search inputs to find specific projects, workflows, repositories, or runner types. * Health bars show the success/failure rate of recent builds or jobs for each project/workflow. ## Container build metrics by organization The Container Builds section shows metrics for all container builds in your organization. For metrics and monitoring by project and build, see [Container build metrics](/docs/container-builds/observability/container-build-metrics) and [Container build logs](/docs/container-builds/observability/container-build-logs). | Metric | Description | | ------------------------ | ------------------------------------------------------------------------------- | | Summary stats | Total builds, total billable time, and total time saved | | Monthly charts | Build counts and build duration over time | | Build Minutes by Project | Billable minutes, build counts, and recent build health status for each project | Click on a day in the charts to filter the project table to show data for only that specific day. Use the project filter to search for specific projects by name. ## GitHub Actions metrics by organization The GitHub Actions section shows summary metrics for all GitHub Actions jobs in your organization. For more analytics and monitoring, see [GitHub Actions metrics and analytics ](/docs/github-actions/observability/github-actions-metrics) and [GitHub Actions logs](/docs/github-actions/observability/github-actions-logs). | Metric | Description | | -------------------------- | --------------------------------------------------------------------------------- | | Summary stats | Total jobs, total billable time, total time elapsed | | Monthly charts | Job counts and job duration over time | | Job Minutes by Workflow | Usage by workflow with recent job health status (sort by clicking column headers) | | Job Minutes by Repository | Usage by repository | | Job Minutes by Runner Type | Usage by runner type | Click on a day in the charts to filter all tables to show data for only that specific day. Use the filters to search for specific workflows, repositories, or runner types. ## Test results analytics by organization Test results are in beta and free to use during the beta period. If you have suggestions to make this feature better, [reach out](/help) and let us know. The [Test Results Analytics page](/orgs/_/test-results/analytics) analyzes test results uploaded from your Depot CI jobs and GitHub Actions jobs, so you can see test health across the whole organization in one place. Results come from JUnit XML reports uploaded by the [`depot/test-report-action`](https://github.com/depot/test-report-action) action. For job-level setup, see [Depot CI test results](/docs/ci/observability/depot-ci-test-results) and [GitHub Actions test results](/docs/github-actions/observability/github-actions-test-results). The dashboard summarizes the selected timeframe and breaks results down by source (Depot CI vs GitHub Actions), repository, branch, and test suite. Use the filter controls at the top of the page to narrow by timeframe, source (Depot CI or GitHub Actions), repository, branch, test suite, file, or class. Use linked failure cards and recent event rows to drill in to the originating run. | Metric | Description | | --------------------------- | ------------------------------------------------------------------------------------------------------- | | Overview | Total results, failure rate, error rate, P95 duration, and a Depot CI vs GitHub Actions split | | Tests over time | Test count by status (passed, failed, errored, skipped) over the selected timeframe | | Failure rate over time | Failure rate trend across the selected timeframe | | Test duration distribution | Test counts bucketed by duration so you can see where time is being spent | | Test duration trends | Per-suite P95 duration trend lines to spot slowdowns | | Failure rates by suite | Suites ranked by failure rate so you can find the noisiest areas | | Most frequent test failures | Tests ranked by failure count across the selected timeframe | | New failures | Tests that started failing in the selected timeframe | | Possibly flaky tests | Depot CI tests that had a failure on one attempt and then passed on a later attempt for the same SHA | | Top 5 slowest tests | Individual tests ranked by P95 duration | | Recent events | A reverse-chronological feed of failing test events with links back to the originating CI or GitHub job | ## Storage The Storage section shows storage usage across all Depot storage types: | Metric | Description | | --------------------- | ------------------------------------------------------------- | | Container Layer Cache | Storage used by container image layers with daily trend chart | | Actions Cache | Storage used by GitHub Actions cache with daily trend chart | | Ephemeral Registry | Storage used by the ephemeral registry with daily trend chart | | Remote Build Cache | Storage used by remote build cache with daily trend chart | | Storage by Project | Storage breakdown by project | Click on a day in the charts to see storage usage for that specific day. ## Agent sandboxes The Agent Sandboxes section shows usage metrics for Depot agent sandboxes: | Metric | Description | | -------------- | -------------------------------------------------------------- | | Summary stats | Total agent sandboxes, total billable time, total elapsed time | | Monthly charts | Sandbox usage over time | ## Depot Registry The **Depot Registry** is an OCI-compliant container registry for storing, managing, and distributing container images and artifacts. You can use it with container builds as a lightweight ephemeral store for build output, and as a full primary registry for all your images. See the [quickstart](/docs/registry/quickstart) to get started. ## How it works Each Depot organization gets its own registry subdomain: ``` {orgId}.registry.depot.dev ``` You can push any image or OCI artifact to any repository name you choose: ```bash docker push {orgId}.registry.depot.dev/your/app:v1 ``` You can also get images into the registry directly from a Depot build by passing `--save` to `depot build`. Depot stores the result under a project-scoped repository automatically, no tagging step required. Depot Registry is backed by a global CDN to distribute layer blobs efficiently, making it significantly faster to pull and push large images regardless of where you're located. If you want to distribute images across multiple registries, use [`depot push`](/docs/cli/reference/container-builds#depot-push) to copy an image from Depot Registry to another registry. The transfer happens directly from Depot infrastructure to your target registry, skipping your local machine entirely. You can also use [`depot pull`](/docs/cli/reference/container-builds#depot-pull) to download any image from Depot Registry into your local, CI, or production environment. ## Registry Explorer The [Registry Explorer](/orgs/_/registry/explorer) in the Depot dashboard lets you browse all your repositories by name. From there you can explore manifests by tag or digest, view artifact metadata and platforms, inspect attestations, and see linked build details for project-scoped images. [Screenshot showing the Depot Registry Explorer with searchable repositories and tag browsing](/images/docs/registry-page.webp) ## Use cases Depot Registry works for a variety of use cases: **Primary registry**: Use Depot Registry as your primary container registry for all your images, including ones you're not building with Depot. **Ephemeral build store**: Automatically save build output during `depot build --save` and pull it down wherever you need it. **Local development**: Pull images directly to your local machine for testing and development. The global CDN ensures fast downloads regardless of your location. **Cross-environment consistency**: Build an image once on Depot, save it to the registry, then promote that same image across development, staging, and production without rebuilding. **OCI artifacts**: Store any OCI-compliant artifact, including Helm charts and AI models, not just container images. **Depot CI custom images**: Snapshot a Depot CI sandbox with your tools and dependencies pre-installed and store it in the registry. Jobs that use the snapshot skip setup entirely, speeding up your CI. See [Build and use custom images](/docs/ci/how-to-guides/custom-images). **Working with large images**: The global distribution mechanism makes pulling and pushing large images fast. The registry supports artifacts up to 50GB. ## Pull-through cache Depot Registry can proxy pulls from an external registry, caching layers on its CDN so subsequent pulls skip the external hop entirely. Common uses include accelerating CI image pulls, distributing images globally without managing your own CDN, and simplifying access to registries with complex authentication (like Google Artifact Registry). For configuration details and supported providers, see [Pull-through cache](/docs/registry/pull-through-cache). ## Authentication and permissions Depot Registry authenticates with the same token types used across the rest of the Depot platform. All token types provide both push and pull access except for pull tokens, which are read-only. You can use the following types of tokens for registry authentication: * **User access tokens**: Full push and pull permissions for any project in any organization you have access to * **Project tokens**: Full push and pull permissions for the specific project they're associated with * **Organization tokens**: Full push and pull permissions for any repository within the organization * **Trust relationship tokens**: Full push and pull permissions for the project when issued via OIDC trust relationships * **Pull tokens**: Read-only, short-lived access for pulling images only (generated via `depot pull-token --project `) ### Authentication for the Docker CLI To use Depot Registry with Docker CLI tools, authenticate using a Depot token. Set the username to `x-token` and the password to your chosen token: ```bash docker login {orgId}.registry.depot.dev -u x-token -p ``` ## Pricing Depot Registry is included in all plans. Storage is billed at **$0.20/GB/month**. There are no charges for data transfer into or out of the registry. ## Image retention By default, images pushed to the Depot Registry are retained for **7 days**, after which they are deleted. You can configure retention on a per-repository basis from the repository's settings in the [Explorer](/orgs/_/registry/explorer). You can choose to retain images by age or by tag count: By age: * 1 day * 7 days (default) * 14 days * 30 days By tag count: * 5 tags * 10 tags * 25 tags * 50 tags * 100 tags Retaining by tag count is useful for reducing storage costs when you care more about keeping the most recent versions than keeping images for a fixed duration. You can also individually delete images from the Registry Explorer. ## Pull-through cache Depot Registry can proxy pulls from an upstream registry. When a pull comes in for a repository with pull-through cache configured, Depot fetches images from the upstream repository, caches them locally to speed up your runners, and serves them through Depot's accelerated CDN. Configuration happens in two steps: * **Upstream registry**: The external registry connection, including the URL and credentials. You configure upstream registries at the organization level and they can be reused across multiple Depot repositories. * **Upstream repository**: The image path within an upstream registry that a Depot repository mirrors. You choose this path when creating a Depot repository. You can create and update upstream registries from [Registry Settings](/orgs/_/registry/settings). Pull-through cache for an individual repository can only be configured when you cerate the repository. ## Use cases **Faster CI pulls**: Pulling images from Docker Hub or another external registry in CI can take several minutes per job. It's also subject to rate limits and upstream availability. With pull-through cache configured, Depot serves cached layers from its CDN rather than the upstream source, so the pull is fast and doesn't depend on an external service being up. **Global image distribution**: Depot's CDN distributes cached layers globally. If you're running jobs or deployments across multiple regions, configuring your registry as an upstream means every region pulls from a nearby CDN node rather than a single-region origin. **Simplified private registry access**: Some registries, like Google Artifact Registry and Google Container Registry, require OAuth-based service account credentials that are complex to configure in every environment. With Depot, you enter the upstream registry's credentials once in the dashboard, and Depot handles authentication to the upstream on every pull. A client needs only a Depot token to pull images. ## Configure an upstream registry Manage upstream registries from the **Registry settings**. Adding an upstream registry here lets you reuse the same credentials across multiple Depot repositories. 1. Open [Registry Settings](/orgs/_/registry/settings) in the Depot dashboard. 2. Under **Pull-through cache**, click **Add upstream registry**. 3. Select a provider from the dropdown. 4. Fill in the registry URL and credentials for the provider (see [Supported registries](#supported-registries)). 5. Click **Save upstream registry**. Once saved, the upstream registry appears in the list and is available when creating a pull-through repository. You can create the repository from Registry Settings by clicking **Create pull-through repository** on the upstream registry, or create it from the repository creation page and select the upstream registry there. ## Create a pull-through repository After creating an upstream registry, create a Depot repository and configure pull-through cache during repository creation. 1. Open [Repositories](/orgs/_/registry/repositories) in the Depot dashboard. 2. Click **Create repository**. 3. Enter the Depot repository name. 4. Under **Pull-through cache**, click **Configure**. 5. Select **Existing registry** and choose the upstream registry from the dropdown. If you haven't created one yet, select **New registry** to create one inline. 6. Enter the upstream repository path to mirror. 7. Click **Create repository**. Once created, Depot proxies pulls from that Depot repository through the configured upstream repository. If Depot previously cached the requested layer, it serves the layer from the CDN without contacting the upstream registry. The first pull of an image can be slower because Depot needs to fetch the manifest and missing blobs from the upstream registry. Subsequent pulls are served from Depot while those blobs remain cached. Pull-through blobs that aren't referenced by a pushed manifest become eligible for cleanup after 6 hours without repository access; once they are cleaned up, the next pull fetches them from the upstream registry again. Pull-through cache cannot be added to or changed for an existing repository. If you need a different upstream repository, create a new Depot repository with the desired pull-through cache configuration. To pull images through Depot Registry, use a [pull token](/docs/cli/authentication#pull-tokens) rather than the upstream registry's credentials. ## Supported registries | Registry | URL | Auth method | | ------------------------- | -------------------------------------------- | ------------------------------------------------------ | | Docker Hub | `https://registry-1.docker.io` | Basic auth: Docker Hub username + access token | | GitHub Container Registry | `https://ghcr.io` | Basic auth: GitHub username + personal access token | | GitLab Container Registry | `https://registry.gitlab.com` | Basic auth: GitLab username + personal access token | | Quay.io | `https://quay.io` | Basic auth: Quay.io username + password or robot token | | AWS ECR | Your ECR registry URL | IAM role ARN | | Google Artifact Registry | `https://us-docker.pkg.dev` (or your region) | Basic auth: `_json_key` + service account JSON key | | Azure Container Registry | Your ACR URL | Basic auth: service principal client ID + secret | | Custom registry | Your registry URL | Basic auth: username + password | Credentials are required for Docker Hub and for any private repository. For other registries, you can omit credentials if the upstream repository is public. ### AWS ECR authentication For AWS ECR upstreams, Depot authenticates using an IAM role ARN rather than static credentials. Enter the ARN of a role that grants Depot read access to your ECR registry. Contact [support@depot.dev](mailto:support@depot.dev) for the trust relationship configuration details needed to allow Depot to assume the role. ## Quickstart for Depot Registry Get started with the Depot Registry to store container builds, images or any other OCI-compliant artifacts. ## Install the Depot CLI Install the [Depot CLI](/docs/cli/reference/overview) on your machine to work with Depot Registry from your terminal. * **macOS** ```shell brew install depot/tap/depot ``` * **Linux** ```shell curl -L https://depot.dev/install-cli.sh | sh ``` * **All platforms** Download the binary file for your platform from the [Depot CLI releases page](https://github.com/depot/cli/releases) in GitHub. ## Authenticate to the registry Each Depot organization has its own registry subdomain: ``` {orgId}.registry.depot.dev ``` You can copy your org ID from the sidebar in the [Depot dashboard](/orgs) or run `depot org list` in your terminal. To authenticate, use `docker login` with a Depot access token. The registry accepts user, project, organization, trust relationship, and pull tokens. See [authentication methods](/docs/cli/authentication) for details on generating these tokens. Set the username to `x-token` and the password to your chosen token: ```shell docker login {orgId}.registry.depot.dev -u x-token -p ``` **Note**: For `depot pull` and `depot push`, the Depot CLI uses your existing CLI credentials to authenticate and `docker login` isn't required. ## Push images to the registry There are two ways to get images into Depot Registry: push an existing image with Docker, or save a build directly from `depot build`. ### With `docker push` Tag the image with your org subdomain and the repository name and tag you want, then push: ```shell docker tag {orgId}.registry.depot.dev/your/app:v1 docker push {orgId}.registry.depot.dev/your/app:v1 ``` Repositories are created automatically on first push. ### With `depot build` Save build output directly to the registry using the `--save` flag: ```shell depot build --save --save-tag my-image . ``` The `--save-tag` flag is optional but useful for referencing the image by name instead of build ID. ## Pull images from the registry ### With `docker pull` Make sure you've [authenticated](#authenticate-to-the-registry) with `docker login`, then pull using the full image reference: ```shell docker pull {orgId}.registry.depot.dev/your/app:v1 ``` ### With `depot pull` The CLI authenticates with your existing Depot credentials so `docker login` isn't required. Specify a build ID or tag: ```shell depot pull --project depot pull --project my-image ``` Omit the build ID or tag to display an interactive list of builds to choose from. ### With Kubernetes Create an image pull secret with your Depot token: ```shell kubectl create secret docker-registry regcred \ --docker-server={orgId}.registry.depot.dev \ --docker-username=x-token \ --docker-password= ``` Then reference the secret in your pod spec using `imagePullSecrets`. ## Copy images to another registry Use `depot push` to copy a saved build from Depot Registry to another registry. Authenticate to the target registry with `docker login` first, then run: ```shell depot push --project -t : ``` The transfer happens directly from Depot infrastructure to your target registry, skipping your local machine. ## Backward compatibility [Depot Registry v2](/blog/now-available-depot-registry-v2) is backward compatible with v1. If you're already using the Depot Registry, you don't need to change anything. Existing project-scoped URLs and build tags continue to work: ``` registry.depot.dev/: ``` Use the org-subdomain format (`{orgId}.registry.depot.dev`) for new repositories and for using the registry as a primary registry with custom names. ## Security For questions, concerns, or information about our security policies or to disclose a security vulnerability, please get in touch with us at [security@depot.dev](mailto:security@depot.dev). ## Overview A Depot organization represents a collection of projects that contain builder VMs and SSD cache disks. These VMs and disks are associated with a single organization and are not shared across organizations. When a build request arrives, the build is routed to the correct builder VM based on organization, project, and requested CPU architecture. Communication between the `depot` CLI and builder VM uses an encrypted HTTPS (TLS) connection. Cache volumes are encrypted at rest using our infrastructure providers' encryption capabilities. ## Our Responsibilities ### Single-tenant Builders A builder in Depot and its SSD cache are tied to a single project and the organization that owns it. Builders are never shared across organizations. Instead, builds running on a given builder are connected to one and only one organization, the organization that owns the projects. Connections from the Depot CLI to the builder VM are routed through a stateless load balancer directly to the project's builder VM and are encrypted using TLS (HTTPS). ### Physical Security Our services and applications run in the cloud using one of our infrastructure providers, AWS and GCP. Depot has no physical access to the underlying physical infrastructure. For more information, see [AWS's security details](https://aws.amazon.com/security/) and [GCP's security details](https://cloud.google.com/docs/security/infrastructure/design). ### Data Encryption All data transferred in and out of Depot is encrypted using hardened TLS. This includes connections between the Depot CLI and builder VMs, which are conducted via HTTPS. In addition, Depot's domain is protected by HTTP Strict Transport Security (HSTS). Cache volumes attached to project builders are encrypted at rest using our infrastructure providers' encryption capabilities. ### Data Privacy Depot does not access builders or cache volumes directly, except for use in debugging when explicit permission is granted from the organization owner. Today, Depot operates cloud infrastructure in regions that are geographically located inside the United States of America as well as the European Union (if a project chooses the EU as its region). ### API Token Security Depot supports API-token-based authentication for various aspects of the application: * **User access tokens** are used by the Depot CLI to authenticate with Depot's internal API, access resources that the user is allowed to access based on their organization memberships and roles, and can be used to initiate a build request. * **OIDC tokens** issued by authorized third-party services can be exchanged for temporary API tokens if the Depot project has configured a trust relationship with that third party. The ephemeral API token can only access the project(s) to which the OIDC entity was granted access. Today, Depot supports creating trust relationships with GitHub Actions, CircleCI, and Buildkite. * **Build mTLS certificates** are used by the Depot CLI to authenticate with the builder VM — these certificates are issued for a single build in response to a successful build request and live only for the lifetime of the build. ### Software Dependencies Depot keeps up to date with software dependencies and has automated tools scanning for dependency vulnerabilities. ### Development Environments Development environments are separated physically from Depot's production environment. ## Your Responsibilities ### Organization Access You can add and remove user access to your organization via the settings page. Users can have one of two roles: * **User** — users can view all projects in your organization and run builds against any project. * **Owner** — owners can create and delete projects, edit project settings, and edit organization settings. We expect to expand the available roles and permissions in the future; don't hesitate to contact us if you have any special requirements. In addition to users, Depot also allows creating trust relationships with GitHub Actions. These relationships enable workflow runs initiated in GitHub Actions to access specific projects in your organization to run builds. Trust relationships can be configured in the project settings. ### Caching and Builder Access Access to create project builds effectively equates to access to the builder VM due to the nature of how `docker build` works. Anyone with access to build a project can access that project's build cache files and potentially add, edit, or remove cache entries. You should be careful that you trust the users and trust relationships that you have given access to a project and use tools like OIDC trust relationships to limit access to only the necessary scope. ## Understanding security in Depot CI ### Secrets encryption and access control Depot CI uses envelope encryption with AWS Key Management Service (KMS) to protect secrets. Each organization has a unique data encryption key generated with KMS. Secret values are encrypted with AES-256-GCM and stored encrypted at rest in the database. Plaintext values are never persisted and are masked in all log output. Depot does not have access to retrieve values from KMS. Only organization owners can create, update, and delete secrets via the API or dashboard. Secret values are write-only and can't be retrieved after creation. Secrets are scoped to either an organization or a specific repository. Repository-scoped secrets are only available to jobs running for that repository. ### Secret import from GitHub during migration When importing secrets from GitHub Actions during migration (`depot ci migrate secrets-and-vars`), Depot creates a one-shot workflow that runs immediately in a standard GitHub Actions runner to pull secrets from your GitHub organization and upload them to Depot CI as repository-scoped secrets. This operation is allowed only for commits created by the Depot Code Access GitHub app via this migration flow. ## Understanding security and isolation in GitHub Actions runners Each GitHub Actions job runs on a new EC2 instance that has never been used before, ensuring complete isolation at the hardware level. Once the job completes, we destroy the instance, maintaining a single tenant environment for each job. ### Caching and storage GitHub Actions can integrate with Depot Cache, allowing you to store data in a cache service backed by S3. You have control over what gets stored in the cache, as you choose which items to mark for caching. Cache entries stored in the Depot Cache are scoped by repository. Cache entries can only be read by the same repository that saved them. This prevents repositories from having key collisions when using the same cache key and ensures that one repository cannot unexpectedly read cache entries from another repository of a different trust level (like reading from or writing to a private repository from a public repository). ### Handling secrets The same masking rules that apply in GitHub Actions are enforced in the runner environment. Any secrets you configure will be masked in the logs, preventing exposure. However, avoid hardcoding secrets in your codebase to prevent potential security breaches. ## Troubleshooting This page provides an overview of troubleshooting resources for Depot products. ## Container builds If you're having issues with Docker image builds using Depot, see the [container builds troubleshooting guide](/docs/container-builds/troubleshooting). ## GitHub Actions runners If you're having issues with Depot-hosted GitHub Actions runners, see the [GitHub Actions troubleshooting guide](/docs/github-actions/troubleshooting). ## Billing ### Payment failures and retries Payment failures usually occur because of insufficient funds, expired cards, or temporary issues with your payment provider. When a payment fails, charges are automatically retried over the course of 14 days. You'll receive an email notification after each failed attempt. **How to resolve** If you receive a payment failure notification: 1. Check that your payment method has sufficient funds 2. Verify that your card hasn't expired 3. Update your payment information through the link in the payment failure email 4. Contact your bank if you suspect the charge was blocked If all retry attempts fail, your subscription is automatically canceled to prevent further charges. You can reactivate your subscription at any time by updating your payment method and [contacting support](/help). If you're experiencing repeated payment failures or need help updating your payment information, reach out to support to get your subscription sorted. ### Obtain invoices with VAT information You can access invoices from Stripe that contain VAT information through the [Billing Portal](/orgs/_/settings) in your organization settings. ## Additional support If you can't find a solution in these guides or the product documentation, [reach out to support](/help).